Gradle使用总结
来源:互联网 发布:java代理管理系统源码 编辑:程序博客网 时间:2024/06/06 05:13
Gradle使用总结
一、Gradle 下载与配置
1.下载
访问https://services.gradle.org/distributions/下载指定版本的Gradle,比如Gradle-2.14.1-all.zip2.配置
解压下载的压缩包,将gradle的路径配置到环境变量中,以mac为例:
cd ~vi .bash_profile在.bash_profile文件中配置:
export JAVA_HOME_7=/Library/Java/JavaVirtualMachines/jdk1.7.0_80.jdk/Contents/Homeexport JAVA_HOME_8=/Library/Java/JavaVirtualMachines/jdk1.8.0_131.jdk/Contents/Homeexport JAVA_HOME=$JAVA_HOME_8export ANDROID_HOME=/Users/haibozheng/Library/Android/sdkexport GRADLE_HOME=/Users/haibozheng/Documents/gradle_241/gradle-2.14.1 # 配置Gradleexport PATH=$PATH:$ANDROID_HOME/platform-tools:$ANDROID_HOME/tools:$GRADLE_HOME/bin # 配置Gradle然后使配置生效
source .bash_profile在命令行中使用:
$ gradle -version------------------------------------------------------------Gradle 3.3------------------------------------------------------------Build time: 2017-01-03 15:31:04 UTCRevision: 075893a3d0798c0c1f322899b41ceca82e4e134bGroovy: 2.4.7Ant: Apache Ant(TM) version 1.9.6 compiled on June 29 2015JVM: 1.8.0_131 (Oracle Corporation 25.131-b11)OS: Mac OS X 10.12.4 x86_64当然,你也可参见官方文档:https://gradle.org/install
二、Gradle在android项目中的配置
(1) setting.gradle
指定当前项目下总共有多少个module,用逗号分隔,项目名称前面有冒号;,比如:
include ':app', ':lib'(2) 外层build.gradle
比如一个简单的项目的配置为:
buildscript { repositories { jcenter() } dependencies { classpath 'com.android.tools.build:gradle:2.2.3' classpath 'com.github.dcendents:android-maven-gradle-plugin:1.5' classpath 'com.jfrog.bintray.gradle:gradle-bintray-plugin:1.7.3' }}allprojects { repositories { mavenLocal() maven { credentials { username "admin" password "**" } url "http://xxxx" } jcenter() }}这里,首先看buildscript闭包,它配置的是打包插件的仓库以及项目要使用的打包插件的依赖。比如我们使用了com.android.tools.build:gradle:2.2.3插件,它对应的仓库在jcenter中。其次看allprojects闭包,它是为每个子项目也就是module配置仓库。当子项目获取依赖时,会按照优先级,依次从mavenLocal,maven,jcenter中拉取依赖。
- (3) module的build.gradle
是针对module的打包进行的配置,比如:
apply plugin: 'com.android.library'android { compileSdkVersion 25 buildToolsVersion "25.0.2" defaultConfig { minSdkVersion 14 targetSdkVersion 25 versionCode 1 versionName "1.0" testInstrumentationRunner "android.support.test.runner.AndroidJUnitRunner" } buildTypes { release { minifyEnabled false proguardFiles getDefaultProguardFile('proguard-android.txt'), 'proguard-rules.pro' } }}dependencies { compile fileTree(dir: 'libs', include: ['*.jar']) androidTestCompile('com.android.support.test.espresso:espresso-core:2.2.2', { exclude group: 'com.android.support', module: 'support-annotations' }) provided 'com.android.support:appcompat-v7:25.0.1' provided 'com.android.support:recyclerview-v7:+' testCompile 'junit:junit:4.12'}如果module需要单独配置仓库,也可以在module的build.gradle文件中配置仓库:
repositories { mavenLocal() maven { credentials { username "admin" password "**" } url "http://xxxx" } jcenter() }三、Gradle 常用命令
- 1.查看当前的task:
gradle tasks
它可以列出当前有哪些可以被执行的task。
$ gradle tasksIncremental java compilation is an incubating feature.:tasks------------------------------------------------------------All tasks runnable from root project------------------------------------------------------------Android tasks-------------androidDependencies - Displays the Android dependencies of the project.signingReport - Displays the signing info for each variant.sourceSets - Prints out all the source sets defined in this project.Build tasks-----------assemble - Assembles all variants of all applications and secondary packages.assembleAndroidTest - Assembles all the Test applications.assembleDebug - Assembles all Debug builds.assembleRelease - Assembles all Release builds.build - Assembles and tests this project.buildDependents - Assembles and tests this project and all projects that depend on it.buildNeeded - Assembles and tests this project and all projects it depends on.clean - Deletes the build directory.compileDebugAndroidTestSourcescompileDebugSourcescompileDebugUnitTestSourcescompileReleaseSourcescompileReleaseUnitTestSourcesextractDebugAnnotations - Extracts Android annotations for the debug variant into the archive fileextractReleaseAnnotations - Extracts Android annotations for the release variant into the archive filemockableAndroidJar - Creates a version of android.jar that's suitable for unit tests.Build Setup tasks-----------------init - Initializes a new Gradle build. [incubating]wrapper - Generates Gradle wrapper files. [incubating]Help tasks----------buildEnvironment - Displays all buildscript dependencies declared in root project 'SuperSwipeRefreshLayout-Demo-AS'.components - Displays the components produced by root project 'SuperSwipeRefreshLayout-Demo-AS'. [incubating]dependencies - Displays all dependencies declared in root project 'SuperSwipeRefreshLayout-Demo-AS'.dependencyInsight - Displays the insight into a specific dependency in root project 'SuperSwipeRefreshLayout-Demo-AS'.help - Displays a help message.model - Displays the configuration model of root project 'SuperSwipeRefreshLayout-Demo-AS'. [incubating]projects - Displays the sub-projects of root project 'SuperSwipeRefreshLayout-Demo-AS'.properties - Displays the properties of root project 'SuperSwipeRefreshLayout-Demo-AS'.tasks - Displays the tasks runnable from root project 'SuperSwipeRefreshLayout-Demo-AS' (some of the displayed tasks may belong to subprojects).Install tasks-------------installDebug - Installs the Debug build.installDebugAndroidTest - Installs the android (on device) tests for the Debug build.uninstallAll - Uninstall all applications.uninstallDebug - Uninstalls the Debug build.uninstallDebugAndroidTest - Uninstalls the android (on device) tests for the Debug build.uninstallRelease - Uninstalls the Release build.Publishing tasks----------------bintrayUpload - Publishes artifacts to bintray.com.Verification tasks------------------check - Runs all checks.connectedAndroidTest - Installs and runs instrumentation tests for all flavors on connected devices.connectedCheck - Runs all device checks on currently connected devices.connectedDebugAndroidTest - Installs and runs the tests for debug on connected devices.deviceAndroidTest - Installs and runs instrumentation tests using all Device Providers.deviceCheck - Runs all device checks using Device Providers and Test Servers.lint - Runs lint on all variants.lintDebug - Runs lint on the Debug build.lintRelease - Runs lint on the Release build.test - Run unit tests for all variants.testDebugUnitTest - Run unit tests for the debug build.testReleaseUnitTest - Run unit tests for the release build.Other tasks-----------assembleDefaultextractProguardFilesjarDebugClassesjarReleaseClassestransformResourcesWithMergeJavaResForDebugUnitTesttransformResourcesWithMergeJavaResForReleaseUnitTestTo see all tasks and more detail, run gradle tasks --allTo see more detail about a task, run gradle help --task <task>BUILD SUCCESSFULTotal time: 6.589 secsThis build could be faster, please consider using the Gradle Daemon: https://docs.gradle.org/2.14.1/userguide/gradle_daemon.html如果要查看tasks之间的依赖,可以使用
gradle tasks --all比如:assembleRelease的依赖
app:assembleRelease - Assembles all Release builds. [app:compileReleaseSources, lib:bundleRelease] app:compileReleaseShaders app:generateReleaseAssets app:lintVitalRelease - Runs lint on just the fatal issues in the release build. app:mergeReleaseAssets app:mergeReleaseJniLibFolders app:mergeReleaseShaders app:packageRelease app:processReleaseJavaRes app:transformClassesWithDexForRelease app:transformNative_libsWithMergeJniLibsForRelease app:transformResourcesWithMergeJavaResForRelease- 执行task
- 执行task
gradle taskNameXXX- 3.对某个module [moduleName] 的某个任务[TaskName] 运行
gradlew :moduleName:taskName四、使用gradlew
如果当前机器安装的Gradle版本与编译项目所需要的Gradle版本不一致,我们可以使用gradle wrapper对项目进行编译。使用gradle wrapper之前,首先看一下gradle下的目录结构:
gradle└── wrapper ├── gradle-wrapper.jar └── gradle-wrapper.properties其中,gradle-wrapper.properties的内容为:
distributionBase=GRADLE_USER_HOMEdistributionPath=wrapper/distszipStoreBase=GRADLE_USER_HOMEzipStorePath=wrapper/distsdistributionUrl=https\://services.gradle.org/distributions/gradle-3.4.1-all.zip使用Gradle Wrapper时,就会使用distributionUrl指定的Gradle版本。
注意:首次使用Gradlew时,会首先从distributionUrl中下载执行版本的Gradle,网络耗时较长。
Gradle Wrapper命令
与gradle类似,在mac下:
./gradlew xxxx五、上传二进制包到仓库
5.1 jcenter仓库
上传到jcenter仓库,我们可以使用android-maven-gradle-plugin和gradle-bintray-plugin插件,经过配置,将其上传。具体步骤如下:
- 1) 创建账号
首先在https://bintray.com注册一个账号,然后在Edit Profile页面,记录下你的用户名和API Key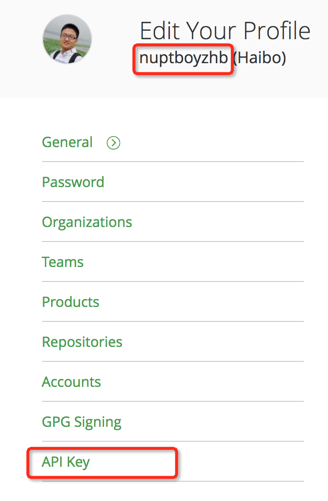
为了安全起见,建议将用户名和API Key保存到本地的环境变量,比如:
export JCENTER_KEY=XXXXXX*****XXXXXXXXexport JCENTER_USER=nuptboyzhb2) 在jcenter上创建repo
比如,创建一个名为maven的maven仓库,创建一个com.github.nuptboyzhb.uikit的包名,链接为https://bintray.com/nuptboyzhb/maven/com.github.nuptboyzhb.uikit3) 配置插件
在最外层的build.gradle脚本中配置插件的依赖,比如:
buildscript { repositories { jcenter() } dependencies { classpath 'com.android.tools.build:gradle:2.2.3' classpath 'com.github.dcendents:android-maven-gradle-plugin:1.5' classpath 'com.jfrog.bintray.gradle:gradle-bintray-plugin:1.7.3' }}- 4) 配置module工程的脚本
比如,我们针对lib这个module的gradle配置如下:
apply plugin: 'com.android.library'apply plugin: 'com.jfrog.bintray'apply plugin: 'com.github.dcendents.android-maven'android { compileSdkVersion 25 buildToolsVersion "25.0.0" defaultConfig { minSdkVersion 14 targetSdkVersion 25 versionCode 1 versionName "1.0" testInstrumentationRunner "android.support.test.runner.AndroidJUnitRunner" } buildTypes { release { minifyEnabled false proguardFiles getDefaultProguardFile('proguard-android.txt'), 'proguard-rules.pro' } } lintOptions { abortOnError false }}dependencies { compile fileTree(dir: 'libs', include: ['*.jar']) androidTestCompile('com.android.support.test.espresso:espresso-core:2.2.2', { exclude group: 'com.android.support', module: 'support-annotations' }) provided 'com.android.support:appcompat-v7:25.0.1' provided 'com.android.support:recyclerview-v7:+' testCompile 'junit:junit:4.12'}def siteUrl = 'https://github.com/nuptboyzhb/SuperSwipeRefreshLayout'def gitUrl = 'https://github.com/nuptboyzhb/SuperSwipeRefreshLayout.git'group = "com.github.nuptboyzhb.lib.uikit"version = "1.0.0"project.archivesBaseName = 'superswiperefreshlayout'def jCenterKey = System.getenv("JCENTER_KEY");def jCenterUser = System.getenv("JCENTER_USER");if (jCenterKey != null && jCenterUser != null) { bintray { user = jCenterUser key = jCenterKey configurations = ['archives'] pkg { repo = "maven" name = "com.github.nuptboyzhb.uikit" websiteUrl = siteUrl vcsUrl = gitUrl licenses = ["MIT"] publish = true version { name = '1.0.0' vcsTag = '1.0.0' gpg { sign = false //passphrase = '***' } } } }}其中,bintray闭包配置的是jcenter中,我们的仓库和账号信息。外层的
group = "com.github.nuptboyzhb.lib.uikit"version = "1.0.0"project.archivesBaseName = 'superswiperefreshlayout'则分别是groupId,version,artifactId.
配置完成之后,我们可以通过执行bintrayUpload任务,上次aar到我们的https://bintray.com/nuptboyzhb/maven/com.github.nuptboyzhb.uikit仓库。
gradle bintrayUpload上传完成之后,我们就可以在bintray.com的对应仓库中看到我们上次的aar包了。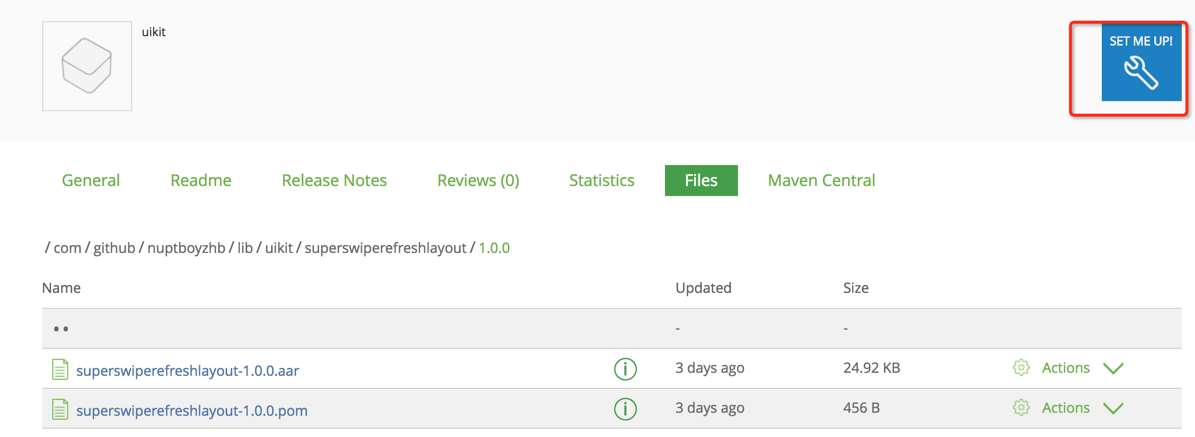
上传成功之后,我们可以首先在自己的仓库下引用这个包,点击‘set me up’,我们可以看到,我们的仓库地址为:
repositories { maven { url "http://dl.bintray.com/nuptboyzhb/maven" }}然后,在项目中就可以引用到我们的aar包了。
compile 'com.github.nuptboyzhb.lib.uikit:superswiperefreshlayout:1.0.0'需要说明的是:我们当前是在http://dl.bintray.com/nuptboyzhb/maven地址下maven仓库中获取的,如果需要同步到jcenter,需要点击Add to JCenter提出申请。
5.2 maven仓库
比如,将aar发布到本地maven仓库。build.gradle配置如下:
apply plugin: 'maven'group = 'com.github.nuptboyzhb.lib.uikit'version = '1.0'uploadArchives { repositories { mavenLocal() }}然后执行uploadArchives命令:
gradle uploadArchives其中,带有用户名和密码的maven仓库配置为:
uploadArchives { repositories { mavenLocal() maven { url "http://xxxxx" credentials { username = "xxxx" password = "xxxx" } } } }六、dependencies配置解读
- 配置解析
以如下dependencies配置为例:
dependencies { compile 'com.android.support:appcompat-v7:25.0.1' compile project(':lib') compile fileTree(dir: 'libs', include: ['*.jar']) provided 'com.android.support:appcompat-v7:25.0.1' compile ('com.willowtreeapps.spruce:spruce-android:1.0.0',{ exclude group: 'com.android.support', module: 'appcompat-v7' })}以上是5种写法:
1) 第一个是依赖appcompat-v7,并将其源码编译到module中
2) 第二个是依赖本项目下的名为lib的module
3) 第三个是依赖本module的libs目录下的jar包
4) 第四个:只是编译过程中依赖appcompat-v7,其源码并不编译到module中
5) 第五个:
- 6.2 依赖本地的aar
比如,我们要依赖本地的cards.aar,并将card.aar放到当前module的libs目录。
allprojects { repositories { jcenter() flatDir { dirs 'libs' } }}dependencies { compile(name:'cards', ext:'aar')}- 6.3 compile的jar包缓存位置
我们知道,当我们使用compile 一个aar包时,比如:
dependencies { compile 'com.taobao.trip:xcore:1.0.0'}那个,经过gradle sync之后,这个aar包下载到哪个地方了呢?会不会每次都下载?带着这些疑问,我们可以看一下系统目录下的.gradle目录。以mac为例:
cd ~/.gradle/caches/modules-2/files-2.1在这个目录下,就可以找到我们对应的aar包了。
Gradle 接收入参
Groovy 获取系统环境变量,exec命令行
- Gradle 使用总结
- Gradle使用总结
- Android Gradle使用总结
- Android Gradle使用总结
- Gradle使用技巧总结
- IDEA 及 Gradle 使用总结
- IDEA 及 Gradle 使用总结
- IDEA 及 Gradle 使用总结
- IDEA 及 Gradle 使用总结
- IDEA 及 Gradle 使用总结
- Android:Gradle之使用教程总结
- Gradle总结
- Gradle总结
- Gradle总结
- gradle使用
- Gradle 使用
- gradle使用
- gradle使用
- SpringMVC是什么?
- 华胜信泰参与编制《智慧城市安全体系研究白皮书》正式发布 ---亮相CSA2017 “平安城市建设与发展论坛”
- Linux大文件删除后未释放空间
- missing artifact jdk.tools:jar:1.7
- 2.5.2_图案
- Gradle使用总结
- 简单的使用dubbo
- React -- 数据流
- HDU 5980 Find Small A
- bitmap的六种压缩方式,Android图片压缩
- WebApi 接口增加备注和测试
- Rhel7.3_Oracle12cR2的RAC搭建安装
- 2.6_路径描边与填充
- MySql