自定义Shape
来源:互联网 发布:商业价值杂志淘宝店 编辑:程序博客网 时间:2024/06/04 19:01
1. 前言
这篇文章介绍了继承并自定义Shape的方法,不过,恐怕,事实上,100个xaml的程序员99个都不会用到。写出来是因为反正都学了,当作写个笔记。
通过这篇文章,你可以学到如下知识点:
- 自定义Shape。
- DeferRefresh模式。
- InvalidateArrange的应用。
2. 从Path派生
UWP中的Shape大部分都是密封类--除了Path。所以要自定义Shape只能从Path派生。Template10给出了这个例子:RingSegment 。
从这个类中可以看到,自定义Shape只需要简单地在每个自定义属性的属性值改变时或SizeChanged时调用private void UpdatePath()为Path.Data赋值就完成了,很简单吧。

RingSegment.StartAngle = 30;RingSegment.EndAngle = 330;RingSegment.Radius = 50;RingSegment.InnerRadius = 30;3. BeginUpdate、EndUpdate与DeferRefresh
这段代码会产生一个问题:每更改一个属性的值后都会调用UpdatePath(),那不就会重复调用四次?
事实上真的会,显然这个类的作者也考虑过这个问题,所以提供了public void BeginUpdate()和public void EndUpdate()函数。
/// <summary>/// Suspends path updates until EndUpdate is called;/// </summary>public void BeginUpdate(){ _isUpdating = true;}/// <summary>/// Resumes immediate path updates every time a component property value changes. Updates the path./// </summary>public void EndUpdate(){ _isUpdating = false; UpdatePath();}使用这两个方法重新写上面那段代码,就是这样:
try{ RingSegment.BeginUpdate(); RingSegment.StartAngle = 30; RingSegment.EndAngle = 330; RingSegment.Radius = 100; RingSegment.InnerRadius = 80;}finally{ RingSegment.EndUpdate();}这样就保证了只有在调用EndUpdate()时才执行UpdatePath(),而且只执行一次。
在WPF中,DeferRefresh是一种更成熟的方案。相信很多开发者在用DataGrid时多多少少有用过(主要是通过CollectionView或CollectionViewSource)。典型的实现方式可以参考DataSourceProvider。在UWPCommunityToolkit中也通过AdvancedCollectionView实现了这种方式。
在RingSegment中添加实现如下:
private int _deferLevel;public virtual IDisposable DeferRefresh(){ ++_deferLevel; return new DeferHelper(this);}private void EndDefer(){ Debug.Assert(_deferLevel > 0); --_deferLevel; if (_deferLevel == 0) { UpdatePath(); }}private class DeferHelper : IDisposable{ public DeferHelper(RingSegment source) { _source = source; } private RingSegment _source; public void Dispose() { GC.SuppressFinalize(this); if (_source != null) { _source.EndDefer(); _source = null; } }}使用如下:
using (RingSegment.DeferRefresh()){ RingSegment.StartAngle = 30; RingSegment.EndAngle = 330; RingSegment.Radius = 100; RingSegment.InnerRadius = 80;}使用DeferRefresh模式有两个好处:
- 调用代码比较简单
- 通过
_deferLevel判断是否需要UpdatePath(),这样即使多次调用DeferRefresh()也只会执行一次UpdatePath()。譬如以下的调用方式:
using (RingSegment.DeferRefresh()){ RingSegment.StartAngle = 30; RingSegment.EndAngle = 330; RingSegment.Radius = 50; RingSegment.InnerRadius = 30; using (RingSegment.DeferRefresh()) { RingSegment.Radius = 51; RingSegment.InnerRadius = 31; }}也许你会觉得一般人不会写得这么复杂,但在复杂的场景DeferRefresh模式是有存在意义的。假设现在要更新一个复杂的UI,这个UI由很多个代码模块驱动,但不清楚其它地方有没有对需要更新的UI调用过DeferRefresh(),而创建一个DeferHelper 的消耗比起更新一次复杂UI的消耗低太多,所以执行一次DeferRefresh()是个很合理的选择。
看到
++_deferLevel这句代码条件反射就会考虑到线程安全问题,但其实是过虑了。UWP要求操作UI的代码都只能在UI线程中执行,所以理论上来说所有UIElement及它的所有操作都是线程安全的。
4. InvalidateArrange
每次更改属性都要调用DeferRefresh显然不是一个聪明的做法,而且在XAML中也不可能做到。另一种延迟执行的机制是利用CoreDispatcher的public IAsyncAction RunAsync(CoreDispatcherPriority priority, DispatchedHandler agileCallback)函数异步地执行工作项。要详细解释RunAsync可能需要一整篇文章的篇幅,简单来说RunAsync的作用就是将工作项发送到一个队列,UI线程有空的时候会从这个队列获取工作项并执行。InvalidateArrange就是利用这种机制的典型例子。MSDN上对InvalidateArrange的解释是:
使 UIElement 的排列状态(布局)无效。失效后,UIElement 将以异步方式更新其布局。
将InvalidateArrange的逻辑简化后大概如下:
protected bool ArrangeDirty { get; set; }public void InvalidateArrange(){ if (ArrangeDirty == true) return; ArrangeDirty = true; Dispatcher.RunAsync(Windows.UI.Core.CoreDispatcherPriority.Normal, () => { ArrangeDirty = false; lock (this) { //Measure //Arrange } });}调用InvalidateArrange后将ArrangeDirty标记为True,然后异步执行Measure及Arrange代码进行布局。多次调用InvalidateArrange会检查ArrangeDirty的状态以免重复执行。利用InvalidateArrange,我们可以在RingSegment的自定义属性值改变事件中调用InvalidateArrange,异步地触发LayoutUpdated并在其中改变Path.Data。
修改后的代码如下:
private bool _realizeGeometryScheduled;private Size _orginalSize;private Direction _orginalDirection;private void OnStartAngleChanged(double oldStartAngle, double newStartAngle){ InvalidateGeometry();}private void OnEndAngleChanged(double oldEndAngle, double newEndAngle){ InvalidateGeometry();}private void OnRadiusChanged(double oldRadius, double newRadius){ this.Width = this.Height = 2 * Radius; InvalidateGeometry();}private void OnInnerRadiusChanged(double oldInnerRadius, double newInnerRadius){ if (newInnerRadius < 0) { throw new ArgumentException("InnerRadius can't be a negative value.", "InnerRadius"); } InvalidateGeometry();}private void OnCenterChanged(Point? oldCenter, Point? newCenter){ InvalidateGeometry();}protected override Size ArrangeOverride(Size finalSize){ if (_realizeGeometryScheduled == false && _orginalSize != finalSize) { _realizeGeometryScheduled = true; LayoutUpdated += OnTriangleLayoutUpdated; _orginalSize = finalSize; } base.ArrangeOverride(finalSize); return finalSize;}protected override Size MeasureOverride(Size availableSize){ return new Size(base.StrokeThickness, base.StrokeThickness);}public void InvalidateGeometry(){ InvalidateArrange(); if (_realizeGeometryScheduled == false ) { _realizeGeometryScheduled = true; LayoutUpdated += OnTriangleLayoutUpdated; }}private void OnTriangleLayoutUpdated(object sender, object e){ _realizeGeometryScheduled = false; LayoutUpdated -= OnTriangleLayoutUpdated; RealizeGeometry();}private void RealizeGeometry(){ //other code here Data = pathGeometry;}这些代码参考了ExpressionSDK的Silverlight版本。ExpressionSDK提供了一些Shape可以用作参考。(安装Blend后通常可以在这个位置找到它:C:\Program Files (x86)\Microsoft SDKs\Expression\Blend\Silverlight\v5.0\Libraries\Microsoft.Expression.Drawing.dll)由于比起WPF,Silverlight更接近UWP,所以Silverlight的很多代码及经验更有参考价值,遇到难题不妨找些Silverlight代码来作参考。

InvalidateArrange属于比较核心的API,文档中也充斥着“通常不建议“、”通常是不必要的”、“慎重地使用它”等字句,所以平时使用最好要谨慎。如果不是性能十分敏感的场合还是建议使用Template10的方式实现。
5. 使用TemplatedControl实现
除了从Path派生,自定义Shape的功能也可以用TemplatedControl实现,一般来说这种方式应该是最简单最通用的方式。下面的代码使用TemplatedControl实现了一个三角形:
[TemplatePart(Name = PathElementName,Type =typeof(Path))][StyleTypedProperty(Property = nameof(PathElementStyle), StyleTargetType =typeof(Path))]public class TriangleControl : Control { private const string PathElementName = "PathElement"; public TriangleControl() { this.DefaultStyleKey = typeof(TriangleControl); this.SizeChanged += OnTriangleControlSizeChanged; } /// <summary> /// 标识 Direction 依赖属性。 /// </summary> public static readonly DependencyProperty DirectionProperty = DependencyProperty.Register("Direction", typeof(Direction), typeof(TriangleControl), new PropertyMetadata(Direction.Up, OnDirectionChanged)); /// <summary> /// 获取或设置Direction的值 /// </summary> public Direction Direction { get { return (Direction)GetValue(DirectionProperty); } set { SetValue(DirectionProperty, value); } } private static void OnDirectionChanged(DependencyObject obj, DependencyPropertyChangedEventArgs args) { var target = obj as TriangleControl; var oldValue = (Direction)args.OldValue; var newValue = (Direction)args.NewValue; if (oldValue != newValue) target.OnDirectionChanged(oldValue, newValue); } protected virtual void OnDirectionChanged(Direction oldValue, Direction newValue) { UpdateShape(); } /// <summary> /// 获取或设置PathElementStyle的值 /// </summary> public Style PathElementStyle { get { return (Style)GetValue(PathElementStyleProperty); } set { SetValue(PathElementStyleProperty, value); } } /// <summary> /// 标识 PathElementStyle 依赖属性。 /// </summary> public static readonly DependencyProperty PathElementStyleProperty = DependencyProperty.Register("PathElementStyle", typeof(Style), typeof(TriangleControl), new PropertyMetadata(null)); private Path _pathElement; public override void OnApplyTemplate() { base.OnApplyTemplate(); _pathElement = GetTemplateChild("PathElement") as Path; } private void OnTriangleControlSizeChanged(object sender, SizeChangedEventArgs e) { UpdateShape(); } private void UpdateShape() { var geometry = new PathGeometry(); var figure = new PathFigure { IsClosed = true }; geometry.Figures.Add(figure); switch (Direction) { case Direction.Left: figure.StartPoint = new Point(ActualWidth, 0); var segment = new LineSegment { Point = new Point(ActualWidth, ActualHeight) }; figure.Segments.Add(segment); segment = new LineSegment { Point = new Point(0, ActualHeight / 2) }; figure.Segments.Add(segment); break; case Direction.Up: figure.StartPoint = new Point(0, ActualHeight); segment = new LineSegment { Point = new Point(ActualWidth / 2, 0) }; figure.Segments.Add(segment); segment = new LineSegment { Point = new Point(ActualWidth, ActualHeight) }; figure.Segments.Add(segment); break; case Direction.Right: figure.StartPoint = new Point(0, 0); segment = new LineSegment { Point = new Point(ActualWidth, ActualHeight / 2) }; figure.Segments.Add(segment); segment = new LineSegment { Point = new Point(0, ActualHeight) }; figure.Segments.Add(segment); break; case Direction.Down: figure.StartPoint = new Point(0, 0); segment = new LineSegment { Point = new Point(ActualWidth, 0) }; figure.Segments.Add(segment); segment = new LineSegment { Point = new Point(ActualWidth / 2, ActualHeight) }; figure.Segments.Add(segment); break; } _pathElement.Data = geometry; } }<Style TargetType="Path" x:Key="PathElementStyle"> <Setter Property="Stroke" Value="RoyalBlue" /> <Setter Property="StrokeThickness" Value="10" /> <Setter Property="Stretch" Value="Fill" /></Style><Style TargetType="local:TriangleControl"> <Setter Property="PathElementStyle" Value="{StaticResource PathElementStyle}" /> <Setter Property="Template"> <Setter.Value> <ControlTemplate TargetType="local:TriangleControl"> <Border Background="{TemplateBinding Background}" BorderBrush="{TemplateBinding BorderBrush}" BorderThickness="{TemplateBinding BorderThickness}"> <Path x:Name="PathElement" Style="{TemplateBinding PathElementStyle}" /> </Border> </ControlTemplate> </Setter.Value> </Setter></Style>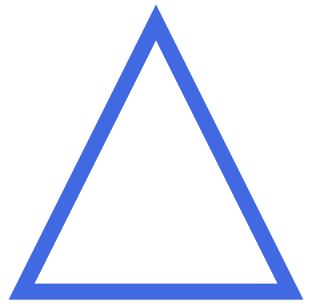
这种方式的好处是容易实现,而且兼容WPF和UWP。缺点是只能通过PathElementStyle修改Path的外观,毕竟它不是Shape,而且增加了VisualTree的层次,不适合于性能敏感的场合。
- 自定义Shape
- 自定义shape
- 自定义Shape
- 自定义Shape
- 自定义shape
- 自定义drawable(shape)
- android 自定义button shape
- Android 自定义shape selector
- 自定义drawable(shape)
- 自定义drawable(shape)
- 自定义drawable(shape)
- Android 自定义图形 shape
- android 自定义shape
- 自定义ImageView 圆角shape
- Android中自定义shape
- 自定义drawable android:shape
- 自定义一个图片shape
- Android自定义shape资源
- centos7下更新firefox
- ubuntu如何改变英文到中文
- Python-定时打开一个网页
- 名投资——坚定不移走价值投资路线
- vector erase 删除vector重复元素
- 自定义Shape
- Linux性能调优之内存调优
- 浅谈策略类型游戏
- TextInputLayout+EditText在注册界面的使用(密码的的隐藏和可见,imeOptions的使用)
- mybatis. <sql>元素重用
- js格式化日期,漂亮
- 如果在回调函数中释放对象,会怎么样?
- Educational Codeforces Round 21
- sql优化随记