Together项目IOS平台开发11
来源:互联网 发布:linux 剩余空间 编辑:程序博客网 时间:2024/06/06 22:22
在上次的博客中我就已经完成了对发现页面导航栏下方的一个滑动菜单的设计以及代码实现。这次是在上一次的基础上对中间的空白部分展示项目的部分进行一个设计。一个原因是为了区别发现栏与推荐栏的区别,另一个原因是因为卡片展示的方式是一种主流的设计模式。因此,我在这个地方使用了稍微比推荐栏cell大点的卡片来展示一个项目。卡片包括了一个图片栏,和下方的2行的文字简介。点击卡片的任意一个部分都可以跳转到详情界面。单个卡片可以看做是一个两个cell组成的一个section,用的是UITableView控件。
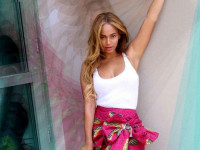
在开发的时候主要遇到的一个问题是系统默认的UITableView是一个矩形的样式,四个角会显得比较僵硬。在苹果的界面设计转向扁平化风格后,圆角就从默认的样式中消失了。因此,要实现圆角是需要对UITableView的Cell的方法进行一个重写的。然后在实现圆角后,另一个问题接踵而来。圆角是对cell两边进行了一个宽度的缩减,将缩减的部分替换成一个贝塞尔曲线形成Layer,但是我们在一个Section上半部分的cell放置展示图片是,图片是一个正常的矩形,所以会与圆角框产生一个遮罩。为了解决这个问题,我想到的是给图片的UIView也设置一个圆角,而且这个圆角只对上半部分两个直角生效。于是这也需要对UIImageView进行一个重写。在这些问题完成后就可以显示最终的效果了,图片如下:

具体的代码如下:
//// SearchDetailViewController.swift// FinalTest//// Created by 沈力同 on 2017/6/11.// Copyright © 2017年 沈力同. All rights reserved.//import UIKitextension UIView { /// 部分圆角 /// /// - Parameters: /// - corners: 需要实现为圆角的角,可传入多个 /// - radii: 圆角半径 func corner(byRoundingCorners corners: UIRectCorner, radii: CGFloat) { let maskPath = UIBezierPath(roundedRect: self.bounds, byRoundingCorners: corners, cornerRadii: CGSize(width: radii, height: radii)) let maskLayer = CAShapeLayer() maskLayer.frame = self.bounds maskLayer.path = maskPath.cgPath self.layer.mask = maskLayer }}extension UIImage { func kt_drawRectWithRoundedCorner(radius radius: CGFloat, _ sizetoFit: CGSize) -> UIImage { let rect = CGRect(origin: CGPoint(x: 0, y: 0), size: sizetoFit) UIGraphicsBeginImageContextWithOptions(rect.size, false, UIScreen.main.scale) UIGraphicsGetCurrentContext()!.addPath(UIBezierPath(roundedRect: rect, byRoundingCorners: UIRectCorner.allCorners, cornerRadii: CGSize(width: radius, height: radius)).cgPath) UIGraphicsGetCurrentContext()?.clip() self.draw(in: rect) UIGraphicsGetCurrentContext()!.drawPath(using: .fillStroke) let output = UIGraphicsGetImageFromCurrentImageContext(); UIGraphicsEndImageContext(); return output! }}extension UIImage { /** * 重设图片大小 */ func reSizeImage(reSize:CGSize)->UIImage { //UIGraphicsBeginImageContext(reSize); UIGraphicsBeginImageContextWithOptions(reSize,false,UIScreen.main.scale); self.draw(in: CGRect(x:0, y:0, width:reSize.width, height:reSize.height)); let reSizeImage:UIImage = UIGraphicsGetImageFromCurrentImageContext()!; UIGraphicsEndImageContext(); return reSizeImage; } /** * 等比率缩放 */ func scaleImage(scaleSize:CGFloat)->UIImage { let reSize = CGSize(width:self.size.width * scaleSize, height:self.size.height * scaleSize) return reSizeImage(reSize: reSize) }}class SearchDetailViewController_0: UIViewController,UITableViewDelegate, UITableViewDataSource{ let screenSizeWidth = UIScreen.main.bounds.size.width let screenSizeHeight = UIScreen.main.bounds.size.height var downView:UIView! var tableView:UITableView? var allnames:Dictionary<Int, [String]>? var adHeaders:[String]? override func viewDidLoad(){ self.view.backgroundColor = UIColor.yellow //初始化数据,这一次数据,我们放在属性列表文件里 self.allnames = [ 0:[String]([ "我的团队", "我的收藏"]), 1:[String]([ "个人资料", "设置"]), 2:[String]([ "我的团队", "我的收藏"]), 3:[String]([ "个人资料", "设置"]) ]; //背景图片 let imageView = UIImageView(image:UIImage(named:"IMG05.jpg")) imageView.frame = CGRect(x: 0, y: 0, width: screenSizeWidth, height: screenSizeHeight) self.view.addSubview(imageView) //创建表视图 self.tableView = UITableView(frame:CGRect(x:5, y:0, width:screenSizeWidth-10, height:screenSizeHeight-152), style:.grouped) self.tableView!.delegate = self self.tableView!.dataSource = self self.tableView!.backgroundColor = UIColor.clear self.tableView!.separatorStyle = UITableViewCellSeparatorStyle.singleLine self.tableView!.separatorColor = UIColor.clear // self.tableView!.layer.masksToBounds = true// // self.tableView!.layer.cornerRadius = 10 self.tableView!.isScrollEnabled = true //创建一个重用的单元格// self.tableView!.register(UITableViewCell.self,// forCellReuseIdentifier: "SwiftCell") self.view.addSubview(self.tableView!) } //在本例中,有2个分区 func numberOfSections(in tableView: UITableView) -> Int { return 5 } //返回表格行数(也就是返回控件数) func tableView(_ tableView: UITableView, numberOfRowsInSection section: Int) -> Int { return 2 } func tableView(_ tableView: UITableView, heightForRowAtIndexPath indexPath: NSIndexPath) -> CGFloat { switch indexPath.row { case 0: return 180 default: return 50 } } //创建各单元显示内容(创建参数indexPath指定的单元) func tableView(_ tableView: UITableView, cellForRowAt indexPath: IndexPath) -> UITableViewCell { var cell = UITableViewCell()// //为了提供表格显示性能,已创建完成的单元需重复使用// let identify:String = "SwiftCell"// // //同一形式的单元格重复使用,在声明时已注册// let cell = tableView.dequeueReusableCell(withIdentifier: identify, for: indexPath)// cell.accessoryType = .none cell.textLabel?.font = UIFont.systemFont(ofSize: 15) cell.textLabel?.numberOfLines = 2 switch (indexPath.row,indexPath.section) { case (0,0): let imageView1 = UIImageView(image:UIImage(named:"IMG03.jpg")) imageView1.layer.masksToBounds = true imageView1.frame = CGRect(x: 10, y: 0, width: tableView.bounds.width-20, height: 180) imageView1.corner(byRoundingCorners: [UIRectCorner.topLeft, UIRectCorner.topRight], radii: 6) cell.contentView.addSubview(imageView1) case (1,0): cell.textLabel?.font = UIFont.systemFont(ofSize: 15) cell.textLabel?.text = "短短15天的时间里,我们深切感受到了葡萄酒圈的强大,尤其是自酿发烧友,通过这次接触,我们发现他们中间不仅藏龙卧虎,而且热情好学,积极向上,是中国葡萄酒果酒行业发展不可或缺的重要力量。" case (0,1): let imageView1 = UIImageView(image:UIImage(named:"IMG03.jpg")) imageView1.layer.masksToBounds = true imageView1.frame = CGRect(x: 10, y: 0, width: tableView.bounds.width-20, height: 180) imageView1.corner(byRoundingCorners: [UIRectCorner.topLeft, UIRectCorner.topRight], radii: 6) cell.contentView.addSubview(imageView1) case (1,1): cell.textLabel?.font = UIFont.systemFont(ofSize: 15) cell.textLabel?.text = "短短15天的时间里,我们深切感受到了葡萄酒圈的强大,尤其是自酿发烧友,通过这次接触,我们发现他们中间不仅藏龙卧虎,而且热情好学,积极向上,是中国葡萄酒果酒行业发展不可或缺的重要力量。" default: break } return cell } //UITableViewDelegate 方法,处理列表项的选中事件 func tableView(_ tableView: UITableView, didSelectRowAt indexPath: IndexPath) { self.tableView!.deselectRow(at: indexPath, animated: true) } //圆角框实现************************************************************************************************************** func tableView(tableView: UITableView, willDisplayCell cell: UITableViewCell, forRowAtIndexPath indexPath: NSIndexPath) { let cornerRadius: CGFloat = 10 cell.backgroundColor = UIColor.clear let layer = CAShapeLayer() let pathRef = CGMutablePath() let bounds = cell.bounds.insetBy(dx: 10, dy: 0) var addLine = false if indexPath.row == 0 && indexPath.row == tableView.numberOfRows(inSection: indexPath.section)-1 { pathRef.__addRoundedRect(transform: nil, rect: bounds, cornerWidth: cornerRadius, cornerHeight: cornerRadius) } else if indexPath.row == 0 { pathRef.move(to: CGPoint(x:bounds.minX,y:bounds.maxY)) pathRef.addArc(tangent1End: CGPoint(x:bounds.minX,y:bounds.minY), tangent2End: CGPoint(x:bounds.midX,y:bounds.minY), radius: cornerRadius) pathRef.addArc(tangent1End: CGPoint(x:bounds.maxX,y:bounds.minY), tangent2End: CGPoint(x:bounds.maxX,y:bounds.midY), radius: cornerRadius) pathRef.addLine(to: CGPoint(x:bounds.maxX,y:bounds.maxY)) addLine = true } else if indexPath.row == tableView.numberOfRows(inSection: indexPath.section)-1 { pathRef.move(to:CGPoint(x:bounds.minX,y:bounds.minY)) pathRef.addArc(tangent1End: CGPoint(x:bounds.minX,y:bounds.maxY), tangent2End: CGPoint(x:bounds.midX,y:bounds.maxY), radius: cornerRadius) pathRef.addArc(tangent1End: CGPoint(x:bounds.maxX,y:bounds.maxY), tangent2End: CGPoint(x:bounds.maxX,y:bounds.midY), radius: cornerRadius) pathRef.addLine(to: CGPoint(x:bounds.maxX,y:bounds.minY)) } else { pathRef.addRect(bounds) addLine = true } layer.path = pathRef //颜色修改 layer.fillColor = UIColor.init(white: 1, alpha: 0.5).cgColor layer.strokeColor = UIColor.lightGray.cgColor if addLine == true { let lineLayer = CALayer() let lineHeight = (1 / UIScreen.main.scale) lineLayer.frame = CGRect(x:bounds.minX+10, y:bounds.size.height-lineHeight,width: bounds.size.width-10, height:lineHeight) lineLayer.backgroundColor = tableView.separatorColor?.cgColor layer.addSublayer(lineLayer) } let testView = UIView(frame: bounds) testView.layer.insertSublayer(layer, at: 0) testView.backgroundColor = UIColor.clear cell.backgroundView = testView } func tableView(_ tableView: UITableView, willDisplayCell cell: UITableViewCell, forRowAtIndexPath indexPath: NSIndexPath) { // 圆角弧度半径 let cornerRadius: CGFloat = 6 // 设置cell的背景色为透明,如果不设置这个的话,则原来的背景色不会被覆盖 cell.backgroundColor = UIColor.clear // 创建一个shapeLayer let layer = CAShapeLayer() let backgroundLayer = CAShapeLayer() //显示选中 // 创建一个可变的图像Path句柄,该路径用于保存绘图信息 let pathRef = CGMutablePath() // 获取cell的size // 第一个参数,是整个 cell 的 bounds, 第二个参数是距左右两端的距离,第三个参数是距上下两端的距离 let bounds = cell.bounds.insetBy(dx: 10, dy: 0) // CGRectGetMinY:返回对象顶点坐标 // CGRectGetMaxY:返回对象底点坐标 // CGRectGetMinX:返回对象左边缘坐标 // CGRectGetMaxX:返回对象右边缘坐标 // CGRectGetMidX: 返回对象中心点的X坐标 // CGRectGetMidY: 返回对象中心点的Y坐标 // 这里要判断分组列表中的第一行,每组section的第一行,每组section的中间行 // CGPathAddRoundedRect(pathRef, nil, bounds, cornerRadius, cornerRadius) if indexPath.row == 0 { // 初始起点为cell的左下角坐标 pathRef.move(to: CGPoint(x: bounds.minX, y: bounds.maxY)) // 起始坐标为左下角,设为p,(CGRectGetMinX(bounds), CGRectGetMinY(bounds))为左上角的点,设为p1(x1,y1),(CGRectGetMidX(bounds), CGRectGetMinY(bounds))为顶部中点的点,设为p2(x2,y2)。然后连接p1和p2为一条直线l1,连接初始点p到p1成一条直线l,则在两条直线相交处绘制弧度为r的圆角。 pathRef.addArc(tangent1End: CGPoint(x:bounds.minX,y:bounds.minY), tangent2End: CGPoint(x:bounds.midX,y:bounds.minY), radius: cornerRadius) pathRef.addArc(tangent1End: CGPoint(x:bounds.maxX,y:bounds.minY), tangent2End: CGPoint(x:bounds.maxX,y:bounds.midY), radius: cornerRadius) // 终点坐标为右下角坐标点,把绘图信息都放到路径中去,根据这些路径就构成了一块区域了 pathRef.addLine(to: CGPoint(x:bounds.maxX, y:bounds.maxY)) } else if indexPath.row == tableView.numberOfRows(inSection: indexPath.section)-1 { // 初始起点为cell的左上角坐标 pathRef.move(to: CGPoint(x: bounds.minX, y: bounds.minY)) pathRef.addArc(tangent1End: CGPoint(x:bounds.minX,y:bounds.maxY), tangent2End: CGPoint(x:bounds.midX,y:bounds.maxY), radius: cornerRadius) pathRef.addArc(tangent1End: CGPoint(x:bounds.maxX,y:bounds.maxY), tangent2End: CGPoint(x:bounds.maxX,y:bounds.midY), radius: cornerRadius) // 添加一条直线,终点坐标为右下角坐标点并放到路径中去 pathRef.addLine(to: CGPoint(x:bounds.maxX,y:bounds.minY)) } else { // 添加cell的rectangle信息到path中(不包括圆角) //假如用填充色,用这个 pathRef.addRect(bounds) // //假如只要边框// pathRef.move(to: CGPoint(x:bounds.minX,y:bounds.maxY))// // pathRef.addLine(to: CGPoint(x:bounds.minX,y:bounds.minY))// // pathRef.move(to: CGPoint(x:bounds.maxX,y:bounds.minY))// // pathRef.addLine(to: CGPoint(x:bounds.maxX,y:bounds.maxY)) } // 把已经绘制好的可变图像路径赋值给图层,然后图层根据这图像path进行图像渲染render layer.path = pathRef backgroundLayer.path = pathRef // 按照shape layer的path填充颜色,类似于渲染render // layer.fillColor = [UIColor colorWithWhite:1.f alpha:0.8f].CGColor layer.strokeColor = UIColor.clear.cgColor layer.fillColor = UIColor.white.cgColor // view大小与cell一致 let roundView = UIView(frame: self.view.bounds) // 添加自定义圆角后的图层到roundView中 roundView.layer.insertSublayer(layer, at: 0) roundView.backgroundColor = UIColor.clear // cell的背景view cell.backgroundView = roundView // 以上方法存在缺陷当点击cell时还是出现cell方形效果,因此还需要添加以下方法 // 如果你 cell 已经取消选中状态的话,那以下方法是不需要的. let selectedBackgroundView = UIView(frame: self.view.bounds) backgroundLayer.fillColor = UIColor.gray.cgColor selectedBackgroundView.layer.insertSublayer(backgroundLayer, at: 0) selectedBackgroundView.backgroundColor = UIColor.clear cell.selectedBackgroundView = selectedBackgroundView // 在使用上面代码前需要把tableView默认的分割线设置为None } }阅读全文
0 0
- Together项目IOS平台开发11
- Together项目IOS平台开发01
- Together项目IOS平台开发02
- Together项目IOS平台开发03
- Together项目IOS平台开发04
- Together项目IOS平台开发05
- Together项目IOS平台开发06
- Together项目IOS平台开发07
- Together项目IOS平台开发08
- Together项目IOS平台开发09
- Together项目IOS平台开发10
- Together项目后台开发01
- Together项目后台开发02
- Together项目后台开发03
- Together项目后台开发04
- Together项目后台开发05
- Together项目后台开发06
- Together项目后台开发07
- [机器学习入门] 李宏毅机器学习笔记-14 (Unsupervised Learning: Linear Dimension Reduction;无监督学习:线性降维)
- 解决因为手机设置字体大小导致h5页面在webview中变形的BUG
- 《汇编语言程序设计教程》人民邮电出版社第二版习题及参考答案
- C++标准库笔记:算法--min/max/swap/iter_swap
- 百度编辑器UEditor常用设置函数大全
- Together项目IOS平台开发11
- 微信 嗅探id 好友
- 红黑树概念、红黑树的插入及旋转操作图解--转载
- JavaScript和HTML及CSS的通俗解释
- 138. Copy List with Random Pointer
- LeetCode Array
- 边沿检测&门控时钟
- PAT乙级真题及训练集(7)--1012. 数字分类 (20)
- AceJump:快速定位光标位置,有了他你可以丢弃鼠标了