cesium自定义气泡窗口infoWindow后续优化篇
来源:互联网 发布:nodejs mysql vue 编辑:程序博客网 时间:2024/06/14 03:51
http://www.cnblogs.com/giserhome/p/6248858.html
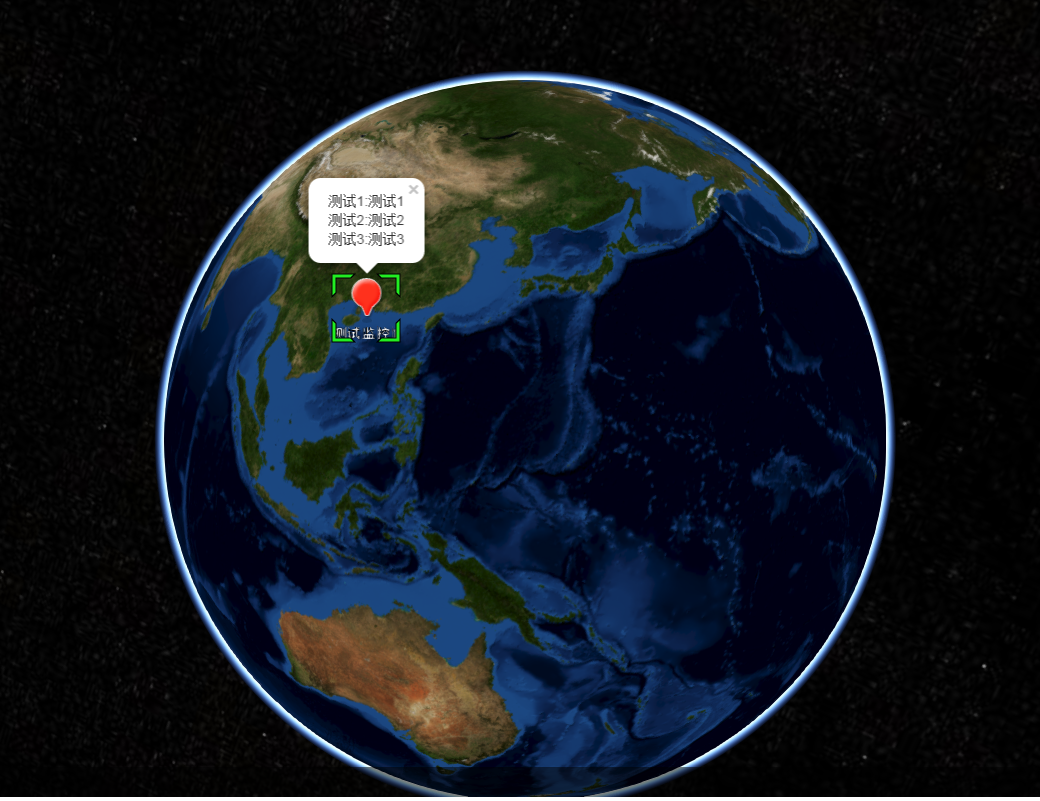
该篇文章实现的自定义气泡窗口是基于修改cesium源代码基础上,这种做法只是援兵之计,凑合应付的,投机取巧罢了,实际上是不太适合的,cesium api更新版本替换,又得手动的去设置一下源代码;本篇则是从另一个角度真正的实现了自定义气泡窗口,气泡窗口的样式定义则是leaflet风格的,效果截图如下:
具体实现思路:
1.气泡窗口css样式
/*leaflet风格气泡窗口样式模板*/.leaflet-popup { position: absolute; text-align: center;}.leaflet-popup-close-button { position: absolute; top: 0; right: 0; padding: 4px 4px 0 0; text-align: center; width: 18px; height: 14px; font: 16px/14px Tahoma, Verdana, sans-serif; color: #c3c3c3; text-decoration: none; font-weight: bold; background: transparent;}.leaflet-popup-content-wrapper { text-align: center; max-height: 200px; overflow-y: auto; background: white; box-shadow: 0 3px 14px rgba(0,0,0,0.4); padding: 1px; text-align: left; border-radius: 12px;}.leaflet-popup-content { margin: 13px 19px; line-height: 1.4;}.leaflet-popup-tip-container { margin: 0 auto; width: 40px; height: 20px; position: relative; overflow: hidden;}.leaflet-popup-tip { background: white; box-shadow: 0 3px 14px rgba(0,0,0,0.4); width: 17px; height: 17px; padding: 1px; margin: -10px auto 0; -webkit-transform: rotate(45deg); -moz-transform: rotate(45deg); -ms-transform: rotate(45deg); -o-transform: rotate(45deg); transform: rotate(45deg);}
2.气泡窗口div面板
//动态添加气泡窗口DIVvar infoDiv = '<div id="trackPopUp" style="display:none;">'+ '<div id="trackPopUpContent" class="leaflet-popup" style="top:5px;left:0;">'+ '<a class="leaflet-popup-close-button" href="#">×</a>'+ '<div class="leaflet-popup-content-wrapper">'+ '<div id="trackPopUpLink" class="leaflet-popup-content" style="max-width: 300px;"></div>'+ '</div>'+ '<div class="leaflet-popup-tip-container">'+ '<div class="leaflet-popup-tip"></div>'+ '</div>'+ '</div>'+ '</div>';$("#"+cesium.mapDivId).append(infoDiv);
气泡窗口div面板看实际情况的,也可以设置在页面html里面,我这里由于需要,是在js动态添加进来的。
3.核心的实现思路部分:如何动态刷新气泡窗口的位置
(1)cesium的点击事件Cesium.ScreenSpaceEventType.LEFT_CLICK监听鼠标的当前位置坐标,然后根据当前坐标去动态更新气泡窗口div的显示位置;
(2)监听cesium的postRender变化事件,这里特别关键,因为你拖拽球体移动,气泡窗口div也要对应移动的,气泡窗口的位置变化跟cesium球体是要动态刷新的;
附上部分关键代码:
cesium点击事件,获取当前位置
handler3D.setInputAction(function(movement) { //点击弹出气泡窗口 var pick = cesium.cesiumViewer.scene.pick(movement.position); if(pick && pick.id){//选中某模型 } else{ $('#trackPopUp').hide(); } }, Cesium.ScreenSpaceEventType.LEFT_CLICK); //加载3D模型
新气泡窗口的位置更新
function positionPopUp (c) {var x = c.x - ($('#trackPopUpContent').width()) / 2;var y = c.y - ($('#trackPopUpContent').height());$('#trackPopUpContent').css('transform', 'translate3d(' + x + 'px, ' + y + 'px, 0)');}
postRender变化事件
var removeHandler = viewer.scene.postRender.addEventListener(function () {var changedC = Cesium.SceneTransforms.wgs84ToWindowCoordinates(viewer.scene, id._position._value);// If things moved, move the popUp tooif ((c.x !== changedC.x) || (c.y !== changedC.y)) {c = changedC;}});
备注:团队承接webgis/gis毕业设计以及webgis项目等业务,欢迎有相关需求的客户来咨询
GIS之家接受webgis开发遇到的技术疑点难点在线咨询,采取在线分答计时收费模式,有需要的加QQ:406503412
GIS之家论坛(推荐):GIS之家论坛
GIS作品:GIS之家
QQ兴趣部落:GIS之家部落
GIS之家交流群一:432512093(已满)
GIS之家交流群二:296438295
GIS之家接受webgis开发遇到的技术疑点难点在线咨询,采取在线分答计时收费模式,有需要的加QQ:406503412
GIS之家论坛(推荐):GIS之家论坛
GIS作品:GIS之家
QQ兴趣部落:GIS之家部落
GIS之家交流群一:432512093(已满)
GIS之家交流群二:296438295
阅读全文
0 0
- cesium自定义气泡窗口infoWindow后续优化篇
- cesium自定义气泡窗口infoWindow
- 高德地图自定义infowindow窗口
- 高德 地图sdk中,自定义弹出框(气泡,对话框,InfoWindow,Marker)
- Mapabc里InfoWindow自定义窗口时的关闭事件。
- Google Map 自定义infowindow
- google map 自定义infowindow
- googlemaps自定义infowindow
- 安卓高德地图之自定义infowindow
- 气泡提示窗口
- 气泡提示窗口
- js窗口气泡
- 百度地图的覆盖物自定义(二)--信息窗口的自定义(调用白茹提供的信息窗口InfoWindow)
- android高德地图自定义infoWindow、点击其它地方隐藏infoWindow、infoWindow点击事件
- 百度地图自定义气泡
- 自定义气泡背景View
- 百度地图自定义气泡
- 自定义气泡菜单
- php利用root权限执行shell脚本
- 5-2 一元多项式的乘法与加法运算
- Python刷题日记:LeetCode-Longest Substring Without Repeating Characters
- PHP 、shell、crontab 执行定时任务
- 56. Yii Modules
- cesium自定义气泡窗口infoWindow后续优化篇
- xheditor关于视频上传的修改
- 机器学习入门算法基础视频
- Synchronized与ReentrantLock区别
- Spring主要标签
- JQUERY Unit01: jQuery概述 、 jQuery选择器 、 jQuery操作DOM
- FTP文件读取以及删除(问题:xml报错、第二次读取inputstream is null等等问题)
- imgproc模块--多边形测试
- struts2 2.3.32补丁升级后出现问题(无法注入变量问题)