SSH框架搭建(Spring-Strtus-Hibernate)
来源:互联网 发布:淘宝售后处理规则 编辑:程序博客网 时间:2024/05/18 12:03
因为最近的学习使用到SSH框架,为了更加的了解SSH框架的搭建流程,我就具体的描述一下
我使用的是eclipse4.6、Tomcat8、JDK1.8,数据库MySQL5.6
我下载的是Struts-2.3.30、Spring-4.2.2、Hibernate5.2.2
我已经给大家整理好所用到的包Struts-2.3.30.rar、Spring-4.2.2.rar、Hibernate5.2.2.rar(单击即可下载)
下载完成后,开始搭建
一、Struts2(MVC)的搭建:
相关描述
Ⅰ.本质上相当于一个Servlet
Ⅱ.不需要手动获取传递参数 (只需要定义声明属性名和设置get、set的方法)、也不需要手动跳转(只需要struts.xml配置相关的路径)
Ⅲ.对项目的分包(例如:dao、service、entity等等),实现MVC模式的开发
Ⅳ.MVC: Action属于Model,而JSP是View页面的展示,其中过滤器起到了Controller的作用
实现流程
1.首先新建一个项目
2.把下载好的Struts-2.3.30解压后,找到struts-2.3.30\apps\ struts2-blank.war \WEB-INF\lib的jar包,复制到项目的WebContent\WEB-INF\lib目录下


3.打开WebContent\WEB-INF\lib\web.xml,定义过滤器,编辑如下

1 <filter>
2 <filter-name>struts2</filter-name>
3 <filter-class>org.apache.struts2.dispatcher.ng.filter.StrutsPrepareAndExecuteFilter</filter-class>
4 </filter>
5 <filter-mapping>
6 <filter-name>struts2</filter-name>
7 <url-pattern>/*</url-pattern>
8 </filter-mapping>
在src目录下新建一个类,必须继承ActionSupport父类才是Action类,编辑如下

1 //默认方法,struts自动调用
2 public class IndexAction extends ActionSupport {
3 public String execute() {
4 //默认返回值
5 return "success";
6 }7 }4.在项目的src目录下新建一个struts.xml文件
 编辑如下
编辑如下
1 <?xml version="1.0" encoding="UTF-8" ?>
2 <!DOCTYPE struts PUBLIC
3 "-//Apache Software Foundation//DTD Struts Configuration 2.3//EN"
4 "http://struts.apache.org/dtds/struts-2.3.dtd">
5 <!-- 上面的头,注意版本,从样例里复制过来 showcase.war\WEB-INF\src\java\struts.xml -->
6 <struts>
7 <package name="mypck" extends="struts-default">
8 <!—name对应的action请求名称,method(不写等于默认方法)默认执行方法是 execute,class定义具体的类-->
9 <action name="Index" class="ssh.action.IndexAction" method="execute">
10 <!-- 接收Action类返回的值,进行跳转指定的页面 -->
11 <result name="success">/WEB-INF/jsp/index.jsp</result>
12 <result name="error">/WEB-INF/jsp/error.jsp</result>
13 </action>
14 </package>
15 </struts>
完成以上流程,基本上Struts2的搭建就ok了
二、Spring(注入实例)的使用:
相关描述
Ⅰ.每一层的代码之间的耦合改为模块(分离/解耦),代码之间互不影响
Ⅱ.不再关注具体的实现类的实例
Ⅲ.更换不同的技术(模块),不需要改动代码,只需要修改applicationContext.xml的相关配置信息
Ⅳ.主要功能IOC(控制反转)松耦合、AOP (面向切面)内聚性
实现流程
1.首先在Struts2搭建基础上,再把下载好的Spring-4.2.2解压后,找到spring-framework-4.2.2.RELEASE\libs的jar包,复制到项目的WebContent\WEB-INF\lib目录下
(注意: 包含<Javadoc、sources源码>的都可以不要)


(注意:导入Spring的包还不够,还差了Struts-2.3.30包里的struts-2.3.30-all\struts-2.3.30\apps\struts2-showcase.war\WEB-INF\lib的两个jar包)
2. 编辑web.xml文件,定义监听器 ,添加下列代码
1 <!-- 不写默认Spring需要读取 WebContent\WEB-INF\applicationContext.xml-->
2 <context-param>
3 <param-name>contextConfigLocation</param-name>
4 <!-- 改变默认读取路径为src目录下的 applicationContext.xml-->
5 <!-- 在改变的路径下还是没找到,便自动到默认路径查找 -->
6 <param-value>classpath:applicationContext.xml</param-value>
7 </context-param>
8 <!-- 定义监听器 -->
9 <listener>
10 <listener-class>org.springframework.web.context.ContextLoaderListener</listener-class>
11 </listener>
3.在src目录下新建applicationContext.xml用作编写Spring
 编写如下(注意:本例没有为Action类注入实例,以下注入只提供参考)
1 <?xml version="1.0" encoding="UTF-8"?>
2 <beans xmlns="http://www.springframework.org/schema/beans"
3 xmlns:xsi="http://www.w3.org/2001/XMLSchema-instance"
4 xmlns:p="http://www.springframework.org/schema/p"
5 xmlns:aop="http://www.springframework.org/schema/aop"
6 xmlns:context="http://www.springframework.org/schema/context"
7 xmlns:jee="http://www.springframework.org/schema/jee"
8 xmlns:tx="http://www.springframework.org/schema/tx"
9 xsi:schemaLocation="
10 http://www.springframework.org/schema/aop http://www.springframework.org/schema/aop/spring-aop-4.2.xsd
11 http://www.springframework.org/schema/beans http://www.springframework.org/schema/beans/spring-beans-4.2.xsd
12 http://www.springframework.org/schema/context http://www.springframework.org/schema/context/spring-context-4.2.xsd
13 http://www.springframework.org/schema/jee http://www.springframework.org/schema/jee/spring-jee-4.2.xsd
14 http://www.springframework.org/schema/tx http://www.springframework.org/schema/tx/spring-tx-4.2.xsd">
15 <!-- 上面的头,注意版本,从样例里复制过来 -->
16 <!-- id定义名字,class具体的类,scope="prototype"定义非单例 -->
17 <bean id="myActionIndex" class="ssh.action.IndexAction" scope="prototype">
18 <!-- 本例没有 -->
19 <!-- 为Action类里的is属性注入id为myIndexService的实例 -->
20 <property name="is" ref="myIndexService" />
21 </bean>
22 <!-- 本例没有 -->
23 <bean id="myIndexService" class="ssh.service.IndexServiceImpl" scope="prototype">
24 </bean>
25 </beans>
1 //本例没有
2 public class IndexAction extends ActionSupport {
3 4 //声明service,但不给它创建具体的实现类的实例,
5 private IndexService is = null;
6 public void setIs(IndexService is) {
7 this.is = is;
8 }9 }4.编辑struts.xml文件,添加下列代码(注意:新版本可以不用写,包括本例)
1 <struts>
2 <!-- 告知Struts2运行时使用Spring来创建对象 -->
3 <constant name="struts.objectFactory" value="spring" />
4 </struts>
改写action里的class属性
1 <!-- class改写成Spring注入的id定义的名字 -->
2 <action name="Index" class="ssh.action.IndexAction" method="execute">
完成以上流程,基本上Struts2-Spring的搭建就ok了
三、Hibernate(数据层)的搭建:
相关描述
Ⅰ.服务器与数据库之间的交互
Ⅱ. Hibernate封装了一系列的JDBC代码,提供相应的方法我们使用,使我们的开发变得简单快捷,效率大大提高
实现流程
1. 首先在Struts2-spring搭建基础上,再把下载好的Hibernate5.2.2解压后,找到hibernate-release-5.2.2.Final\lib\required的jar包,复制到项目的WebContent\WEB-INF\lib目录下(注意:本例使用是MySQL,记得导入对应的数据库驱动包)


2.编写applicationContext.xml文件,添加以下代码,用作描述具体的数据库信息(定义1个sessionFactory,用作于注入)
1 <bean id="sessionFactory" class="org.springframework.orm.hibernate5.LocalSessionFactoryBean">
2 <!-- 注入连接池,包含了数据库用户名,密码等等信息 -->
3 <property name="dataSource" ref="myDataSource"></property>
4 <property name="hibernateProperties">
5 <props>
6 <!-- 数据库的方言 -->
7 <prop key="hibernate.dialect">org.hibernate.dialect.MySQL5Dialect</prop>
8 <!-- 是否显示打印sql语句-->
9 <prop key="hibernate.show_sql">true</prop>
10 <!-- 是否格式化显示sql语句-->
11 <prop key="hibernate.format_sql">true</prop>
12 <!-- 是否自动提交-->
13 <prop key="hibernate.connection.autocommit">false</prop>
14 <!-- 没表帮你创建表,有表就更新表信息 -->
15 <prop key="hibernate.hbm2ddl">update</prop>
16 </props>
17 </property>
18 <property name="mappingResources">
19 <list>
20 <!-- 映射文件路径(实体类) -->
21 <value>ssh/entity/BookCard.hbm.xml</value>
22 </list>
23 </property>
24 </bean>
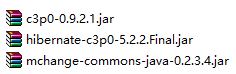
3.为c3p0数据池导入相应的jar包,在Hibernate5.2.2压缩包hibernate-release-5.2.2.Final\lib\optional\c3p0的3个jar包, 复制到项目的WebContent\WEB-INF\lib目录下(提议:也可以使用..\optional\dbcp的数据池)(区别:c3p0:稳定性、dbcp:速度比较快)
4. 继续编写applicationContext.xml文件,添加以下代码(为sessionFactory注入一个c3p0数据库)
1 <!-- 定义c3p0数据池 -->
2 <bean id="myDataSource" class="com.mchange.v2.c3p0.ComboPooledDataSource">
3 <!-- 数据库的驱动 -->
4 <property name="driverClass" value="com.mysql.jdbc.Driver"/>
5 <!-- 数据库的路径 -->
6 <property name="jdbcUrl" value="jdbc:mysql://localhost:3306/CardDB"/>
7 <!-- 数据库的用户名 -->
8 <property name="user" value="root"/>
9 <!-- 数据库的密码 -->
10 <property name="password" value="123456"/>
11 <!-- 每300秒检查所有连接池中的空闲连接 -->
12 <property name="idleConnectionTestPeriod" value="300"></property>
13 <!-- 最大空闲时间,900秒内未使用则连接被丢弃。若为0则永不丢弃 -->
14 <property name="maxIdleTime" value="900"></property>
15 <!-- 最大连接数 -->
16 <property name="maxPoolSize" value="2"></property>
17 </bean>
5.第4步也可以替换成,以下写法,先在src目录下创建一个jdbc.properties的文件(用于记录保存数据库相关的信息)

1 jdbc.driver=com.mysql.jdbc.Driver2 jdbc.url=jdbc:mysql://localhost:3306/CardDB3 jdbc.user=root4 jdbc.password=123456
然后applicationContext.xml文件就可以引用该文件内的参数
1 <property name="driverClass" value="${jdbc.driver}"/>
2 <property name="jdbcUrl" value="${jdbc.url}"/>
3 <property name="user" value="${jdbc.user}"/>
4 <property name="password" value="${jdbc.password}"/>
(注意:引用前提必须要在applicationContext.xml文件里添加以下代码,声明一下引用的文件路径)
1 <context:property-placeholder location="classpath:jdbc.properties.txt" />
6.最后在实体类的目录下新建一个实体类.hbm.xml的文件,进行以下编辑
1 <?xml version="1.0" encoding="UTF-8"?>
2 <hibernate-mapping xmlns="http://www.hibernate.org/xsd/hibernate-mapping">
3 <!-- name是实体类的具体路径,table是定义创建表的名字 -->
4 <class name="ssh.entity.BookCard" table="BookCard">
5 <!-- 定义主键的名称 -->
6 <id name="cid" column="cid">
7 <!-- 定义主键为自动增长 -->
8 <generator class="native"></generator>
9 </id>10 <!-- 定义数据库的其他的字段 的具体描述-->
11 <property name="name" type="string" length="50" column="name" not-null="true"></property>
12 <property name="sex" type="string" length="2" column="sex"></property>
13 <property name="cardDate" type="date" column="cardDate"></property>
14 <property name="deposit" type="double" column="deposit"></property>
15 </class>
16 </hibernate-mapping>
以上就是一个简单的SSH搭建的流程
- SSH框架搭建(Spring-Strtus-Hibernate)
- strtus spring hibernate ssh面试内容总结
- Eclipse搭建SSH(Struts2+Spring+Hibernate)框架教程
- 基于Spring + SpringMVC + Hibernate (ssh)搭建JAVAEE框架
- eclipse搭建SSH框架(Spring+SpringMVC+Hibernate)
- 用eclipse搭建SSH(struts+spring+hibernate)框架
- SSH(spring +hibernate+struts2)三大框架的搭建
- 整合Struts2 Spring Hibernate,搭建SSH框架
- SSH(struts+spring+hibernate)框架搭建流程
- SSH(Struts2+Spring+Hibernate)框架搭建流程
- 集成测试Strtus+Spring+Hibernate
- 集成测试Strtus+Spring+Hibernate
- 集成测试Strtus+Spring+Hibernate
- GWT、Spring、Strtus、Hibernate整合
- 简单的strtus框架搭建
- java传统框架ssh---struts、spring、hibernate框架的搭建
- SSH(struts+spring+hibernate)迅速开发--第二章 SSH框架搭建(1)
- SSH(struts+spring+hibernate)迅速开发--第二章 SSH框架搭建(2)
- [leetcode]104. Maximum Depth of Binary Tree@Java解题报告
- mysql 在 centos 上安装
- 基于opencv的图像分析,PID算法,串口发送,单片机接收,输出脉冲继而控制步进电机转动
- fast-rcnn 详解
- HDU
- SSH框架搭建(Spring-Strtus-Hibernate)
- C开发lua模块(二) --- 操作table和调用lua函数
- 2017"百度之星"程序设计大赛
- 简单看下Java 的内存及其共享
- 遇到的面试题(附网上参考答案)
- python-pandas的基本用法04
- 海量数据分析问题总结
- 【LeetCode】149. Max Points on a Line
- MySQL存储过程详解 mysql 存储过程