详解linux下编译安装配置php5.6.30过程
来源:互联网 发布:nginx转发配置 编辑:程序博客网 时间:2024/06/05 13:21
原文地址:http://www.php.cn/php-weizijiaocheng-358134.html
一、编译安装php5.6.30
安装环境:
1
2
# cat /etc/redhat-releaseCentOS release 6.8 (Final)1
2
# /application/nginx/sbin/nginx -vnginx version: nginx/1.6.3下载php5.6.30安装包
1
wget <a rel="nofollow" href="http://cn2.php.net/distributions/php-5.6.30.tar.bz2" target="_blank">http://cn2.php.net/distributions/php-5.6.30.tar.bz2</a>解压
1
tar -xjf php-5.6.30.tar.bz2安装所需依赖包
1
2
3
4
# rpm -qa zlib-devel libxm12-devel libjpeg-devel libjpeg-turbo-devel libiconv-develfreetype-devel libpng-devel libpng-devel gd-devel libcurl-devel libxslt-devel# yum install zlib-devel libxm12-devel libjpeg-devel libjpeg-turbo-devel libiconv-develfreetype-devel libpng-devel libpng-devel gd-devel libcurl-devel libxslt-devel -y安装libiconv库
1
2
3
4
5
6
wgettar zxf libiconv-1.14.tar.gzcd libiconv-1.14./configure --prefix=/usr/local/libiconvmakemake install开始安装 php
1
2
3
4
5
6
7
8
9
10
11
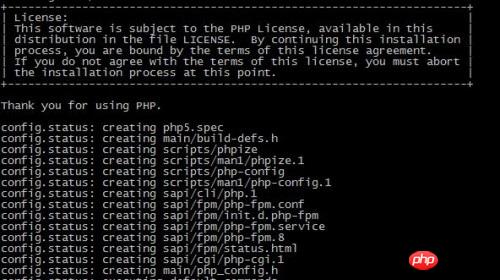
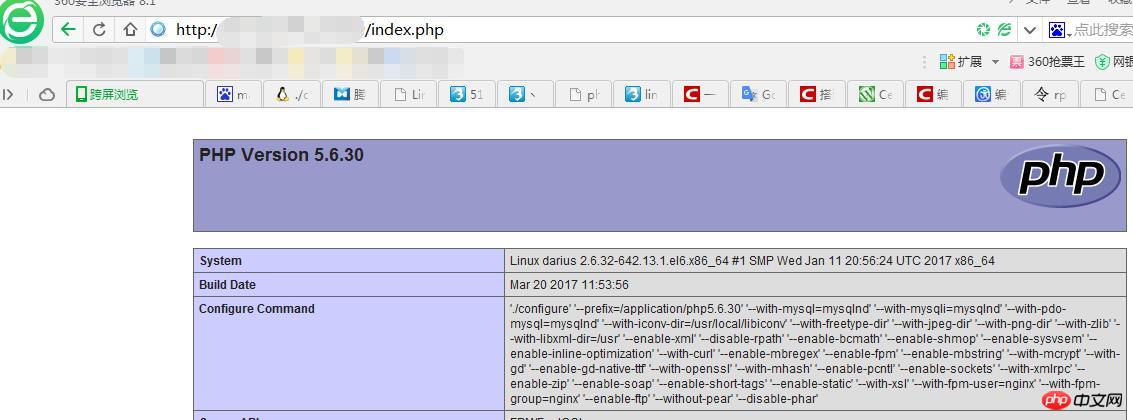
[root@darius php-5.6.30]#./configure --prefix=/application/php5.6.30--with-mysql=mysqlnd --with-mysqli=mysqlnd --with-pdo-mysql=mysqlnd--with-iconv-dir=/usr/local/libiconv --with-freetype-dir --with-jpeg-dir --with-png-dir --with-zlib --with-libxml-dir=/usr --enable-xml --disable-rpath --enable-bcmath --enable-shmop --enable-sysvsem --enable-inline-optimization --with-curl --enable-mbregex --enable-fpm --enable-mbstring --with-mcrypt --with-gd --enable-gd-native-ttf --with-openssl --with-mhash --enable-pcntl --enable-sockets --with-xmlrpc --enable-zip --enable-soap --enable-short-tags --enable-static --with-xsl --with-fpm-user=nginx --with-fpm-group=nginx --enable-ftp --without-pear --disable-phar #因为本机没有pear包,所以选择暂时跳过(--without-pear --disable-phar),等php安装后再补装go-pear
make 编译
1
2
3
4
5
6
7
8
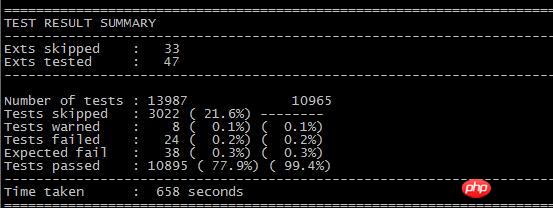
[root@darius php-5.6.30]# make.........Build complete.Don't forget to run 'make test'. [root@darius php-5.6.30]# make testmake test的结果报了一些问题,我没有理会,继续安装了

执行make install
1
2
3
4
5
6
7
8
9
10
11
12
13
14
15
16
17
18
19
[root@darius php-5.6.30]# make installInstalling shared extensions: /application/php5.6.30/lib/php/extensions/no-debug-non-zts-20131226/Installing PHP CLI binary: /application/php5.6.30/bin/Installing PHP CLI man page: /application/php5.6.30/php/man/man1/Installing PHP FPM binary: /application/php5.6.30/sbin/Installing PHP FPM config: /application/php5.6.30/etc/Installing PHP FPM man page: /application/php5.6.30/php/man/man8/Installing PHP FPM status page: /application/php5.6.30/php/php/fpm/Installing PHP CGI binary: /application/php5.6.30/bin/Installing PHP CGI man page: /application/php5.6.30/php/man/man1/Installing build environment: /application/php5.6.30/lib/php/build/Installing header files: /application/php5.6.30/include/php/Installing helper programs: /application/php5.6.30/bin/ program: phpize program: php-configInstalling man pages: /application/php5.6.30/php/man/man1/ page: phpize.1 page: php-config.1Installing PDO headers: /application/php5.6.30/include/php/ext/pdo/二、配置php
1
2
3
4
cp php.ini-production /usr/local/php/etc/php.ini #复制php配置文件到安装目录rm -rf /etc/php.ini #删除系统自带配置文件ln -s /usr/local/php/etc/php.ini /etc/php.ini #添加软链接到 /etc目录cp /usr/local/php/etc/php-fpm.conf.default /usr/local/php/etc/php-fpm.conf #拷贝模板文件为php-fpm配置文件ln -s /usr/local/php/etc/php-fpm.conf /etc/php-fpm.conf #添加软连接到 /etc目录修改php-fpm.conf
1
pid = run/php-fpm.pid #取消前面的分号修改php-ini.conf
找到:disable_functions=
修改为:
1
2
3
4
5
6
7
8
disable_functions =passthru,exec,system,chroot,scandir,chgrp,chown,shell_exec,proc_open,proc_get_status,ini_alter,ini_alter,ini_restore,dl,openlog,syslog,readlink,symlink,popepassthru,stream_socket_server,escapeshellcmd,dll,popen,disk_free_space,checkdnsrr,checkdnsrr,getservbyname,getservbyport,disk_total_space,posix_ctermid,posix_get_last_error,posix_getcwd, posix_getegid,posix_geteuid,posix_getgid, posix_getgrgid,posix_getgrnam,posix_getgroups,posix_getlogin,posix_getpgid,posix_getpgrp,posix_getpid, posix_getppid,posix_getpwnam,posix_getpwuid, posix_getrlimit, posix_getsid,posix_getuid,posix_isatty, posix_kill,posix_mkfifo,posix_setegid,posix_seteuid,posix_setgid, posix_setpgid,posix_setsid,posix_setuid,posix_strerror,posix_times,posix_ttyname,posix_uname#列出PHP可以禁用的函数,如果某些程序需要用到这个函数,可以删除,取消禁用。
找到:;date.timezone =
修改为:
1
date.timezone = PRC #设置时区找到:expose_php = On
修改为:
1
expose_php = Off #禁止显示php版本的信息找到:short_open_tag = Off
修改为:
1
short_open_tag = ON #支持php短标签注意:short_open_tag 必须打开.开启以后可以使用PHP的段标签:()。同时,只有开启这个才可以使用 <?= 以代替 <? echo 。有一些开源系统里会使用短标签,如果不打开的话会报错。
找到opcache.enable=0
修改为
1
opcache.enable=1 #php支持opcode缓存找到:;opcache.enable_cli=1 #php支持opcode缓存
修改为:
1
opcache.enable_cli=0在最后一行添加:
1
zend_extension=opcache.so #开启opcode缓存功能:wq #保存退出
配置nginx.conf
1
2
3
4
5
6
7
location ~ \.php$ { root html/bbs; #你网页根目录 fastcgi_pass 127.0.0.1:9000; fastcgi_index index.php; fastcgi_param SCRIPT_FILENAME $document_root$fastcgi_script_name; include fastcgi_params;}创建测试文件:
1
2
3
4
5
6
[root@darius bbs]# cat index.php<?php phpinfo(); ?>[root@darius bbs]# cat index.htmlbbs.html[root@darius bbs]# pwd/application/nginx/html/bbs启动php-fpm,重启nginx,并测试结果
1
/application/php/sbin/php-fpm -c /application/php/etc/php.ini -y /application/php/etc/php-fpm.conf1
/application/nginx/sbin/nginx -s reload

阅读全文
0 0
- 详解linux下编译安装配置php5.6.30过程
- Linux下PHP5.6编译参数详解
- linux下编译安装php5.6
- Linux 下软件配置,编译与安装的基本过程
- centos7 下安装Apache2+MariaDB+PHP5过程详解
- centos7 下安装Apache2+MariaDB+PHP5过程详解
- Ubuntu下从源码手工编译安装及配置PHP5
- Ubuntu下从源码手工编译安装及配置PHP5
- Linux下软件源码编译安装的configure配置详解
- Linux下Php5 Mysql5 Apache2 GD2 Zend3编译安装步骤
- linux下用源代码编译安装apache2.x + php5.x
- CentOS下编译安装PHP5
- 编译安装php5.6.30
- Windows下Nginx+PHP5(FastCgi)安装配置详解
- Windows下Nginx+PHP5(FastCgi)安装配置详解
- Windows下Nginx+PHP5(FastCgi)安装配置详解
- Windows下Nginx+PHP5(FastCgi)安装配置详解
- Windows下Nginx+PHP5(FastCgi)安装配置详解
- Hadoop学习(一)
- D
- [LeetCode]404. Sum of Left Leaves 树的典型题目
- POJ1789 Truck History
- 笔记11 《C++ 大学教程》
- 详解linux下编译安装配置php5.6.30过程
- Linux学习笔记01:文件管理
- 慕课网学习Java入门第二季笔记
- 二叉树的基本操作 C++
- E
- 线性筛+区间枚举
- Linux常用命令
- csdn如何转载别人的文章
- larave5.4自定义公共函数的创建


