PhpStorm2017.2 安装Xdebug
来源:互联网 发布:php招聘要求不靠谱 编辑:程序博客网 时间:2024/06/03 19:49
我的开发环境:phpStudy,php7.0,PhpStorm2017.2。
第一步:在PHPStorm中打开Xdebug扩展,然后在php.ini中会出现关于Xdebug的设置信息。
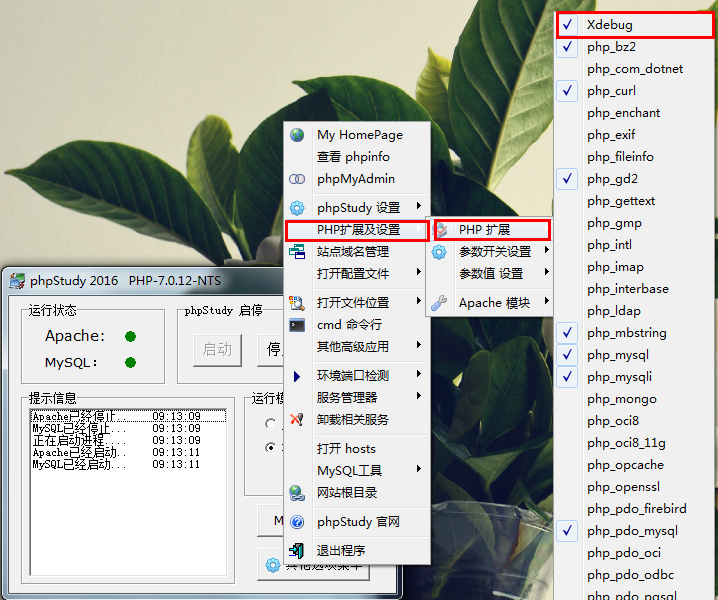
点击“其他选项菜单”,点击“PHP扩展及设置”,点击PHP扩展,如下图所示。
点击“其他选项菜单”,点击“打开配置文件”,选择php-ini单击打开。在该文件中ctrl+F搜索xdebug,把xdebug部分内容设置成如下格式。
[XDebug]xdebug.profiler_output_dir="D:\phpStudy\tmp\xdebug"xdebug.trace_output_dir="D:\phpStudy\tmp\xdebug"zend_extension="D:\phpStudy\php\php-7.0.12-nts\ext\php_xdebug.dll";自定义xdebug.remote_enable = Onxdebug.profiler_enable = offxdebug.profiler_enable_trigger = offxdebug.show_local_vars=0xdebug.idekey = "PHPSTORM"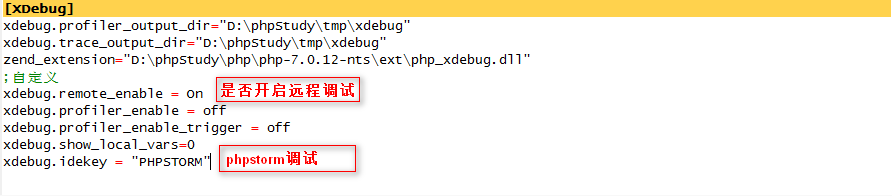
第二步、PHPstorm配置
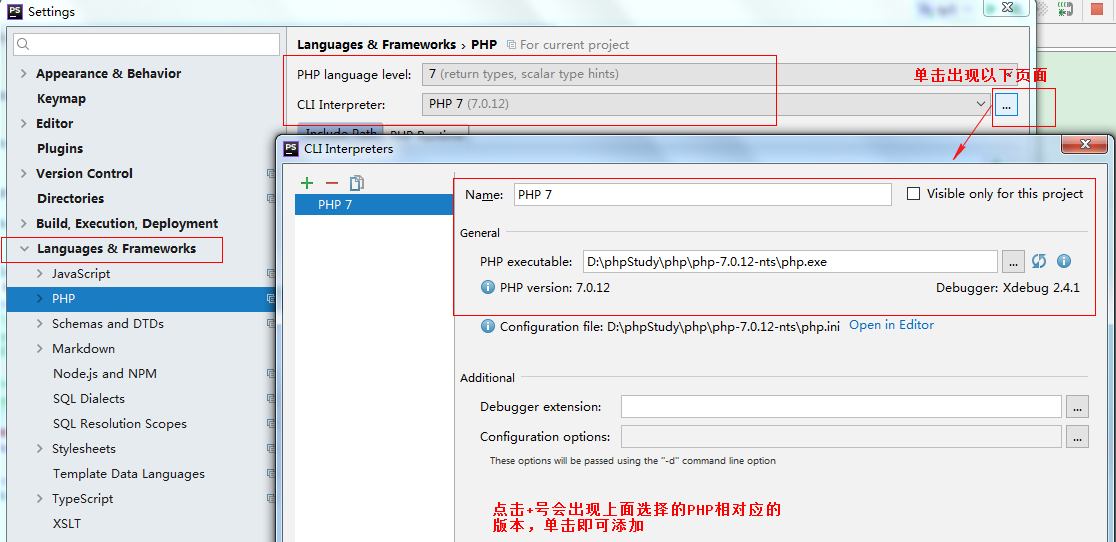
1、选择PHP版本
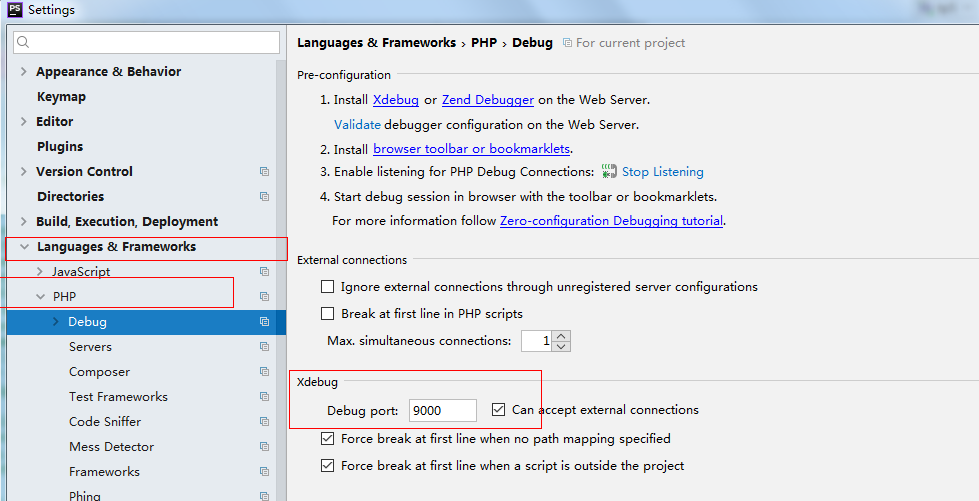
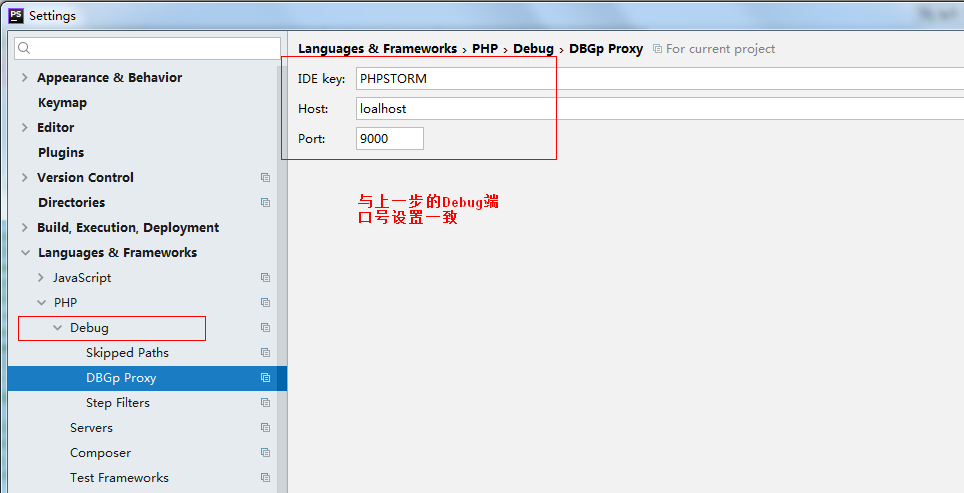
2、设置Debug端口号,“Debug port”与“xdebug.remote_port”一致。
3、设置IDEKey
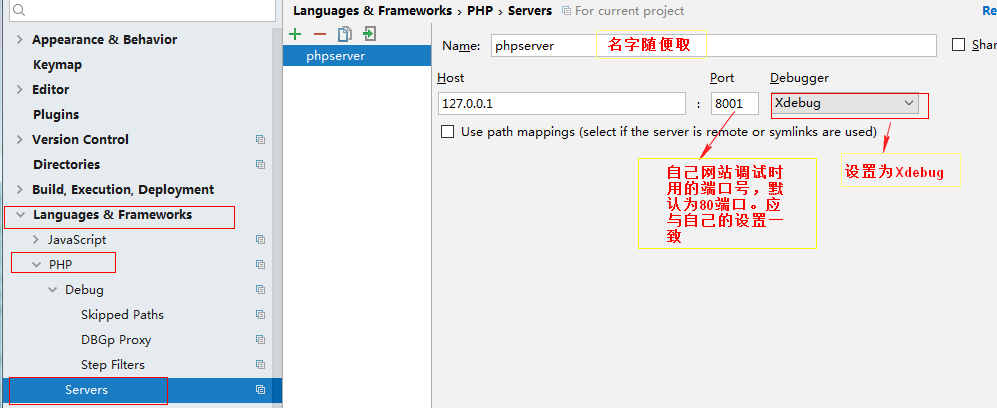
4、设置服务器,在 PHP>Servers 中,将对应服务器的调试工具修改为“Xdebug”,如果没有,请创建。这里的 “Port” 为服务器运行端口
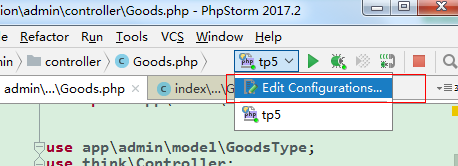
5、增加PHP Web Application。
- 选择Edit Configurations
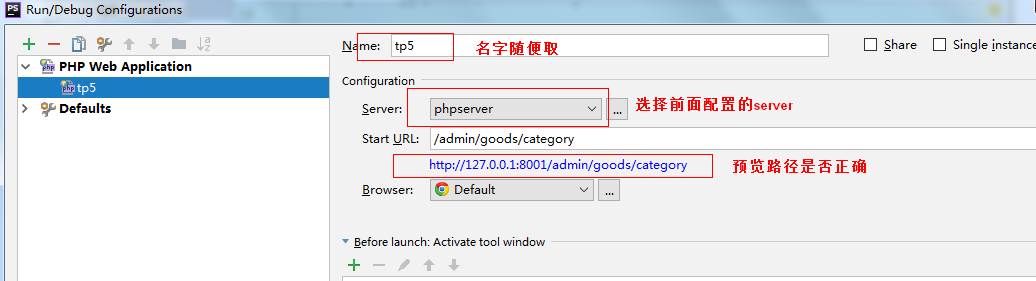
2. 选择PHP Web Application,增加配置
6、至此,配置基本完成,现在查看一下配置信息。
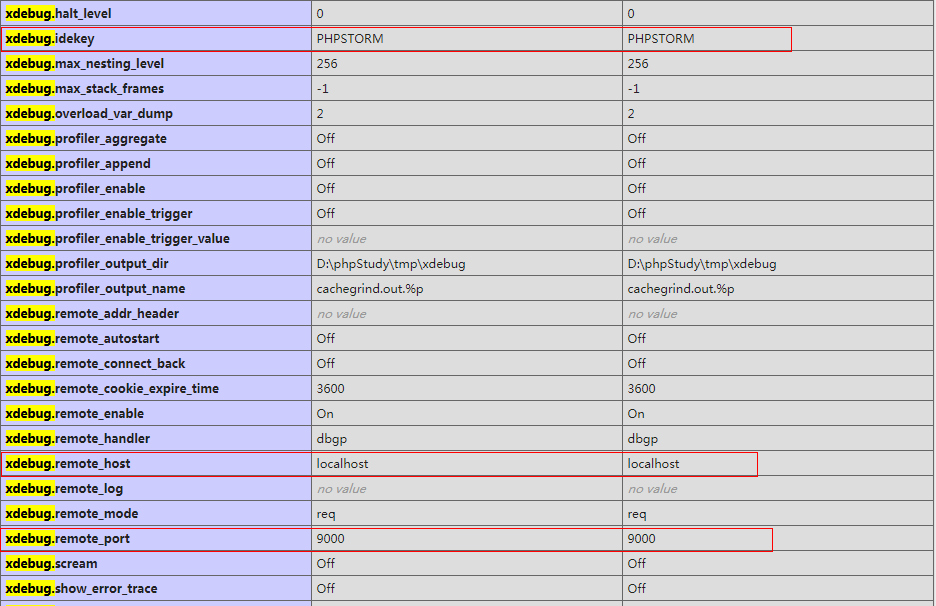
运行项目目录下的phpinfo.php文件,没有可以自己写一个,查看xdebug.ide,xdebug.remote_port等信息,如下图所示。
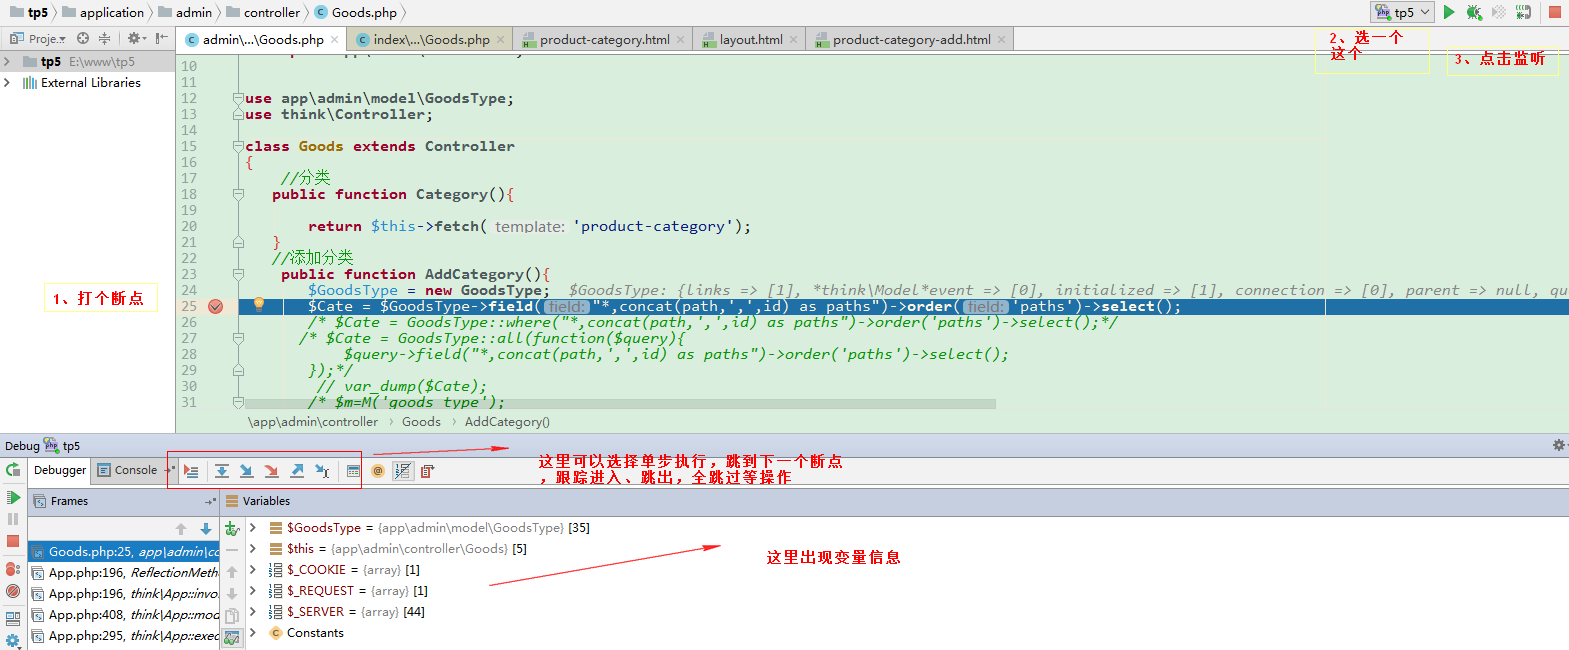
7、调试程序。
到这里,就基本完成了phpstorm和xdebug的配置,或许你看这篇文章,第一次配置不会成功。这样的话,建议多搜几篇文章结合看,总是会成功的。
阅读全文
0 0
- PhpStorm2017.2 安装Xdebug
- phpstorm2017 安装和破解
- CentOS6.2 安装Xdebug
- phpstorm2017.2中文输入问题
- sublime text 2 安装 xdebug
- 破解安装phpstorm2017.1,centos和windows
- xdebug安装
- xdebug 安装
- xdebug 安装
- xdebug安装
- Xdebug安装
- xdebug安装
- xdebug 安装
- Xdebug安装
- 安装xdebug
- PhpStorm 2016.3.2 wamp3.0.6 安装 Xdebug
- centos7.2 xdebug(php 扩展) 安装
- PhPStorm2017安装教程以及界面背景设置及其常见问题解答
- 成功者绝不放弃 jzoj 2017.8.17 B组
- java23种设计模式
- Java框架之Shiro
- 【Mybatis从0到1-002】使用 jdbc 开发的前期准备
- 贪吃蛇
- PhpStorm2017.2 安装Xdebug
- 新特性总结-JDK1.0
- Ajax实现动态刷新页面(get)
- 由数据字典codes集,获取数据字典names集--oracle方式
- 如何在service中显示Dialog
- javascript倒计时
- MySQL5.7并发复制演进
- Java IO学习笔记之字节流和字符流
- ubuntu完全卸载mysql