SpringMVC详解(三)------基于注解的入门实例
来源:互联网 发布:文华财经编程教程 编辑:程序博客网 时间:2024/06/03 19:14
前两篇博客我们讲解了基于XML 的入门实例,以及SpringMVC运行的详细流程。但是我们发现基于 XML 的配置还是比较麻烦的,而且,每个 Handler 类只能有一个方法,在实际开发中肯定是不可能这样来进行开发的。那么这篇博客我们就讲解实际开发中用的最多的基于注解配置的SpringMVC配置。
本篇博客源码下载链接:http://pan.baidu.com/s/1dESLgv3 密码:vkuy
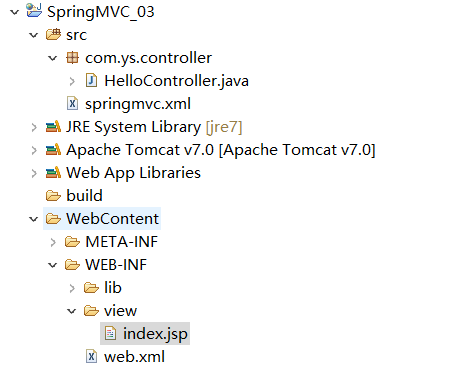
项目结构为:
1、在 web.xml 文件中配置前端处理器
<?xml version="1.0" encoding="UTF-8"?><web-app xmlns:xsi="http://www.w3.org/2001/XMLSchema-instance" xmlns="http://java.sun.com/xml/ns/javaee" xsi:schemaLocation="http://java.sun.com/xml/ns/javaee http://java.sun.com/xml/ns/javaee/web-app_3_0.xsd" version="3.0"> <display-name>SpringMVC_01</display-name> <!-- 配置前端控制器DispatcherServlet --> <servlet> <servlet-name>springmvc</servlet-name> <servlet-class>org.springframework.web.servlet.DispatcherServlet</servlet-class> <!--springmvc.xml 是自己创建的SpringMVC全局配置文件,用contextConfigLocation作为参数名来加载 如果不配置 contextConfigLocation,那么默认加载的是/WEB-INF/servlet名称-servlet.xml,在这里也就是 springmvc-servlet.xml --> <init-param> <param-name>contextConfigLocation</param-name> <param-value>classpath:springmvc.xml</param-value> </init-param> </servlet> <servlet-mapping> <servlet-name>springmvc</servlet-name> <!--第一种配置:*.do,还可以写*.action等等,表示以.do结尾的或者以.action结尾的URL都由前端控制器DispatcherServlet来解析 第二种配置:/,所有访问的 URL 都由DispatcherServlet来解析,但是这里最好配置静态文件不由DispatcherServlet来解析 错误配置:/*,注意这里是不能这样配置的,应为如果这样写,最后转发到 jsp 页面的时候,仍然会由DispatcherServlet进行解析, 而这时候会找不到对应的Handler,从而报错!!! --> <url-pattern>/</url-pattern> </servlet-mapping></web-app>
2、在 springmvc.xml 文件中配置处理器映射器,处理器适配器,视图解析器
<?xml version="1.0" encoding="UTF-8"?><beans xmlns="http://www.springframework.org/schema/beans" xmlns:xsi="http://www.w3.org/2001/XMLSchema-instance" xmlns:mvc="http://www.springframework.org/schema/mvc" xmlns:context="http://www.springframework.org/schema/context" xmlns:aop="http://www.springframework.org/schema/aop" xmlns:tx="http://www.springframework.org/schema/tx" xsi:schemaLocation="http://www.springframework.org/schema/beans http://www.springframework.org/schema/beans/spring-beans-4.2.xsd http://www.springframework.org/schema/mvc http://www.springframework.org/schema/mvc/spring-mvc-4.2.xsd http://www.springframework.org/schema/context http://www.springframework.org/schema/context/spring-context.xsd http://www.springframework.org/schema/aop http://www.springframework.org/schema/aop/spring-aop-4.2.xsd http://www.springframework.org/schema/tx http://www.springframework.org/schema/tx/spring-tx.xsd"><!--注解处理器映射器 --> <bean class="org.springframework.web.servlet.mvc.method.annotation.RequestMappingHandlerMapping"></bean> <!--注解处理器适配器 --> <bean class="org.springframework.web.servlet.mvc.method.annotation.RequestMappingHandlerAdapter"></bean> <!--使用mvc:annotation-driven可以代替上面的映射器和适配器这里面会默认加载很多参数绑定方法,比如json转换解析器就默认加载,所以优先使用下面的配置 --><!-- <mvc:annotation-driven></mvc:annotation-driven> --><!--单个配置Handler --><!-- <bean class="com.ys.controller.HelloController"></bean> --><!--批量配置Handler,指定扫描的包全称 --><context:component-scan base-package="com.ys.controller"></context:component-scan><!--配置视图解析器 --><bean class="org.springframework.web.servlet.view.InternalResourceViewResolver"><!-- 返回视图页面的前缀 --><property name="prefix" value="/WEB-INF/view/"></property><!-- 返回页面的后缀 --><property name="suffix" value=".jsp"></property></bean></beans>
3、编写 Handler
package com.ys.controller;import org.springframework.stereotype.Controller;import org.springframework.web.bind.annotation.RequestMapping;import org.springframework.web.servlet.ModelAndView;//使用@Controller注解表示这个类是一个Handler@Controllerpublic class HelloController {//@RequestMapping注解括号里面的表示访问的URL@RequestMapping("hello")public ModelAndView hello(){ModelAndView modelView = new ModelAndView();//类似于 request.setAttribute()modelView.addObject("name","张三");//配置返回的视图名,由于我们在springmvc.xml中配置了前缀和后缀,这里直接写视图名就好modelView.setViewName("index");//modelView.setViewName("/WEB-INF/view/index.jsp");return modelView;}}注意@Controller注解和@RequestMapping注解的用法
4、编写 视图 index.jsp
<%@ page language="java" contentType="text/html; charset=UTF-8" pageEncoding="UTF-8"%><!DOCTYPE html PUBLIC "-//W3C//DTD HTML 4.01 Transitional//EN" "http://www.w3.org/TR/html4/loose.dtd"><html><head><meta http-equiv="Content-Type" content="text/html; charset=UTF-8"><title>Insert title here</title></head><body>hello:${name}</body></html>
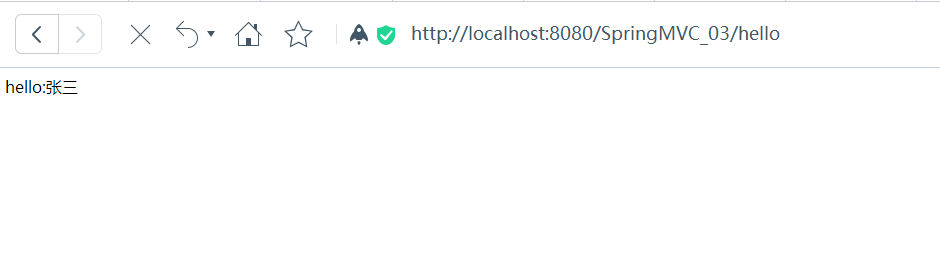
5、在浏览器中输入:http://localhost:8080/SpringMVC_03/hello
阅读全文
0 0
- SpringMVC详解(三)------基于注解的入门实例
- SpringMVC详解(三)------基于注解的入门实例
- SpringMVC详解(三)------基于注解的入门实例
- SpringMVC详解(三)------基于注解的入门实例
- 基于注解的SpringMVC入门
- SpringMVC入门(三) 注解的使用
- 基于注解实现springmvc的入门helloworld
- 基于注解的SpringMVC配置的详解
- SpringMvc入门到开发(三)之注解的控制器
- SpringMVC 基于注解的Controller详解
- SpringMVC 基于注解的Controller详解
- SpringMVC 基于注解的Controller详解
- SpringMVC 基于注解的Controller详解s
- SpringMVC 基于注解的Controller详解
- SpringMVC 基于注解的Controller详解
- SpringMVC基于注解的Controller详解
- SpringMVC 基于注解的Controller详解
- SpringMVC 基于注解的Controller详解
- python爬虫-下载图片到本地目录
- Android 动画详解之Tween动画
- JVM内存模型
- 解决Android拍照保存在系统相册不显示的问题
- javaweb中的监听器
- SpringMVC详解(三)------基于注解的入门实例
- Unity处女作学习总结--第二、三天
- Android 基于ImageSwitcher实现的左右切换图片
- 怎么使用乐鑫云端服务器软件
- 20170822
- hdu4372(第一类斯特林数) Count the Buildings
- 阅读《thinking in Java》 一切都是对象
- java中的String类常量池详解
- 设计模式——六大原则