YOLO: Real-Time Object Detection
来源:互联网 发布:mac谷歌应用商店打不开 编辑:程序博客网 时间:2024/06/06 04:35
You only look once (YOLO) is a state-of-the-art, real-time object detection system. On a Titan X it processes images at 40-90 FPS and has a mAP on VOC 2007 of 78.6% and a mAP of 48.1% on COCO test-dev.
SSD300COCO trainvaltest-dev41.2-46linkSSD500COCO trainvaltest-dev46.5-19linkYOLOv2 608x608COCO trainvaltest-dev48.162.94 Bn40cfgweightsTiny YOLOCOCO trainval--7.07 Bn200cfgweights
How It Works
Prior detection systems repurpose classifiers or localizers to perform detection. They apply the model to an image at multiple locations and scales. High scoring regions of the image are considered detections.
We use a totally different approach. We apply a single neural network to the full image. This network divides the image into regions and predicts bounding boxes and probabilities for each region. These bounding boxes are weighted by the predicted probabilities.

Our model has several advantages over classifier-based systems. It looks at the whole image at test time so its predictions are informed by global context in the image. It also makes predictions with a single network evaluation unlike systems likeR-CNN which require thousands for a single image. This makes it extremely fast, more than 1000x faster than R-CNN and 100x faster thanFast R-CNN. See ourpaper for more details on the full system.
What's New in Version 2?
YOLOv2 uses a few tricks to improve training and increase performance. Like Overfeat and SSD we use a fully-convolutional model, but we still train on whole images, not hard negatives. Like Faster R-CNN we adjust priors on bounding boxes instead of predicting the width and height outright. However, we still predict the x and y coordinates directly. The full details are in our paper.!
Detection Using A Pre-Trained Model
This post will guide you through detecting objects with the YOLO system using a pre-trained model. If you don't already have Darknet installed, you shoulddo that first. Or instead of reading all that just run:
git clone https://github.com/pjreddie/darknetcd darknetmakeEasy!
You already have the config file for YOLO in the cfg/ subdirectory. You will have to download the pre-trained weight filehere (258 MB). Or just run this:
wget https://pjreddie.com/media/files/yolo.weightsThen run the detector!
./darknet detect cfg/yolo.cfg yolo.weights data/dog.jpgYou will see some output like this:
layer filters size input output 0 conv 32 3 x 3 / 1 416 x 416 x 3 -> 416 x 416 x 32 1 max 2 x 2 / 2 416 x 416 x 32 -> 208 x 208 x 32 ....... 29 conv 425 1 x 1 / 1 13 x 13 x1024 -> 13 x 13 x 425 30 detectionLoading weights from yolo.weights...Done!data/dog.jpg: Predicted in 0.016287 seconds.car: 54%bicycle: 51%dog: 56%
Darknet prints out the objects it detected, its confidence, and how long it took to find them. We didn't compile Darknet withOpenCV so it can't display the detections directly. Instead, it saves them inpredictions.png. You can open it to see the detected objects. Since we are using Darknet on the CPU it takes around 6-12 seconds per image. If we use the GPU version it would be much faster.
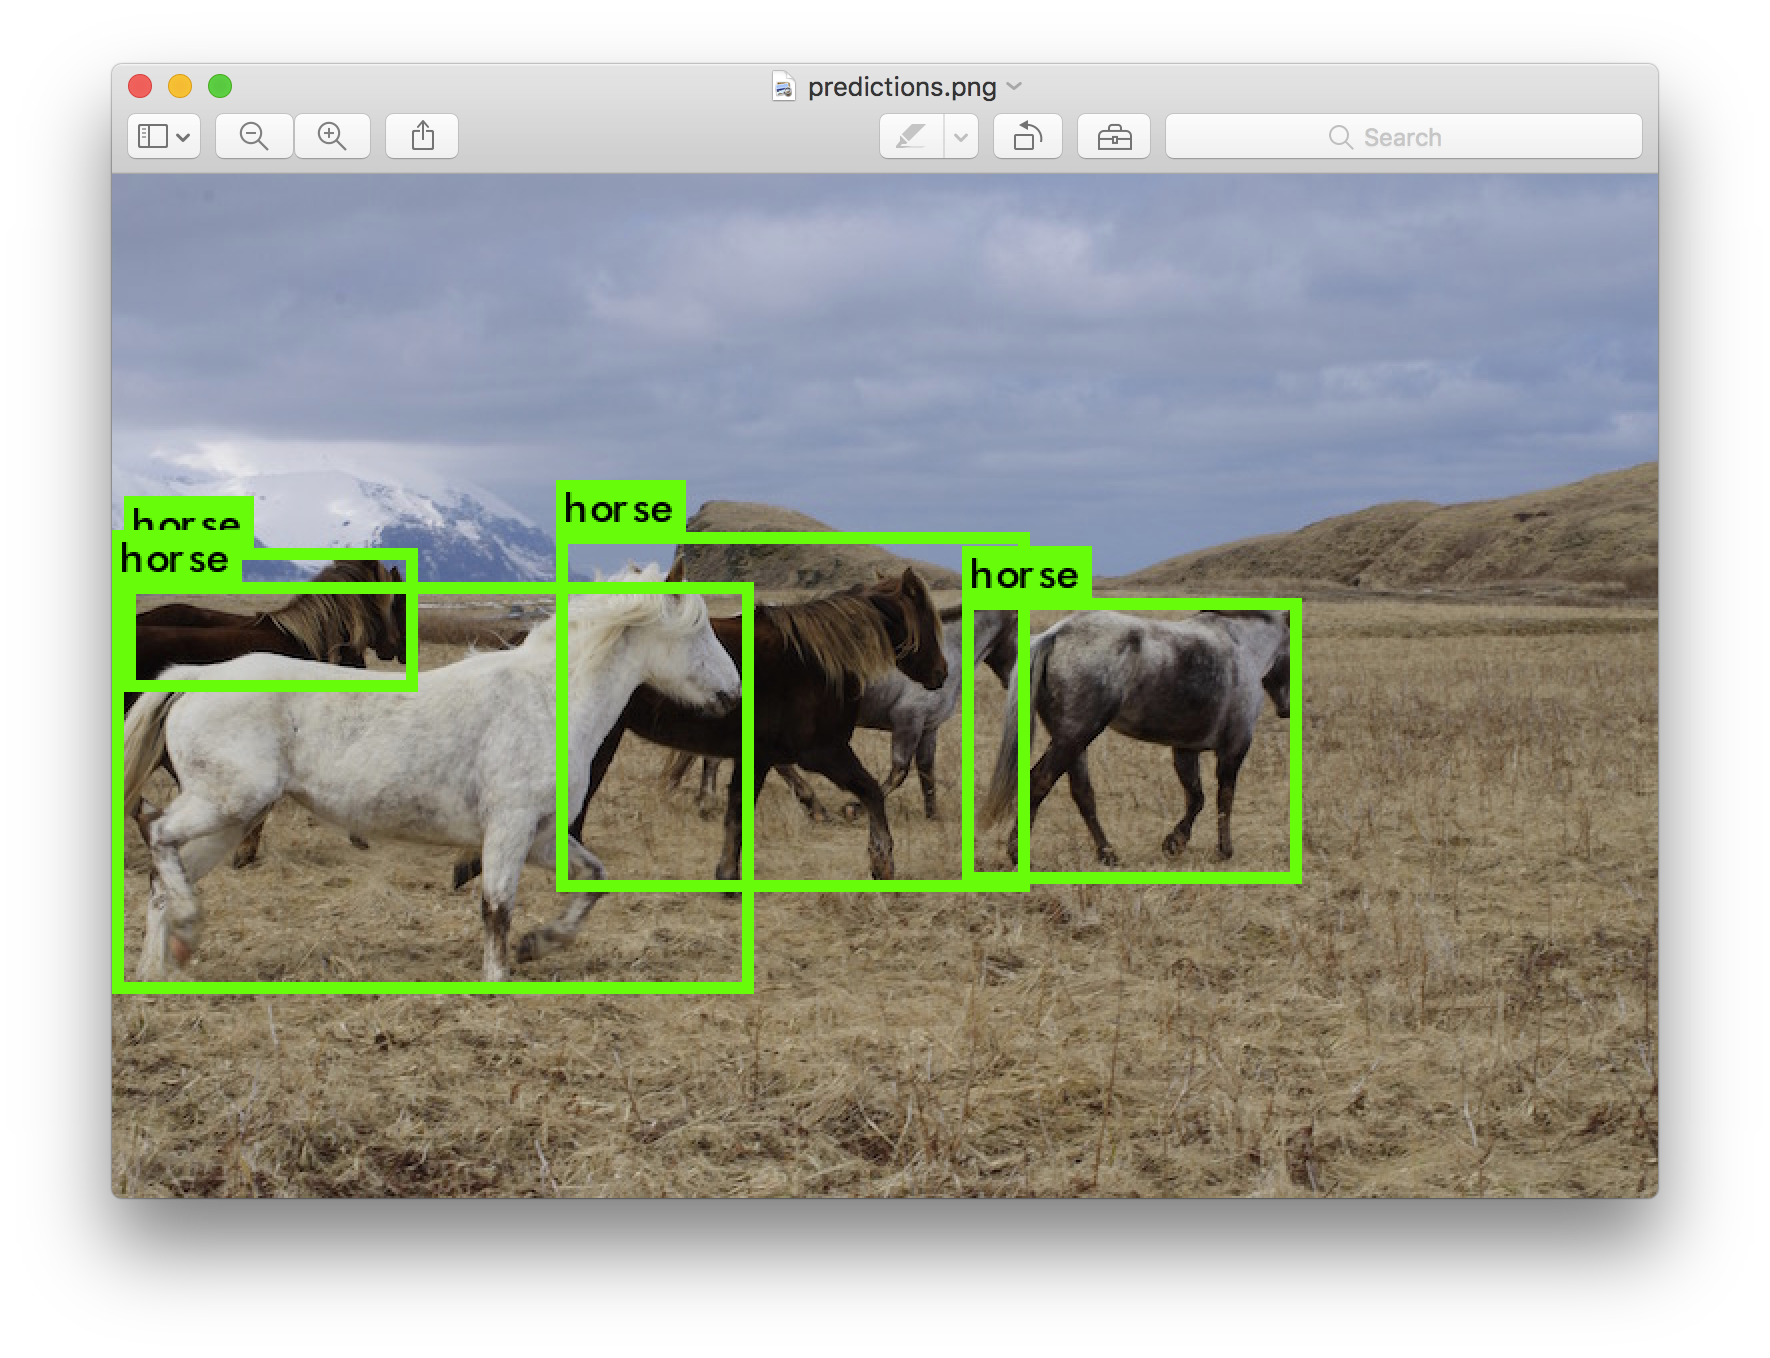
I've included some example images to try in case you need inspiration. Try data/eagle.jpg, data/dog.jpg, data/person.jpg, ordata/horses.jpg!
The detect command is shorthand for a more general version of the command. It is equivalent to the command:
./darknet detector test cfg/coco.data cfg/yolo.cfg yolo.weights data/dog.jpgYou don't need to know this if all you want to do is run detection on one image but it's useful to know if you want to do other things like run on a webcam (which you will seelater on).
Multiple Images
Instead of supplying an image on the command line, you can leave it blank to try multiple images in a row. Instead you will see a prompt when the config and weights are done loading:
./darknet detect cfg/yolo.cfg yolo.weightslayer filters size input output 0 conv 32 3 x 3 / 1 416 x 416 x 3 -> 416 x 416 x 32 1 max 2 x 2 / 2 416 x 416 x 32 -> 208 x 208 x 32 ....... 29 conv 425 1 x 1 / 1 13 x 13 x1024 -> 13 x 13 x 425 30 detectionLoading weights from yolo.weights ...Done!Enter Image Path:Enter an image path like data/horses.jpg to have it predict boxes for that image.
Once it is done it will prompt you for more paths to try different images. UseCtrl-C to exit the program once you are done.
Changing The Detection Threshold
By default, YOLO only displays objects detected with a confidence of .25 or higher. You can change this by passing the-thresh <val> flag to theyolo command. For example, to display all detection you can set the threshold to 0:
./darknet detect cfg/yolo.cfg yolo.weights data/dog.jpg -thresh 0Which produces:
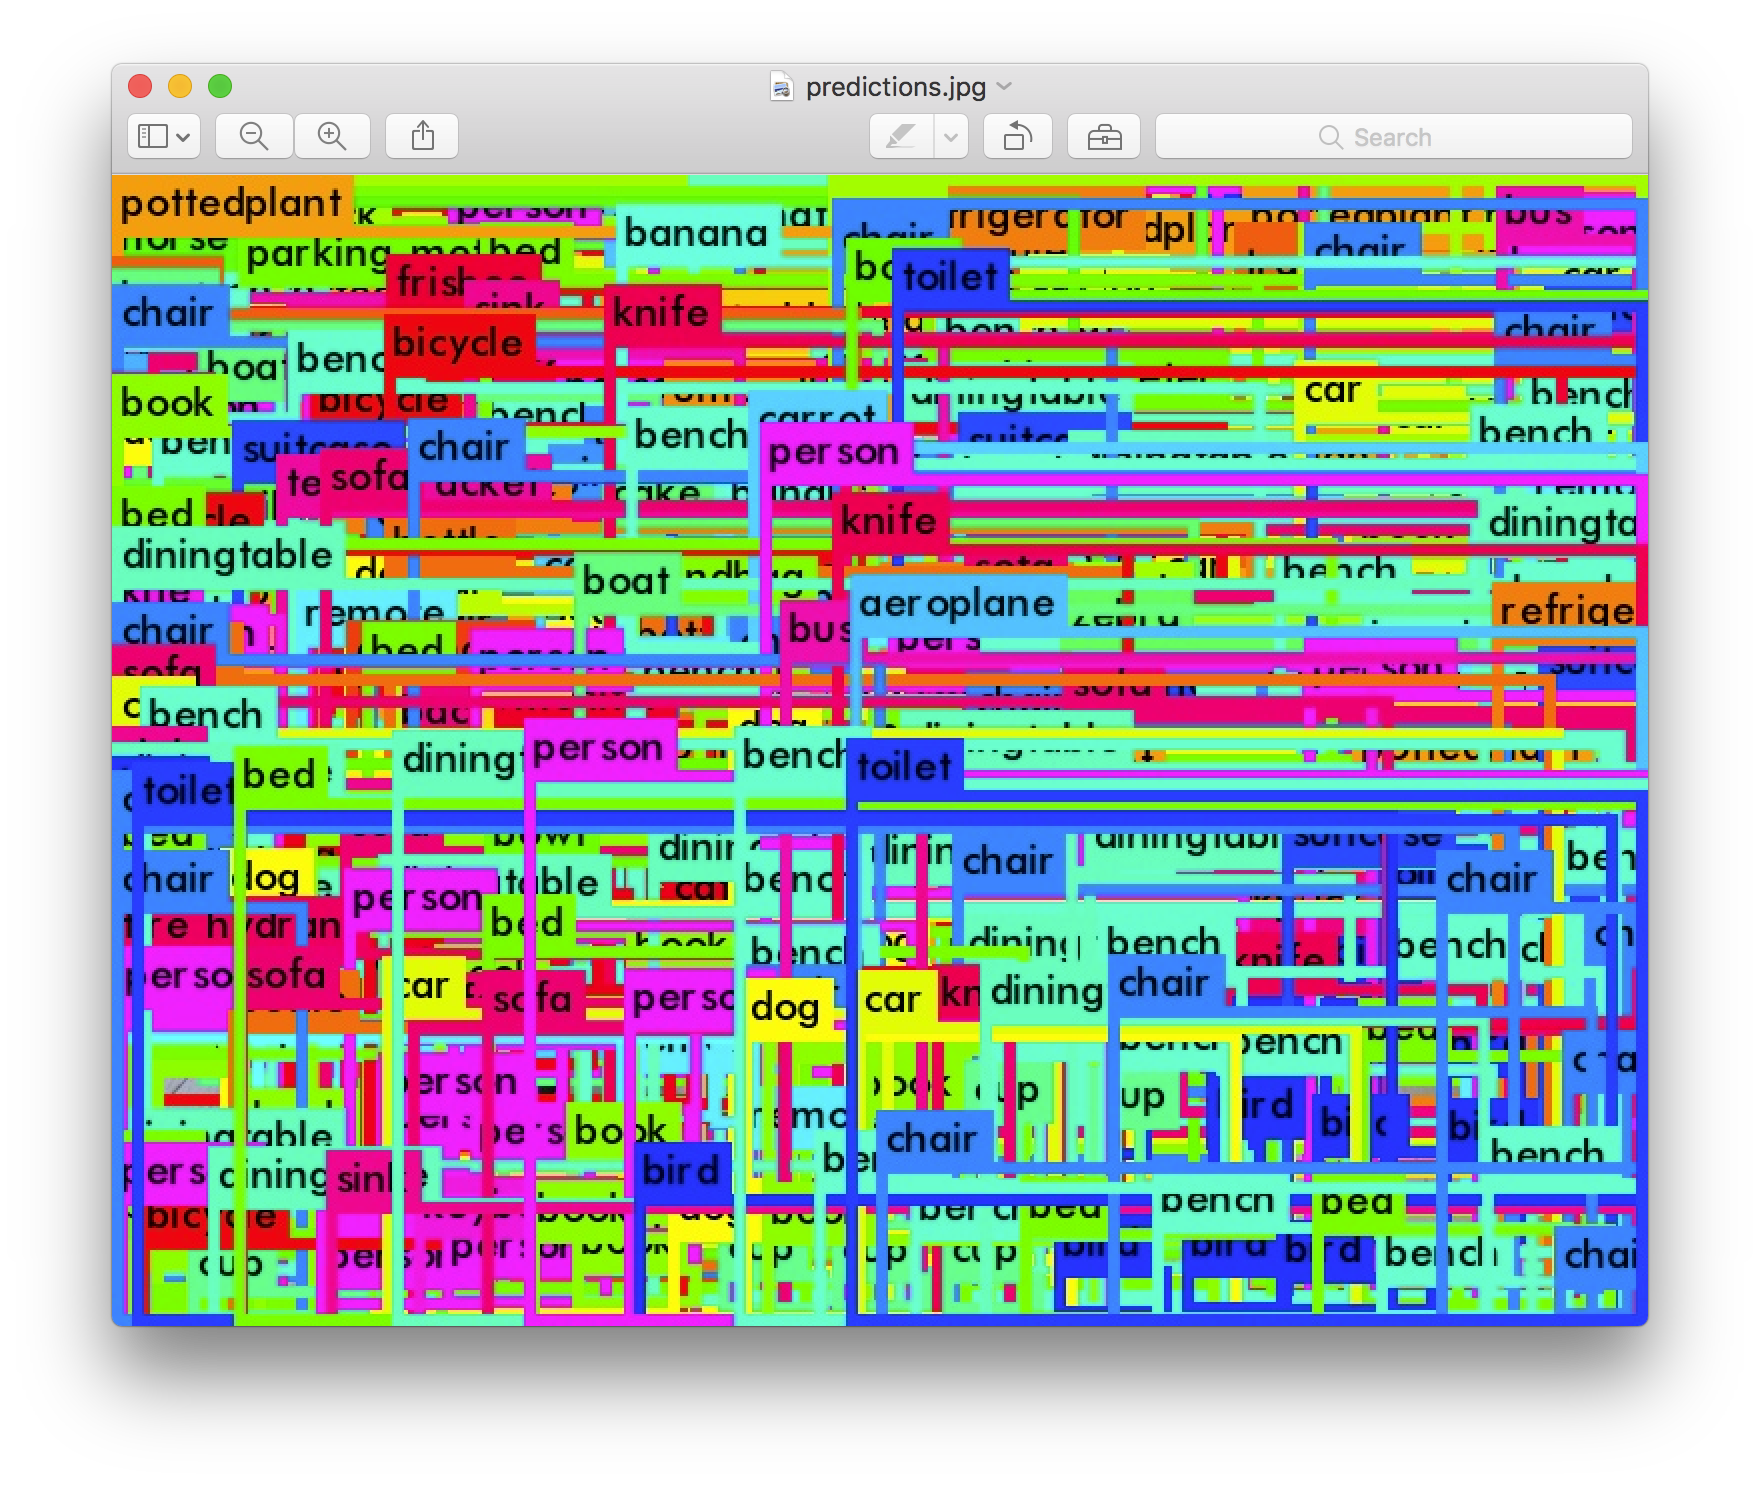
So that's obviously not super useful but you can set it to different values to control what gets thresholded by the model.
Tiny YOLO
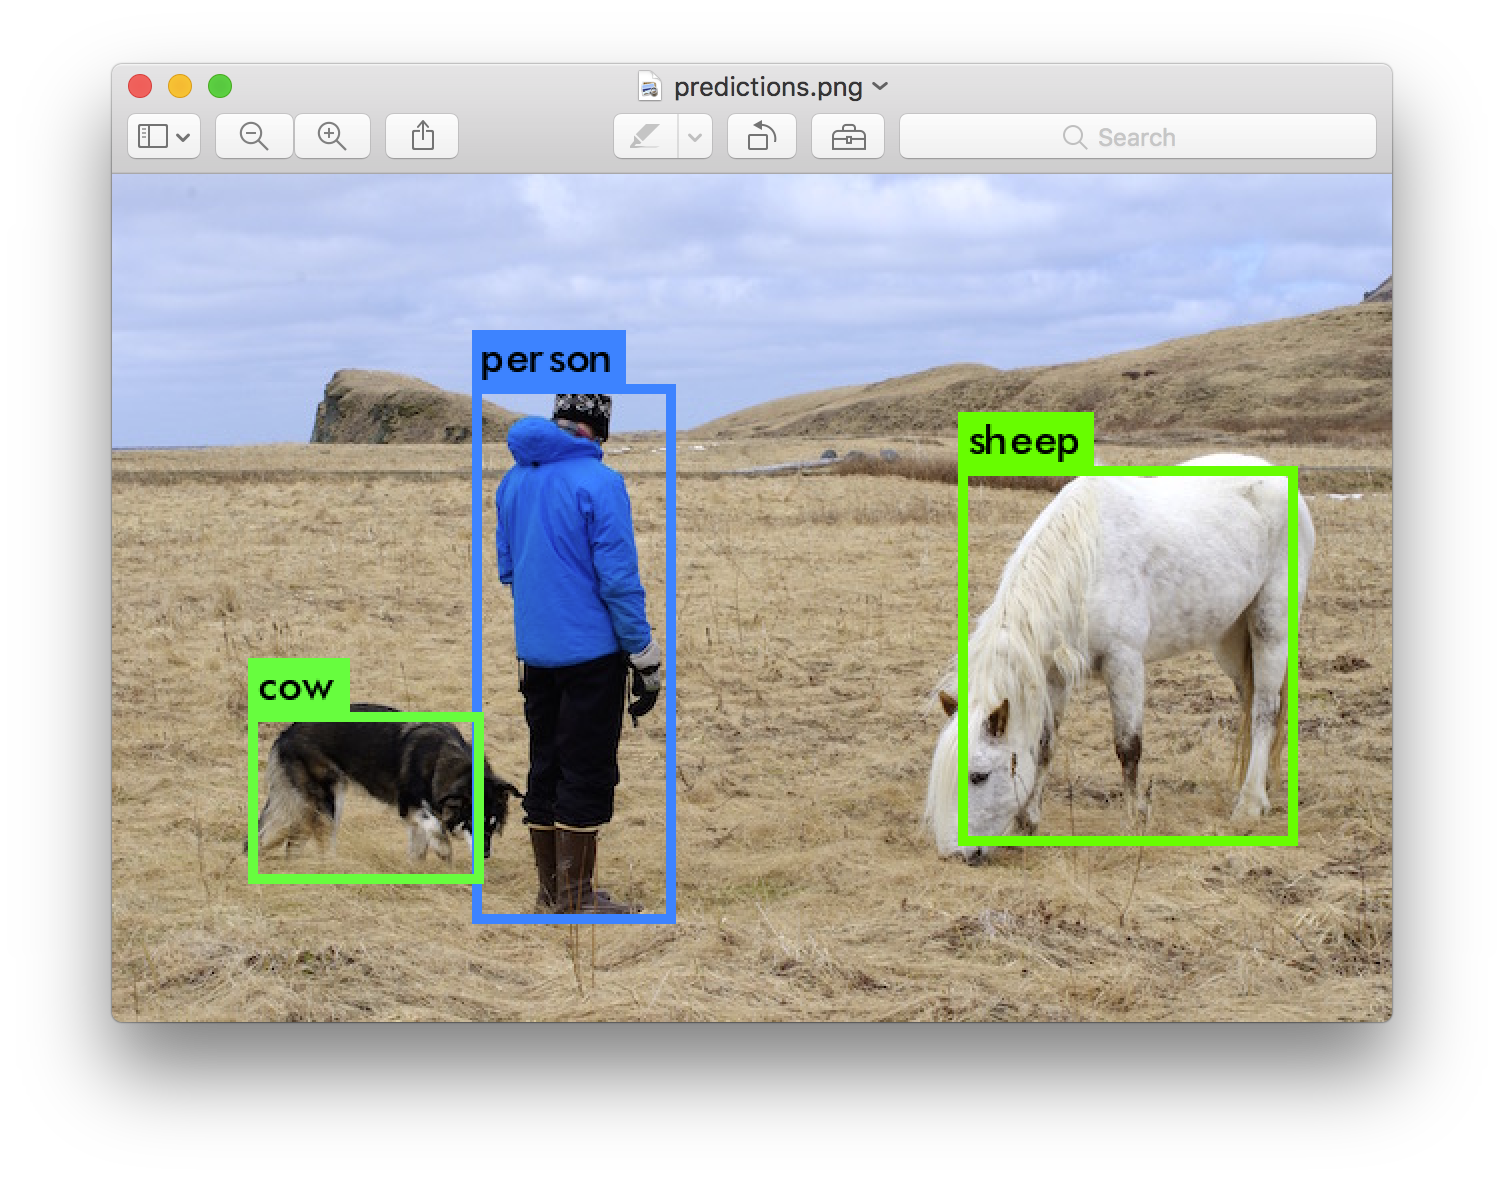
Tiny YOLO is based off of the Darknet reference network and is much faster but less accurate than the normal YOLO model. To use the version trained on VOC:
wget https://pjreddie.com/media/files/tiny-yolo-voc.weights./darknet detector test cfg/voc.data cfg/tiny-yolo-voc.cfg tiny-yolo-voc.weights data/dog.jpgWhich, ok, it's not perfect, but boy it sure is fast. On GPU it runs at >200 FPS.
Real-Time Detection on a Webcam
Running YOLO on test data isn't very interesting if you can't see the result. Instead of running it on a bunch of images let's run it on the input from a webcam!
To run this demo you will need to compile Darknet with CUDA and OpenCV. Then run the command:
./darknet detector demo cfg/coco.data cfg/yolo.cfg yolo.weightsYOLO will display the current FPS and predicted classes as well as the image with bounding boxes drawn on top of it.
You will need a webcam connected to the computer that OpenCV can connect to or it won't work. If you have multiple webcams connected and want to select which one to use you can pass the flag-c <num> to pick (OpenCV uses webcam0 by default).
You can also run it on a video file if OpenCV can read the video:
./darknet detector demo cfg/coco.data cfg/yolo.cfg yolo.weights <video file>That's how we made the YouTube video above.
Training YOLO on VOC
You can train YOLO from scratch if you want to play with different training regimes, hyper-parameters, or datasets. Here's how to get it working on the Pascal VOC dataset.
Get The Pascal VOC Data
To train YOLO you will need all of the VOC data from 2007 to 2012. You can find links to the datahere. To get all the data, make a directory to store it all and from that directory run:
curl -O https://pjreddie.com/media/files/VOCtrainval_11-May-2012.tarcurl -O https://pjreddie.com/media/files/VOCtrainval_06-Nov-2007.tarcurl -O https://pjreddie.com/media/files/VOCtest_06-Nov-2007.tartar xf VOCtrainval_11-May-2012.tartar xf VOCtrainval_06-Nov-2007.tartar xf VOCtest_06-Nov-2007.tarThere will now be a VOCdevkit/ subdirectory with all the VOC training data in it.
Generate Labels for VOC
Now we need to generate the label files that Darknet uses. Darknet wants a .txt file for each image with a line for each ground truth object in the image that looks like:
<object-class> <x> <y> <width> <height>Where x, y, width, and height are relative to the image's width and height. To generate these file we will run thevoc_label.py script in Darknet'sscripts/ directory. Let's just download it again because we are lazy.
curl -O https://pjreddie.com/media/files/voc_label.pypython voc_label.pyAfter a few minutes, this script will generate all of the requisite files. Mostly it generates a lot of label files inVOCdevkit/VOC2007/labels/ andVOCdevkit/VOC2012/labels/. In your directory you should see:
ls2007_test.txt VOCdevkit2007_train.txt voc_label.py2007_val.txt VOCtest_06-Nov-2007.tar2012_train.txt VOCtrainval_06-Nov-2007.tar2012_val.txt VOCtrainval_11-May-2012.tarThe text files like 2007_train.txt list the image files for that year and image set. Darknet needs one text file with all of the images you want to train on. In this example, let's train with everything except the 2007 test set so that we can test our model. Run:
cat 2007_train.txt 2007_val.txt 2012_*.txt > train.txtNow we have all the 2007 trainval and the 2012 trainval set in one big list. That's all we have to do for data setup!
Modify Cfg for Pascal Data
Now go to your Darknet directory. We have to change the cfg/voc.data config file to point to your data:
1 classes= 20 2 train = <path-to-voc>/train.txt 3 valid = <path-to-voc>2007_test.txt 4 names = data/voc.names 5 backup = backupYou should replace <path-to-voc> with the directory where you put the VOC data.
Download Pretrained Convolutional Weights
For training we use convolutional weights that are pre-trained on Imagenet. We use weights from theExtraction model. You can just download the weights for the convolutional layershere (76 MB).
curl -O https://pjreddie.com/media/files/darknet19_448.conv.23If you want to generate the pre-trained weights yourself, download the pretrainedDarknet19 448x448 model and run the following command:
./darknet partial cfg/darknet19_448.cfg darknet19_448.weights darknet19_448.conv.23 23But if you just download the weights file it's way easier.
Train The Model
Now we can train! Run the command:
./darknet detector train cfg/voc.data cfg/yolo-voc.cfg darknet19_448.conv.23Training YOLO on COCO
You can train YOLO from scratch if you want to play with different training regimes, hyper-parameters, or datasets. Here's how to get it working on theCOCO dataset.
Get The COCO Data
To train YOLO you will need all of the COCO data and labels. The script scripts/get_coco_dataset.sh will do this for you. Figure out where you want to put the COCO data and download it, for example:
cp scripts/get_coco_dataset.sh datacd databash get_coco_dataset.shNow you should have all the data and the labels generated for Darknet.
Modify cfg for COCO
Now go to your Darknet directory. We have to change the cfg/coco.data config file to point to your data:
1 classes= 80 2 train = <path-to-coco>/trainvalno5k.txt 3 valid = <path-to-coco>/5k.txt 4 names = data/coco.names 5 backup = backupYou should replace <path-to-coco> with the directory where you put the COCO data.
You should also modify your model cfg for training instead of testing. cfg/yolo.cfg should look like this:
[net]# Testing# batch=1# subdivisions=1# Trainingbatch=64subdivisions=8....Train The Model
Now we can train! Run the command:
./darknet detector train cfg/coco.data cfg/yolo.cfg darknet19_448.conv.23If you want to use multiple gpus run:
./darknet detector train cfg/coco.data cfg/yolo.cfg darknet19_448.conv.23 -gpus 0,1,2,3If you want to stop and restart training from a checkpoint:
./darknet detector train cfg/coco.data cfg/yolo.cfg backup/yolo.backup -gpus 0,1,2,3What Happened to the Old YOLO Site?
If you are using YOLO version 1 you can still find the site here: https://pjreddie.com/darknet/yolov1/
Cite
If you use YOLOv2 in your work please cite our paper!
@article{redmon2016yolo9000, title={YOLO9000: Better, Faster, Stronger}, author={Redmon, Joseph and Farhadi, Ali}, journal={arXiv preprint arXiv:1612.08242}, year={2016}}- YOLO: Real-Time Object Detection
- YOLO: Real-Time Object Detection
- YOLO: Real-Time Object Detection
- YOLO: Real-Time Object Detection
- YOLO: Real-Time Object Detection解读
- YOLO:Real-Time Object Detection学习笔记
- You Only Look Once(YOLO):Unified, Real-Time Object Detection
- 基于Jetson TX1的 YOLO: Real-Time Object Detection
- Object Detection -- 论文YOLO(You Only Look Once: Unified, Real-Time Object Detection)解读
- RCNN学习笔记(6):You Only Look Once(YOLO):Unified, Real-Time Object Detection
- RCNN学习笔记(6):You Only Look Once(YOLO):Unified, Real-Time Object Detection
- YOLO原理--读《You Only Look Once:Unified, Real-Time Object Detection》
- YOLO:You Only Look Once: Unified, Real-Time Object Detection论文总结
- YOLO9000( YOLO v2 ), a state of the art, real time object detection system
- RCNN系列学习笔记(5):You Only Look Once(YOLO):Unified, Real-Time Object Detection
- 【笔记】YOLO: You Only Look Once:Unified, Real-Time Object Detection
- RCNN学习笔记(7):You Only Look Once(YOLO):Unified, Real-Time Object Detection
- 【目标检测】[论文阅读][yolo] You Only Look Once: Unified, Real-Time Object Detection
- 我的座右铭
- Oracle学习笔记(八) 约束
- day04作业
- 在C语言算法中的前置++与后置++
- JavaEE 获取路径
- YOLO: Real-Time Object Detection
- [ 转]放弃MATLAB!简述winpython为什么比MATLAB更方便
- hibernate--CoreAPI_Session
- R入门-001
- python中excel基本操作实例
- 欢迎使用CSDN-markdown编辑器
- 2014年国人开发的最热门的开源软件TOP 100
- Unity3D
- mongodb的c++接口说明