【深度学习】人脸识别、视频中找人的实现
来源:互联网 发布:vb api浏览器 user32 编辑:程序博客网 时间:2024/05/21 16:59
转载请注明出处:http://blog.csdn.net/chengcheng1394/article/details/77817194
本程序使用SeetaFaceEngine和cv2.CascadeClassifier做人脸识别,然后利用VGG模型做人脸特征的比较。
代码下载地址:
https://github.com/chengstone/FindFaceInVideo
https://github.com/chengstone/SeetaFaceEngine
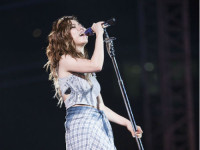
先上效果图:


视频中找人的效果在GitHub项目文件夹out中:https://github.com/chengstone/FindFaceInVideo/tree/master/VGGFace/out。
思路是这样的,目的是要在给定图片或者视频中找人,核心要解决的就是两件事,一个是人脸的识别,一个是人脸特征的比较。相似度越高,那么就意味着人找到了。
0、环境搭建
1、人脸识别
人脸识别实现的选择,我本想使用卷积神经网络训练出人脸识别的模型,输出人脸的位置,但是发现训练的效果不理想,只好换方案了。
最终我使用了SeetaFaceEngine的实现方案,原项目地址:https://github.com/seetaface/SeetaFaceEngine。
只使用其中的FaceDetection和FaceAlignment,其中FaceAlignment/src/test/face_alignment_test.cpp做了修改,下面会大致说下改动。修改后的项目地址:https://github.com/chengstone/SeetaFaceEngine
核心代码逻辑:FaceDetection负责人脸位置的识别,FaceAlignment进行人脸对齐(仿射变换),将对齐后的人脸图片保存,作为后续人脸特征比较时使用。
核心代码:
seeta::FaceDetection detector("seeta_fd_frontal_v1.0.bin");bool procFaceImage(string fullpath, string path, string filename, string ext, string dst_path, string in_size){ // 人脸识别模型初始化 detector.SetMinFaceSize(40); detector.SetScoreThresh(2.f); detector.SetImagePyramidScaleFactor(0.8f); detector.SetWindowStep(4, 4); // 人脸对齐模型初始化 seeta::FaceAlignment point_detector((MODEL_DIR + "seeta_fa_v1.1.bin").c_str()); //加载参数传入的图像,灰度图,用于人脸识别 IplImage *img_grayscale = NULL; img_grayscale = cvLoadImage(/*(DATA_DIR + "image_0001.jpg")*/fullpath.c_str(), 0); if (img_grayscale == NULL) { printf("%s\n", fullpath.c_str()); printf("[0]img_grayscale == NULL\n"); return false; }//缩小尺寸过大的图像,如果图像像素太大的话,会影响识别效果。 IplImage *outImg = NULL; while(img_grayscale->width > 1024 + 1024 || img_grayscale->height > 768 + 512 ){ outImg = cvCreateImage(cvSize(img_grayscale->width / 2, img_grayscale->height / 2), img_grayscale->depth, img_grayscale->nChannels); cvPyrDown(img_grayscale, outImg); img_grayscale = outImg; }//调用FaceDetection做人脸识别,支持一张图多个人脸 printf("detectFace now!\n"); seeta::ImageData image_data; std::vector<seeta::FaceInfo> faces = detectFace(img_grayscale, &image_data); if (faces.size() == (0)) { printf("[1]detectFace error!\n"); return false; } printf("face number = %d\n",faces.size()); printf("PointDetectLandmarks now!\n");//准备好要保存的位置和文件名 string result_path = (/*path*/dst_path + "/" + filename + "_result." + ext); // Detect 5 facial landmarks seeta::FacialLandmark points[5];//又一次加载参数传入的图像,彩色图,大图缩减 { IplImage *img_color = cvLoadImage(/*(DATA_DIR + "image_0001.jpg")*/fullpath.c_str(), 1); while(img_color->width > 1024 + 1024 || img_color->height > 768 + 512 ){ outImg = cvCreateImage(cvSize(img_color->width / 2, img_color->height / 2), img_color->depth, img_color->nChannels); cvPyrDown(img_color, outImg); img_color = outImg; }//将找到的人脸位置在彩色图上画出矩形框,保存图片,图片名称类似于:IMG_3001_result.JPG for(int idx = 0;idx < faces.size(); idx++){ cvRectangle(img_color, cvPoint(faces[idx].bbox.x, faces[idx].bbox.y), cvPoint(faces[idx].bbox.x + faces[idx].bbox.width - 1, faces[idx].bbox.y + faces[idx].bbox.height - 1), CV_RGB(255, 0, 0)); } cvSaveImage(result_path.c_str(), img_color); //printf("Show result image\n"); //cvShowImage("result", img_color); }//主循环,开始处理每一张脸 for(int idx = 0;idx < faces.size(); idx++){ printf("Proc No.%d\n", idx);//对每张脸找出landmarks(保存到points) point_detector.PointDetectLandmarks(image_data, faces[idx], points); IplImage *img_color = cvLoadImage(/*(DATA_DIR + "image_0001.jpg")*/fullpath.c_str(), 1); int pts_num = 5; cv::Mat img = cv::cvarrToMat(img_color);//仿射变换,根据眼睛坐标进行人脸对齐。利用landmarks算出要旋转的角度,对彩色图做旋转(人脸对齐),然后将旋转后的landmarks坐标保存到points中//后面要抠图,把人脸保存下来 Mat retImg = getwarpAffineImg(img, points); Mat dstResizeImg;IplImage* dstimg_tmp = NULL;int resize_num = 0; IplImage qImg = IplImage(retImg); char ch_idx[3] ={0}; sprintf(ch_idx, "%d", idx); char ch_size[5] = {0}; sprintf(ch_size, "%d", atoi(in_size.c_str()));//把旋转后的图片创建灰度图,下面要做一次人脸识别,用来抠图将人脸保存下来//这里的代码各种图片格式转换,确实很绕:P IplImage *dst_gray = cvCreateImage(cvGetSize(&qImg), qImg.depth, 1);// cvCvtColor(&qImg, dst_gray, CV_BGR2GRAY);// seeta::ImageData image_data_inner;//对旋转后的图片做人脸识别 std::vector<seeta::FaceInfo> faces_inner = detectFace(dst_gray, &image_data_inner); if (faces_inner.size() == (0)) { printf("[2]detectFace error!\n"); return false; } char ch_x1[5] = {0}; char ch_y1[5] = {0}; char ch_x2[5] = {0}; char ch_y2[5] = {0};//idx下标是主循环中的下标,这里默认对旋转后图片人脸识别出的人脸顺序,跟主循环识别出的人脸顺序是一致的//因为两次人脸识别输入的图像不是同一个,一个是原图像,一个是旋转后的,可能会有不一致的情况,不过目前还没出现过//所以暂时就默认这样做了,偷个懒~~~~ sprintf(ch_x1, "%d", faces_inner[idx].bbox.x); sprintf(ch_y1, "%d", faces_inner[idx].bbox.y); sprintf(ch_x2, "%d", faces_inner[idx].bbox.x + faces_inner[idx].bbox.width); sprintf(ch_y2, "%d", faces_inner[idx].bbox.y + faces_inner[idx].bbox.height); string save_path = (/*path*/dst_path + "/" + filename + "_crop_" + ch_size + "_" + ch_idx + "_" + ch_x1 + "_" + ch_y1 + "_" + ch_x2 + "_" + ch_y2 +"." + ext); try{//根据这张脸的BBox位置设置ROI,下面要开始抠图了 cvSetImageROI(&qImg, cvRect(faces_inner[idx].bbox.x, faces_inner[idx].bbox.y, faces_inner[idx].bbox.width, faces_inner[idx].bbox.height)); CvSize dst_size; if(in_size != ""){ resize_num = atoi(in_size.c_str()); }//支持抠图的自定义大小,抠图并保存,文件名类似:IMG_3588_crop_224_0_145_460_652_967.JPG if(resize_num != 0){ dst_size.height = resize_num; dst_size.width = resize_num; dstimg_tmp = cvCreateImage(dst_size, IPL_DEPTH_8U, 3); cvResize(&qImg, dstimg_tmp); cvSaveImage(save_path.c_str(), dstimg_tmp); } else { cvSaveImage(save_path.c_str(), &qImg); }//复位ROI cvResetImageROI(&qImg); }catch(...){ printf("Exception occured!\n");//异常时的抠图处理 cvSetImageROI(img_grayscale, cvRect(faces[idx].bbox.x, faces[idx].bbox.y, faces[idx].bbox.width, faces[idx].bbox.height)); CvSize dst_size; if(in_size != ""){ resize_num = atoi(in_size.c_str()); } if(resize_num != 0){ dst_size.height = resize_num; dst_size.width = resize_num; dstimg_tmp = cvCreateImage(dst_size, IPL_DEPTH_8U, 3); cvResize(img_grayscale, dstimg_tmp); cvSaveImage(save_path.c_str(), dstimg_tmp); } else { cvSaveImage(save_path.c_str(), img_grayscale); } cvResetImageROI(img_grayscale); }//释放资源 // Release memory cvReleaseImage(&img_color); delete[] image_data_inner.data; } //cvSaveImage(result_path, &qImg); cvReleaseImage(&img_grayscale); //delete[]data; delete[] image_data.data; return true;}主函数main虽然行数多,大部分都是重复的,主要是处理命令行,然后调用上面的函数procFaceImage处理人脸图像。
命令行的格式参见GitHub上的ReadMe说明:https://github.com/chengstone/FindFaceInVideo/blob/master/README.md。


2、人脸对齐
算法是采用仿射变换,根据眼睛坐标进行人脸对齐。这里参考了Taily老段的文章和代码,并做了适当修改。
参见:http://blog.csdn.net/taily_duan/article/details/52914399
仿射变换将原坐标(x, y)变换为新坐标(x', y')的计算方法: 
通过上面的公式, 可计算出原图像经过变换后的新图像。
计算仿射变换矩阵函数getRotationMatrix2D:
- Mat getRotationMatrix2D( Point2f center, double angle, double scale );
根据旋转中心, 旋转角度,缩放因子计算仿射变换矩阵。
计算方法: 
代码:
Mat getwarpAffineImg(Mat &src, /*vector<Point2d>*/seeta::FacialLandmark* landmarks){Mat oral; src.copyTo(oral);//计算两眼中心点,按照此中心点进行旋转, 第0个为左眼坐标,1为右眼坐标Point2d eyesCenter = Point2d((landmarks[0].x + landmarks[1].x) * 0.5f, (landmarks[0].y + landmarks[1].y) * 0.5f);//计算两个眼睛间的角度double dy = (landmarks[1].y - landmarks[0].y);double dx = (landmarks[1].x - landmarks[0].x);double angle = atan2(dy, dx) * 180.0 / CV_PI; // Convert from radians to degrees.//由eyesCenter, angle, scale按照公式计算仿射变换矩阵,此时1.0表示不进行缩放Mat rot_mat = getRotationMatrix2D(eyesCenter, angle, 1.0);Mat rot;//进行仿射变换,变换后大小为src的大小warpAffine(src, rot, rot_mat, src.size());vector<Point2d> marks;//使用仿射变换矩阵,计算变换后各关键点在新图中所对应的位置坐标。for (int n = 0; n<5/*landmarks.size()*/; n++){Point2d p = Point2d(0, 0);p.x = rot_mat.ptr<double>(0)[0] * landmarks[n].x + rot_mat.ptr<double>(0)[1] * landmarks[n].y + rot_mat.ptr<double>(0)[2];p.y = rot_mat.ptr<double>(1)[0] * landmarks[n].x + rot_mat.ptr<double>(1)[1] * landmarks[n].y + rot_mat.ptr<double>(1)[2];marks.push_back(p);landmarks[n].x = p.x;landmarks[n].y = p.y;}return rot;}3、人脸特征比较
这部分代码在FindFaceInVideo中的face_recognition.py。逻辑很简单,使用VGG模型做特征提取。
face_recognition.py来源于https://github.com/HolmesShuan/DeepID-I-Reimplement,我做了修改,并加入了face_recog_test测试函数。
get_feature_new函数打开图片,使用VGG网络提取特征。
compare_pic函数对传入的两个特征计算相似度。
关键点在于阈值的选取。face_recog_test函数会读取测试图片,计算各组图片最佳的参数:Accuracys,Thresholds,Precisions,Recalls,F1Score等。
global net;net = caffe.Classifier('/home/chengstone/Downloads/caffe/VGGFace/VGG_FACE_deploy.prototxt', '/home/chengstone/Downloads/caffe/VGGFace/VGG_FACE.caffemodel');def compare_pic(feature1, feature2): predicts = pw.cosine_similarity(feature1, feature2); return predicts;def get_feature_new(path): global net; X = read_image_new(path); # test_num = np.shape(X)[0]; # print test_num; out = net.forward_all(data = X); #print out feature = np.float64(out['fc7']); feature = np.reshape(feature, (1, 4096)); return feature;def read_image_new(filepath): averageImg = [129.1863, 104.7624, 93.5940]; X = np.empty((1,3,224,224)); filename = filepath.split('\n'); filename = filename[0]; im = skimage.io.imread(filename, as_grey=False); image = skimage.transform.resize(im, (224, 224))*255; #mean_blob.shape = (-1, 1); #mean = np.sum(mean_blob) / len(mean_blob); X[0,0,:,:] = image[:,:,0] - averageImg[0]; X[0,1,:,:] = image[:,:,1] - averageImg[1]; X[0,2,:,:] = image[:,:,2] - averageImg[2]; return X;## __Author__ chengstone# __WeChat__ 15041746064# __e-Mail__ 69558140@163.com# #'max accuracy: 0.894666666667', #'max threshold: 0.769', #'Max Precision: 0.919472913616 599', #'Max Recall: 1.0 0', #'Final F1Score: 0.224185221039', #'Final Precision: 0.868980612883', #'Final Recalls: 0.926333333333', #'Best Accuracy: 0.893333333333', #'Best Thershold: 0.753'def face_recog_test(): thershold = 0.85; DATA_BASE = "/home/chengshd/ML/caffe-master/examples/VGGFace/"; POSITIVE_TEST_FILE = "positive_pairs_path.txt"; thresholds = np.zeros(len(np.arange(0.4,1,0.05))) Accuracys = np.zeros(len(np.arange(0.4,1,0.05))) Precisions = np.zeros(len(np.arange(0.4,1,0.05))) Recalls = np.zeros(len(np.arange(0.4,1,0.05))) F1Score = np.zeros(len(np.arange(0.4,1,0.05))) tick = 0 for thershold in np.arange(0.4, 1, 0.05): True_Positive = 0; True_Negative = 0; False_Positive = 0; False_Negative = 0; print "===============================================" # Positive Test f_positive = open(DATA_BASE + POSITIVE_TEST_FILE, "r"); PositiveDataList = f_positive.readlines(); f_positive.close( ); labels = np.zeros(len(PositiveDataList)) results = np.zeros(len(PositiveDataList)) thresholds[tick] = thershold for index in range(len(PositiveDataList)): filepath_1 = PositiveDataList[index].split(' ')[0]; filepath_2 = PositiveDataList[index].split(' ')[1]; labels[index] = PositiveDataList[index].split(' ')[2][:-2]; feature_1 = get_feature_new(DATA_BASE + filepath_1); feature_2 = get_feature_new(DATA_BASE + filepath_2); result = compare_pic(feature_1, feature_2); #print "Two pictures similarity is:%f\n\n"%(result) print "%s and %s Two pictures similarity is : %f\n\n"%(filepath_1,filepath_2,result) #print "thershold: " + str(thershold); if result>=thershold: print 'Same person!!!!\n\n' else: print 'Different person!!!!\n\n' if result >= thershold: # print 'Same Guy\n\n' #True_Positive += 1; results[index] = 1 else: # wrong #False_Positive += 1; results[index] = 0 if labels[index] == 1: if results[index] == 1: True_Positive += 1; else: False_Negative += 1; else: if results[index] == 1: False_Positive += 1; else: True_Negative += 1; if True_Positive + False_Positive == 0: Precisions[tick] = 0 else: Precisions[tick] = float(True_Positive) / (True_Positive + False_Positive) if True_Positive + False_Negative == 0: Recalls[tick] = 0 else: Recalls[tick] = float(True_Positive) / (True_Positive + False_Negative) if Precisions[tick] + Recalls[tick] == 0: F1Score[tick] = 0 else: F1Score[tick] = (Precisions[tick] * Recalls[tick]) / (2 * (Precisions[tick] + Recalls[tick])) acc = float(np.sum((labels == results))) / len(PositiveDataList) print 'labels = ',labels print 'results = ',results Accuracys[tick] = acc tick = tick + 1 print "Accuracy: " + str(float(acc)); print "thershold: " + str(thershold); print 'Accuracys: ', Accuracys print 'Thresholds: ', thresholds print 'Precisions: ', Precisions print 'Recalls: ', Recalls print 'F1Score: ', F1Score print 'Max Precision: ', np.max(Precisions), np.where(Precisions == np.max(Precisions))[0][0] print 'Max Recall: ', np.max(Recalls), np.where(Recalls == np.max(Recalls))[0][0] print "Final Accuracy: ", np.max(Accuracys) re = np.where(Accuracys == np.max(Accuracys)) print 'Final Thershold: ', thresholds[re[0][0]] print 'Final F1Score: ', np.max(F1Score) re = np.where(F1Score == np.max(F1Score)) print 'Final Precision: ',Precisions[re[0][0]] print 'Final Recalls: ',Recalls[re[0][0]] print 'Best Accuracy: ',Accuracys[re[0][0]] print 'Best Thershold: ',thresholds[re[0][0]]4、开始找人
重头戏来了,代码见facedetect.py。先介绍图片中找人。
解释一个概念:待查找人。比如我是私人侦探,你来找我让我在某个地方找人,那你得给我提供你要找的人的照片吧?不然我哪知道要找谁。
这个照片就是待查找人的照片。
思路很清晰,三件事:①获取目标(待查找人)的人脸(特征)。使用SeetaFaceEngine/FaceAlignment进行人脸识别。②获取输入图片中的人脸(特征)。使用opencv的cv2.CascadeClassifier做人脸识别。③预测。使用face_recognition.py做人脸特征的比较,计算相似度。
#图片找人主函数,主要就是调用三个函数:getTargetFace,getDstFace,predictiondef findPersionByImage(): global targetsArr global dstArr getTargetFace() #print targetsArr[0].shape getDstFace() # print dstArr[0].shape prediction() print 'done'TargetPath = MAIN_PATH + 'targets.txt'#获取目标(待查找人)的人脸(特征)。def getTargetFace(): # print 'getTargetFace IN:' global targetsArr if os.path.exists(TargetPath) == False: print TargetPath + ' File not found' exit(0)#targets.txt中保存待查找人的图片位置 fileObj = open(TargetPath) fileObjDataList = fileObj.readlines(); fileObj.close() #for line in fileObj: # print line#支持多目标查找,比如你给我甲,乙,丙三个人的照片 for index in range(len(fileObjDataList)): line = fileObjDataList[index] print index, line[:-1] if os.path.exists(line[:-1]) == False: print TargetPath + ' File not found' else: targetsArr.append(returnFaceImg(line[:-1], MAIN_PATH + line[:-1].split('/')[-1].split('.')[0] + '/', 224))#SeetaFaceEngine/FaceAlignment的可执行程序路径FaceCropPath = '/home/chengstone/Downloads/SeetaFaceEngine/FaceAlignment/build/'FA_TEST = './fa_test'IMAGE_TXT = 'image.txt'#程序会给每个待查找人建立一个文件夹,文件夹名就是待查找人图片的名字命名(dstpath)def returnFaceImg(imagePath, dstpath, corp_size): # print 'returnFaceImg IN:'#写入人脸识别的命令行,即将调用SeetaFaceEngine/FaceAlignment imagetxt_file = open(FaceCropPath + IMAGE_TXT, 'w') imagetxt_file.writelines(imagePath + ' ' + dstpath + ' ' + str(corp_size) + '\n') imagetxt_file.close()#判断指定文件/目录是否存在,如果不存在则创建 checkFile(dstpath)#调用SeetaFaceEngine/FaceAlignment的开关,应该设成1 if createFaceFlag == 1: os.chdir(FaceCropPath) os.system(FA_TEST) #人脸识别 #cv2.waitKey(500) #print 'here' t_targetsArr = []#待查找人图片命名的文件夹(dstpath)目录结构:#只有一个人的情况下,通常有两个文件,一个名字类似IMG_3588_crop_224_0_145_460_652_967.JPG,这个是人脸图片#另一个名字类似IMG_3588_result.JPG,这个是脸部用矩形框圈出的原始图片 #有可能会有多张待查找人人脸,所以做循环,将每一张人脸特征保存到数组中 for parent, dirnames, filenames in os.walk(dstpath): for f_file in filenames: #if "result" in filenames: if f_file.find("result") == -1: print parent, dirnames, f_file#调用face_recognition.py获取人脸特征 t_targetsArr.append(get_feature_new(parent + f_file)) else:#显示脸部用矩形框圈出的图片 img = cv2.imread(parent + f_file) plt.subplot(1, 2, 1) b, g, r = cv2.split(img) img2 = cv2.merge([r, g, b]) if VIDEO_FLAG != 1: plt.imshow(img2) # plt.show() #cv2.namedWindow(f_file) #cv2.imshow(f_file, img) #cv2.waitKey(5) print np.array(t_targetsArr).shape return np.array(t_targetsArr)#获取输入图片(camPicture)中的人脸(特征)。def getDstFace(): # print 'getDstFace IN:' global dstArr dstArr.append(returnFaceImg_Dst(camPicture)) # print dstArrdef returnFaceImg_Dst(imagePath): # print 'returnFaceImg_Dst IN:' global FoundFace global dst_rects global g_vis img = cv2.imread(imagePath) print 'img.dtype = ', img.dtype #aa = cv.CloneMat(np.fromarrays(img)) #print aa.dtype # cv.CreateMat(img)#如果图片尺寸过大,要缩小尺寸,否则影响人脸识别效果 #print imagePath sp = img.shape while(sp[0] > 768 + 512 or sp[1] > 1024 + 1024): #sp[0]: height sp[1]: width sp[3]: tongdao img = cv2.pyrDown(img) sp = img.shape gray = cv2.cvtColor(img, cv2.COLOR_BGR2GRAY) gray = cv2.equalizeHist(gray)#使用cv2.CascadeClassifier做人脸识别 rects = detect(gray, cascade) vis = img.copy() g_vis = vis print 'dst rects =',rects,vis.dtype,vis.shape if len(rects) != 0: print imagePath + ' Face found' FoundFace = 1#处理人脸Bbox重叠的情况 new_rects = procOverlap(rects) print new_rects.shape#循环获取每张脸的特征,并保存到数组 t_dstsArr = [] for rect in new_rects: print rect[0], rect[1], rect[2]-rect[0], rect[3]-rect[1] print imagePath.split('/')[-2] vis2 = vis[rect[1]:rect[3], rect[0]:rect[2], :] # vis2 = vis[rect[2]:rect[0], rect[3]:rect[1], :] cv2.imwrite("./tmp.jpg", vis2) # aaa = cv2.imread("./tmp.jpg") # plt.imshow(aaa) # plt.show() t_dstsArr.append(get_feature_new("./tmp.jpg"))#在输入图片上用矩形框圈出识别出的人脸 if DEBUG_FLAG == 1: draw_rects(vis, new_rects, (255, 0, 0)) # plt.imshow(vis) # plt.show() dst_rects = new_rects print np.array(t_dstsArr).shape return np.array(t_dstsArr) else: FoundFace = 0 print imagePath + ' Face not found' return []#人脸识别,scaleFactor=1.06559这个数是经过很多次测试得出的def detect(img, cascade): # print 'detect IN:' rects = cascade.detectMultiScale(img, scaleFactor=1.06559, minNeighbors=4, minSize=(5, 5), flags = cv.CV_HAAR_SCALE_IMAGE) if len(rects) == 0: return [] rects[:,2:] += rects[:,:2] return rects#人脸特征都准备好了,现在开始预测。def prediction(): print 'prediction IN:' global targetsArr global dstArr global dst_rects # t_dstArr = np.array(dstArr) # print dstArr # try: if 1 == 1: if FoundFace == 1: # if len(dstArr[0]) != 0: dstShape = dstArr[0].shape print 'dst shape: ', dstShape[0] targetShape = targetsArr[0].shape print 'target shape: ', targetShape[0] results = np.zeros([dstShape[0], targetShape[0]])#双层循环,输入图片和待查找人都可能是多个,将每一次相似度结果保存起来 print '===========predict results: ===========' for i in range(dstShape[0]): for j in range(targetShape[0]): # print results[i][j] results[i][j] = compare_pic(dstArr[0][i], targetsArr[0][j]) print results[i][j]#将每一个相似度与阈值比较,超出VGG_THRESHOLD阈值就换个颜色在人脸上画矩形框,并标出相似度,最终图像保存到tmp.jpg # print dstArr[0][0].shape, dstArr[0][0] # result = compare_pic(feature_1, feature_2); for i in range(dstShape[0]): for j in range(targetShape[0]): if results[i][j] >= VGG_THRESHOLD: draw_single_rect(g_vis, dst_rects[i], (0, 255, 0)) if DEBUG_FLAG == 1: if results[i][j] >= VGG_THRESHOLD: pen = (0, 255, 0) else: pen = (255, 0, 0) cv2.putText(g_vis, str(round(results[i][j], 2)), (dst_rects[i][0], dst_rects[i][1] - 7), cv2.FONT_HERSHEY_DUPLEX, 0.8, pen) cv2.imwrite(MAIN_PATH + "tmp.jpg", g_vis) plt.subplot(1, 2, 2) b, g, r = cv2.split(g_vis) img2 = cv2.merge([r, g, b]) # plt.figure(num=1) plt.imshow(img2) if VIDEO_FLAG != 1: plt.show()关于阈值VGG_THRESHOLD:
按理说相似度越高越好,经过我的测试,我将相似度阈值(VGG_THRESHOLD)设置成了0.4。
就是说相似度大于40%,我就认为是同一个人。这个值设的确实有点小了,奈何我用自己的照片去测试,很少出现相似度大于85%以上的时候。。。。
但是一旦两个人不相似,相似度很低,大都小于1%,所以0.4这个值还是堪用的。
5、人脸检测时Bbox重叠的处理
在使用cv2.CascadeClassifier做人脸检测时,有时会出现矩形框重叠的情况,所以需要将这些重叠的矩形框识别出来
一旦重叠的矩形框指向的是同一个人脸,则需要删除一个矩形框
这里参考了i_wooden的文章,参考了部分代码,原文:
判断两个矩形是否重叠http://blog.csdn.net/qianchenglenger/article/details/50484053
算法思想是:
①先判断两个矩形是否相交。相交条件是:P2点坐标大于P3点坐标 并且 P4点坐标大于P1点坐标。
def isOverlap(tmp_rect, rects): i = 0 for x1, y1, x2, y2 in rects: if(tmp_rect[0] != x1 and tmp_rect[1] != y1 and tmp_rect[2] != x2 and tmp_rect[3] != y2): if(tmp_rect[2] > x1 and x2 > tmp_rect[0] and tmp_rect[3] > y1 and y2 > tmp_rect[1]): return i i = i + 1 return -1②一旦相交,需要判断两个相交的矩形框是否是同一个人脸,需要根据相交面积与组合面积的比例来判断。
计算两个矩形的重叠面积比例,即相交面积与组合面积的比例。def computeRectJoinUnion(rect1, rect2):#x1,y1为相交位置的左上角坐标,x2,y2为相交位置的右下角坐标 x1 = max(rect1[0], rect2[0]) y1 = max(rect1[1], rect2[1]) x2 = min(rect1[2], rect2[2]) y2 = min(rect1[3], rect2[3])#判断是否相交,如果相交,求出相交面积 AJoin = 0 if(x2 > x1 and y2 > y1): AJoin = (x2 - x1) * (y2 - y1) A1 = (rect1[2] - rect1[0]) * (rect1[3] - rect1[1]) A2 = (rect2[2] - rect2[0]) * (rect2[3] - rect2[1])#两矩形组合的面积 AUnion = A1 + A2 - AJoin#返回相交面积与组合面积的比例 if(AUnion > 0): return float(AJoin) / AUnion return 0③将取得的相交面积与组合面积的比例和阈值做比较,超出阈值则认为两个矩形圈出的是同一个人脸。


def procOverlap(rects): print 'procOverlap IN:' #print rects i = 0 new_rects = [] del_rects = [] for x1, y1, x2, y2 in rects: tmp_rect = rects[i]#第一步,判断是否相交 bOverlap = isOverlap(tmp_rect, rects) if(bOverlap > -1): print tmp_rect print rects[bOverlap], bOverlap#第二步,计算矩形重叠比例 rectJountUnion = computeRectJoinUnion(tmp_rect, rects[bOverlap]) print 'rectJountUnion = ', rectJountUnion#第三步,与矩形重叠比例阈值做比较 if(rectJountUnion > del_threshold): A1 = (tmp_rect[2] - tmp_rect[0]) * (tmp_rect[3] - tmp_rect[1]) A2 = (rects[bOverlap][2] - rects[bOverlap][0]) * (rects[bOverlap][3] - rects[bOverlap][1])#一旦超出阈值,留下面积小的矩形框,删除面积大的矩形框 if(A1 < A2): new_rects.append(tmp_rect) #np.delete(rects, bOverlap, 0) del_rects.append(rects[bOverlap]) print 'A1 < A2' #else: else: new_rects.append(tmp_rect) else: new_rects.append(tmp_rect) #print 'i = ', i #print 'new_rects = ', new_rects #print new_rects[i], i i = i + 1#删除重叠矩形框 del_idx = [] for node in del_rects: j = 0 for new_node in new_rects: #print new_node[0],new_node[1],new_node[2],new_node[3] if(node[0] == new_node[0] and node[1] == new_node[1] and node[2] == new_node[2] and node[3] == new_node[3]): del_idx.append(j) #if(node == new_node): # print node,' is equel.' j = j + 1 print del_idx for idx in del_idx: del new_rects[idx]#返回无重叠矩形框 #print new_rects print 'procOverlap done.' return np.array(new_rects)关于矩形重叠比例阈值,经过测试,最终选择了del_threshold = 0.15,意味着矩形重叠比例大于15%就可以认定两个矩形圈出的是同一个人脸。6、视频找人
视频找人跟图片找人原理一样,视频不就是图片的集合嘛,本质上还是图片找人。然后将找到的人和识别到的人脸画上矩形框,输出成视频文件即可。def findPersionByVideo(): global targetsArr global dstArr global camPicture#获取目标(待查找人)的人脸(特征)。 getTargetFace()#打开视频文件 videoCapture = cv2.VideoCapture(videoPath) fps = videoCapture.get(cv2.cv.CV_CAP_PROP_FPS) size = (int(videoCapture.get(cv2.cv.CV_CAP_PROP_FRAME_WIDTH)), int(videoCapture.get(cv2.cv.CV_CAP_PROP_FRAME_HEIGHT))) framesCount = videoCapture.get(cv2.cv.CV_CAP_PROP_FRAME_COUNT) # videoWriter = cv2.VideoWriter(MAIN_PATH + 'out/' + videoPath.split('/')[-1], cv2.cv.CV_FOURCC('M', 'J', 'P', 'G'), fps, size) videoWriter = cv2.VideoWriter(MAIN_PATH + 'out/test.avi', cv2.cv.CV_FOURCC('M', 'J', 'P', 'G'), fps, size)#处理后输出的视频文件 print 'videoWrite = ' + MAIN_PATH + 'out/test.avi' success, frame = videoCapture.read()#开始视频每一帧的循环 print 'frame.shape = ', frame.shape tick = 0 while success: # and tick < 10 tick = tick + 1 print 'Current frame : ' + str(tick) + ' / ' + str(framesCount) dstArr = []#将视频每一帧作为输入图片 cv2.imwrite(MAIN_PATH + "frame_tmp.jpg", frame) camPicture = MAIN_PATH + "frame_tmp.jpg"#获取输入图片(camPicture)中的人脸(特征) getDstFace() # getDstFace_2()#开始预测 prediction()#显示处理的每一帧,并输出到处理后的视频文件中 print 'g_vis.shape = ', g_vis.shape cv2.imshow("find persion by video", g_vis) # cv2.imshow("find persion by video", frame) cv2.waitKey(1000/int(fps)) videoWriter.write(g_vis) # videoWriter.write(frame) success, frame = videoCapture.read() videoCapture.release() videoWriter.release() print 'findPersionByVideo done'7、结尾
最后,关于代码工程的目录结构和使用说明请参见:https://github.com/chengstone/FindFaceInVideo/blob/master/README.md如有问题可以随时联系:mail:69558140@163.com
参考资料:
SeetaFace Engine:https://github.com/seetaface/SeetaFaceEngineDeepID-I-implementation:https://github.com/HolmesShuan/DeepID-I-Reimplementopencv 仿射变换 根据眼睛坐标进行人脸对齐 计算变换后对应坐标:http://blog.csdn.net/taily_duan/article/details/52914399判断两个矩形是否重叠:http://blog.csdn.net/qianchenglenger/article/details/50484053
- 【深度学习】人脸识别、视频中找人的实现
- 深度学习的人脸识别
- 深度学习-人脸识别
- 基于视频深度学习的人物行为识别 资料汇总
- 基于深度学习的视频识别方法概览
- 基于深度学习的视频识别方法概览
- C++实现基于深度学习的人脸识别系统(Dlib+Caffe+Opencv)
- 深度学习在视频动作识别应用
- 深度学习在人脸识别领域的应用
- 深度学习在人脸识别领域的应用
- 基于深度学习的人脸表情识别(一)
- 基于深度学习的人脸识别系统
- 基于深度学习的人脸识别技术综述
- 【深度学习】基于深度学习的人脸识别系统系列(Caffe+OpenCV+Dlib)
- windows phone 实现mjpeg流视频的人脸识别
- LBP 和深度学习,人脸识别
- 人脸检测识别深度学习记录
- Dlib+OpenCV深度学习人脸识别
- python rest_framework
- HDU
- java中的Error和Exception层级关系示意图
- J
- Java设计模式学习03——建造者模式
- 【深度学习】人脸识别、视频中找人的实现
- python字典和JSON格式的转换
- MapReduce的shuffle阶段
- 2017智慧树中国近代史新编答案单元测验答案
- H
- java 编程思想的学习笔记
- oracle应用
- hash table
- Android 强大的滚动控件 RecyclerView