Hyperion planning11.1.2 LCM(官方文档)
来源:互联网 发布:python数据分析实例 编辑:程序博客网 时间:2024/06/18 13:45
First-Time Oracle® Hyperion Enterprise Performance Management System Lifecycle Management Migration for Oracle® Hyperion Financial Management, Fusion Edition 11.1.2 with Hyperion® Shared Services 11.1.2
Purpose
This tutorial covers a first-time lifecycle management (LCM) migration for Financial Management classic applications or for Financial Management applications that are created in Oracle Hyperion Enterprise Performance Management Architect (Performance Management Architect). This LCM migration utilizes Hyperion Shared Services 11.1.2.
Time to Complete
Approximately 2 hours.
Overview
In this tutorial, you perform a first-time lifecycle management migration with a Financial Management 11.1.2 application and with Shared Services 11.1.2 from a source environment to a destination environment.
The Financial Management application consists of artifacts from various products. For example:
- Shared Services users, groups, provisioning artifacts, and task flows
- Performance Management Architect dimensions, Calculation Manager, data synchronization, and import profile artifacts for Financial Management applications created in Performance Management Architect
- Financial Management artifacts
- Financial reports
Because the artifacts for Financial Management applications span multiple products, you must migrate the artifacts from each product as it relates to the Financial Management application.
Scenario
You are tasked with a first-time migration for Financial Management 11.1.2 application from a source environment to a destination environment. The 11.1.2 release is installed and configured on the source and destination environments, which utilize separate Shared Services 11.1.2 instances. Consequently, the file system will be utilized for this migration.
Prerequisites
Before starting this tutorial, you should:
1.
Install and configure Financial Management 11.1.2 and all related Performance Management Architect 11.1.2 products in the source and destination environments (Hyperion Shared Services, Performance Management Architect, Oracle Hyperion Financial Reporting, Fusion Edition and so on).
2.
Ensure that the source environment contains the Financial Management application with all metadata.
3 .
Ensure that the source and destination user who is performing the LCM activities is provisioned with the following roles:
- Shared Services LCM administrator
- Financial Management application administrator
Exporting a Financial Management Application to the File System in the Source Environment
In this part of the tutorial, you migrate a Financial Management application to the File System.
1.
In the source environment, log on to Shared Services as the user who is provisioned with the appropriate LCM roles.

2.
Navigate to Foundation > Shared Services, and select the following native directory provisioning artifacts and the task flows that are applicable to the Financial Management application:
- Users – Native Directory users
- Groups – Native Directory groups
- Assigned Roles – Roles granted to users and groups through the provisioning process. You should select the roles for the associated product artifacts that pertain to the Financial Management application.
Note: You should choose the assigned roles for all products that contain artifacts for the Financial Management application.

3.
Navigate to the default application group, and select the Financial Management application that you want to migrate; for example, Reports.

Click Select All to select all Financial Management application artifacts.
![]()
4.
For Financial Management applications created in Performance Management Architect,, navigate to Foundation >EPM Architect >Application Metadata >Consolidation Applications, and select the Performance Management Architect artifacts that reside under the Financial Management application that you are migrating. In the following example, it is Reports.

5.
Navigate to Hyperion Reporting and Analysis and perform the following actions:
a) Expand the Repository Objects folder.
b) Select the Financial Reports folder that contains the financial reports which are associated with the Financial Management application.

6.
On the Selected Artifacts tab, review the set of artifacts that you selected for the migration of the Financial Management application.

Click the Define Migration button to define the migration of the Financial Management application.
![]()
7.
Select the first product to migrate (for example, Reporting and Analysis).
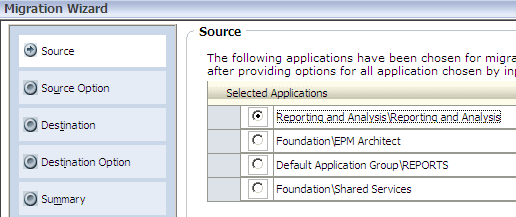
Click Next.
![]()
8.
On the Source Options page, select Export with job output if you want that information to be migrated.

Click Next.
![]()
9.
On the Destination page, enter the name of the file system folder where the Financial Reporting artifacts will be extracted.

Click Next.
![]()
10.
Review the Destination Options page to ensure that the parameters are correct.

Click Next.
![]()
You are directed back to the beginning of the migration wizard so that you can define other product migrations.
11.
Select the next application to migrate (for example, Financial Management application that you created in Performance Management Architect).

Click Next.
![]()
12.
Review the source options.
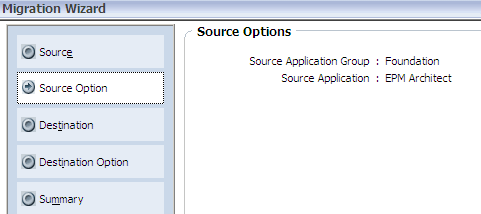
Click Next.
![]()
13.
On the Destination page, enter the name of the file system folder where the Performance Management Architect artifacts will be extracted.

Click Next.
![]()
14.
Review the destination options to ensure that the parameters are correct.

Click Next.
![]()
15.
Select the next application to migrate (for example, the Reports application).

Click Next.
![]()
16.
Review the source options.
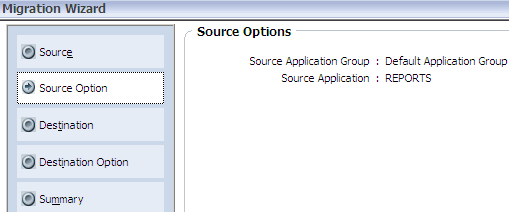
Click Next.
![]()
17.
On the Destination page, enter the name of the file system folder where the Financial Management artifacts will be extracted.

Click Next.
![]()
18.
Review the destination options to ensure that the parameters are correct.

Click Next.
![]()
19.
Select the next application to migrate (for example, the Shared Services application).

Click Next.
![]()
20.
On the Source Options page, filter the user, groups, and roles as needed.

Click Next.
![]()
21.
On the Destination page, enter the name of the file system folder where the Shared Services artifacts will be extracted.

Click Next
![]()
22.
Review the destination options to ensure that the parameters are correct.

Click Next.
![]()
23.
Review the Migration Summary to ensure that the defined migrations are correct.
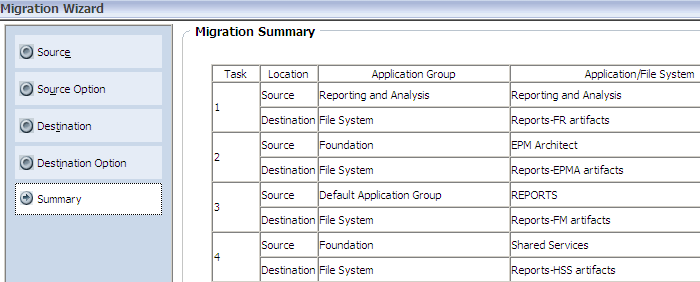
24.
Click Save Migration Definition.

25.
Click Save.

26.
Enter the location and name for the migration definition file, and click Save.

27.
On the Migration Summary page, click Execute Migration.
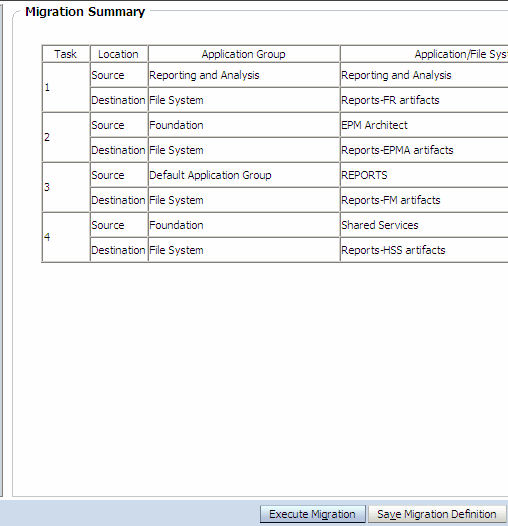
The migration of the Financial Management application is executed.
28.
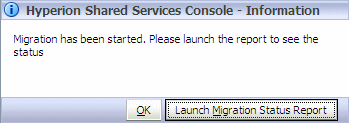
Click Launch Migration Status Report.
29.
On the Migration Status Report page, review the status of the migration. If needed, refresh the Migration Status Report to see that the migration was completed successfully.

Copying Artifacts for the Financial Management Application from the Source Environment to the Destination Environment
The artifacts for the source environment application that exist on the file system must be moved to the destination environment file system. You can accomplish this task by copying and pasting the artifacts, sending them through FTP, or burning them to a DVD.
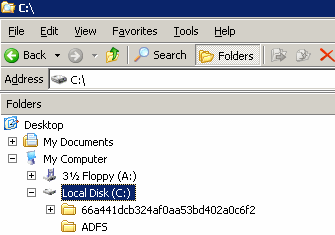
The default file system location for the Life Cycle Management artifacts is on the Shared Services Web application server at c:\oracle\Middleware\user_projects\epmsystem1\common\import_export.
The artifacts must also be copied into the user directory within this file system location.
In this example, you copy and paste the artifacts within Windows Explorer.
1.
In the source environment, navigate to Windows Explorer on the file system.
2.
Select Tools > Map Network Drive.

3.
Enter the parameters for the destination environment file system location, and clickFinish.

4.
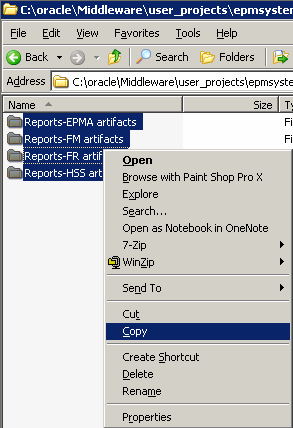
Navigate to the artifacts for the source environment application. Select the folders, right-click, and selectCopy.
5.
Navigate to the newly mapped destination location, right-click, and select Paste.

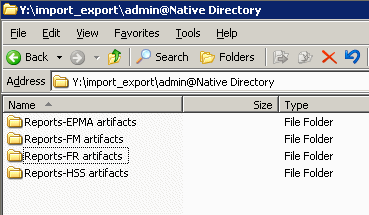
6.
The database artifact folders now reside in the destination server file system location.
Creating a Financial Management Classic Application Shell in the Destination Environment
Before migrating a Financial Management classic application, you must create the Financial Management classic application shell in the destination environment.
Before following these steps Financial Management must be installed and configured in the destination environment.
Note: For Financial Management applications that you created in Performance Management Architect, you can skip this section.
1.
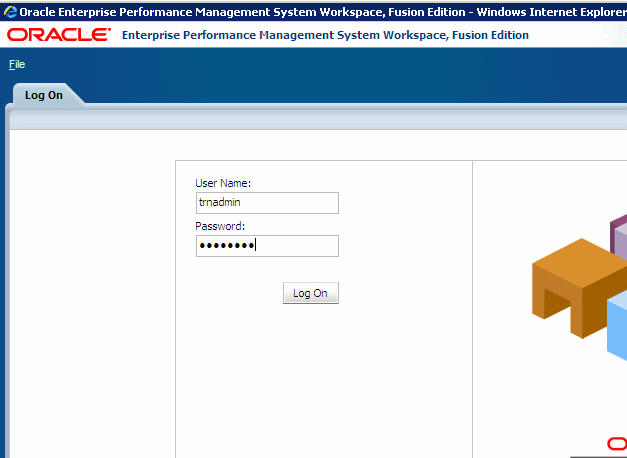
Log on to Workspace in the destination environment.
2.
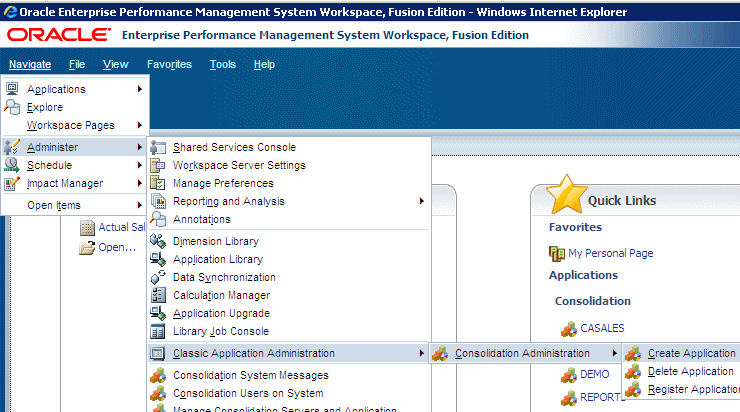
Select Navigate > Administer > Classic Application Administration > Consolidation Administration > Create Application.
3.
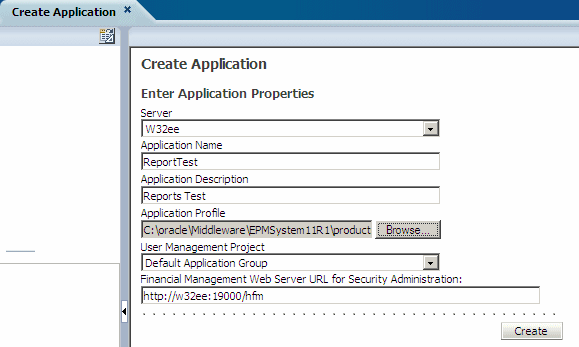
Enter the application properties to create a Financial Management classic application shell, and clickCreate.
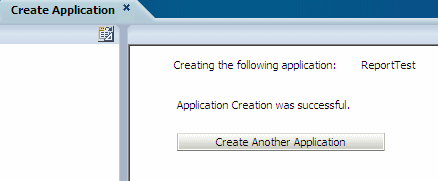
4.
Confirm that the application was successfully created.
Importing a Financial Management Application from the File System in the Destination Environment
You have exported the artifacts for the Financial Management application from the source environment to the file system and copied the artifacts to the destination environment file system.
You now import a Financial Management application from the file system to the destination environment.
1.
In the destination, log on to Shared Services as the user who is provisioned with the appropriate LCM roles.

2.
Perform one of the following actions:
- For Financial Management applications that were created in Performance Management Architect, proceed to step 3.
- For Financial Management classic applications, skip to step 14.
3 .
If the Financial Management application was created in Performance Management Architect, under Application Group Management navigate toFile System.

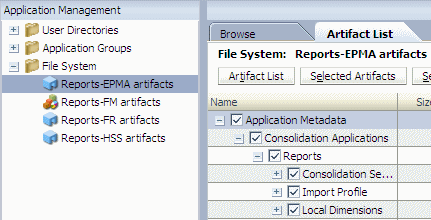
4.
Select the artifacts for the Performance Management Architect file system that are applicable to the Financial Management application.
Click Define Migration.
![]()
5.
View the Source Options page.

Click Next.
![]()
6.
Select the destination (in this case, Performance Management Architect).

Click Next.
![]()
7.
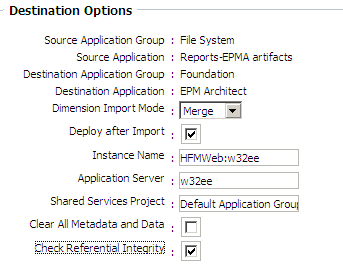
Perform the following actions:
a) In the Dimension Import Mode list, select Merge or Replace.
b) Select Deploy after Import.
c) Enter the remaining parameters to deploy the application view to a physical Financial Management application.
Click Next.
![]()
8.
Review the Migration Summary.

Click Save Migration Definition.
![]()
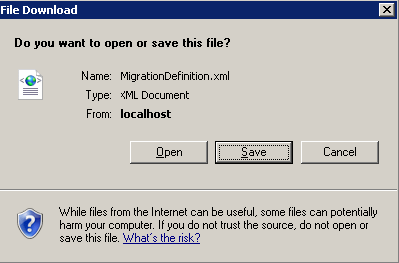
9.
In the File Download dialog box, click Save.
10.
Enter the location and the file name for the migration definition, and click Save.

11.
Navigate to the Migration Summary page.

Select Execute Migration.
![]()
The migration is executed.
12.
Click Launch Migration Status Report to view the status of the migration

13.
Confirm that the migration is completed.

Click Cancel to close the Migration Status Report.
![]()
14.
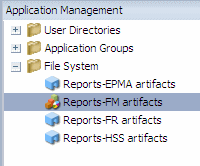
Navigate to File System, and select the Financial Management application artifacts, the Financial Management application financial reports, and the Financial Management Shared Services artifacts.
15.
Select the Selected Artifacts tab to view the artifacts that you selected for the migration.

Click Define Migration.
![]()
16.
Select the Shared Services artifacts.

Click Next.
![]()
17.
Review the source options.

Click Next.
![]()
18.
On the Destination page, select the Shared Services repository.

Click Next.
![]()
19.
On the Destination Options page, select the import operation type and the number of maximum errors to allow before stopping the import.

Click Next.
![]()
20.
Select the Financial Management artifacts.

Click Next.
![]()
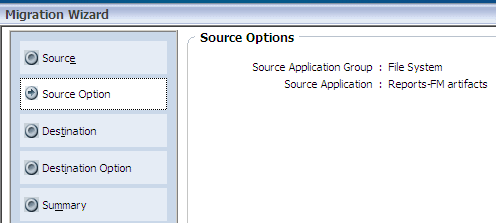
21.
Review the source options.
Click Next.
![]()
22.
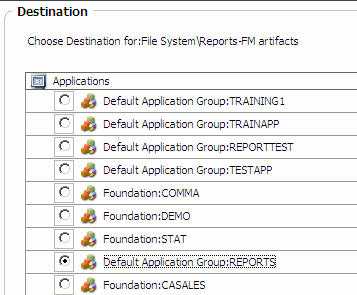
Select the destination Financial Management application to which you want to import the artifacts.
Click Next
![]()
23.
For Import Dimension Mode and Import Phased Submission Assignment mode, selectmerge orreplace. Note: If dimensions or phased submission assignments are not being imported, these options will not be considered.

Click Next.
![]()
24.
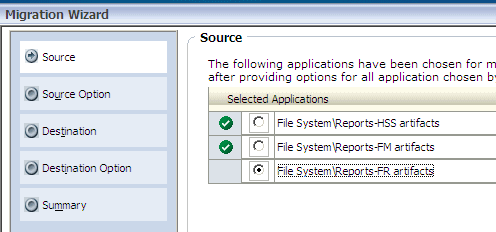
On the Source page, select the Financial Reports artifacts.
Click Next.
![]()
25.
Review the source options.

Click Next.
![]()
26.
On the Destination page, select the Reporting and Analysis repository.

Click Next.
![]()
27.
Optional: On the Destination Options page, select Exclude Job Output on Import.

Click Next.
![]()
28.
Review the Migration Summary.

Click Save Migration Definition.
![]()
29.
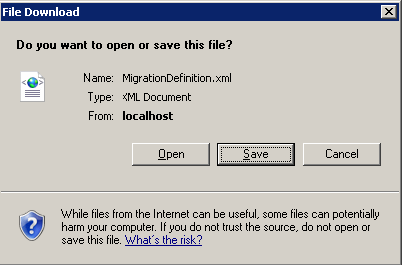
In the File Download dialog box, click Save.
30.
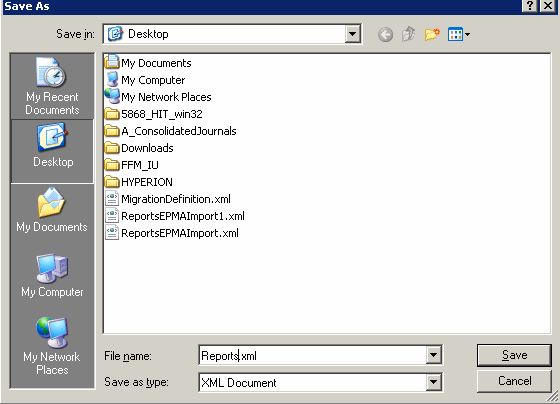
Enter the location and the file name for the migration definition, and clickSave.
31.
Navigate back to the Migration Summary page.

Click Execute Migration.
![]()
32.
Click Launch Migration Status Report.

33.
Confirm that the migration is completed.

Summary
In this tutorial, you learned how to:
- Export the application artifacts from your source environment to the file system
- Copy artifacts for the Financial Management application from the source environment to the destination environment
- For Financial Management classic applications, create a Financial Management classic application shell in the destination environment
- Import the application artifacts from the destination environment file system to the application
Resources
- To learn more about life cycle management, refer to the Oracle® Hyperion Enterprise Performance Management System, Release 11.1.2, Lifecycle Management Guide.
- To learn more about Financial Management, refer to additional OBEs in the Oracle Learning Library.
- Hyperion planning11.1.2 LCM(官方文档)
- Hyperion planning LCM迁移(官方文档)
- Hyperion 11.1.1.2 迁移步骤(转)
- HBase协处理器(1.2官方文档)
- HBase数据模型(1.2官方文档)
- HBase Shell命令(1.2官方文档)
- log4j 1.2 官方文档
- Ruby官方文档翻译(Ruby官方文档中文版)
- 【Android官方文档】翻译Android官方文档-AIDL(三)
- ASIHTTPRequest官方文档(一)
- fmdb官方文档(翻译)
- fragment详解(官方文档)
- 学习官方文档(photoLocations)
- ASIHTTPRequest官方文档(一)
- fragment详解(官方文档)
- Leveldb官方文档(中文版)
- NSRunLoop(1)官方文档
- Pro Git(官方文档)
- E
- 微服务架构的基础框架选择:Spring Cloud还是Dubbo?
- Unbuntu php7 下的gd2扩展安装
- open-falcon 相关文章地址记录
- loadrunner11如何使用java Vuser运行java代码及设置环境变量和上传jdk
- Hyperion planning11.1.2 LCM(官方文档)
- java匿名内部类
- POJ 1661 Help Jimmy——树形dp
- java分页
- Windows7下安装与破解IntelliJ IDEA2017
- FastDFS+nginx的安装配置
- 深度学习中遇到的一些概念
- ubuntu解决apache不能解析php问题等详细步骤(php7 + mysql5.7 +apache2.4)
- Android消息传递之EventBus 3.0使用详解


