ASP.NET Core的身份认证框架IdentityServer4(7)- 使用客户端证书控制API访问
来源:互联网 发布:仙侠世界大网络下载 编辑:程序博客网 时间:2024/06/06 03:52
前言
今天(2017-9-8,写于9.8,今天才发布)一口气连续把最后几篇IdentityServer4相关理论全部翻译完了,终于可以进入写代码的过程了,比较累。目前官方的文档和Demo以及一些相关组件全部是.net core 1.1的,应该是因为目前IdentityServer4目前最新版本只是2.0.0 rc1的原因,官方文档和Demo还没来更新。我准备使用的是.net core 2.0 所支持的IdentityServer4 2.0.0,官方文档及Demo只能参考,因为在asp.net core 2.0及IdentityServer4 2.0版本中一些接口做了调整,有些写法和原来不一样。本文是根据官方QuickStart1(官方QuickStart演示项目的目前只支持.net core 1.1,QuickStart1是第一个QuickStart)写出的demo。
第一次接触IdentityServer4是在ABP的asp.net zero项目中,感觉IdentityServer4挺方便的,便有了系统性的学一下IdentityServer4的想法,这是我写IdentityServer4系列文章的原因。
本文包括后续的Demo都会放在github:https://github.com/stulzq/IdentityServer4.Samples 希望大家能给我来一个star 鼓励一下。
使用客户端证书保护API
此示例介绍了使用IdentityServer保护API的最基本场景。
在这种情况下,我们将定义一个API和要访问它的客户端。 客户端将在IdentityServer上请求访问令牌,并使用它来访问API。
准备
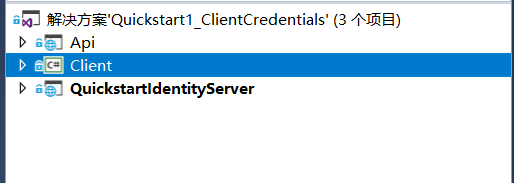
创建一个名为QuickstartIdentityServer的ASP.NET Core Web 空项目(asp.net core 2.0),端口5000
创建一个名为Api的ASP.NET Core Web Api 项目(asp.net core 2.0),端口5001
创建一个名为Client的控制台项目(.net core 2.0)
定义API
在QuickstartIdentityServer项目中添加一个Config.cs文件:
// scopes define the API resources in your systempublic static IEnumerable<ApiResource> GetApiResources(){ return new List<ApiResource> { new ApiResource("api1", "My API") };}定义客户端
对于这种情况,客户端将不具有交互式用户,并将使用IdentityServer使用所谓的客户机密码进行身份验证。 将以下代码添加到Config.cs文件中:
// client want to access resources (aka scopes)public static IEnumerable<Client> GetClients(){ return new List<Client> { new Client { ClientId = "client", // 没有交互性用户,使用 clientid/secret 实现认证。 AllowedGrantTypes = GrantTypes.ClientCredentials, // 用于认证的密码 ClientSecrets = { new Secret("secret".Sha256()) }, // 客户端有权访问的范围(Scopes) AllowedScopes = { "api1" } } };}配置 IdentityServer
要配置IdentityServer以使用范围和客户端定义,您需要向ConfigureServices方法添加代码。
Startup.cs
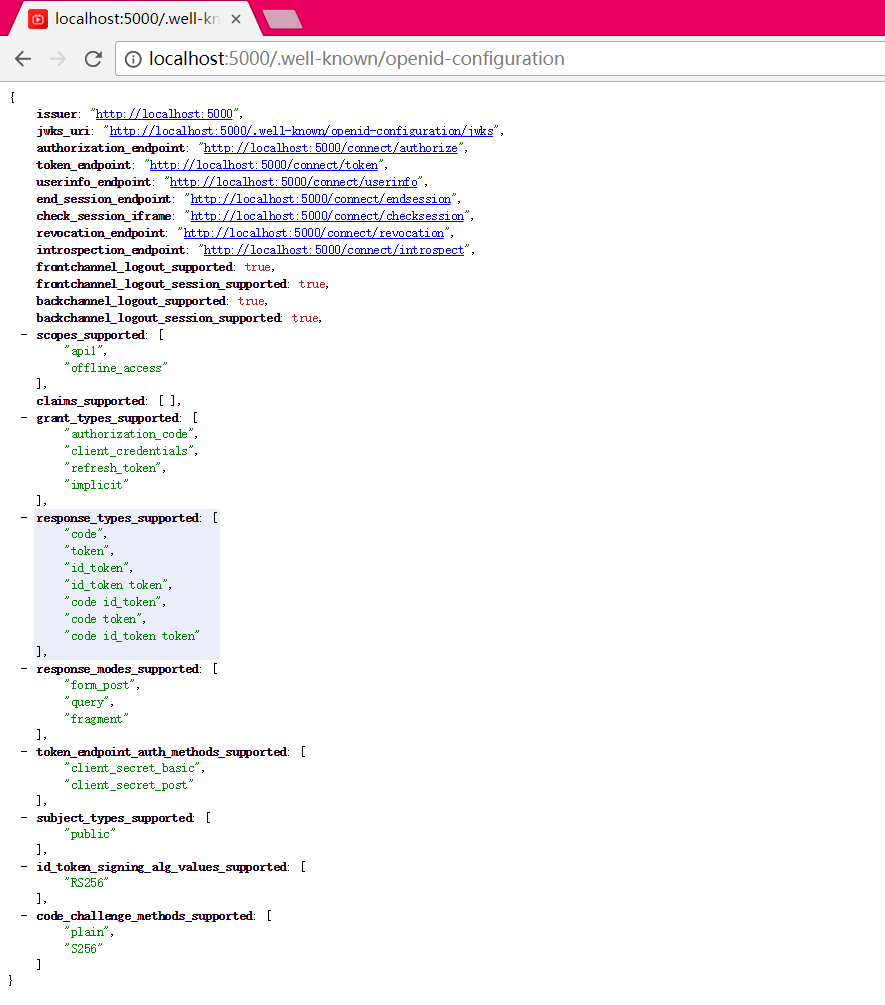
// This method gets called by the runtime. Use this method to add services to the container.// For more information on how to configure your application, visit https://go.microsoft.com/fwlink/?LinkID=398940public void ConfigureServices(IServiceCollection services){ // 使用内存存储,密钥,客户端和资源来配置身份服务器。 services.AddIdentityServer() .AddDeveloperSigningCredential() .AddInMemoryApiResources(Config.GetApiResources()) .AddInMemoryClients(Config.GetClients());}// This method gets called by the runtime. Use this method to configure the HTTP request pipeline.public void Configure(IApplicationBuilder app, IHostingEnvironment env,ILoggerFactory loggerFactory){ loggerFactory.AddConsole(LogLevel.Debug); app.UseDeveloperExceptionPage(); app.UseIdentityServer();}运行此项目,打开浏览器访问http://localhost:5000/.well-known/openid-configuration你将会看到所谓的发现文档。
添加API
在项目Api中添加一个Controller
[Route("[controller]")][Authorize]public class IdentityController : ControllerBase{ [HttpGet] public IActionResult Get() { return new JsonResult(from c in User.Claims select new { c.Type, c.Value }); }}稍后将使用此控制器来测试授权要求,以及通过API来查看声明身份。
配置
添加身份验证中间件
- 验证传入令牌以确保它来自可信发行者。
- 令牌验证是有效的,用于在这个API
在项目中添加nuget包Microsoft.AspNetCore.Authentication.JwtBearer:
这里使用了
Microsoft.AspNetCore.Authentication.JwtBearer包来替换AccessTokenValidation,因为后者还没有更新到.net core 2.0,使用的话,是有问题的

您还需要将中间件添加到管道中。它必须在MVC之前添加:
public void ConfigureServices(IServiceCollection services){ services.AddMvcCore().AddJsonFormatters(); services.AddAuthentication((options) => { options.DefaultScheme = JwtBearerDefaults.AuthenticationScheme; options.DefaultChallengeScheme = JwtBearerDefaults.AuthenticationScheme; }) .AddJwtBearer(options => { options.TokenValidationParameters = new TokenValidationParameters(); options.RequireHttpsMetadata = false; options.Audience = "api1";//api范围 options.Authority = "http://localhost:5000";//IdentityServer地址 });}// This method gets called by the runtime. Use this method to configure the HTTP request pipeline.public void Configure(IApplicationBuilder app, IHostingEnvironment env){ app.UseAuthentication(); app.UseMvc();}创建客户端
最后一个步骤是编写一个客户端来请求访问令牌,然后使用这个令牌来访问 API。为此你需要为你的解决方案添加一个控制台应用程序。
IdentityServer 上的令牌端点实现了 OAuth 2.0 协议,你应该使用合法的 HTTP请求来访问它。然而,我们有一个叫做 IdentityModel 的客户端库,它将协议交互封装到了一个易于使用的 API 里面。
添加 IdentityModel NuGet 程序包到你的客户端项目中。

IdentityModel 包含了一个用于 发现端点 的客户端库。这样一来你只需要知道 IdentityServer 的基础地址,实际的端点地址可以从元数据中读取:
// 从元数据中发现端口var disco = await DiscoveryClient.GetAsync("http://localhost:5000");接着你可以使用 TokenClient 来请求令牌。为了创建一个该类型的实例,你需要传入令牌端点地址、客户端id和密码。
然后你可以使用 RequestClientCredentialsAsync 方法来为你的目标 API 请求一个令牌:
// 请求令牌var tokenClient = new TokenClient(disco.TokenEndpoint, "client", "secret");var tokenResponse = await tokenClient.RequestClientCredentialsAsync("api1");if (tokenResponse.IsError){ Console.WriteLine(tokenResponse.Error); return;}Console.WriteLine(tokenResponse.Json);注意:从控制台中复制和粘贴访问令牌到 jwt.io 以检查令牌的合法性。
最后是调用 API。
为了发送访问令牌到 API,你一般要使用 HTTP 授权 header。这可以通过 SetBearerToken 扩展方法来实现:
// 调用apivar client = new HttpClient();client.SetBearerToken(tokenResponse.AccessToken);var response = await client.GetAsync("http://localhost:5001/identity");if (!response.IsSuccessStatusCode){ Console.WriteLine(response.StatusCode);}else{ var content = await response.Content.ReadAsStringAsync(); Console.WriteLine(JArray.Parse(content));}依次启动QuickstartIdentityServer>API>Client
最后查看输出结果:

注意:默认情况下访问令牌将包含 scope 身份信息,生命周期(nbf 和 exp),客户端 ID(client_id) 和 发行者名称(iss)。
进一步实践
当前演练目前主要关注的是成功的步骤:
- 客户端可以请求令牌
- 客户端可以使用令牌来访问 API
你现在可以尝试引发一些错误来学习系统的相关行为,比如:
- 尝试在 IdentityServer 未运行时(unavailable)连接它
- 尝试使用一个非法的客户端id或密码来请求令牌
- 尝试在请求令牌的过程中请求一个非法的 scope
- 尝试在 API 未运行时(unavailable)调用它
- 不向 API 发送令牌
- 配置 API 为需要不同于令牌中的 scope
本文demo github地址 https://github.com/stulzq/IdentityServer4.Samples/tree/master/Quickstarts/1_ClientCredentials
- ASP.NET Core的身份认证框架IdentityServer4(7)- 使用客户端证书控制API访问
- ASP.NET Core的身份认证框架IdentityServer4(7)- 使用客户端证书控制API访问
- ASP.NET Core的身份认证框架IdentityServer4(3)-术语的解释
- IdentityServer4 ASP.NET Core的OpenID Connect OAuth 2.0框架学习保护API
- 尝试新的开发组合:Asp.NET Core+ABP框架+IdentityServer4+MySQL+Ext JS
- 在ASP.NET Core中使用Angular2,以及与Angular2的Token base身份认证
- 基于客户端(浏览器)证书身份认证的方法
- ASP.net 使用证书认证
- Asp.NET Core+ABP框架+IdentityServer4+MySQL+Ext JS之配置IdentityServer
- Asp.NET Core+ABP框架+IdentityServer4+MySQL+Ext JS之数据迁移
- Asp.NET Core+ABP框架+IdentityServer4+MySQL+Ext JS之添加实体
- Asp.NET Core+ABP框架+IdentityServer4+MySQL+Ext JS之显示登录视图
- ASP.NET Core 使用Cookie验证身份
- ASP.NET Core 使用Cookie验证身份
- ASP.NET Core 使用Cookie验证身份
- ASP.NET身份认证
- ASP.NET身份认证
- 在ASP.NET Core中实现一个Token base的身份认证
- Mac安装mysql
- 【Java实践】十二小球天平三次称重问题
- java 开发实战经典 练习题 第12章 第7题 完成系统登录程序 从命令行输入用户名和密码
- MicroSoft SQL Server Manager 通过ODBC与VS进行连接操作示例程序
- C语言实例练习
- ASP.NET Core的身份认证框架IdentityServer4(7)- 使用客户端证书控制API访问
- linux如何设置行号
- 网络流--最小费用最大流MCMF算法
- 24. Swap Nodes in Pairs
- 279. Perfect Squares (完全平方数)
- 10大深度学习架构:计算机视觉优秀从业者必备(附代码实现)
- 关于tensorboard启动问题
- STL bitset用法总结
- 用Maven创建JIfnal需要引入两个