SpringSecurity4最小化配置
来源:互联网 发布:android网络电话源码 编辑:程序博客网 时间:2024/04/30 00:52
Maven设置
<dependency> <groupId>org.springframework.security</groupId> <artifactId>spring-security-config</artifactId> <version>4.2.3.RELEASE</version></dependency><dependency> <groupId>org.springframework.security</groupId> <artifactId>spring-security-web</artifactId> <version>4.2.3.RELEASE</version></dependency>添加Security XML文件
文件名:applicationContext-security.xml
文件位置:src/main/resource/spring/applicationContext-security.xml
<?xml version="1.0" encoding="UTF-8"?><beans xmlns="http://www.springframework.org/schema/beans"xmlns:security="http://www.springframework.org/schema/security" xmlns:xsi="http://www.w3.org/2001/XMLSchema-instance" xsi:schemaLocation="http://www.springframework.org/schema/beans http://www.springframework.org/schema/beans/spring-beans.xsd http://www.springframework.org/schema/security http://www.springframework.org/schema/security/spring-security.xsd"></beans> 设置web.xml
<filter> <filter-name>springSecurityFilterChain</filter-name> <filter-class>org.springframework.web.filter.DelegatingFilterProxy</filter-class></filter><filter-mapping> <filter-name>springSecurityFilterChain</filter-name> <url-pattern>/*</url-pattern></filter-mapping>最小化配置securityXML
在applicationContext-security.xml中添加如下内容
<http> <intercept-url pattern="/**" access="hasRole('USER')" /> <form-login /> <logout /></http>intercept-url:根据pattern拦截url请求
form-login:使用一个有username和password的表单进行登录
logout:退出系统
添加用户信息用于测试
在applicationContext-security.xml中添加如下内容
<authentication-manager> <authentication-provider> <user-service> <user name="jimi" password="jimispassword" authorities="ROLE_USER, ROLE_ADMIN" /> <user name="bob" password="bobspassword" authorities="ROLE_USER" /> </user-service> </authentication-provider></authentication-manager>元素:认证管理器
元素: 认证提供者
元素:用户服务,创建了两个账户,保存在内存中。
注意各元素之间的关系
访问页面
重启服务器,会有一个默认的登录页面
http://localhost/你的项目名当没有指定登录用的表单页面时,Spring Security 会生成一个默认登录低低页面。
编写login.jsp
login.jsp位于项目的根目录(webRoot)下
<body> <form name="f" action="login" method="post"> <fieldset> <legend>Please Login</legend> <label for="username">Username</label> <input type="text" id="username" name="username" value="${username}"/> <label for="password">Password</label> <input type="password" id="password" name="password"/> <div class="form-actions"> <button type="submit" class="btn">Log in</button> </div> </fieldset></form></body>相应的securityXML 设置
<http pattern="/css/**" security="none"/><http pattern="/login.jsp*" security="none"/><http use-expressions="false"> <intercept-url pattern="/**" access="ROLE_USER" /> <form-login login-page='/login.jsp'/></http>当元素的属性use-expressions=”false”时,的access属性值为ROLE_USER
当元素的属性use-expressions=”true”或没有此属性时,的access属性值为hasRole(‘USER’)
当不想写login.jsp时
<http use-expressions="false"> <intercept-url pattern="/**" access="ROLE_USER" /> <http-basic /></http>这时会弹出一个窗口用于用户登录信息的录入。大概是这样子。 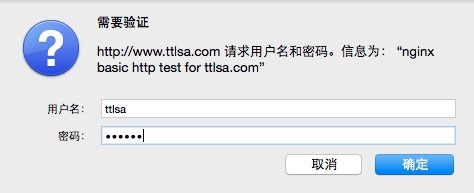
设置登录成功后的跳转页面
<form-login login-page='/login.jsp' default-target-url='/home.jsp' always-use-default-target='true' />default-target-url:登录成功后跳转页面
always-use-default-target:总是跳转到default-target-url定义的页面
给密码加密
<beans:bean name="bcryptEncoder" class="org.springframework.security.crypto.bcrypt.BCryptPasswordEncoder"/><authentication-manager> <authentication-provider> <password-encoder ref="bcryptEncoder"/> <user-service> <user name="jimi" password="d7e6351eaa13189a5a3641bab846c8e8c69ba39f" authorities="ROLE_USER, ROLE_ADMIN" /> <user name="bob" password="4e7421b1b8765d8f9406d87e7cc6aa784c4ab97f" authorities="ROLE_USER" /> </user-service> </authentication-provider></authentication-manager>其它问题
当遇到
HTTP Status 403 - Could not verify the provided CSRF token because your session was not found.参考:http://blog.csdn.net/yiifaa/article/details/71744120?utm_source=itdadao&utm_medium=referral
- SpringSecurity4最小化配置
- SpringSecurity4.1配置
- Iptables 最小化配置
- 最小化Spring XML配置
- 最小化Spring XML配置
- 最小化springXML 配置
- CentOS7最小化安装配置
- Spring--最小化XML配置
- Linux最小化服务配置说明
- centos_32最小化安装HA配置
- Spring笔记---最小化Spring配置
- SpringMVC——最小化配置
- centos7 最小化安装后配置
- CentOS 7最小化安装配置
- CentOS7 最小化安装完配置
- CentOS 7 最小化安装 配置
- springsecurity4.2入门完整实例
- redhat as4 最小化安装配置全记录
- 聊聊JVM的年轻代
- Kryo:快速、高效的序列化框架
- Springboot配置https访问
- dpdk学习之ip_pipeline源代码分析
- hadoop streaming参数整理
- SpringSecurity4最小化配置
- Linux(CentOS)下安装JDK
- Unity 中生成JSON以及对应的解析方法
- 面试题49:把字符串转换成整数
- 图像二值化 cv2.threshold
- Linux : 给硬盘分区
- 关于xgboost安装在anaconda上面(python3.6,64位,windows10)
- C++ 函数模板
- 0day安全——第四章小实验学习笔记