Java后台框架篇--Spring之缓存
来源:互联网 发布:微信cms是啥 编辑:程序博客网 时间:2024/06/05 07:19
1.spring从3.1开始支持缓存功能。spring 自带的缓存机制它只在方法上起作用,对于你使用其他持久化层的框架来讲,是没有影响的,相对来讲这种缓存方式还是不错的选择。
2.提供缓存的接口:org.springframework.cache.Cache ;org.springframework.cache.CacheManager这两个接口都在context中,一个是用来提供缓存的,一个是用来提供管理缓存的。
3.缓存是使用键值对的形式存在的,对应Java中就要使用Map<K,V>这种数据结构来处理,推荐使用java.util.concurrent.ConcurrentMap来存放。
4.注解:

在上面的注解中我们常用到的有@Cacheable,@CacheEvict,@CachePut这3个,我们目前也只学这3个
5.
@Cacheable:用来定义缓存的。常用到是value,key;分别用来指明缓存的名称和方法中参数,对于value你也可以使用cacheName,在查看源代码是我们可以看到:两者是指的同一个东西。
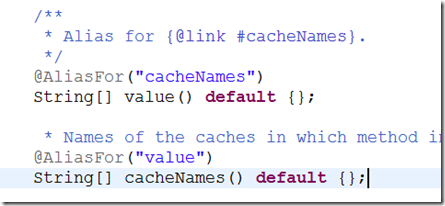
@CacheEvict:用来清理缓存。常用有cacheNames,allEntries(默认值false);分别代表了要清除的缓存名称和是否全部清除(true代表全部清除)。
@CachePut:用来更新缓存,用它来注解的方法都会被执行,执行完后结果被添加到缓存中。该方法不能和@Cacheable同时在同一个方法上使用。
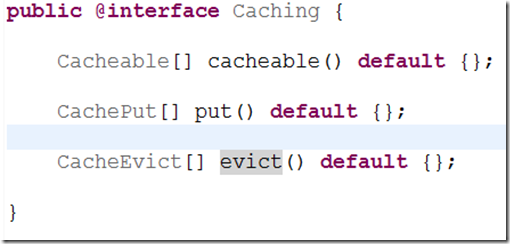
6.对于@Caching注解来讲,如果有两种不同的需求,都是放在同一个方法上,这种需求如果只是使用@CacheEvict或者@CachePut是无法实现,因为他们不能多样化的作用在同一个方法上。可以使用@Caching(evict={@CacheEvict(“a1”),@CacheEvict(“a2”,allEntries=true)});@Caching源代码如下:
7.下面我们来看看CacheManager这个接口,源代码如下:

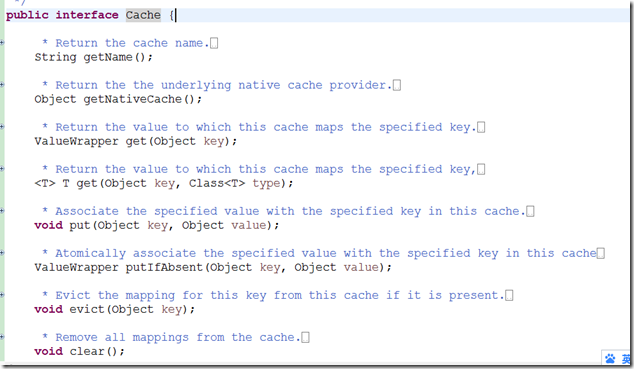
不难看出,最终目的还是用来获取Cache这个对象的,而我们缓存的数据都放在Cache中,部分源代码如下:
8.上面的一些基本的东西都已说完,下面看看怎么配置,让缓存真正的起作用:
来看看官方文档给的写法,里面重要的是spring-cache.xsd

其中的注解添加完,你就可以中代码中使用了:

在使用spring中缓存时,我们一般选择SimpleCacheManager这个类。
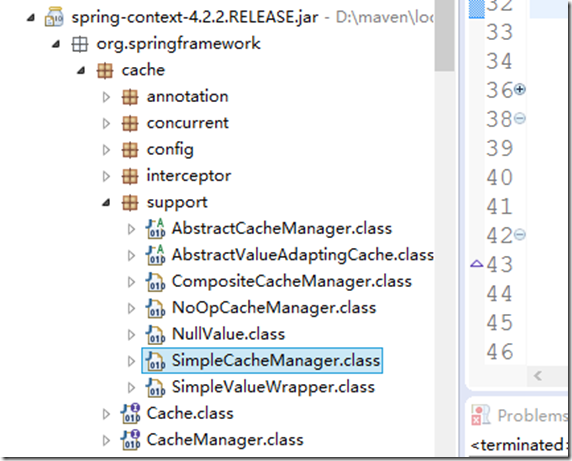
SimpleCacheManager源代码如下:
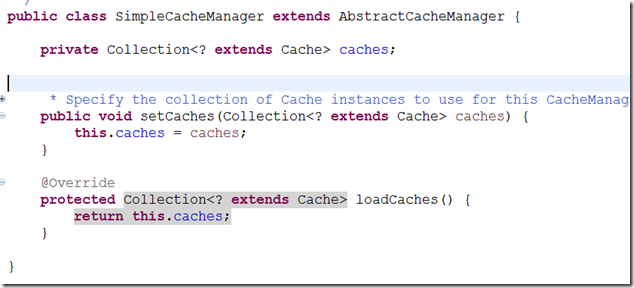
可以看出我们需要配置caches这个属性,来看看官方文档的例子吧,在xml中添加如下代码:创建了两个缓存的名称一个是books 一个是 default,我们可以只创建一个。

但是set中我们因该怎么写,在文章开头我们提到了ConcurrentMap这个类,再看下下面的红框中,我们选择一个,其中看其源代码可知道ConcurrentMapCacheFactoryBean内容包含其他两个。所有我们选择这个。
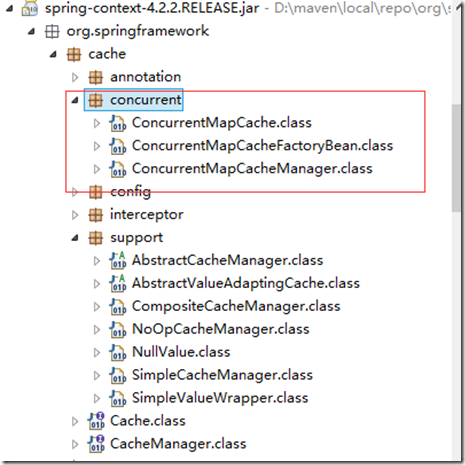
其源代码如下:

9.现在基本的配置都完成,现在就需要配置自己的bean去做下测试了。
编写一个逻辑处理的类,把该类放在xml定义:
public class TestCacheService { //通过参数name @Cacheable(cacheNames="uCache",key="#name") public User get(String name){ User u = new User(); u.setAge(12); u.setUserName("jobs"); System.out.println("没有缓存"+name); return u; } //通过方法名 @Cacheable(value="uCache",key="#root.methodName") public User get2(){ User u = new User(); u.setAge(12); u.setUserName("gate"); System.out.println("没有缓存"); return u; }}
编写一个测试类
public class TestCache { public static void main(String[] args) { ApplicationContext context = new ClassPathXmlApplicationContext("config/spring-cache.xml"); TestCacheService testCache = (TestCacheService)context.getBean("testCache"); testCache.get("jobs"); testCache.get("jobs");
} }运行测试一下,会发现报错,原因是xml中的p:name没有绑定:
在xml中添加:xmlns:p="http://www.springframework.org/schema/p"就可。
测试结果只有一行被打印处理,说明我们的缓存起作用了。
10.如何从缓存中提取缓存的数据:
首先我们要知道怎么从缓存中提取已经缓存过的数据:
public class TestCache { public static void main(String[] args) { ApplicationContext context = new ClassPathXmlApplicationContext("config/spring-cache.xml"); TestCacheService testCache = (TestCacheService)context.getBean("testCache"); CacheManager cm = (CacheManager) context.getBean("cacheManager"); //添加数据到缓存中 testCache.get("job"); Cache uCache = cm.getCache("uCache"); //通过参数作为key,得到对应的value User u1 = (User) uCache.get("job").get(); u1.show(); //添加数据到缓存中 testCache.get2(); //通过方法名作为key,得到对应value User u2 = (User) uCache.get("get2").get(); u2.show(); }}
当然还有其他形式作为其key,类如官方文档就给了如下参考,它是使用spel:
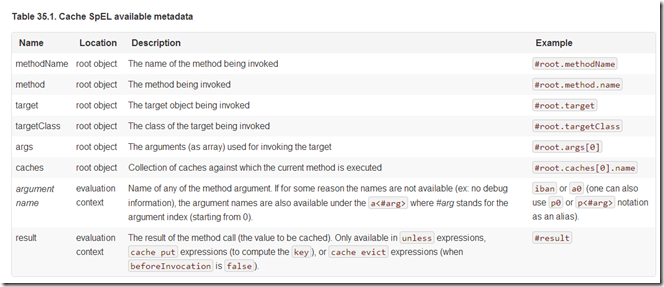
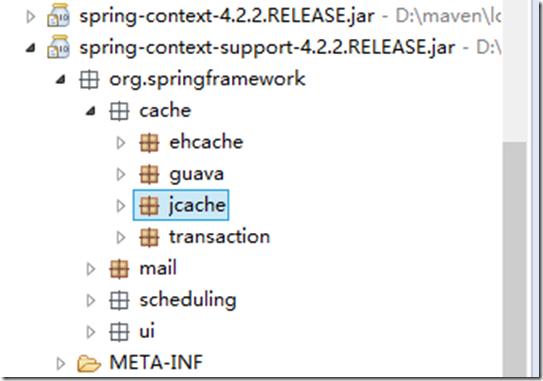
当让还有其它的缓存技术,例如ehcache,guava,jcache:
- Java后台框架篇--Spring之缓存
- Java后台框架篇--Spring整合redia自动缓存管理
- Java后台框架篇--Spring之WebFlow
- Java后台框架篇--Spring之AOP
- Java后台框架篇--Spring之WebService入门
- Java后台框架篇--Spring之AspectJ AOP
- Java后台框架篇--Spring高级装配
- Java后台框架篇--spring+websocket整合
- Java后台框架篇--Spring框架中模块组成
- Java后台框架篇--Spring之Bean的五个作用域
- java 整合redis缓存 SSM 后台框架
- Java后台框架篇--Struts之简介
- Java后台框架篇--Spring依赖注入和控制反转
- Java后台框架篇--Spring的AOP实现原理
- Java后台框架篇--Spring应用上下文配置:Xml方式
- Java后台框架篇--Spring中Bean的生命周期
- Java后台框架篇--Spring Integration模块集成
- Java后台框架篇--Spring的三种配置方式
- ubuntu samba出错问题排查
- <安彦>Linux的基础命令
- 从程序猿到工程师的转变
- 解决用CreateCompatibleBitmap()创建兼容位图出现的黑底问题
- iOS下JS与原生OC互相调用
- Java后台框架篇--Spring之缓存
- 了解java .lang 包,java.util包等常用包
- MapperScannerConfigurer[注入映射器]
- i2c
- Solr中的字段类型field type
- rubycritic
- C语言的操作符
- 实现对数组{25,24,12,76,101,96,28} 的排序
- Json学习


