Spring Boot学习
来源:互联网 发布:seo分享ppt 编辑:程序博客网 时间:2024/05/24 04:45
Spring Boot是为了简化Spring应用的创建、运行、调试、部署等而出现的,使用它可以做到专注于Spring应用的开发,而无需过多关注XML的配置。
简单来说,它提供了一堆依赖打包,并已经按照使用习惯解决了依赖问题---习惯大于约定。
Spring Boot默认使用tomcat作为服务器,使用logback提供日志记录。
无需多言,直接进入节奏:
前提
Spring Boot提供了一系列的依赖包,所以需要构建工具的支持:maven 或 gradle。个人仅熟悉maven,所以下面的内容都是maven相关的。
如果不熟悉maven,请先了解一下。
使用
① 新建一个maven项目。
② pom中parent设为 spring-boot-starter-parent 。建议使用最新的 RELEASE 版本。否则可能需要设置<repositories/>和<pluginRepositories/> 。
③ 添加应用需要的starter模块,作为示例,我们仅添加web starter模块。
这里需要解释下starter模块,简单的说,就是一系列的依赖包组合。例如web starter模块,就是包含了Spring Boot预定义的一些Web开发的常用依赖:
○ spring-web, spring-webmvc Spring WebMvc框架
○ tomcat-embed-* 内嵌Tomcat容器
○ jackson 处理json数据
○ spring-* Spring框架
○ spring-boot-autoconfigure Spring Boot提供的自动配置功能
换句话说,当你添加了相应的starter模块,就相当于添加了相应的所有必须的依赖包。
starter模块的列表及含义,见 Spring Boot的启动器Starter详解 。
至此,pom内容如下:
<project xmlns="http://maven.apache.org/POM/4.0.0" xmlns:xsi="http://www.w3.org/2001/XMLSchema-instance" xsi:schemaLocation="http://maven.apache.org/POM/4.0.0 http://maven.apache.org/xsd/maven-4.0.0.xsd"> <modelVersion>4.0.0</modelVersion> <groupId>cn.larry.spring</groupId> <artifactId>larry-spring-demo4</artifactId> <version>0.0.1-SNAPSHOT</version> <parent> <groupId>org.springframework.boot</groupId> <artifactId>spring-boot-starter-parent</artifactId> <version>1.4.0.RELEASE</version> </parent> <dependencies> <dependency> <groupId>org.springframework.boot</groupId> <artifactId>spring-boot-starter-web</artifactId> </dependency> </dependencies></project>
保存pom,刷新maven,以便刷新依赖导入。
基本上,如果没有特别的需要,现在就可以直接写Controller了!!!--特别的需要 是指设置容器、访问端口、路径等。后面再解释。
④ 写一个简单的Controller。--直接拿了 Spring Boot——开发新一代Spring Java应用 中的示例。
package cn.larry.spring.controller;import org.springframework.boot.SpringApplication;import org.springframework.boot.autoconfigure.EnableAutoConfiguration;import org.springframework.stereotype.Controller;import org.springframework.web.bind.annotation.RequestMapping;import org.springframework.web.bind.annotation.ResponseBody;@Controller@EnableAutoConfigurationpublic class SampleController { @RequestMapping("/") @ResponseBody String home() { return "Hello World!"; } public static void main(String[] args) throws Exception { SpringApplication.run(SampleController.class, args); }}
这里有两个新东西:@EnableAutoConfiguration 和 SpringApplication 。
@EnableAutoConfiguration 用于自动配置。简单的说,它会根据你的pom配置(实际上应该是根据具体的依赖)来判断这是一个什么应用,并创建相应的环境。
在上面这个例子中,@EnableAutoConfiguration 会判断出这是一个web应用,所以会创建相应的web环境。
SpringApplication 则是用于从main方法启动Spring应用的类。默认,它会执行以下步骤:
- 创建一个合适的ApplicationContext实例 (取决于classpath)。
- 注册一个CommandLinePropertySource,以便将命令行参数作为Spring properties。
- 刷新application context,加载所有单例beans。
- 激活所有CommandLineRunner beans。
默认,直接使用SpringApplication 的静态方法run()即可。但也可以创建实例,并自行配置需要的设置。
具体的描述见javadoc即可,如下:
 View Code
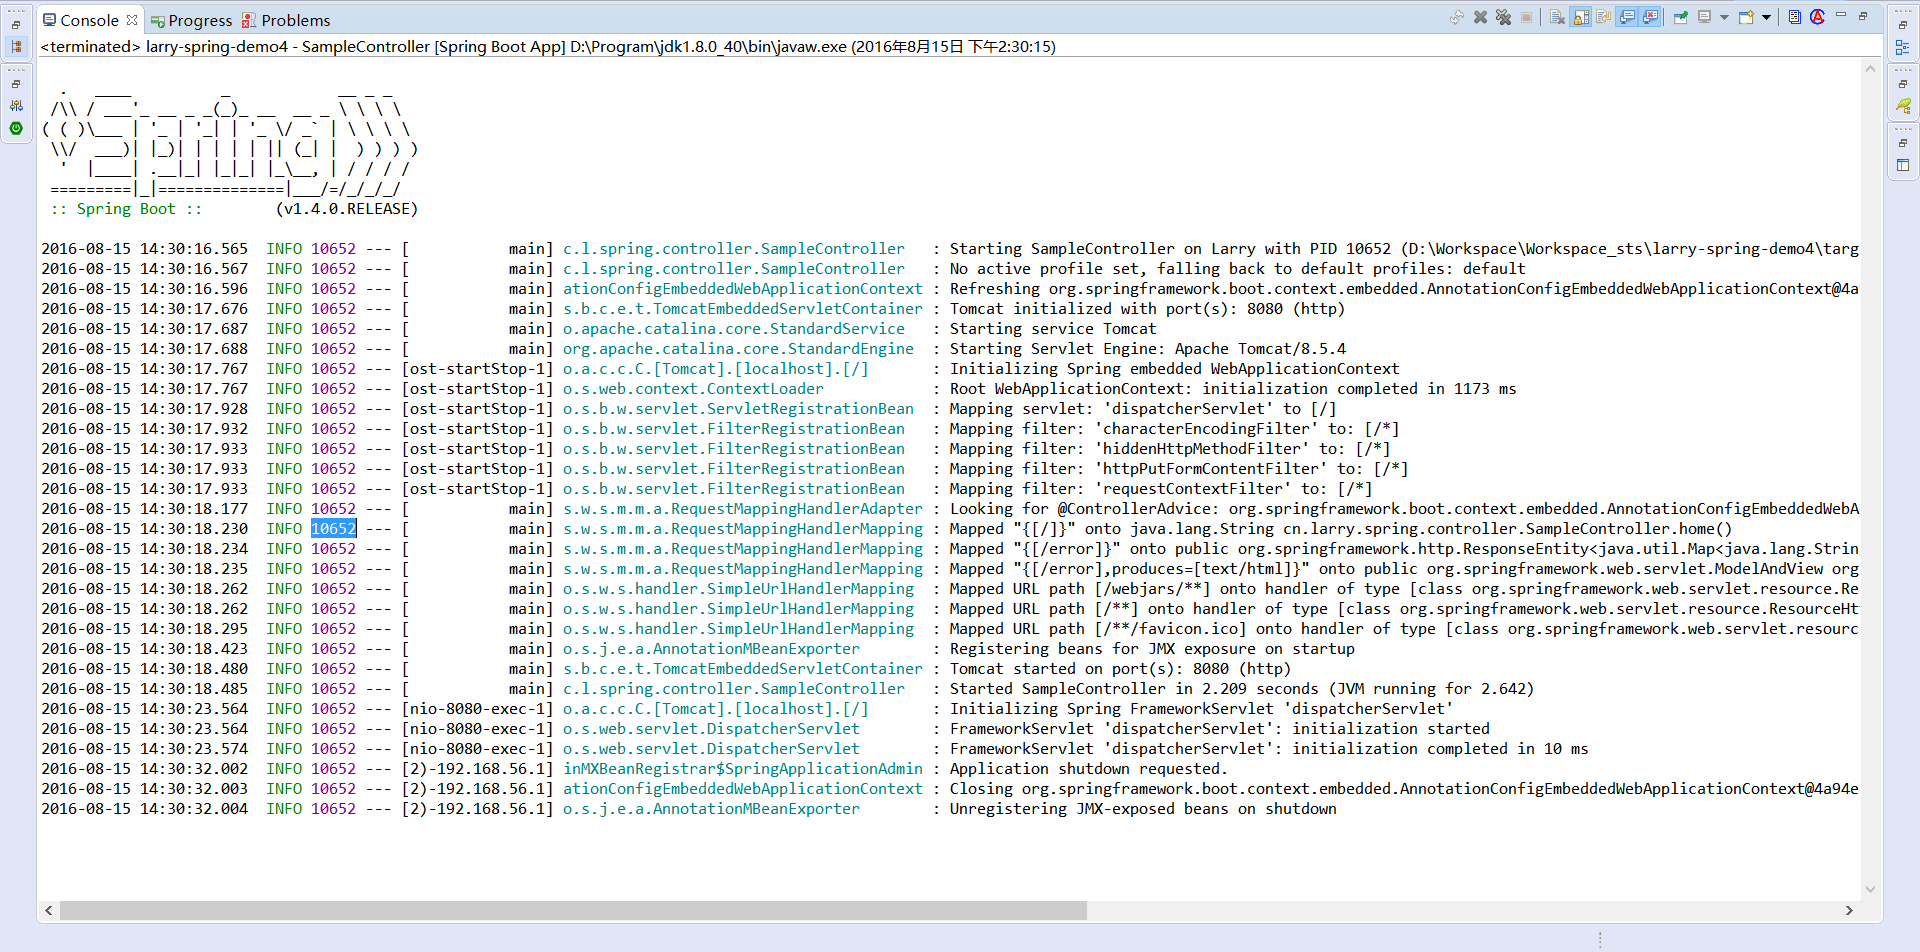
⑤ 现在,直接右键启动main方法即可。启动信息(包括关闭信息)如下:
1 . ____ _ __ _ _ 2 /\\ / ___'_ __ _ _(_)_ __ __ _ \ \ \ \ 3 ( ( )\___ | '_ | '_| | '_ \/ _` | \ \ \ \ 4 \\/ ___)| |_)| | | | | || (_| | ) ) ) ) 5 ' |____| .__|_| |_|_| |_\__, | / / / / 6 =========|_|==============|___/=/_/_/_/ 7 :: Spring Boot :: (v1.4.0.RELEASE) 8 9 2016-08-15 14:30:16.565 INFO 10652 --- [ main] c.l.spring.controller.SampleController : Starting SampleController on Larry with PID 10652 (D:\Workspace\Workspace_sts\larry-spring-demo4\target\classes started by Administrator in D:\Workspace\Workspace_sts\larry-spring-demo4)10 2016-08-15 14:30:16.567 INFO 10652 --- [ main] c.l.spring.controller.SampleController : No active profile set, falling back to default profiles: default11 2016-08-15 14:30:16.596 INFO 10652 --- [ main] ationConfigEmbeddedWebApplicationContext : Refreshing org.springframework.boot.context.embedded.AnnotationConfigEmbeddedWebApplicationContext@4a94ee4: startup date [Mon Aug 15 14:30:16 CST 2016]; root of context hierarchy12 2016-08-15 14:30:17.676 INFO 10652 --- [ main] s.b.c.e.t.TomcatEmbeddedServletContainer : Tomcat initialized with port(s): 8080 (http)13 2016-08-15 14:30:17.687 INFO 10652 --- [ main] o.apache.catalina.core.StandardService : Starting service Tomcat14 2016-08-15 14:30:17.688 INFO 10652 --- [ main] org.apache.catalina.core.StandardEngine : Starting Servlet Engine: Apache Tomcat/8.5.415 2016-08-15 14:30:17.767 INFO 10652 --- [ost-startStop-1] o.a.c.c.C.[Tomcat].[localhost].[/] : Initializing Spring embedded WebApplicationContext16 2016-08-15 14:30:17.767 INFO 10652 --- [ost-startStop-1] o.s.web.context.ContextLoader : Root WebApplicationContext: initialization completed in 1173 ms17 2016-08-15 14:30:17.928 INFO 10652 --- [ost-startStop-1] o.s.b.w.servlet.ServletRegistrationBean : Mapping servlet: 'dispatcherServlet' to [/]18 2016-08-15 14:30:17.932 INFO 10652 --- [ost-startStop-1] o.s.b.w.servlet.FilterRegistrationBean : Mapping filter: 'characterEncodingFilter' to: [/*]19 2016-08-15 14:30:17.933 INFO 10652 --- [ost-startStop-1] o.s.b.w.servlet.FilterRegistrationBean : Mapping filter: 'hiddenHttpMethodFilter' to: [/*]20 2016-08-15 14:30:17.933 INFO 10652 --- [ost-startStop-1] o.s.b.w.servlet.FilterRegistrationBean : Mapping filter: 'httpPutFormContentFilter' to: [/*]21 2016-08-15 14:30:17.933 INFO 10652 --- [ost-startStop-1] o.s.b.w.servlet.FilterRegistrationBean : Mapping filter: 'requestContextFilter' to: [/*]22 2016-08-15 14:30:18.177 INFO 10652 --- [ main] s.w.s.m.m.a.RequestMappingHandlerAdapter : Looking for @ControllerAdvice: org.springframework.boot.context.embedded.AnnotationConfigEmbeddedWebApplicationContext@4a94ee4: startup date [Mon Aug 15 14:30:16 CST 2016]; root of context hierarchy23 2016-08-15 14:30:18.230 INFO 10652 --- [ main] s.w.s.m.m.a.RequestMappingHandlerMapping : Mapped "{[/]}" onto java.lang.String cn.larry.spring.controller.SampleController.home()24 2016-08-15 14:30:18.234 INFO 10652 --- [ main] s.w.s.m.m.a.RequestMappingHandlerMapping : Mapped "{[/error]}" onto public org.springframework.http.ResponseEntity<java.util.Map<java.lang.String, java.lang.Object>> org.springframework.boot.autoconfigure.web.BasicErrorController.error(javax.servlet.http.HttpServletRequest)25 2016-08-15 14:30:18.235 INFO 10652 --- [ main] s.w.s.m.m.a.RequestMappingHandlerMapping : Mapped "{[/error],produces=[text/html]}" onto public org.springframework.web.servlet.ModelAndView org.springframework.boot.autoconfigure.web.BasicErrorController.errorHtml(javax.servlet.http.HttpServletRequest,javax.servlet.http.HttpServletResponse)26 2016-08-15 14:30:18.262 INFO 10652 --- [ main] o.s.w.s.handler.SimpleUrlHandlerMapping : Mapped URL path [/webjars/**] onto handler of type [class org.springframework.web.servlet.resource.ResourceHttpRequestHandler]27 2016-08-15 14:30:18.262 INFO 10652 --- [ main] o.s.w.s.handler.SimpleUrlHandlerMapping : Mapped URL path [/**] onto handler of type [class org.springframework.web.servlet.resource.ResourceHttpRequestHandler]28 2016-08-15 14:30:18.295 INFO 10652 --- [ main] o.s.w.s.handler.SimpleUrlHandlerMapping : Mapped URL path [/**/favicon.ico] onto handler of type [class org.springframework.web.servlet.resource.ResourceHttpRequestHandler]29 2016-08-15 14:30:18.423 INFO 10652 --- [ main] o.s.j.e.a.AnnotationMBeanExporter : Registering beans for JMX exposure on startup30 2016-08-15 14:30:18.480 INFO 10652 --- [ main] s.b.c.e.t.TomcatEmbeddedServletContainer : Tomcat started on port(s): 8080 (http)31 2016-08-15 14:30:18.485 INFO 10652 --- [ main] c.l.spring.controller.SampleController : Started SampleController in 2.209 seconds (JVM running for 2.642)32 2016-08-15 14:30:23.564 INFO 10652 --- [nio-8080-exec-1] o.a.c.c.C.[Tomcat].[localhost].[/] : Initializing Spring FrameworkServlet 'dispatcherServlet'33 2016-08-15 14:30:23.564 INFO 10652 --- [nio-8080-exec-1] o.s.web.servlet.DispatcherServlet : FrameworkServlet 'dispatcherServlet': initialization started34 2016-08-15 14:30:23.574 INFO 10652 --- [nio-8080-exec-1] o.s.web.servlet.DispatcherServlet : FrameworkServlet 'dispatcherServlet': initialization completed in 10 ms35 2016-08-15 14:30:32.002 INFO 10652 --- [2)-192.168.56.1] inMXBeanRegistrar$SpringApplicationAdmin : Application shutdown requested.36 2016-08-15 14:30:32.003 INFO 10652 --- [2)-192.168.56.1] ationConfigEmbeddedWebApplicationContext : Closing org.springframework.boot.context.embedded.AnnotationConfigEmbeddedWebApplicationContext@4a94ee4: startup date [Mon Aug 15 14:30:16 CST 2016]; root of context hierarchy37 2016-08-15 14:30:32.004 INFO 10652 --- [2)-192.168.56.1] o.s.j.e.a.AnnotationMBeanExporter : Unregistering JMX-exposed beans on shutdown
如果使用sts (Spring Tools Suite--没意外的话,后面的博客我会介绍一下),还可以用Spring Application的形式启动,信息不变,但是彩色的,如下:

⑥ 根据这个信息,我们可以看出很多东西,不过现在先访问一下吧。
默认访问地址: http://localhost:8080/
按照之前的web项目习惯,你可能会问,怎么没有项目路径?
这就是Spring Boot的默认设置了,将项目路径直接设为根路径。
当然,我们也可以设置自己的项目路径 -- 在classpath下的 application.properties 或者 application.yaml 文件中设置即可。
内容如下:
# application.yaml# Server settings (ServerProperties)server: port: 8080 address: 127.0.0.1 sessionTimeout: 30 contextPath: /aaa # Tomcat specifics tomcat: accessLogEnabled: false protocolHeader: x-forwarded-proto remoteIpHeader: x-forwarded-for basedir: backgroundProcessorDelay: 30 # secs# application.properties# Server settings (ServerProperties)server.port=8080server.address=127.0.0.1#server.sessionTimeout=30server.contextPath=/aaa# Tomcat specifics#server.tomcat.accessLogEnabled=falseserver.tomcat.protocolHeader=x-forwarded-protoserver.tomcat.remoteIpHeader=x-forwarded-forserver.tomcat.basedir=server.tomcat.backgroundProcessorDelay=30上面, server.contextPath=/aaa 就是设置了项目路径。所以现在需要访问http://localhost:8080/aaa/ 才行。
分析
OK,当目前为止,已经成功运行并访问了一个 SpringMVC 应用。简单的不能再简单了!
再来看一下启动时的信息:
第 9 行,启动SampleController。第10行,查找active profile,无,设为default。第11行,刷新上下文。第12行,初始化tomcat,设置端口8080,设置访问方式为http。第13行,启动tomcat服务。第14行,启动Servlet引擎。第15行,Spring内嵌的WebApplicationContext 初始化开始。第16行,Spring内嵌的WebApplicationContext 初始化完成。第17行,映射servlet,将 dispatcherServlet 映射到 [/] 。 第18行,映射filter,将 characterEncodingFilter 映射到 [/*] 。 第19行,映射filter,将 hiddenHttpMethodFilter 映射到 [/*] 。 第20行,映射filter,将 httpPutFormContentFilter 映射到 [/*] 。 第21行,映射filter,将 requestContextFilter 映射到 [/*] 。 第22行,查找 @ControllerAdvice。 第23行,映射路径 "{[/]}" 到 cn.larry.spring.controller.SampleController.home()。 第24行,映射路径 "{[/error]}" 到 org.springframework.boot.autoconfigure.web.BasicErrorController.error(javax.servlet.http.HttpServletRequest)。 第25行,映射路径 "{[/error],produces=[text/html]}" 到 org.springframework.web.servlet.ModelAndView org.springframework.boot.autoconfigure.web.BasicErrorController.errorHtml(javax.servlet.http.HttpServletRequest,javax.servlet.http.HttpServletResponse)。 第26行,略。 第27行,略。 第28行,略。 第29行,略。 第30行,tomcat启动完毕。 第31行,SampleController启动耗费的时间。 第32行,初始化 dispatcherServlet 。 第33行,dispatcherServlet 的初始化已启动。 第34行,dispatcherServlet 的初始化已完成。 第35行,收到shutdown关闭请求。 第36行,关闭AnnotationConfigEmbeddedWebApplicationContext。 第37行,略。从上面的启动信息中可以明显看到SpringMVC的加载过程,特别需要注意的是这种默认方式下加载的几个 filter 。
这里就不再介绍了,具体可以见本文末尾最后三个链接。
参考:
Spring Boot——开发新一代Spring Java应用Spring Boot的启动器Starter详解深入学习微框架:Spring Boot Spring MVC过滤器-RequestContextFilterSpring MVC过滤器-HttpPutFormContentFilterSpring MVC过滤器-HiddenHttpMethodFilter- Spring boot 学习知识点
- spring-boot学习
- Spring Boot 学习(一)
- spring-boot学习笔记
- Spring Boot学习笔记
- spring-boot 深入学习
- spring -boot 搭建学习
- spring boot示例学习
- Spring Boot 学习
- Spring Boot学习笔记
- spring boot 入门学习
- spring boot 学习笔记
- spring boot学习
- Spring Boot学习
- Spring Boot学习笔记
- Spring Boot学习笔记
- 学习spring boot
- Spring Boot 学习笔记
- Jquery.media.js实现网页在线预览pdf文件
- React学习之路(一)
- 微博第三方登录
- java反序列化php序列化的对象
- Tslib-1.4的嵌入式移植
- Spring Boot学习
- 测试
- 第69讲 php面向对象中的析构方法
- mongodb
- thinkphp中的session的使用和理解!
- 【Leetcode-Easy-198】House Robber
- 读写锁实现读写者问题
- [复习]欧几里得 最大公约数与最小公倍数
- 多功能电子钟


