UISearchController 教程-开始
来源:互联网 发布:工作两年程序员 编辑:程序博客网 时间:2024/05/18 00:53
原文:UISearchController Tutorial: Getting Started
作者:Tom Elliott
译者:kmyhy更新说明:本教程由 Tom Elliott 升级为 Xcode 9 beta,Swift 4 和 iOS 11。原教程作者是 Andy Pereira。
对于用户来说,在海量数据中滚动列表是一件缓慢而痛苦的事情。当和海量数据打交道时,允许用户查找某些内容是一件至关紧要的事情。UIKit 中包含了 UISearchBar,它和 UITableView 是无缝对接的,允许用户进行快速的、响应式的信息过滤。
在这篇 UISearchController 教程中,你会编写一个基于标准 table view 的、实现了搜索功能的 Candy app。你将用 UISearchController 为 table view 提供搜索能力,支持动态过滤以及一个可选的 scope bar。最后,让你的 app 对用户更加友好,满足用户的迫切需求。
准备好了吗?那就让我们开始吧。
开始
从这里下载开始项目,然后打开项目。这个 app 已经包含了一个 navigation controller。在 Xcode 项目导航器中,选中项目文件 CandySearch,然后在 target 中选择 CandySearch,在 signing 栏将 team 修改为你的开发 team。Build & run,你会看到一个空列表:
回到 Xcode,在 Candy.swift 中定义有一个结构体,用于存储每块糖果的显示信息。该结构体有两个属性:category 和 name。
当用户在 app 中搜索某种糖果时,将使用搜索字串对 name 属性进行匹配。在本教程后期实现 scope bar 时你会用到 category 属性。
渲染 table view
打开 MasterViewController.swift。其中 candies 属性用于管理各种 Candy 对象,用户将在这些对象中进行搜索。说到这里,我们还没有添加糖果呢!
在本教程中,你只消创建固定数量的糖果以演示 search bar 的使用就行了;如果是真实的 app,你可能要在成千上万个对象中进行搜索。但无论 app 要搜索的对象有多少,方法都是同样的。这种方法的最大优点就在于可伸缩性!
要填充糖果数组,请 viewDidLoad() 方法的 super.viewDidLoad() 一句后添加:
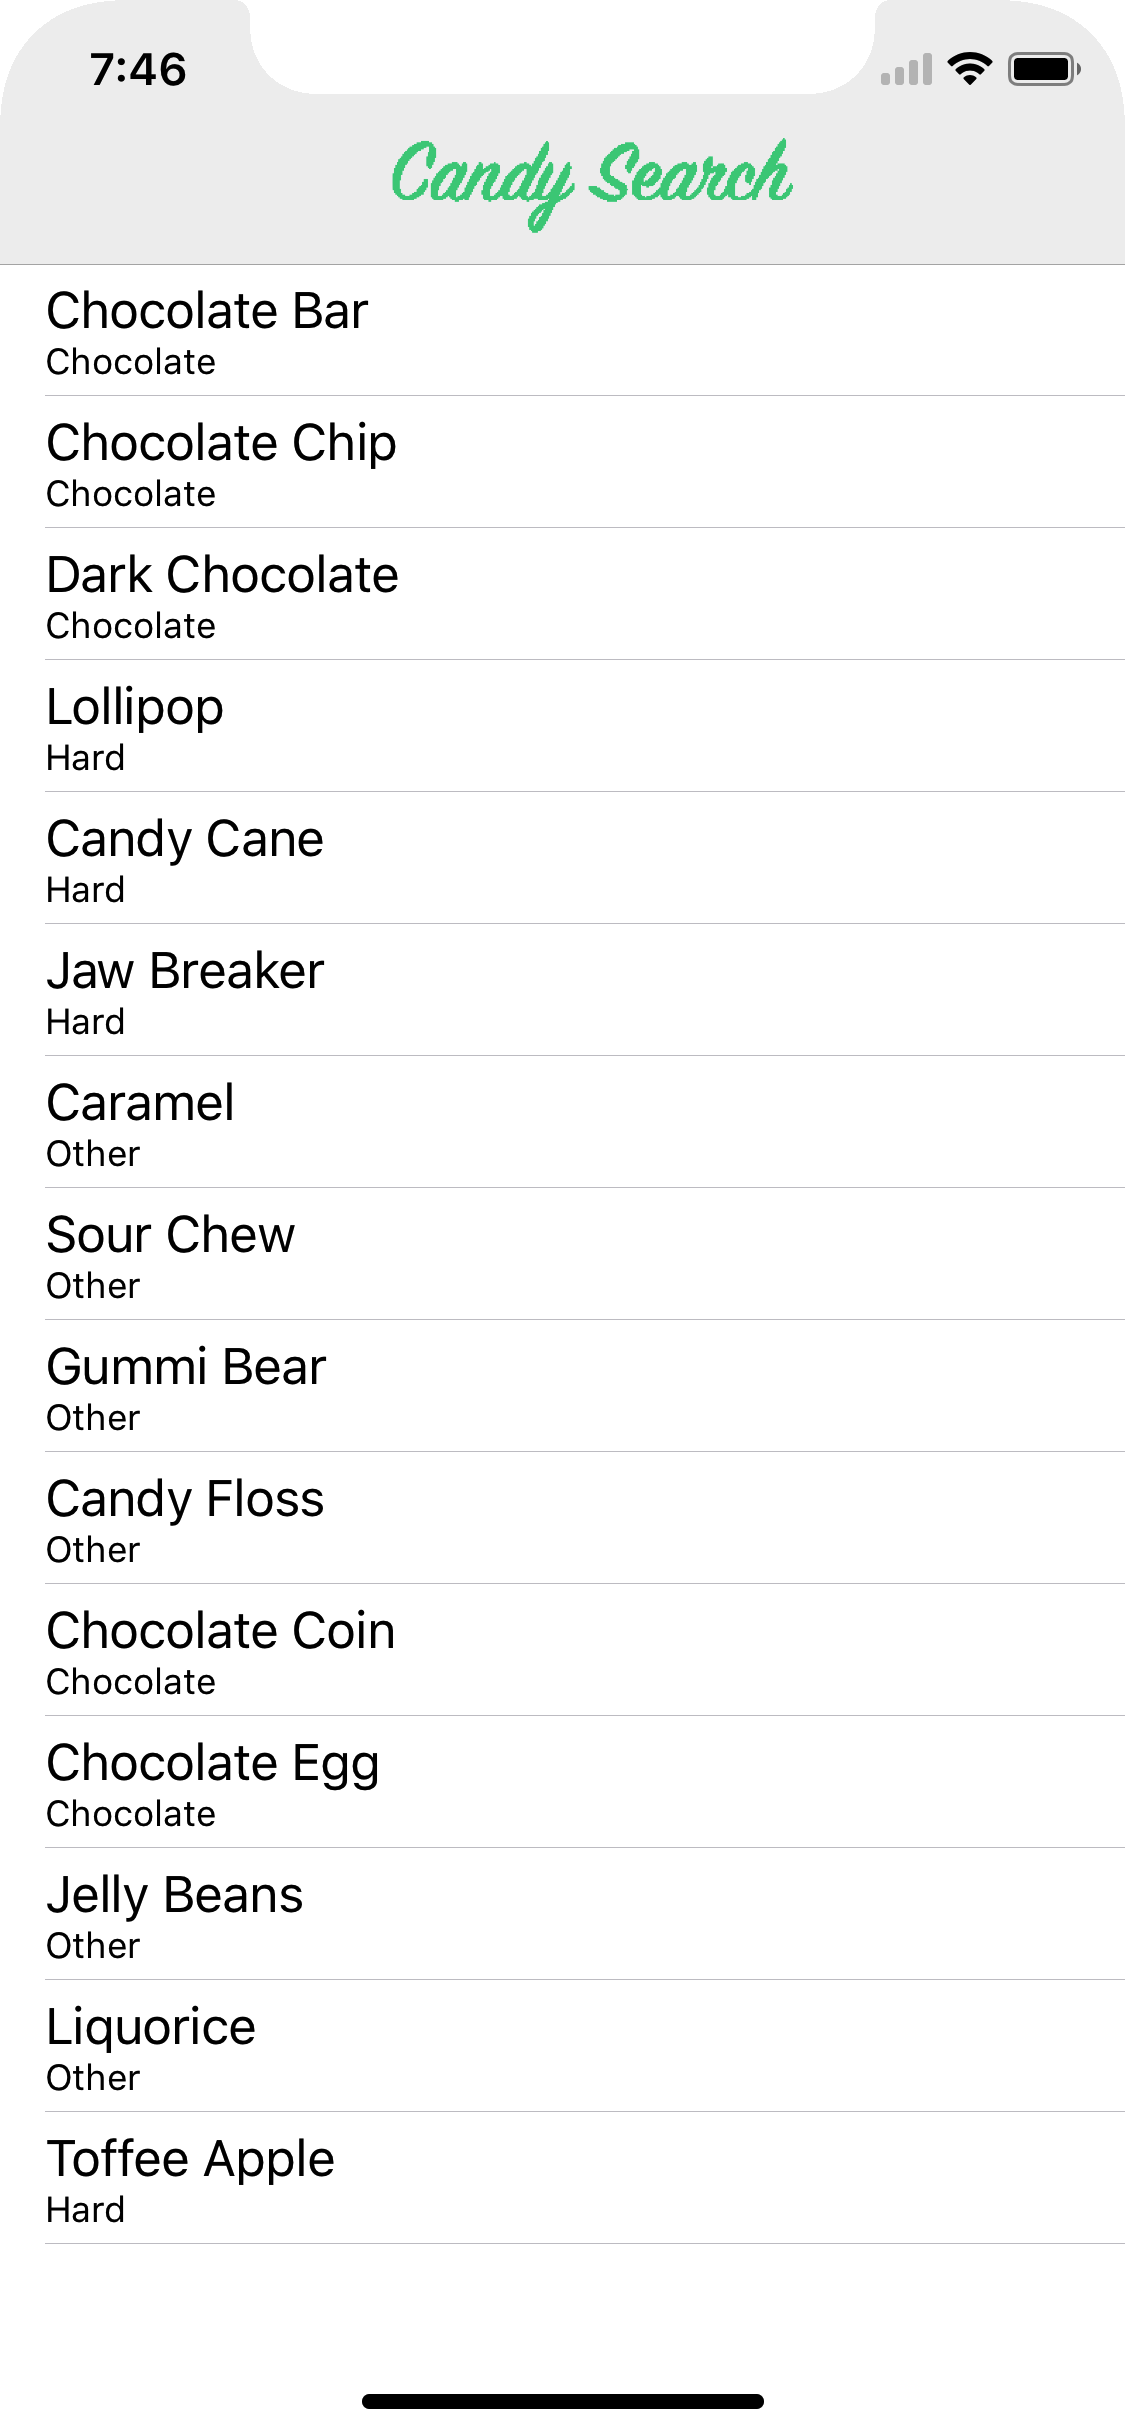
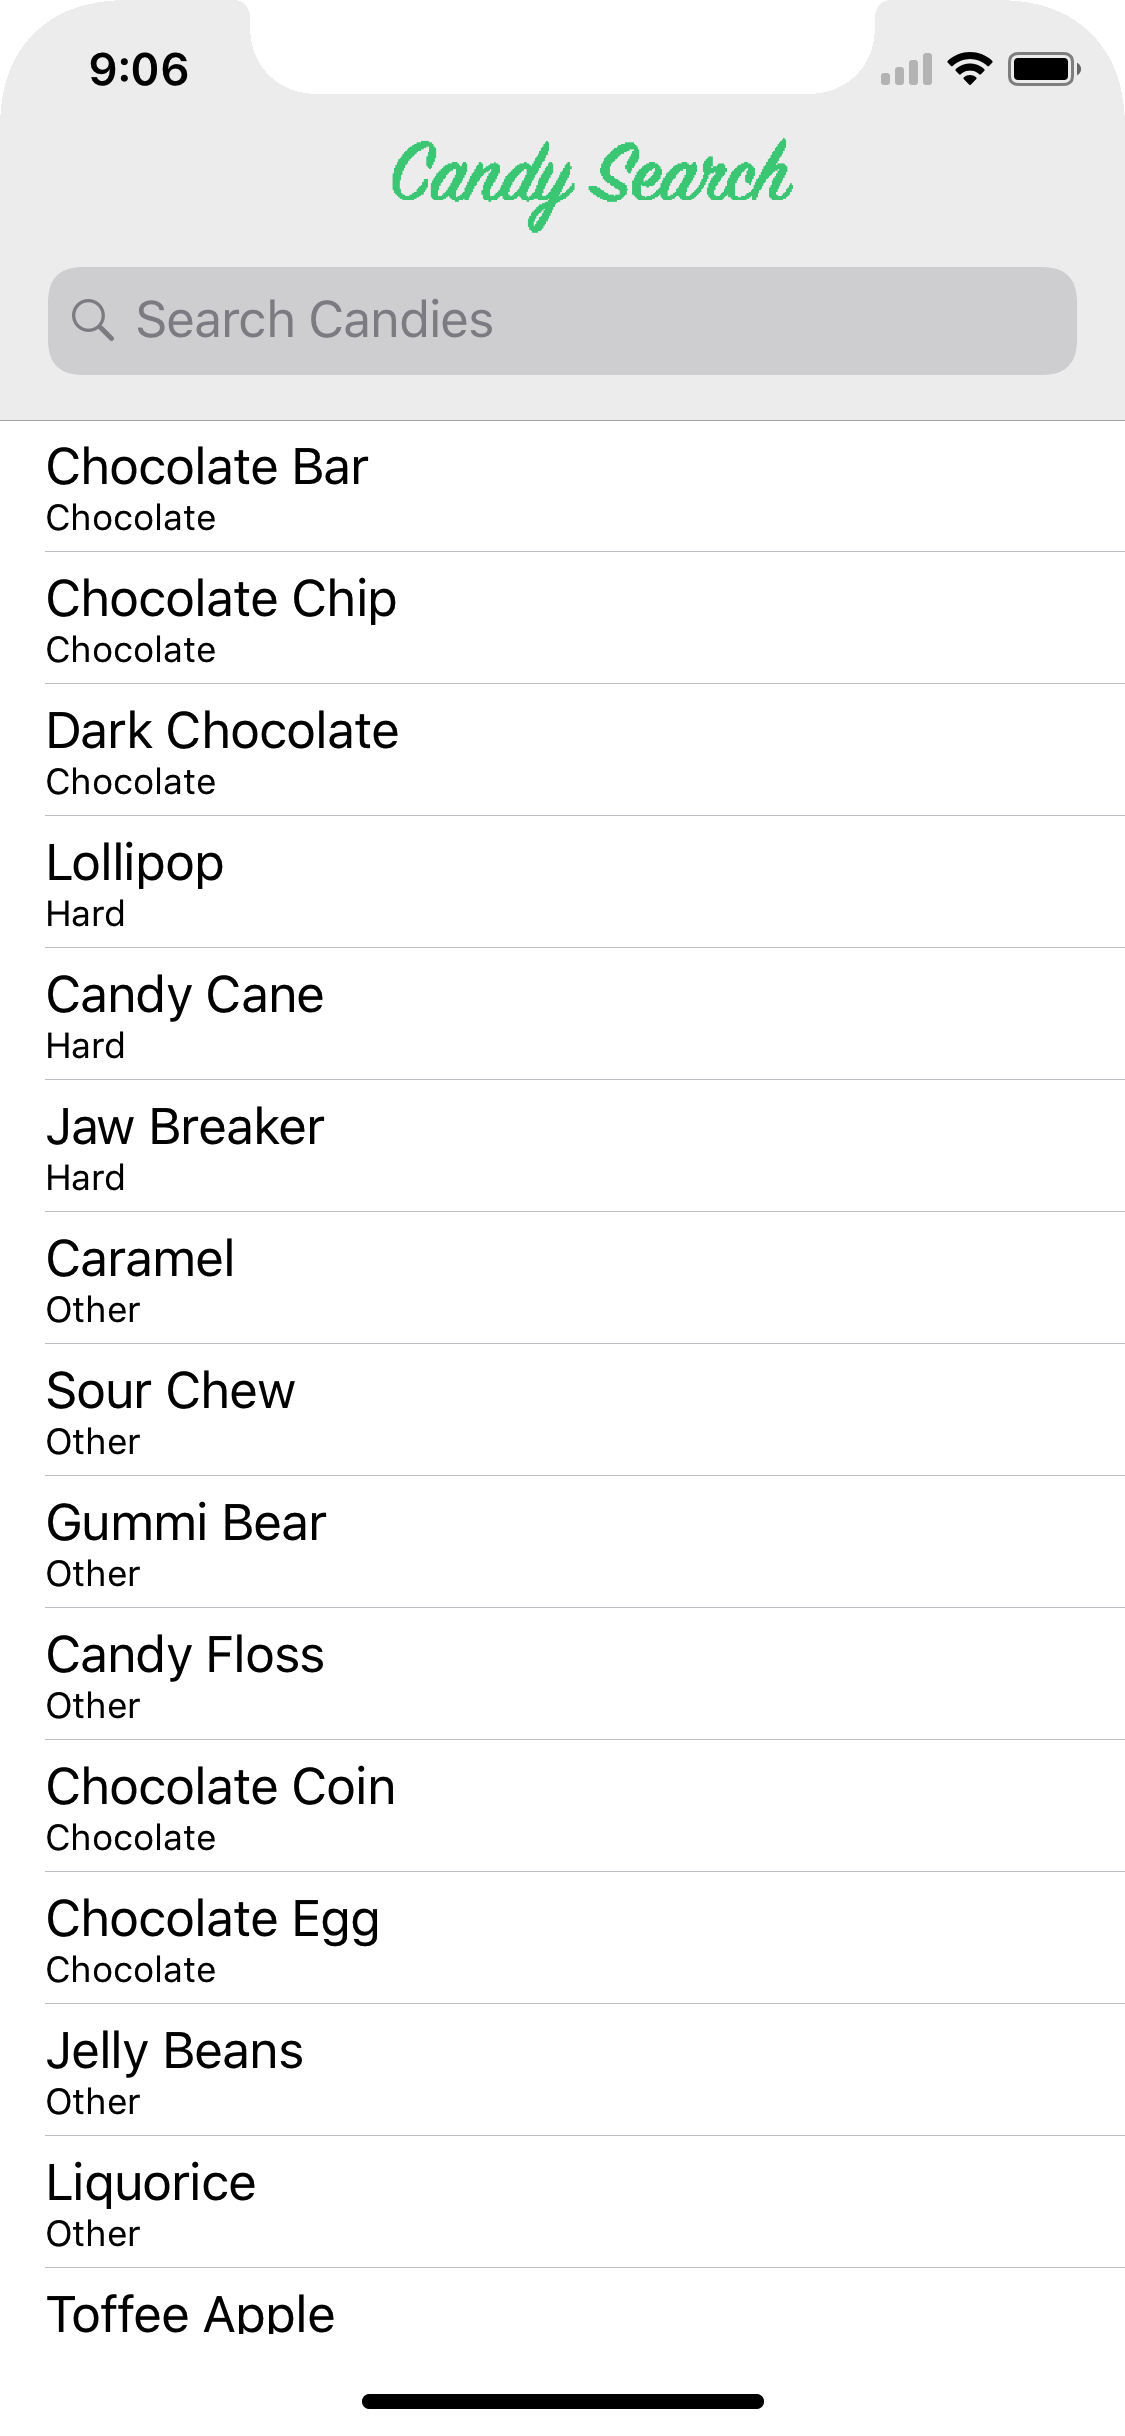
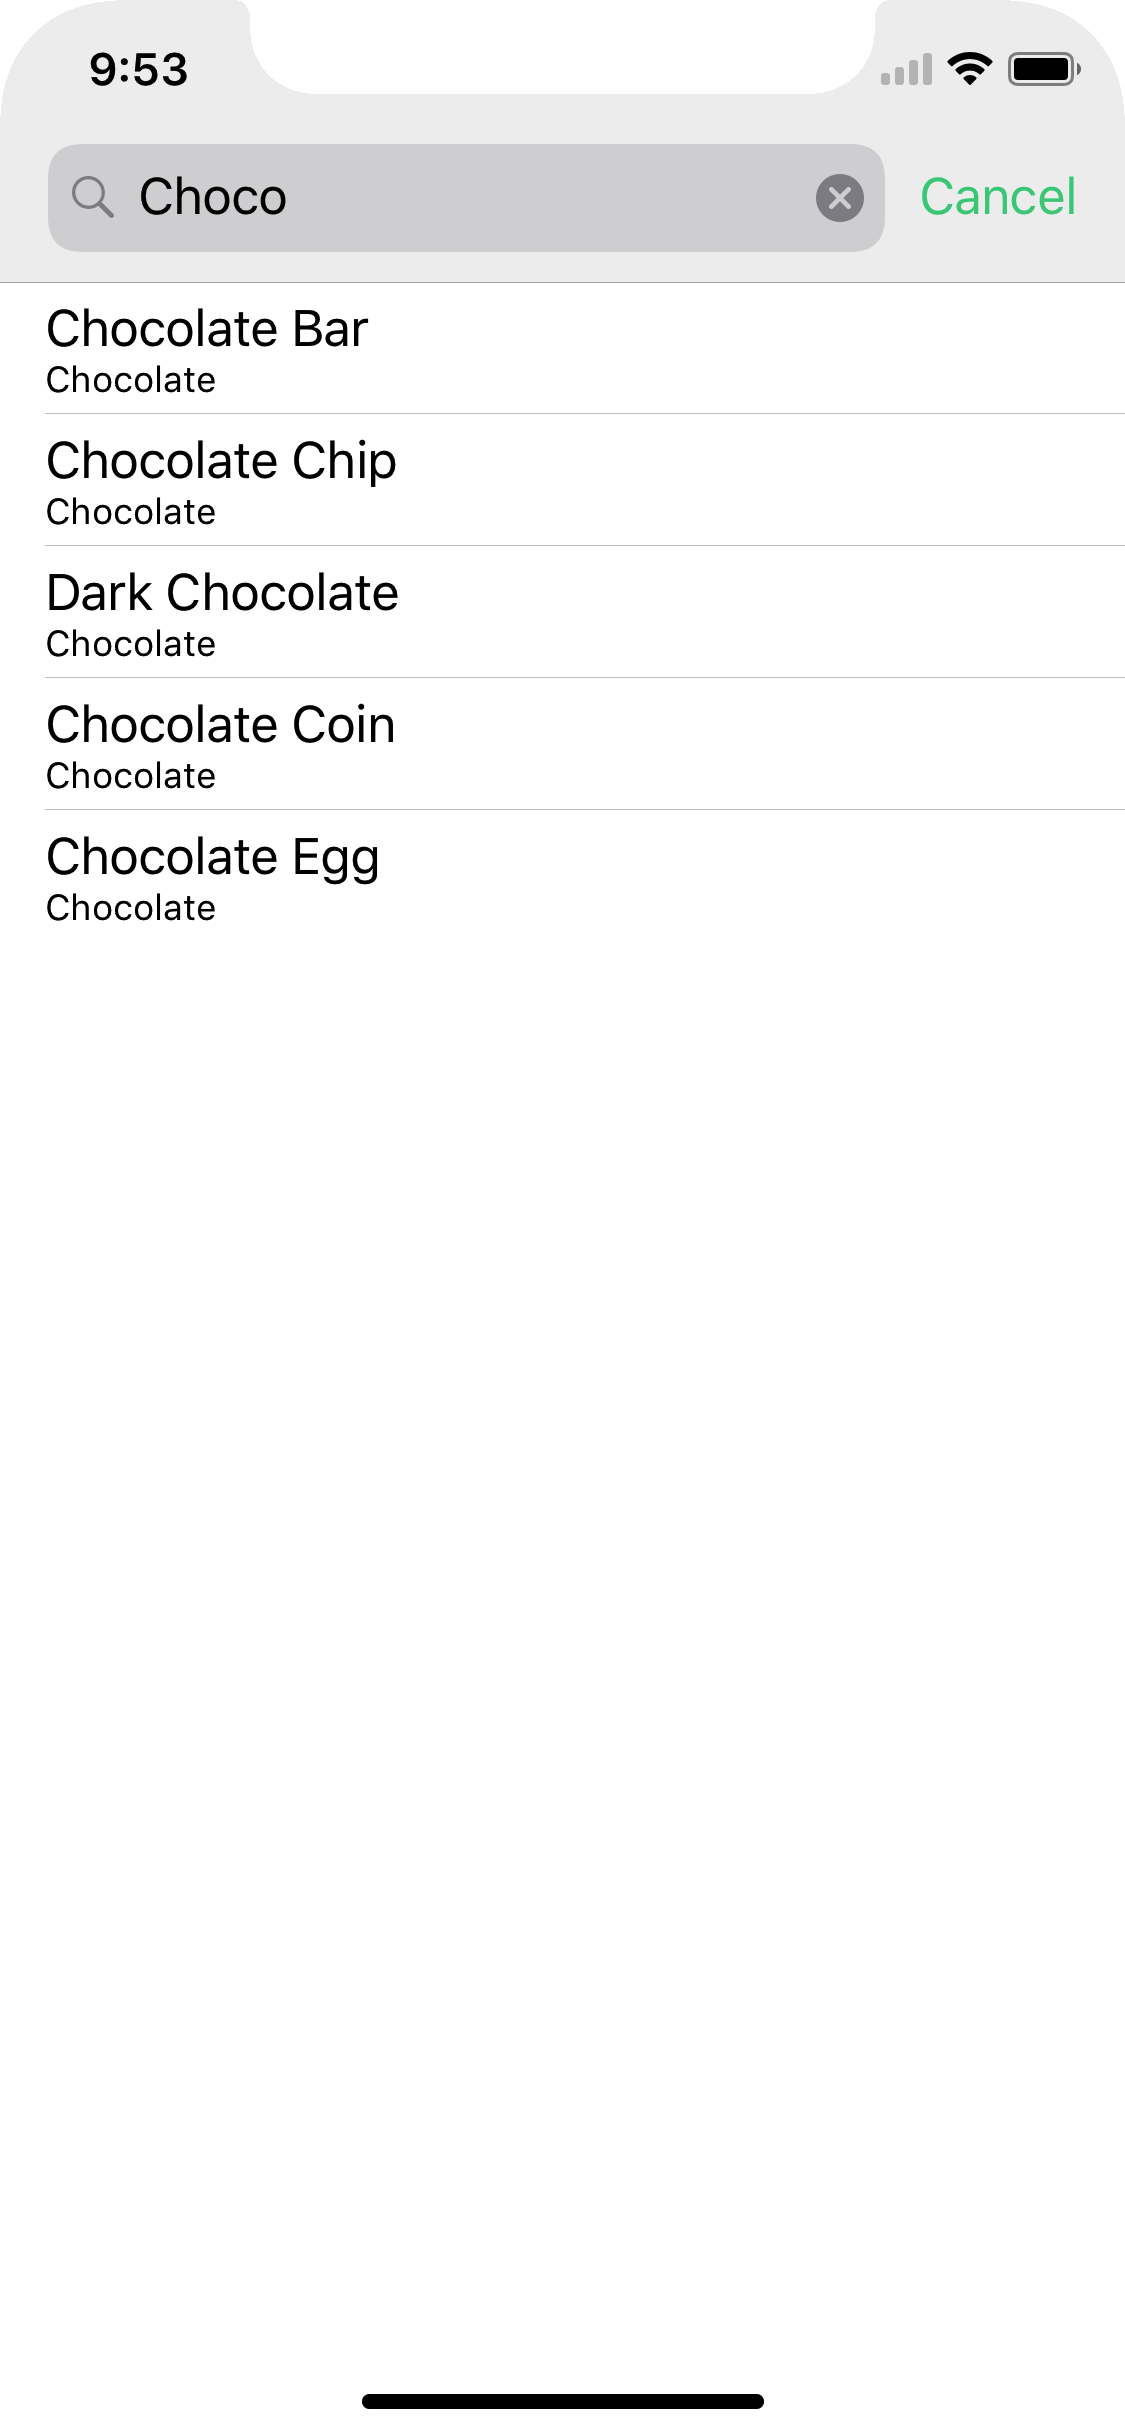
candies = [ Candy(category:"Chocolate", name:"Chocolate Bar"), Candy(category:"Chocolate", name:"Chocolate Chip"), Candy(category:"Chocolate", name:"Dark Chocolate"), Candy(category:"Hard", name:"Lollipop"), Candy(category:"Hard", name:"Candy Cane"), Candy(category:"Hard", name:"Jaw Breaker"), Candy(category:"Other", name:"Caramel"), Candy(category:"Other", name:"Sour Chew"), Candy(category:"Other", name:"Gummi Bear"), Candy(category:"Other", name:"Candy Floss"), Candy(category:"Chocolate", name:"Chocolate Coin"), Candy(category:"Chocolate", name:"Chocolate Egg"), Candy(category:"Other", name:"Jelly Beans"), Candy(category:"Other", name:"Liquorice"), Candy(category:"Hard", name:"Toffee Apple")]Build & run。因为 Table view 的 delegate 和 dataSource 方法都是已经写好的,你会发现 table view 已经能够显示出列表了:
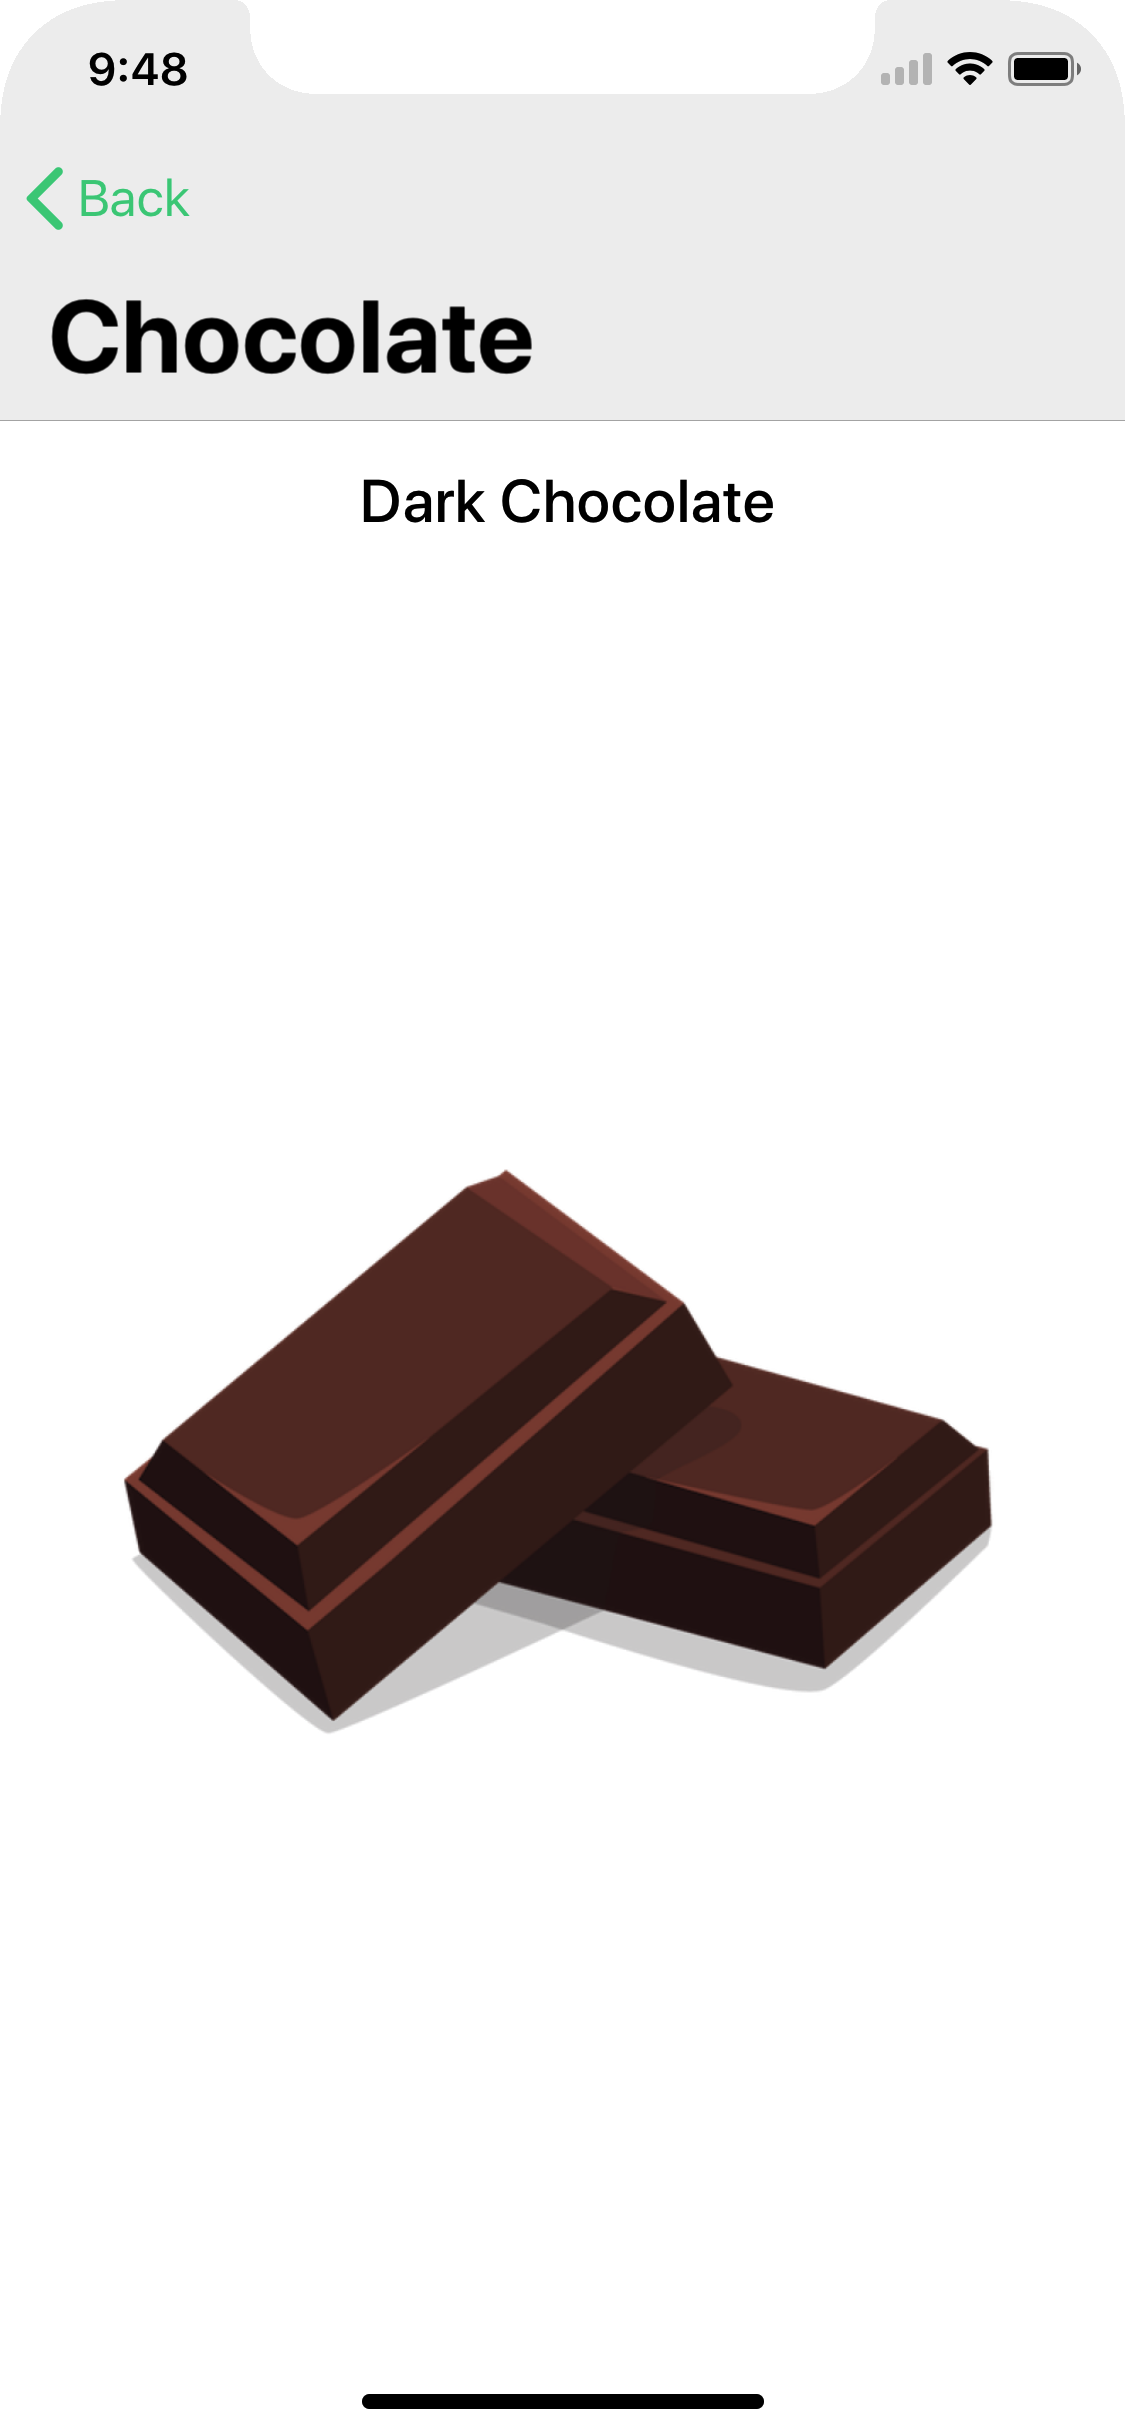
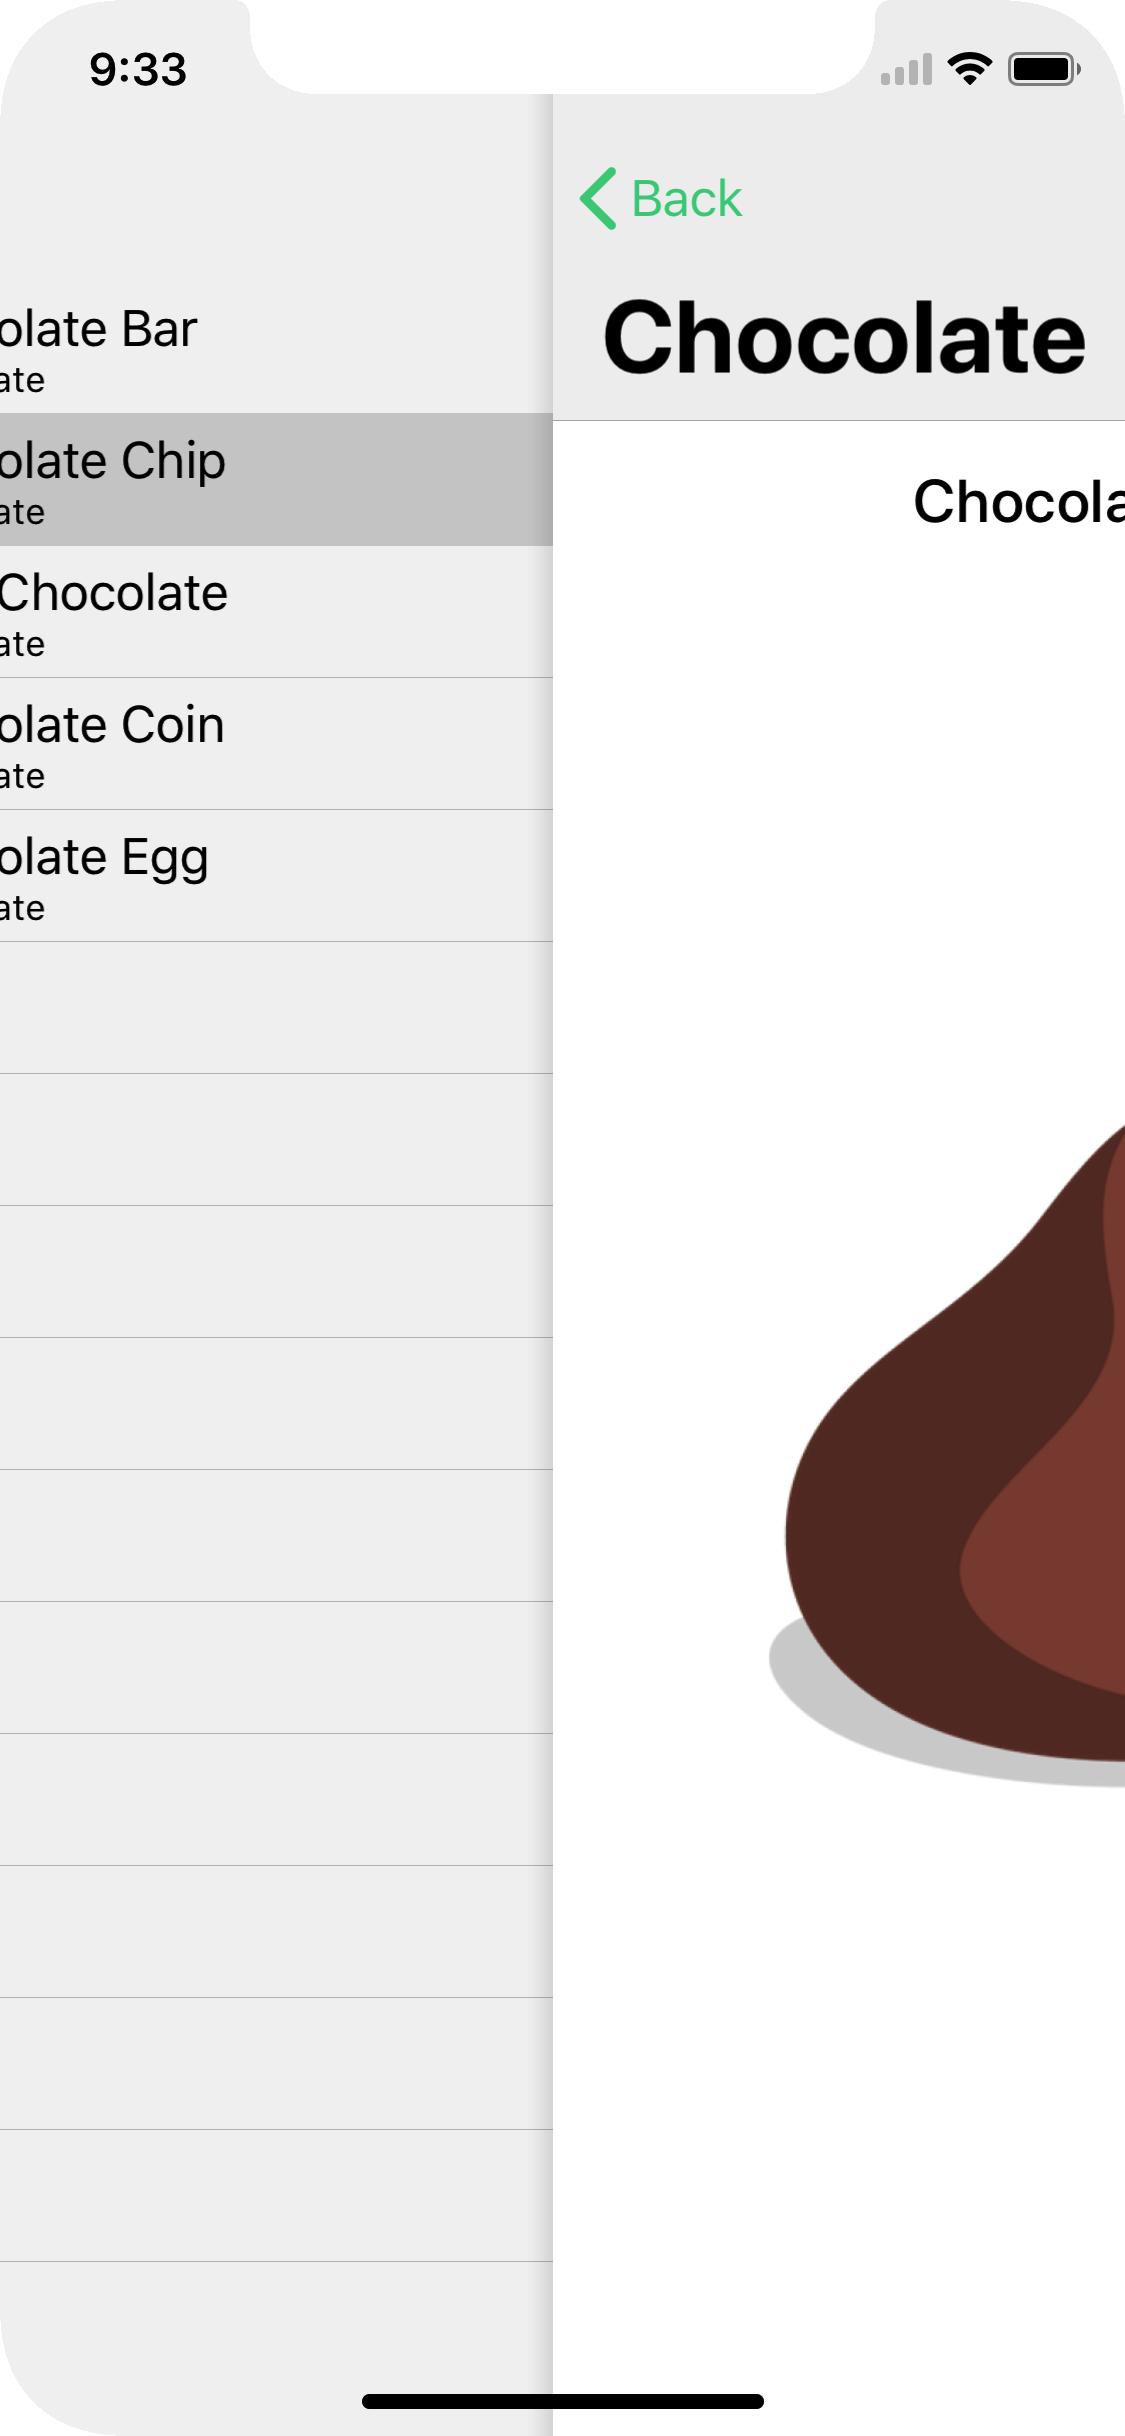
点击某行,糖果的详情页面会显示:
好多糖糖!要找到你想要的糖果还是要费点事的!你必须要用到 UISearchBar 了。
UISearchController 介绍
如果你翻阅 UISearchController 的文档,你将发现文档非常少。它根本没有实现任何和搜索相关的功能。这个类只是向用户提供了一个标准的接口,具体还得靠 iOS app 来实现。
UISearchController 会和一个 delegate 协议打交道,由 app 的其它部分来了解用户在做什么。你需要自己实现字符串匹配的实际功能。
虽然这看起来有点吓人,但定制化的查找功能允许你牢牢地控制 app 应该返回某些特定的结果集。 用户总是希望搜索是智能化的——以及快速的。
如果你曾经用过 table view 的搜索功能,你可能知道 UISearchDisplayController。从 iOS 8 开始,这个类被抛弃,用 UISearchController 来替代,后者简化了搜索的过程。
不幸的是,在写到本文为止,IB 不支持 UISearchController。因此你必须以编码的方式来创建 UI 了。
在 MasterViewController.swift 中,在 candies 数组的定义之下添加一个新属性:
let searchController = UISearchController(searchResultsController: nil)searchResultsController 的初始值指定为 nil,是告诉 search controller,你想将正在查找的 table view 来显示搜索结果。如果你在这里指定一个不同的 view controller,那么就会用那个 view controller 来显示结果。
要让 MasterViewController 能够实时响应 search bar,必须实现 UISearchResultsUpdating。这个协议定义了根据用户输入来动态改变搜索结果的方法。
还是在 MasterViewController.swift 中,添加一个扩展:
extension MasterViewController: UISearchResultsUpdating { // MARK: - UISearchResultsUpdating Delegate func updateSearchResults(for searchController: UISearchController) { // TODO }}updateSearchResults(for:) 方法是你的类必须实现的唯一的 UISearchResultsUpdating 协议方法。稍后你会填充这个方法。
现在,你需要为 searchController 设置几个属性。还是在 MasterViewController.swift,在 viewDidLoad() 方法的 super.viewDidLoad() 后添加:
// Setup the Search Controller searchController.searchResultsUpdater = self searchController.obscuresBackgroundDuringPresentation = false searchController.searchBar.placeholder = "Search Candies" navigationItem.searchController = searchController definesPresentationContext = true代码解释如下:
- searchResultsUpdater 是 UISearchController 的一个属性,它实现了新的 UISearchResultsUpdating 协议。这个协议允许你自己的类接收 UISearchBar 的文本改变通知。
- 默认,UISearchController 会以半透明遮罩的形式呈现。如果你用另一个 view controller 作为 searchResultsController 时会使用到这个属性。这里,你使用当前 view 来显示结果,因此就不需要遮罩层了。
- 设置 searchBar 的 placeholder 文本。
- iOS 11 中的新特性,将 searchBar 添加到 NavigationItem 中。这是必须的,为了让 IB 和 UISearchController 兼容。
5.最后,设置 view controller 的 definesPresentationContext 为 true,确保当用户从 UISearchController 跳转到另一个 view controller 时 search bar 不再显示。
UISearchResultsUpdating 和过滤
创建好 search controller 之后,你必须写一些代码让它能够使用。首先,在 MasterViewController 顶部添加属性:
var filteredCandies = [Candy]()这个属性用于保存用户搜索到的糖果。
然后,在 MasterViewController 主类中添加助手方法:
// MARK: - Private instance methodsfunc searchBarIsEmpty() -> Bool { // Returns true if the text is empty or nil return searchController.searchBar.text?.isEmpty ?? true}func filterContentForSearchText(_ searchText: String, scope: String = "All") { filteredCandies = candies.filter({( candy : Candy) -> Bool in return candy.name.lowercased().contains(searchText.lowercased()) }) tableView.reloadData()}searchBarIsEmpty() 不用解释。
filterContentForSearchText(_:scope:) 方法根据 searchText 来过滤糖果,然后将结果放到 filteredCandies 数组。先不管 scope: 参数,后面才会用到它。
filter() 函数需要一个闭包参数,闭包类型是 (candy: Candy) -> Bool。它会对数组中的元素进行遍历,然后将每个元素都传递给这个闭包并调用闭包。
你可以用这个闭包来决定某个糖果是否应该作为搜索结果中的一部分并呈现给用户。如果这个糖果应该放到 filteredCandies 数组中,返回 true,否者返回 false。
要判断是否应该返回,你可以用 contains(_:) 方法检查糖果的名称是否匹配 searchText。在进行比较之前,需要将两个字符串都转换成小写。
注意:大部分情况下,用户在搜索时都不关系字符是大写还是小写,因此我们只需要将输入的文字转换成小写并和糖果名字的小写字符进行比较,进行一个大小写不敏感的查找。现在,你可以输出 Chocolate 也可以输入 chocolate,都可以得到一样的结果。这相当不错吧?
还记得 UISearchResultsUpdating 协议吗?在 updateSearchResults(for:)方法中只有一个 TODO 注释。现在,你刚刚写好了一个方法,这样当我们想刷新查找结果时就可以直接调用这个方法了。
将 updateSearchResults(for:) 方法中的 TODO 注释修改为对 filterContentForSearchText(_:scope:) 的调用:
filterContentForSearchText(searchController.searchBar.text!)现在,当用户在 search bar 中删除或者输入每个字符时,UISearchController 都会通过回调 updateSearchResults(for:) 方法来通知 MasterViewController 类,同时会调用 filterContentForSearchText(_:scope:)。
Build & run,你会看到在b表格释放多出了一个 search bar。
但是,当你输入某些搜索关键字时,仍然没有获得搜索结果。为什么?因为你还没有添加代码,让 table view 知道什么时候使用这些搜索结果。
刷新 Table View
回到 MasterViewController.swift,添加一个方法,判断当前是不是正在查找:
func isFiltering() -> Bool { return searchController.isActive && !searchBarIsEmpty()}然后,修改 tableView(_:numberOfRowsInSection:) 方法:
func tableView(_ tableView: UITableView, numberOfRowsInSection section: Int) -> Int { if isFiltering() { return filteredCandies.count } return candies.count}修改的地方不多,只是简单地检查用户是不是正在进行查找,并根据情况使用 filteredCandies 或者 candies 数组作为表格数据源。
然后,修改 tableView(_:cellForRowAt:) 方法为:
func tableView(_ tableView: UITableView, cellForRowAt indexPath: IndexPath) -> UITableViewCell { let cell = tableView.dequeueReusableCell(withIdentifier: "Cell", for: indexPath) let candy: Candy if isFiltering() { candy = filteredCandies[indexPath.row] } else { candy = candies[indexPath.row] } cell.textLabel!.text = candy.name cell.detailTextLabel!.text = candy.category return cell}两个方法都会调用 isFiltering(),这个方法会判断 searchController 的 active 属性来决定要显示哪个数组。
当用户点击 search bar 的搜索栏时,active 属性会被设置为 true。如果 search controller 的 active 属性为 true,同时用户输入的内容不为空,将使用 filteredCandies 数组中的数据。否则,使用完整的糖果数据。
再说一遍,search controller 会自动处理结果 Table view 的显示隐藏,因此你只需要根据 controller 的状态以及用户是否搜索到结果来提供正确的数据(过滤的数组或者完整的数组)就可以了。
Build & run。你已经拥有一个能够过滤表格行的 search bar 了。
用一下这个 app,看看怎么才能搜到各种糖果。还有几个地方有问题。当你从搜索结果中选中一行,你会看到详情页显示的是别的糖果!让我们来解决它。
将数据传递给详情页
在向详情页传递数据时,你必须让这个 view controller 知道用户正处于什么环境:完整列表还是搜索结果。
还是在 MasterViewController.swift 中,在 prepare(for:sender:) 方法中,找到下列代码:
let candy = candies[indexPath.row]将它替换成:
let candy: Candyif isFiltering() { candy = filteredCandies[indexPath.row]} else { candy = candies[indexPath.row]}这里,先用 isFiltering() 进行判断,在执行 detail view controller 的 segue 时提供正确的糖果对象。
Build & run,执行这些代码,看 app 是否能够正确从主列表或者搜索列表导航到详情页。
用 Scope Bar 过滤结果集
如果你想给用户提供另外一种过滤结果集的方式,你可以用一个 Scope Bar 附加到你的 search bar 上,用于根据类别来过滤糖果。它会根据你在创建 candies 数组时糖果对象的不同类别进行过滤:巧克力、硬糖和其它。
首先,你必须在 MasterViewController 中创建一个 scope bar。这个 scope bar 是一个 segmented 控件,用于将搜索范围缩小到某个范围。具体是什么样的范围可以由你来定义。在这个例子中,它指的就是通过的种类,当然也可以是其它,比如型号、范围或者别的什么。
scope bar 的使用非常简单,只需要实现一个委托方法。
在 MasterViewController.swift,再加一个扩展实现 UISearchBarDelegate。在 UISearchResultsUpdating 扩展之后添加:
extension MasterViewController: UISearchBarDelegate { // MARK: - UISearchBar Delegate func searchBar(_ searchBar: UISearchBar, selectedScopeButtonIndexDidChange selectedScope: Int) { filterContentForSearchText(searchBar.text!, scope: searchBar.scopeButtonTitles![selectedScope]) }}当用户切换 scope bar 按钮时这个委托方法会调用。这时,你可能想重新进行过滤,因此用新的 scope 值调用 filterContentForSearchText(_:scope:) 方法。
然后修改 filterContentForSearchText(_:scope:) 方法,用上这个 scope 参数:
func filterContentForSearchText(_ searchText: String, scope: String = "All") { filteredCandies = candies.filter({( candy : Candy) -> Bool in let doesCategoryMatch = (scope == "All") || (candy.category == scope) if searchBarIsEmpty() { return doesCategoryMatch } else { return doesCategoryMatch && candy.name.lowercased().contains(searchText.lowercased()) } }) tableView.reloadData()}这里对糖果的 category 和 scope bar 传入的 scope 进匹配(或者判断 scope 是否为 All)。然后判断 search bar 中是否输入了内容,然后再过滤糖果。你还要修改 isFiltering() 方法,当 scope bar 被选中时返回 true。
func isFiltering() -> Bool { let searchBarScopeIsFiltering = searchController.searchBar.selectedScopeButtonIndex != 0 return searchController.isActive && (!searchBarIsEmpty() || searchBarScopeIsFiltering)}差不多就这样了,但范围过滤机制还不算完整。你必须修改第一个类扩展中的 updateSearchResults(for:) 方法,让它能够将当前选择的 scope 传递出去:
func updateSearchResults(for searchController: UISearchController) { let searchBar = searchController.searchBar let scope = searchBar.scopeButtonTitles![searchBar.selectedScopeButtonIndex] filterContentForSearchText(searchController.searchBar.text!, scope: scope)}还有一个问题是用户还不能看见 scope bar。要添加 scope bar,请先找到 search controller 一开始创建时的代码。在 MasterViewController.swift 的 viewDidLoad() 方法中,在对 candies 进行赋值之前添加:
// Setup the Scope BarsearchController.searchBar.scopeButtonTitles = ["All", "Chocolate", "Hard", "Other"]searchController.searchBar.delegate = self这会在 search bar 上添加一个 scope bar,同时将糖果的 category 作为 scope bar 的标题。你也添加了一个“全部”(All) ,以便在搜索时忽略糖果的 category。
现在,你输入时,选定的 scope 按钮和搜索文本将同时起作用。
Build & run。输入几个字符,改变搜索范围。
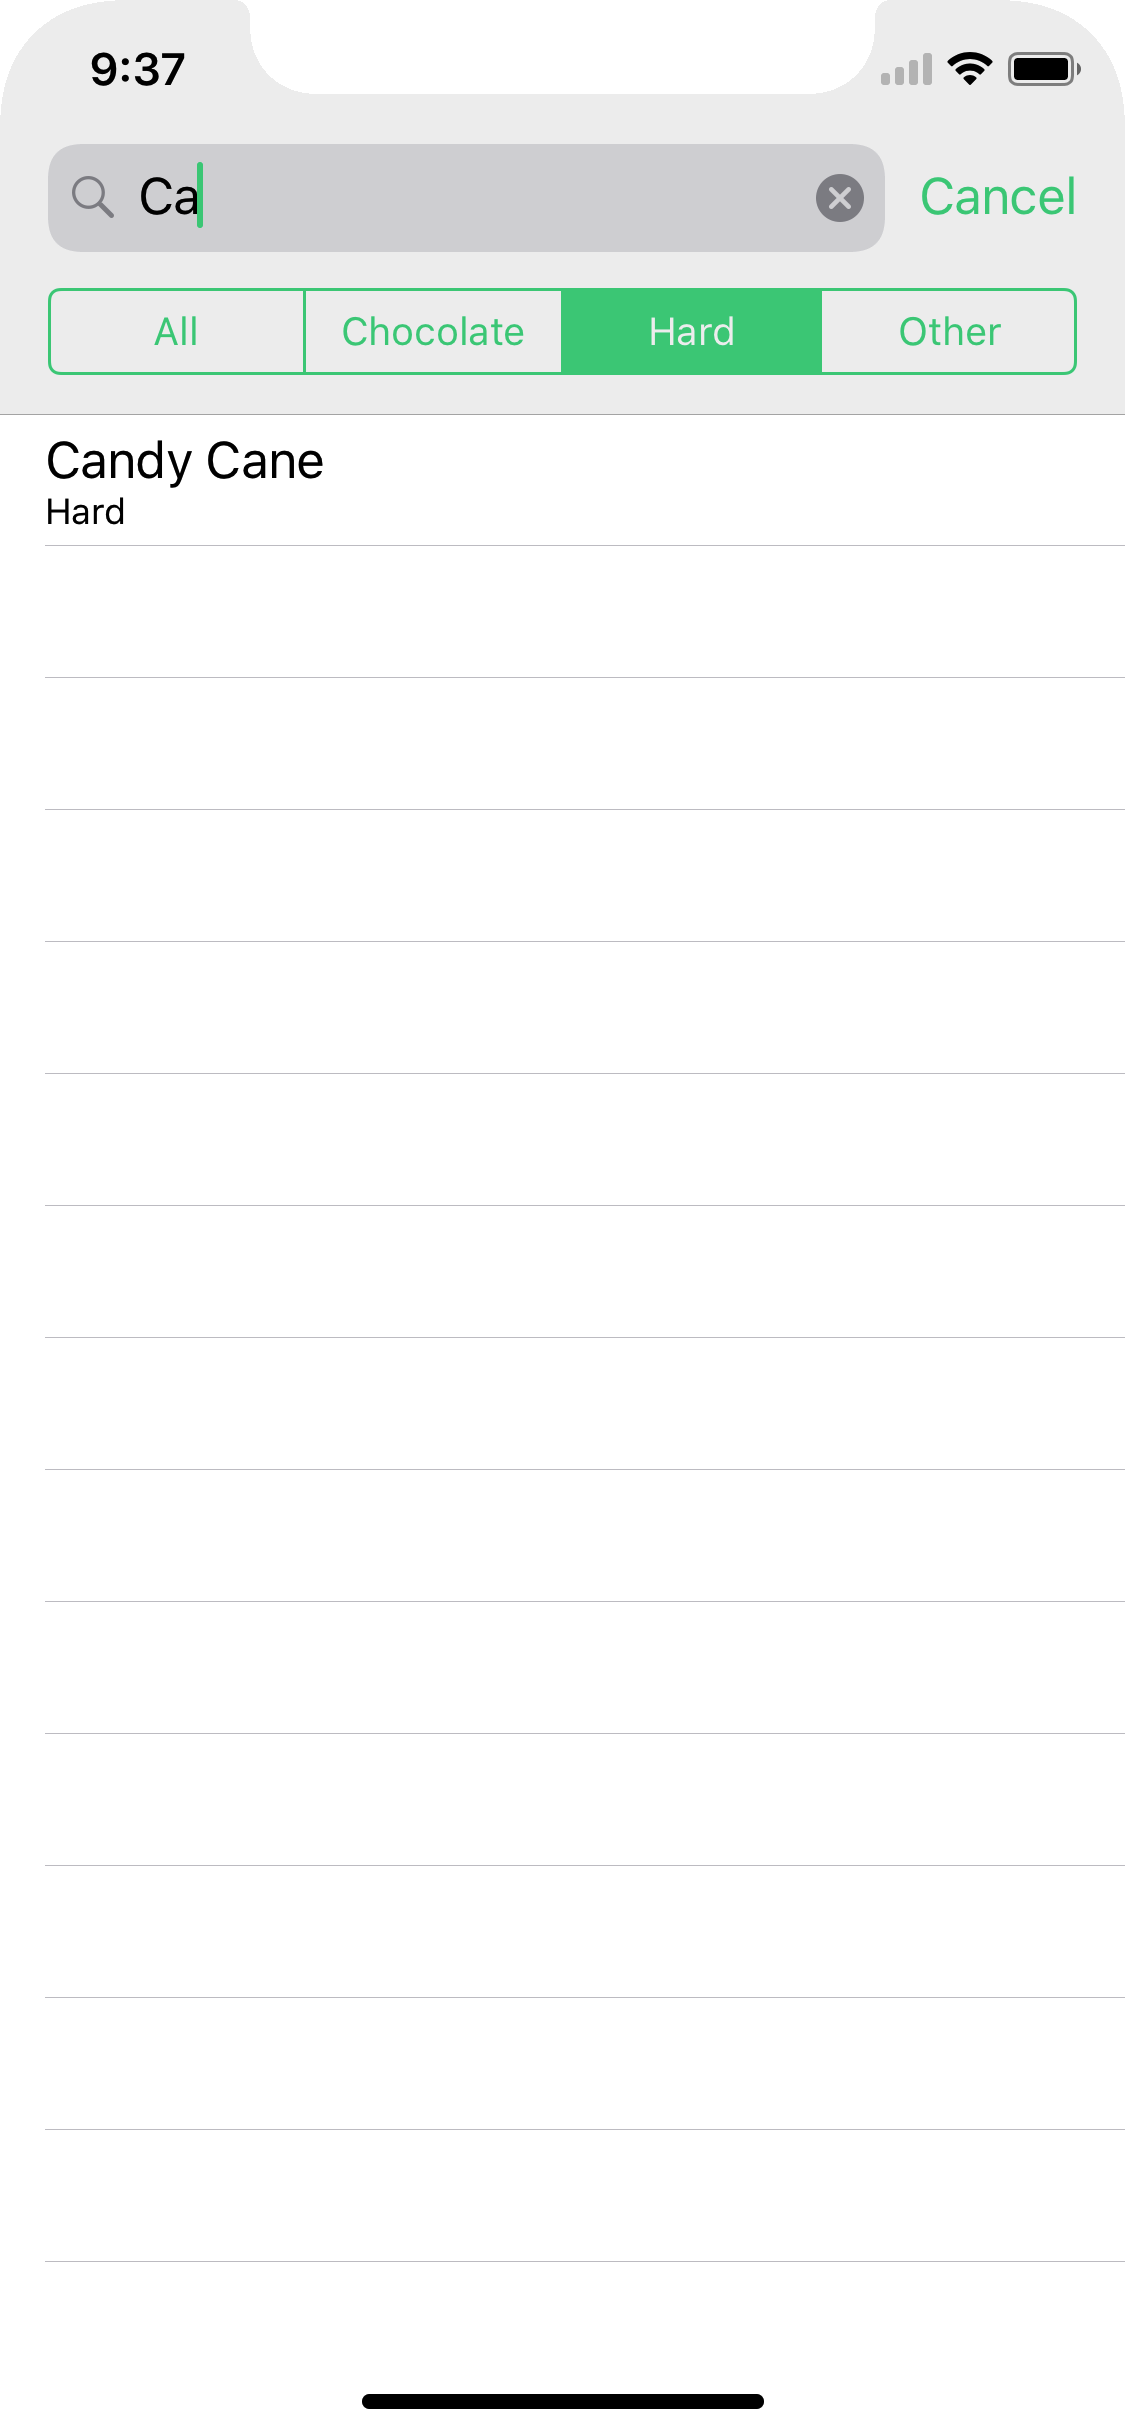
输入 caramel,范围选择 All。结果显示在列表中,但如果你将范围缩小到 Chocolate,caramel 会不见,因为它不是巧克力呀!
还有一小点问题。我们没有显示结果集的条数。当根本没有结果集返回的时候这尤其重要,因为用户很难明白这到底是没有搜到结果呢,还是网速太慢需要等待。
添加结果数显示
要解决这个问题,我们需要在视图中添加一个 footer。它会在正在过滤糖果列表时显示,告诉用户搜索结果数组中有多少糖果。打开 SearchFooter.swift在。在一个简单的 UIView 中已经包含了一个 label,以及一个用于告诉搜索结果集条数的公有方法。
回到 MasterViewController.swift。在类头部,这个 footer 的 IBOutlet 已经是现成的了,在 Main.storyboard 中 master 场景的底部你可以看见它。在 viewDidLoad() 方法创建 scope bar 之后添加:
// Setup the search footertableView.tableFooterView = searchFooter这句将自定义的 footer 设置为 table view 的 footer view。然后,当搜索文本发生改变时修改它的结果集条数。将 tableView(_:numberOfRowsInSection:) 修改为:
func tableView(_ tableView: UITableView, numberOfRowsInSection section: Int) -> Int { if isFiltering() { searchFooter.setIsFilteringToShow(filteredItemCount: filteredCandies.count, of: candies.count) return filteredCandies.count } searchFooter.setNotFiltering() return candies.count}这里仅仅是调用了 searchFooter 的方法。
Build & run,进行一些搜索,当搜索结果返回时观察 footer 的变化。你必须点击 search 按钮才能隐藏键盘并看见这个 footer。


接下来做什么?
恭喜你——你的 app 已经可以直接在主 table view 中进行搜索了。
本教程的示例项目在此处下载。
table view 在所有 app 中都会用到,提供搜索选项是一种非常好的做法。通过 UISearchBar 和 UISearchController,iOS 提供了大量开箱即用的功能,因此我们没有理由不用它。能够在大表格中进行搜索也是一种好的用户体验,如果用户发现你没有提供,他们会很不开心。
我希望你将来会在你的 table view app 中添加搜索功能。有问题和评论,请到论坛中发言。
- UISearchController 教程-开始
- UISearchController
- UISearchController
- UISearchController
- UISearchController
- UISearchController
- UISearchController
- UIsearchController
- UIsearchController
- UISearchController
- UISearchController
- UISearchController
- UISearchController,SearchBar的教程-Swift
- iOS UISearchController
- iOS - UISearchController
- UISearchController偏移
- UISearchController搜索
- ssrs开始教程
- git学习小结
- php利用redis实现分页列表,新增,删除功能
- 2017上半年技术文章集合—184篇文章分类汇总
- SQL server management studio 错误40,53
- ASP .Net学习笔记_20171115
- UISearchController 教程-开始
- 产品经理教你写代码—用JAVA写一个阿里云VPC Open API调用程序
- 线程并发三:线程组和守护线程
- java == 和equals
- Trafodion 开发环境搭建
- js中的原型链
- LR录制手机app脚本
- lintcode&九章算法——Google面试题 | 有效括号字符串 ? 待解决
- ios 图片拉伸方法