使用 PowerShell 创建 Linux 虚拟机
来源:互联网 发布:淘宝网小衫春季女 编辑:程序博客网 时间:2024/06/05 00:52
Azure PowerShell 模块用于从 PowerShell 命令行或脚本创建和管理 Azure 资源。 本指南详细介绍了如何使用 Azure PowerShell 模块部署运行 Ubuntu 服务器的虚拟机。 服务器部署以后,将创建 SSH 连接,并且安装 NGINX webserver。
如果没有 Azure 订阅,可在开始前创建一个试用帐户。
本快速入门需要 Azure PowerShell 模块 3.6 或更高版本。 运行 Get-Module -ListAvailable AzureRM 即可查找版本。 如果需要进行安装或升级,请参阅安装 Azure PowerShell 模块。
最后,需要在 Windows 用户配置文件的 .ssh 目录中存储名为 id_rsa.pub 的公共 SSH 密钥。 有关创建适用于 Azure 的 SSH 密钥的详细信息,请参阅创建适用于 Azure 的 SSH 密钥。
登录 Azure
使用 Login-AzureRmAccount -EnvironmentName AzureChinaCloud 命令登录到 Azure 订阅,并按照屏幕上的说明进行操作。
Login-AzureRmAccount -EnvironmentName AzureChinaCloud创建资源组
使用 New-AzureRmResourceGroup 创建 Azure 资源组。 资源组是在其中部署和管理 Azure 资源的逻辑容器。
New-AzureRmResourceGroup -Name myResourceGroup -Location chinaeast创建网络资源
创建虚拟网络、子网和公共 IP 地址。 这些资源用来与虚拟机建立网络连接,以及连接到 Internet。
# Create a subnet configuration$subnetConfig = New-AzureRmVirtualNetworkSubnetConfig -Name mySubnet -AddressPrefix 192.168.1.0/24# Create a virtual network$vnet = New-AzureRmVirtualNetwork -ResourceGroupName myResourceGroup -Location chinaeast `-Name MYvNET -AddressPrefix 192.168.0.0/16 -Subnet $subnetConfig# Create a public IP address and specify a DNS name$pip = New-AzureRmPublicIpAddress -ResourceGroupName myResourceGroup -Location chinaeast `-AllocationMethod Static -IdleTimeoutInMinutes 4 -Name "mypublicdns$(Get-Random)"创建网络安全组和网络安全组规则。 网络安全组使用入站和出站规则保护虚拟机。 在本例中,为端口 22 创建一个入站规则,该规则允许传入的 SSH 连接。 我们还需要为端口 80 创建入站规则,以允许传入的 Web 流量。
# Create an inbound network security group rule for port 22$nsgRuleSSH = New-AzureRmNetworkSecurityRuleConfig -Name myNetworkSecurityGroupRuleSSH -Protocol Tcp `-Direction Inbound -Priority 1000 -SourceAddressPrefix * -SourcePortRange * -DestinationAddressPrefix * `-DestinationPortRange 22 -Access Allow# Create an inbound network security group rule for port 80$nsgRuleWeb = New-AzureRmNetworkSecurityRuleConfig -Name myNetworkSecurityGroupRuleWWW -Protocol Tcp `-Direction Inbound -Priority 1001 -SourceAddressPrefix * -SourcePortRange * -DestinationAddressPrefix * `-DestinationPortRange 80 -Access Allow# Create a network security group$nsg = New-AzureRmNetworkSecurityGroup -ResourceGroupName myResourceGroup -Location chinaeast `-Name myNetworkSecurityGroup -SecurityRules $nsgRuleSSH,$nsgRuleWeb使用 New-AzureRmNetworkInterface 为虚拟机创建网卡。 网卡将虚拟机连接到子网、网络安全组和公共 IP 地址。
# Create a virtual network card and associate with public IP address and NSG$nic = New-AzureRmNetworkInterface -Name myNic -ResourceGroupName myResourceGroup -Location chinaeast `-SubnetId $vnet.Subnets[0].Id -PublicIpAddressId $pip.Id -NetworkSecurityGroupId $nsg.Id创建虚拟机
创建虚拟机配置。 此配置包括部署虚拟机时使用的设置,例如虚拟机映像、大小和身份验证配置。
# Define a credential object$securePassword = ConvertTo-SecureString ' ' -AsPlainText -Force$cred = New-Object System.Management.Automation.PSCredential ("azureuser", $securePassword)# Create a virtual machine configuration$vmConfig = New-AzureRmVMConfig -VMName myVM -VMSize Standard_D1 | `Set-AzureRmVMOperatingSystem -Linux -ComputerName myVM -Credential $cred -DisablePasswordAuthentication | `Set-AzureRmVMSourceImage -PublisherName Canonical -Offer UbuntuServer -Skus 16.04-LTS -Version latest | `Add-AzureRmVMNetworkInterface -Id $nic.Id# Configure SSH Keys$sshPublicKey = Get-Content "$env:USERPROFILE\.ssh\id_rsa.pub"Add-AzureRmVMSshPublicKey -VM $vmconfig -KeyData $sshPublicKey -Path "/home/azureuser/.ssh/authorized_keys"使用 New-AzureRmVM 创建虚拟机。
New-AzureRmVM -ResourceGroupName myResourceGroup -Location chinaeast -VM $vmConfig连接到虚拟机
完成部署后,请与虚拟机建立 SSH 连接。
使用 Get-AzureRmPublicIpAddress 命令返回虚拟机的公共 IP 地址。
Get-AzureRmPublicIpAddress -ResourceGroupName myResourceGroup | Select IpAddress在装有 SSH 的系统中,使用以下命令连接到虚拟机。 如果在 Windows 上操作,可以使用 Putty 来创建连接。
ssh <Public IP Address>出现提示时,请输入登录用户名 azureuser。 如果在创建 SSH 密钥时输入了密码,还需要输入此密码。
安装 NGINX
使用以下命令更新包源并安装最新的 NGINX 包。
# update package sourcesudo apt-get -y update# install NGINXsudo apt-get -y install nginx查看 NGIX 欢迎页
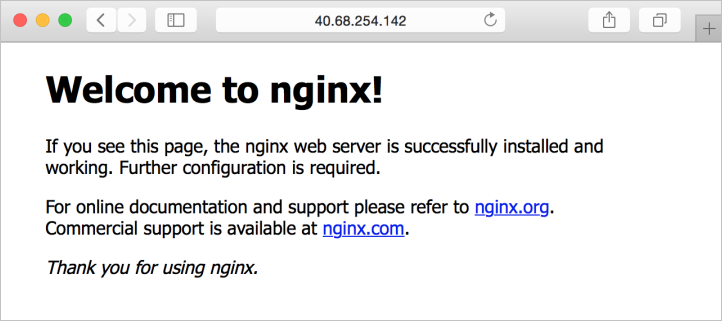
NGINX 已安装,并且现在已从 Internet 打开 VM 上的端口 80 - 可以使用所选的 Web 浏览器查看默认的 NGINX 欢迎页。 请务必使用前面记录的公共 IP 地址访问默认页面。
清理资源
如果不再需要资源组、VM 和所有相关的资源,可以使用 Remove-AzureRmResourceGroup 命令将其删除。
Remove-AzureRmResourceGroup -Name myResourceGroup后续步骤
在本快速入门中,部署了一个简单的虚拟机、一条网络安全组规则,并安装了一个 Web 服务器。 若要详细了解 Azure 虚拟机,请继续学习 Linux VM 的教程。 立即访问http://market.azure.cn
Azure Linux 虚拟机教程
- 使用 PowerShell 创建 Linux 虚拟机
- 使用 PowerShell 创建 Linux 虚拟机
- 使用Azure powershell 创建Azure虚拟机
- [Azure]使用Powershell为ASM虚拟机创建快照
- 通过powershell来创建Azure虚拟机
- 使用PowerShell 创建SharePoint 网站
- 使用Powershell 管理Azure云端虚拟机!
- [Azure]使用Powershell批量添加虚拟机ACL
- linux下虚拟机的创建使用
- 【Azure】使用ssh创建访问Linux虚拟机
- 使用 Azure 门户创建 Linux 虚拟机
- 使用 Azure CLI 创建 Linux 虚拟机
- 使用 Azure 门户创建 Linux 虚拟机
- 安装VMware,创建ubuntu linux虚拟机,使用Secure连接虚拟机
- vMware 5.5 利用vcenter的powershell 批量创建虚拟机
- PowerShell创建ARM虚拟机6合1脚本
- 用于创建和管理 Azure 虚拟机的常用 PowerShell 命令
- SharePoint 2013 使用PowerShell创建State Service
- 目标检测之R-CNN 汇报
- C++17中那些值得关注的特性
- 让a标签href链接失效
- 移动硬盘上安装WIN7 WIN10系统
- spring 依赖注入bean的属性
- 使用 PowerShell 创建 Linux 虚拟机
- 视频编解码学习之二:编解码框架
- 顏色和編碼?兩者有關係嗎?
- Unity安卓交互
- 安装barbican服务
- VMWare使用rhel7.2(一)
- CDH Oozie 安装,使用,优化小技巧
- Jetson TX1/TX2配置教程--拷贝离线安装包
- MobaXterm连接Linux虚拟机