Linux笔记 分类_https://crossoverjie.top
来源:互联网 发布:淘宝差评怎么写差评词 编辑:程序博客网 时间:2024/06/02 04:24
Linux(二)服务器运行环境配置
Linux(一)常用命令
2、方法二:官网下载安装mysql-server
# wget http://dev.mysql.com/get/mysql-community-release-el7-5.noarch.rpm# rpm -ivh mysql-community-release-el7-5.noarch.rpm# yum install mysql-community-server
安装成功后重启mysql服务。
# service mysqld restart
初次安装mysql,root账户没有密码。

[root@yl-web yl]# mysql -u root Welcome to the MySQL monitor. Commands end with ; or \g.Your MySQL connection id is 3Server version: 5.6.26 MySQL Community Server (GPL)Copyright (c) 2000, 2015, Oracle and/or its affiliates. All rights reserved.Oracle is a registered trademark of Oracle Corporation and/or itsaffiliates. Other names may be trademarks of their respectiveowners.Type 'help;' or '\h' for help. Type '\c' to clear the current input statement.mysql> show databases;+--------------------+| Database |+--------------------+| information_schema || mysql || performance_schema || test |+--------------------+4 rows in set (0.01 sec)mysql>
设置密码
mysql> set password for 'root'@'localhost' =password('password');Query OK, 0 rows affected (0.00 sec)mysql>
不需要重启数据库即可生效。
在mysql安装过程中如下内容:
Installed:
  mysql-community-client.x86_64 0:5.6.26-2.el7                mysql-community-devel.x86_64 0:5.6.26-2.el7
  mysql-community-libs.x86_64 0:5.6.26-2.el7                  mysql-community-server.x86_64 0:5.6.26-2.el7

Dependency Installed:
  mysql-community-common.x86_64 0:5.6.26-2.el7

Replaced:
  mariadb.x86_64 1:5.5.41-2.el7_0          mariadb-devel.x86_64 1:5.5.41-2.el7_0   mariadb-libs.x86_64 1:5.5.41-2.el7_0
  mariadb-server.x86_64 1:5.5.41-2.el7_0
所以安装完以后mariadb自动就被替换了,将不再生效。
[root@yl-web yl]# rpm -qa |grep mariadb[root@yl-web yl]#
三、配置mysql
1、编码
mysql配置文件为/etc/my.cnf
最后加上编码配置
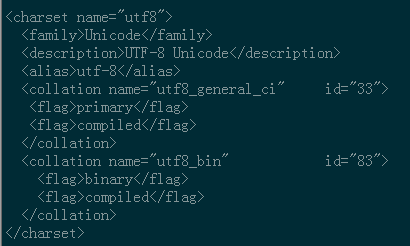
[mysql]default-character-set =utf8这里的字符编码必须和/usr/share/mysql/charsets/Index.xml中一致。
2、远程连接设置
把在所有数据库的所有表的所有权限赋值给位于所有IP地址的root用户。
mysql> grant all privileges on *.* to root@'%'identified by 'password';
如果是新用户而不是root,则要先新建用户
mysql>create user 'username'@'%' identified by 'password';
此时就可以进行远程连接了。
关闭防火墙
systemctl stop firewalld.service
禁止开机启动防火墙
systemctl disable firewalld.service安装 tomcat
安装tomcat
将apache-tomcat-7.0.29.tar.gz文件上传到/usr/local中执行以下操作:
代码如下:
[root@linuxidc local]# cd /usr/local
[root@linuxidc local]# wget https://mirrors.tuna.tsinghua.edu.cn/apache/tomcat/tomcat-7/v7.0.82/bin/apache-tomcat-7.0.82.tar.gz
[root@linuxidc local]# tar -zxv -f apache-tomcat-7.0.29.tar.gz // 解压压缩包
[root@linuxidc local]# rm -rf apache-tomcat-7.0.29.tar.gz // 删除压缩包
[root@linuxidc local]# mv apache-tomcat-7.0.29 tomcat
启动Tomcat
执行以下操作:
代码如下:
[root@linuxidc ~]# /usr/local/tomcat/bin/startup.sh //启动tomcat
Using CATALINA_BASE: /usr/local/tomcat
Using CATALINA_HOME: /usr/local/tomcat
Using CATALINA_TMPDIR: /usr/local/tomcat/temp
Using JRE_HOME: /usr/java/jdk1.7.0/jre
Using CLASSPATH: /usr/local/tomcat/bin/bootstrap.jar:/usr/local/tomcat/bin/tomcat-juli.jar
出现以上信息说明已成功启动。
防火墙开放8080端口
增加8080端口到防火墙配置中,执行以下操作:
[root@linuxidc ~]# vi + /etc/sysconfig/iptables
#增加以下代码
-A RH-Firewall-1-INPUT -m state --state NEW -m tcp -p tcp --dport 8080 -j ACCEPT
重启防火墙
[root@linuxidc java]# service iptables restart
检验Tomcat安装运行
通过以下地址查看tomcat是否运行正常:
http://192.168.15.231:8080/
看到tomcat系统界面,说明安装成功!
停止Tomcat
[root@linuxidc ~]# /usr/local/tomcat/bin/shutdown.sh //停止tomcat
2.修改系统文件
2.添加下面两行脚本,记住是两行,仅仅第二行不行,必须加第一行。在/etc/rc.d/rc.local文件最后加上:
说明:/usr/java/jdk1.7.0_60 是jdk安装目录
/usr/local/tomcat是tomcat安装的目录
3.注意:修改rc.local文件为可执行
- Linux笔记 分类_https://crossoverjie.top
- linux--IT--top--笔记
- top命令---Linux学习笔记
- Linux top命令说明笔记
- Linux top free命令学习笔记
- 【linux学习笔记】top命令总结
- linux学习笔记--top命令使用方法
- linux top
- linux top
- Linux TOP
- linux top
- linux top
- Linux top
- linux top
- Linux-top
- linux top
- linux top
- Linux top
- 【Scikit-Learn 中文文档】内核近似
- Android IOS 移动端前端框架对比——framework7,SUI,MUI框架——React Native和Vuejs
- 欢迎使用CSDN-markdown编辑器
- Lintcode:Fizz Buzz 问题
- 【Scikit-Learn 中文文档】成对的矩阵, 类别和核函数
- Linux笔记 分类_https://crossoverjie.top
- 虚拟机之间的配置
- Hadoop安装使用HDFS(Windows)
- Optimization for Deep Learning Highlights in 2017
- 【Scikit-Learn 中文文档】预测目标 (y) 的转换
- 完整的H5牛牛 教程分享 源码
- 【raspberrypi】retropie街机模拟器
- I/O重定向
- SHELL 中的变量