Win10 安装 digits
来源:互联网 发布:日本动画片制作软件 编辑:程序博客网 时间:2024/06/06 00:02
安装caffe配置python接口
接下来就按照官方教程来安装了。。。
1. If the installation process complains compiler not found, you need to install Microsoft Visual C++ Compiler for Python 2.7, downloaded at (https://www.microsoft.com/en-us/download/details.aspx?id=44266). We recommend installing it by
msiexec /i VCForPython27.msi ALLUSERS=1
如果提示找不到python 路径,则 python python_path.py
 View Code
2. 安装Graphviz, Graphviz is available at (www.graphviz.org/Download.php). Please note this site is not always available online. The installation directory can not contain space, so don't install it under the regular 'c:\Program Files (x86)' directory. Try something like 'c:\graphviz' instead. When the installation directory contains space, pydot could not launch the dot.exe file, even it has no problem finding it. Add the c:\graphviz\bin directory to your PATH.
3. Clone DIGITS from github.com (https://github.com/nvidia/digits). From the command prompt (run as administrator) and cd to DIGITS directory. Then type
python -m pip install -r requirements.txt
4. You may see error about Pillow, like ValueError: jpeg is required unless explicitly disabled using --disable-jpeg, aborting If this happens, download Pillow Windows Installer (Pillow-3.1.1.win-amd64-py2.7.exe) at https://pypi.python.org/pypi/Pillow/3.1.1 and run the exectuables. After installing Pillow in the above way, run
python -m pip install -r requirements.txt
After the above command, check if all required Python dependencies are met by comparing requirements.txt and output of the following command.
python -m pip list
5. If gevent is not v1.0.2, install it from the whl file, downloaded previously from (http://www.lfd.uci.edu/~gohlke/pythonlibs/).
python -m pip install gevent-1.0.2-cp27-none-win_amd64.whl
6. It should uninstall the gevent you had, and install gevent 1.0.2.
Because readline is not available in Windows, you need to install one additional Python package.
python -m pip install pyreadline
值得提出的是最后一步运行digits的命令发生了变化
python -m digits
然后是缺什么安装什么。。。
例如:
No module named wtforms
pip install wtforms
Invalid version: 'CAFFE_VERSION'

windows/caffe/caffe.vcxproj <PostBuildEvent> <Command>"$(ScriptsDir)\FixGFlagsNaming.cmd" "$(OutDir)" $(Configuration)</Command> </PostBuildEvent> + <ClCompile> + <PreprocessorDefinitions>NDEBUG;%(PreprocessorDefinitions);CAFFE_VERSION=1.0.0-rc3</PreprocessorDefinitions> + </ClCompile> </ItemDefinitionGroup> <ItemGroup> <ClCompile Include="..\..\tools\caffe.cpp" /> windows/pycaffe/pycaffe.vcxproj <ItemDefinitionGroup> <ClCompile> <DisableSpecificWarnings>4003</DisableSpecificWarnings> + <PreprocessorDefinitions Condition="'$(Configuration)|$(Platform)'=='Release|x64'">NDEBUG;%(PreprocessorDefinitions);CAFFE_VERSION=1.0.0-rc3</PreprocessorDefinitions> </ClCompile> <PreBuildEvent> <Command>"$(ScriptsDir)\PythonPreBuild.cmd" "$(SolutionDir)" "$(ProtocDir)" "$(OutDir)"</Command>
No module named flask.ext.socketio
pip install flask-socketiopip install -I Flask==0.10.1pip install flask-wtf
No module named lmdb
pip install lmdb
最后 python -m digits 启动
打开浏览器输入: localhost:5000 就可以看到
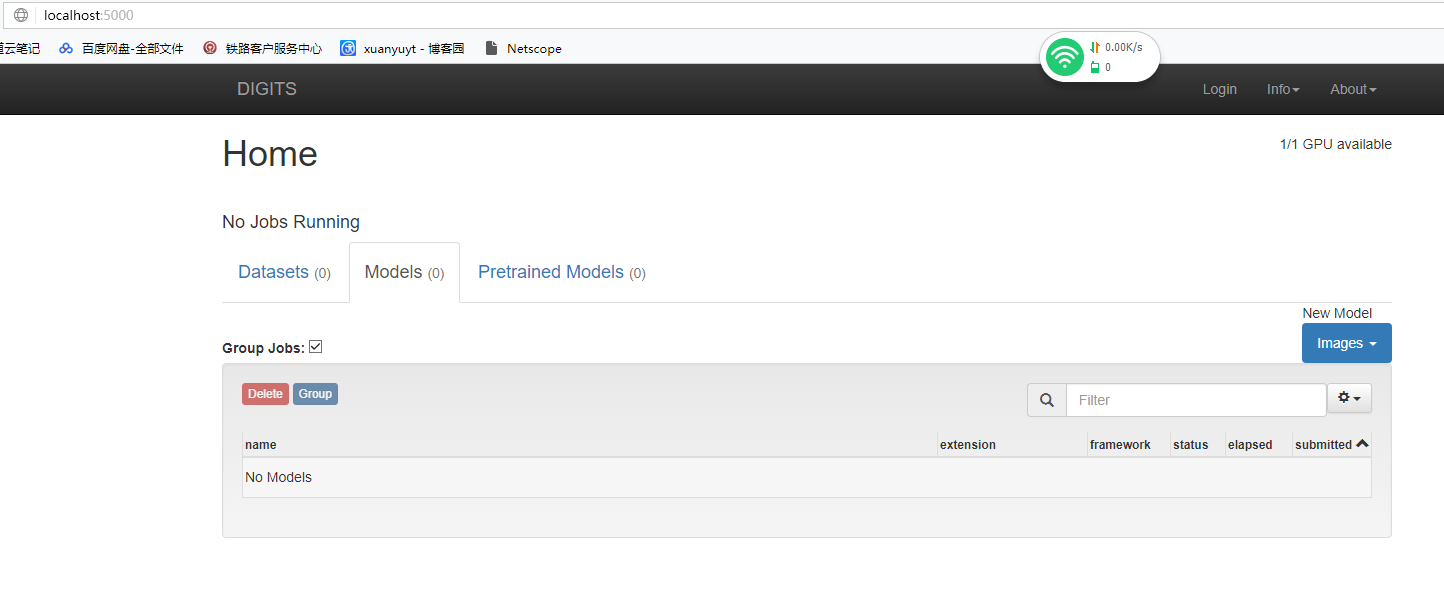
运行mnist实例
一、准备数据,这里感谢此博文,也可以参照官方教程
原始数据需要的是图片,但网上提供的mnist数据并不是图片格式的数据,因此我们需要将它转换成图片才能运行。
digits提供了一个脚本文件,用于下载mnist, cifar10 和cifar100 三类数据,并转换成png格式图片。文件路径为:
DIGITS-master/download_data/__main__.py
我们先在当前用户的根目录下,新建一个mnist文件夹用来保存mnist图片。
cd C:\DIGITS-master\digits\download_data
然后执行脚本
python __main__.py mnist mnist__main__.py 带两个参数,第一个为数据集名称(可设置为mnist, cifar10或cifar100),第二个为输出路径(mnist)
执行成功后,会在mnist文件夹下,生成两个文件夹(train文件夹和test文件夹),每个文件夹下面就是我们需要的图片(10类分别放在10个子文件夹内),同时还生成了对应在图片列表文件train.txt和test.txt

接下来,在浏览器上运行digits, 点击左边Dataset模块的"Image"按钮选择“classification", 创建一个dataset
数据集
手写体MNIST数据集的原始数据格式为:png,每幅图像大小为:28×28,包含70K个手写体数字,共10类,其中60K为训练用样本(train+val),10K的测试样本(test)。本例中,从训练样本中随机抽取25%的数据作为验证集(val),使用digits生成的数据信息如下:
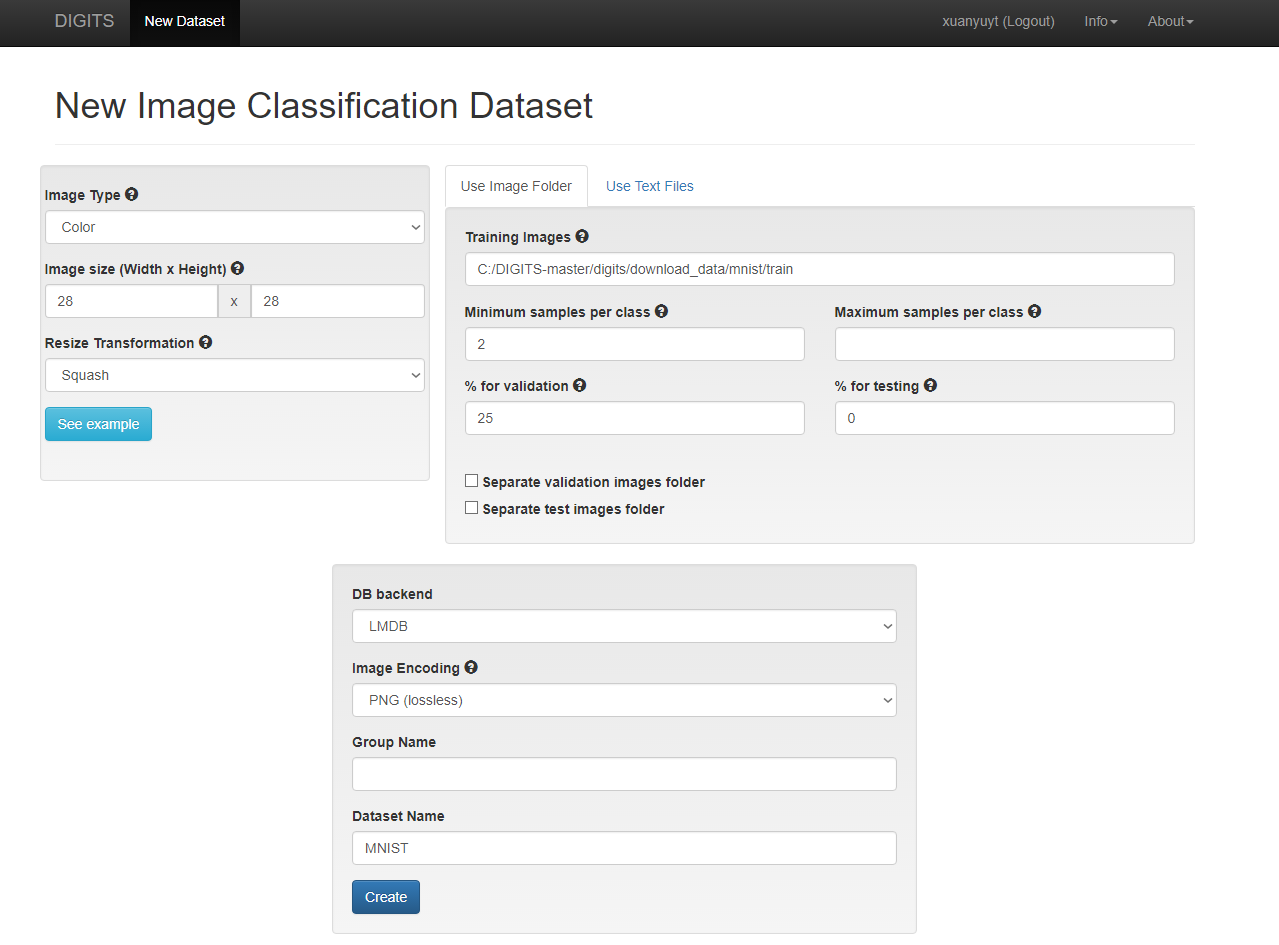
在这个页面的左边,可以设置图片是彩色图片还是灰度图片,如果提供的原始图片大小不一致,还可用Resize Transformation功能转换成一致大小 。从页面中间可以看出,系统默认将训练图片中的25%取出来作为验证集(for validation)。
如果想把用来测试的图片,也生成lmdb, 则把“ separate test image folder" 这个选项选上。
全部设置好后,点击"create" 按钮,开始生成lmdb数据。
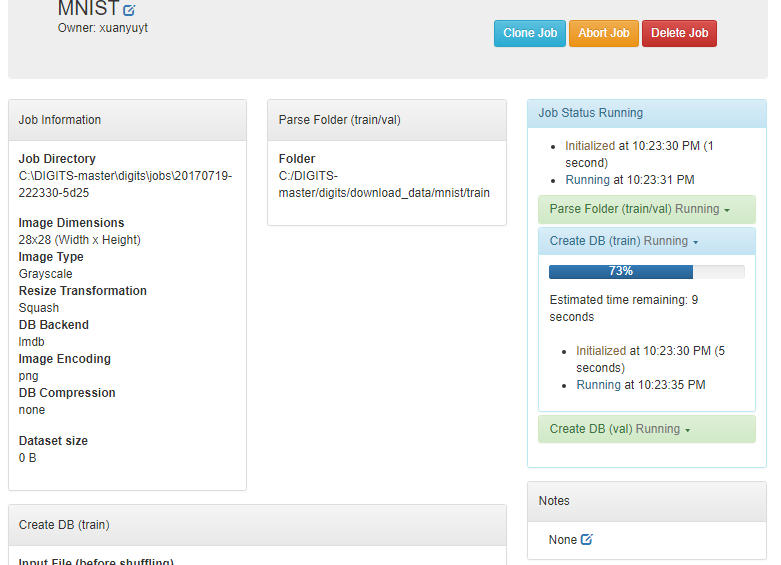
注意左上角的Job Directory(工作目录),生成的lmdb文件就放在这个目录下面,大家最好打开这个目录去看看,看一下生成了些什么文件,了解一下运行原理。

在这个界面,我们还可以可视化查看训练和测试的图片,如下图:

train.txt里面存放的是所有训练图片的列表清单,柱状图清晰地显示了10类样本各自的数量。点击" Explorer the db” 即可查看图片。
最后,点击最左上角“ DIGITS" 链接回到网站根目录。
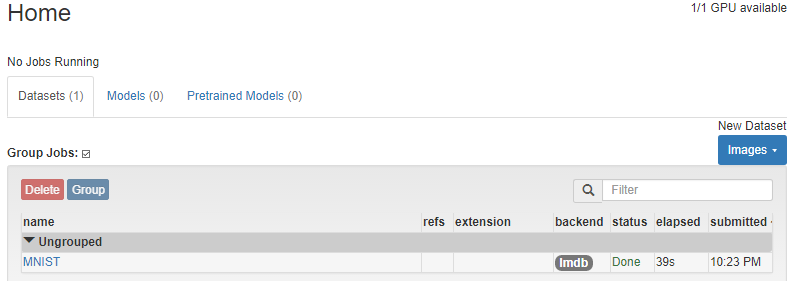
经过前面的操作,我们就把数据准备好了。接下来继续。。。
二、训练一个model,这里感谢此博文,也可以参考官方教程
右击右边Models模块的” Images" 按钮 ,选择“classification"
在打开页面右下角可以看到,系统提供了一个caffe model,分别为LeNet, AlexNet, GoogLeNet, 如果使用这三个模型,则所有参数都已经设置好了,就不用再设置了。
模型参数
模型选择LeNet(Original Paper 1998)
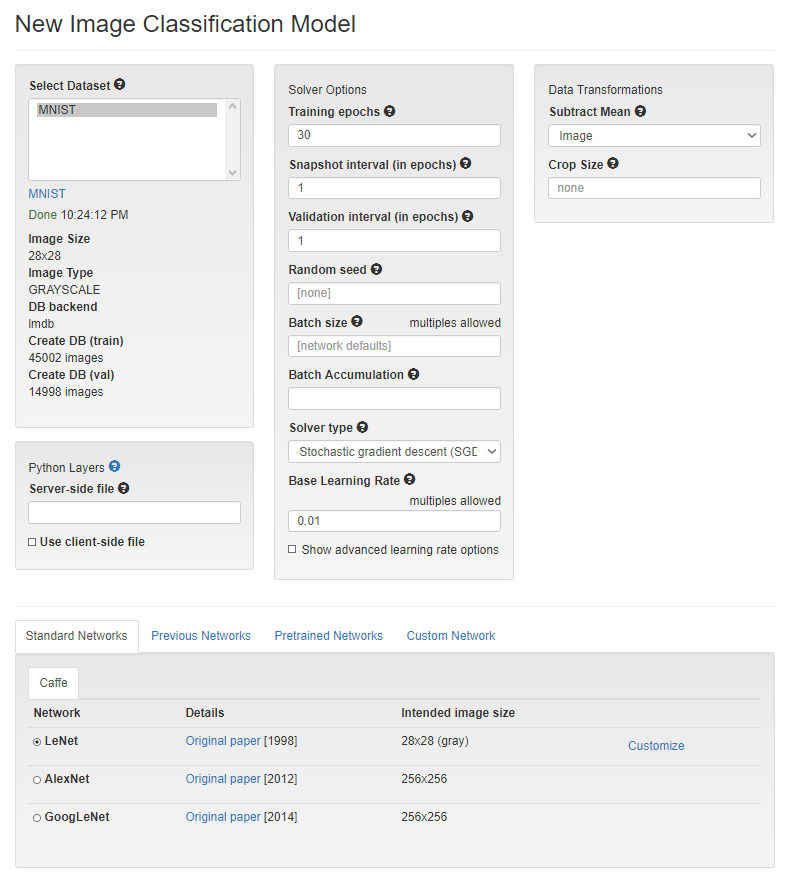
在下面,系统为我们列举出了本机所带的显卡,我们可以选择其中一块进行运行。
在最下面,输入一个model name, 就可以点击create 按钮了。如果有些选项不对,会有错误提示,很人性化。
在训练过程页面,左上角显示了生成的配置文件名称 (放在job目录文件下,默认路径为:C:/DIGITS-master/digits/jobs/),运行过程中保存的caffemodel快照也保存在这个目录下面。
页面中显示了训练和测试的数据信息、训练所用的时间和gpu使用情况以及一些实时化图表,可以看到训练阶段的loss, 测试阶段的loss和accuracy,相当方便,甚至还可以看到学习率的变化情况,吃惊吧!

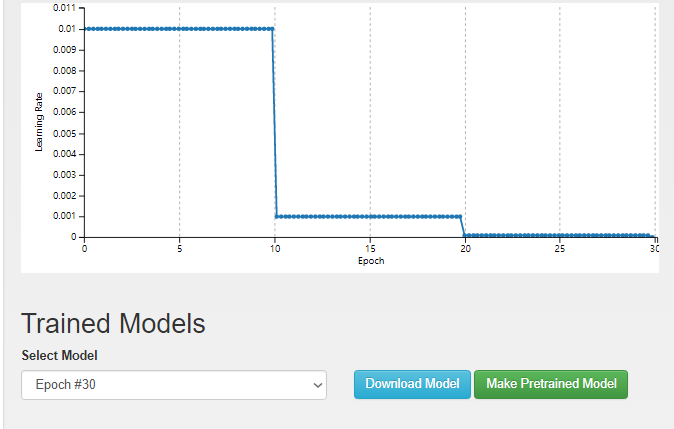
模型训练好后,直接就可以在下面进行测试了。
测试新来的图片
将页面拖到最下面,选择Upload imager按钮,加载一幅测试图片。在 C:/DIGITS-master/digits/download_data/mnist/test 下面有大量的测试图片,随便选一张就可以了。
也可以通过在Image URL方框里,输入一张网上的图片地址来进行测试。
加载好测试图片,在 Show visualizations and statistics 选择模式框上点上勾。
点击”Classify One" 按钮就可以开始测试了。
如果你不是对一张图片进行测试,而是一个测试集,则是在" Upload Image List"这个地方,选择测试图片的列表清单文件(如 val.txt)
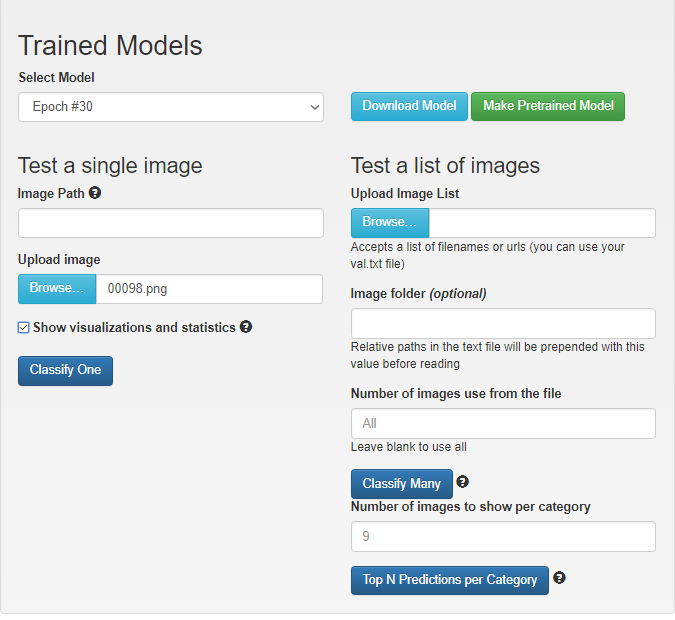
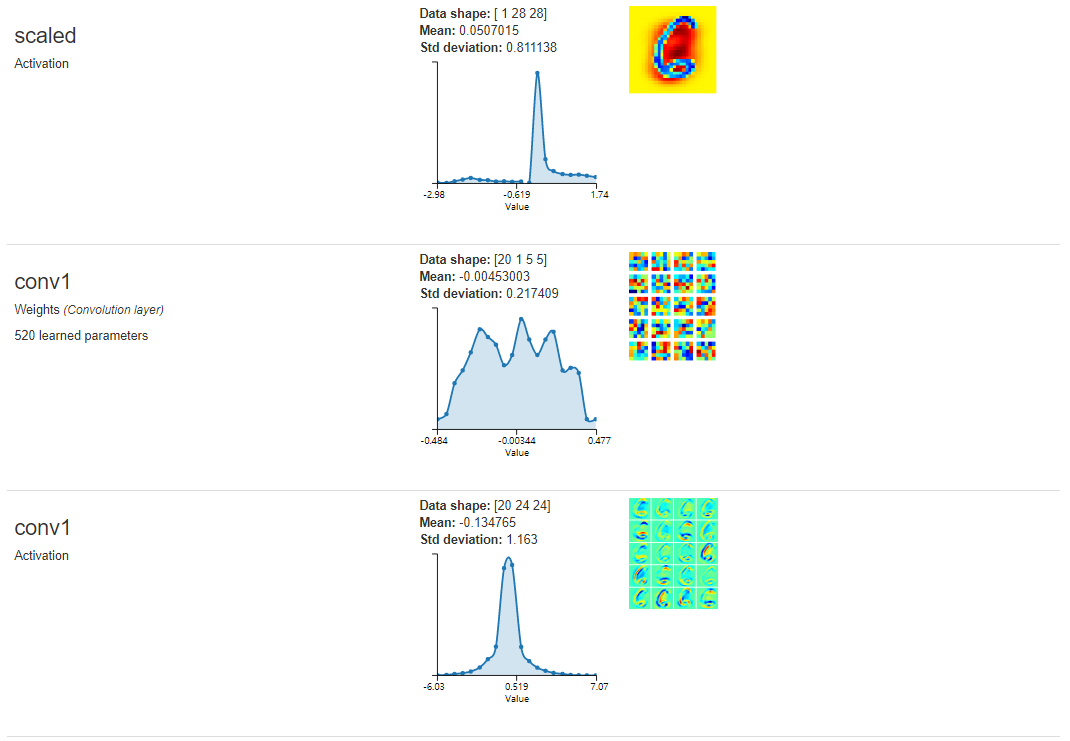
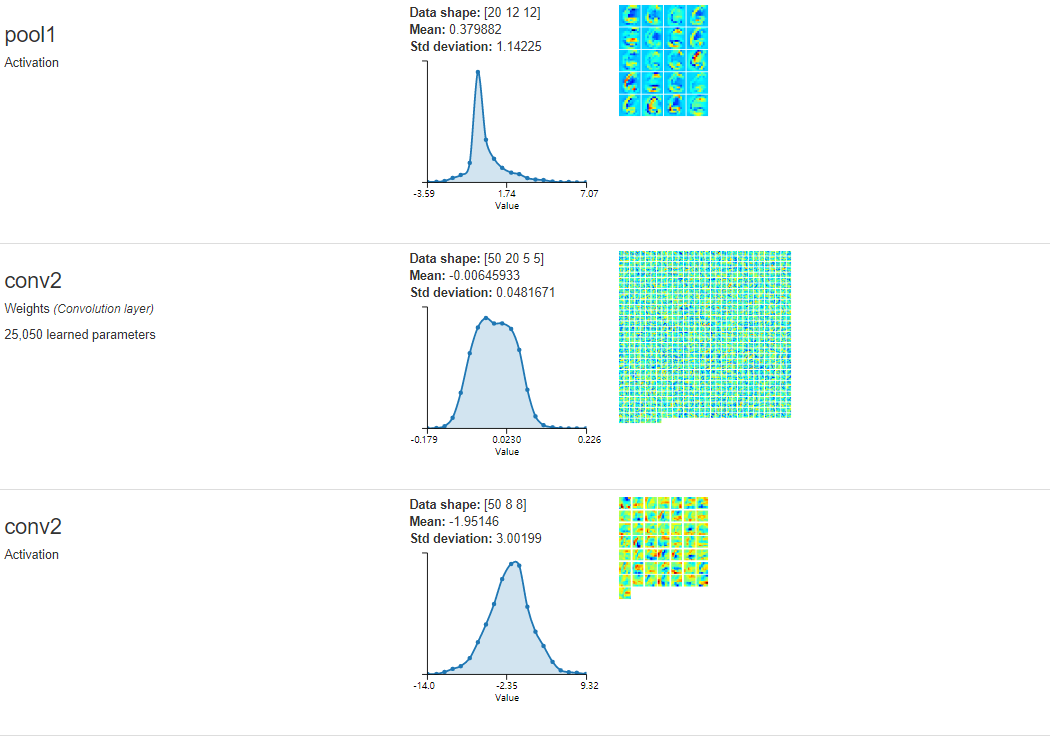
系统会弹出一个新的页面,显示top-5的分类情况 ,同时digits还提供了测试数据与权值的可视化和统计信息。


- Win10 安装 digits
- Digits 安装
- caffe 工具digits安装
- DIGITS安装和配置
- Ubuntu中安装digits
- 安装nvidia digits
- NVIDIA DIGITS 安装
- Win10安装
- 安装win10
- Win10下搭建Mxnet并训练handwritten digits
- ubuntu14.04安装caffe+digits
- Ubuntu下安装CAFFE-Digits
- 安装Windows digits问题列表
- Ubuntu 16.04 安装 NVIDIA DIGITS
- 新安装Win10
- 怎样安装win10
- win10下安装sbt
- 轻松安装win10
- LayaAir 加载图集资源并播放动画
- position属性absolute与relative 的区别
- 用自己电脑开个WiFi热点
- MVP+XRexyclerview+RxJava+Retrofit+Fresco
- Hdoj 1021 Fibonacci Again (找规律)
- Win10 安装 digits
- 灾难恢复测试识别特征的弱点
- 【转】Ubuntu 12.04下安装arm-linux-gcc等gnu arm toolchain交叉编译工具
- Intellij Idea/Webstorm/Phpstorm 版本控制忽略文件
- http 与 https
- HDFS机架感知策略,MapReduce的Shuffle过程
- 利用java进行Mysql数据库的导入导出
- Linux系统下的软链接和硬链接异同
- HTML控件Aspose.Html 12月新版17.12发布 | 附下载