使用Maven创建Springmvc+Mybatis+Velocity项目
来源:互联网 发布:php如何解决ajax跨域 编辑:程序博客网 时间:2024/06/08 19:49
本文使用的开发环境为MacOS(10.12.3)+Eclipse(Mars.2 Release (4.5.2))+Tomcat-8.0.41
1.使用Maven创建项目
由于maven服务器在海外,为了加快依赖类库的下载速度,我们可以设置maven更新服设置成国内的阿里云仓库,打开{userdir}/.m2/settings.xml文件,如果不存在,请创建,修改内容如下:
<?xml version="1.0" encoding="UTF-8"?><settings xmlns="http://maven.apache.org/SETTINGS/1.0.0" xmlns:xsi="http://www.w3.org/2001/XMLSchema-instance" xsi:schemaLocation="http://maven.apache.org/SETTINGS/1.0.0 http://maven.apache.org/xsd/settings-1.0.0.xsd"> <mirrors> <!-- 阿里云仓库 --> <mirror> <id>alimaven</id> <mirrorOf>central</mirrorOf> <name>aliyun maven</name> <url>http://maven.aliyun.com/nexus/content/repositories/central/</url> </mirror> <!-- 中央仓库1 --> <mirror> <id>repo1</id> <mirrorOf>central</mirrorOf> <name>Human Readable Name for this Mirror.</name> <url>http://repo1.maven.org/maven2/</url> </mirror> <!-- 中央仓库2 --> <mirror> <id>repo2</id> <mirrorOf>central</mirrorOf> <name>Human Readable Name for this Mirror.</name> <url>http://repo2.maven.org/maven2/</url> </mirror> </mirrors> </settings>重启Eclipse后生效。
创建maven项目
打开Eclipse菜单File->New->Project…->Maven->Maven Project ,填写项目信息 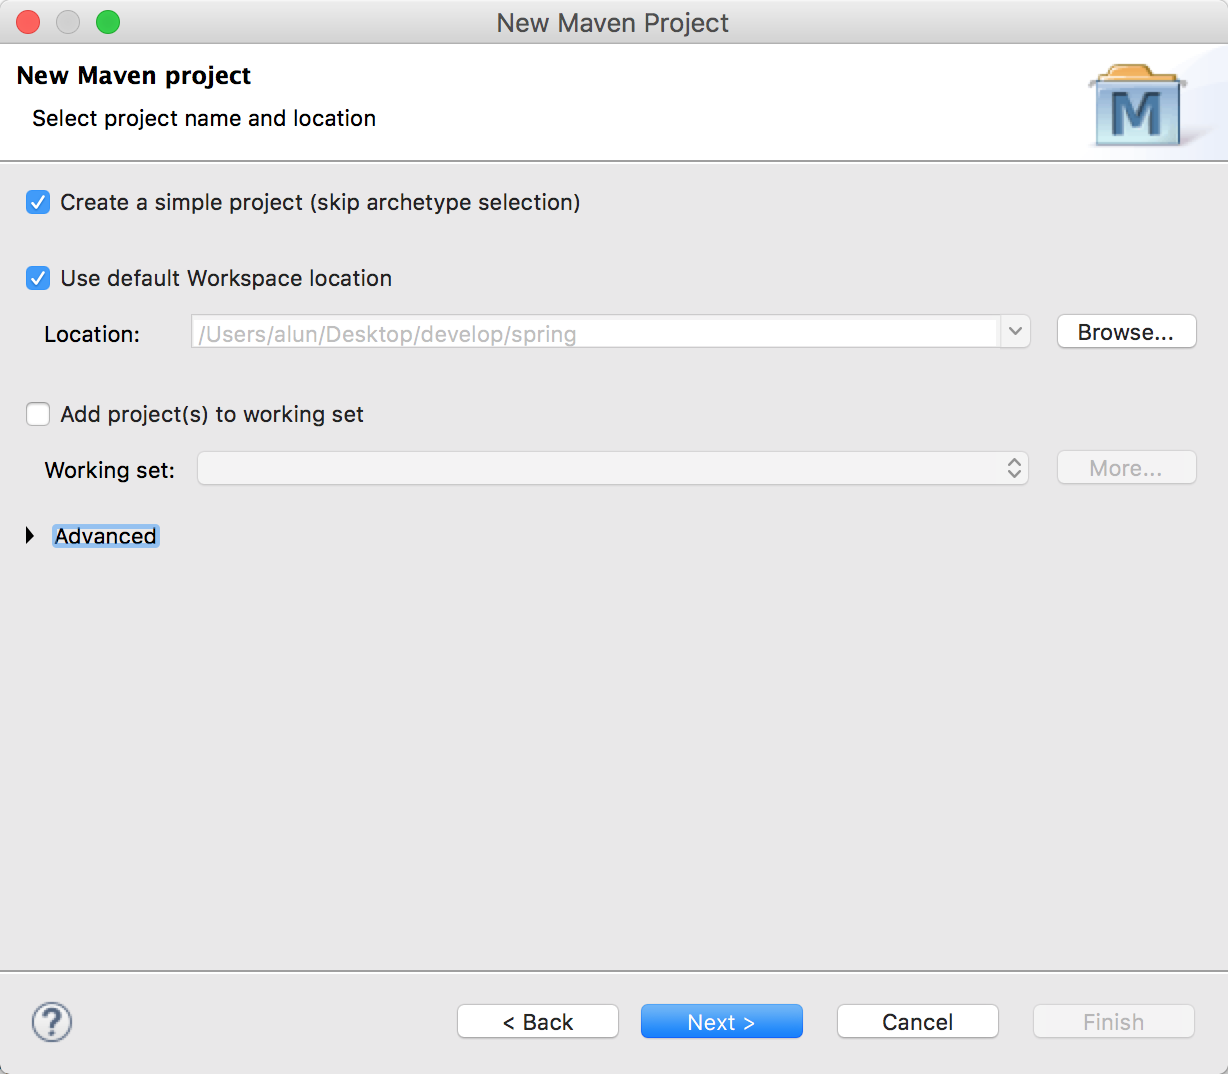
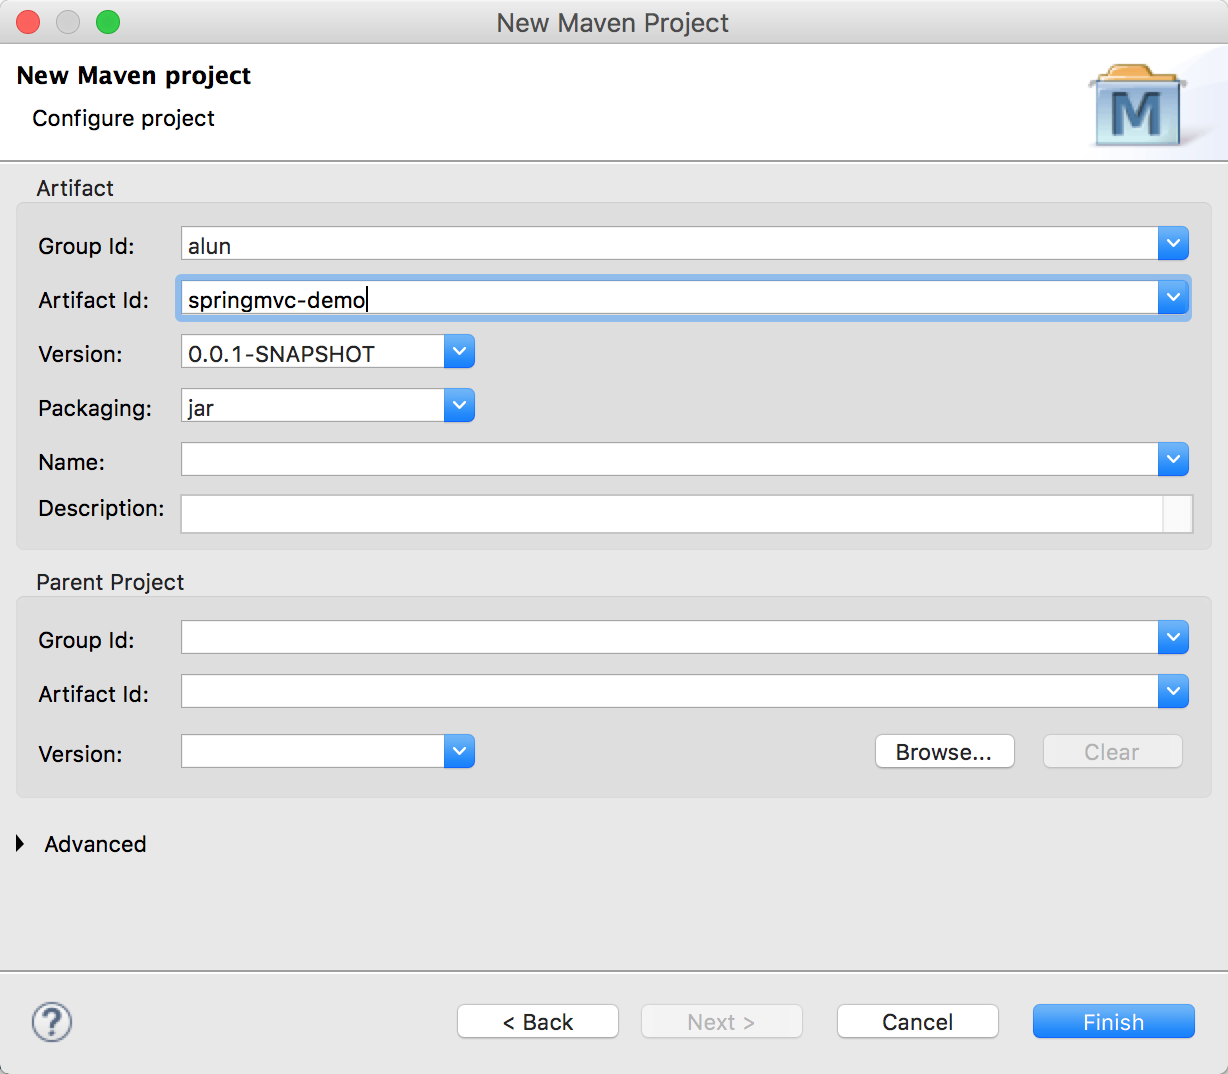
点Finish完成创建
选中项目,打开Eclipse菜单Project->Propertise->Project Factes 修改项目为Dynamic Web Module项目,如下图: 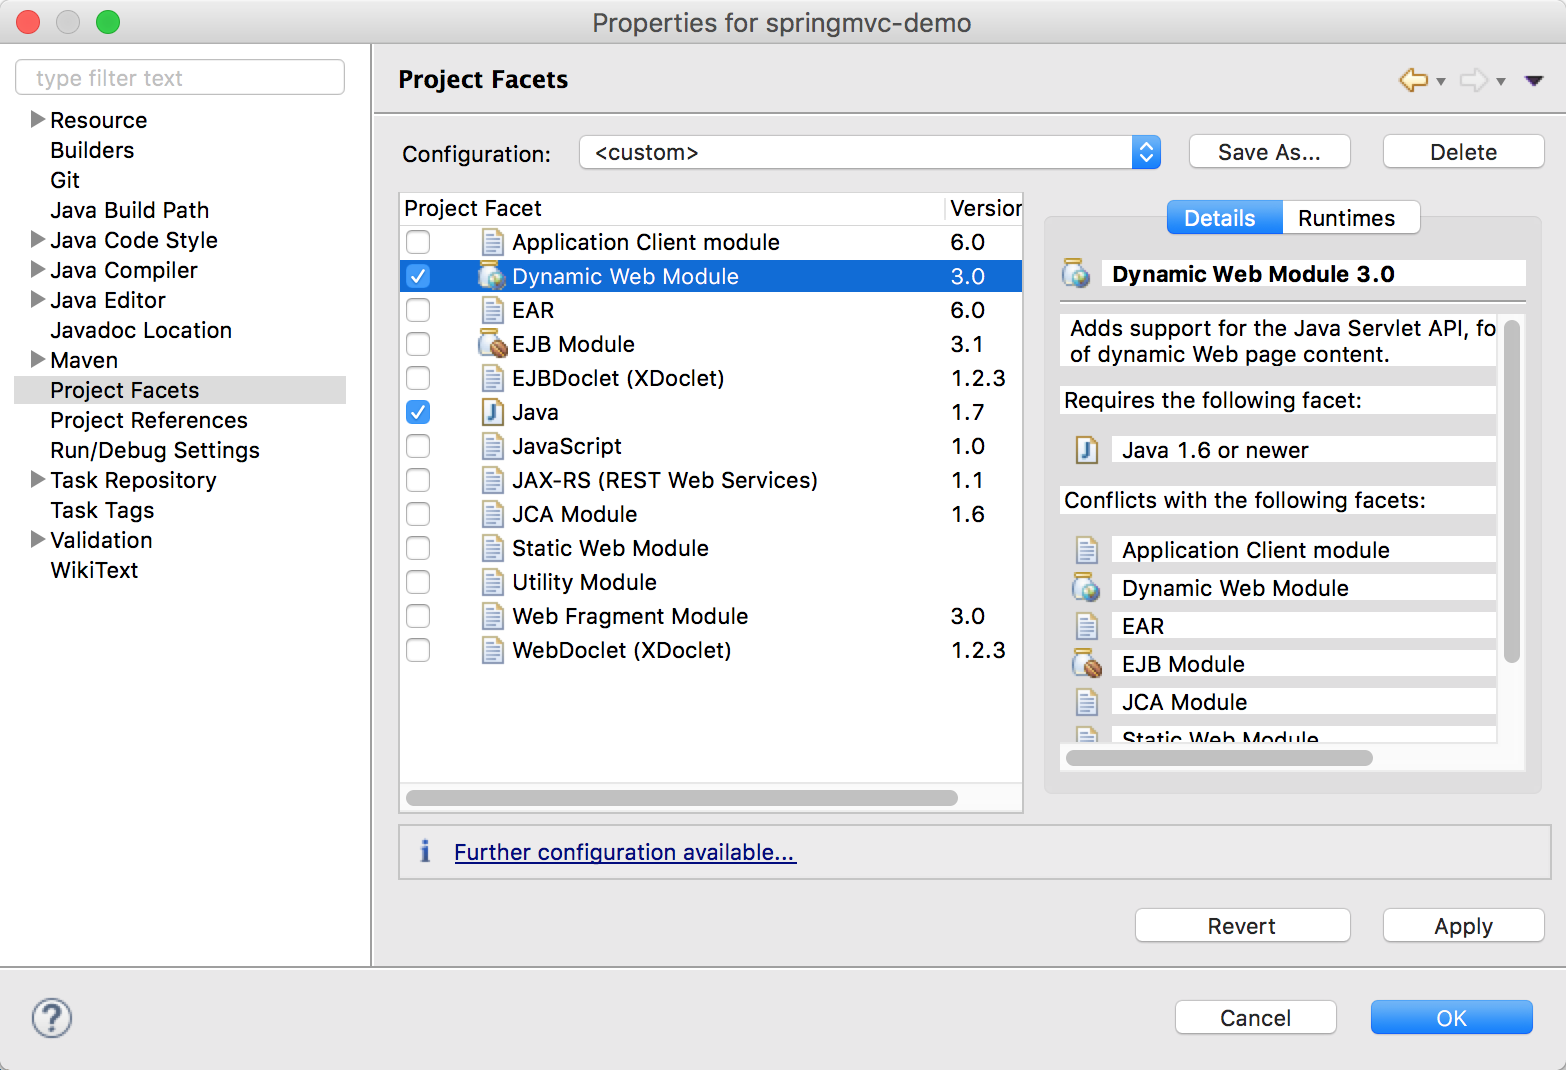
点OK,会在项目根目录创建一个WebContent目录,将WebContent修改为webapp,拖至src/main目录下
选中项目,打开Eclipse菜单Project->Propertise->Deployment Assembly 修改项目发布目录,删除src/test/java,src/test/resources,点Add…,选择Java Build Path Entries,添加Maven Dependencies,如下图: 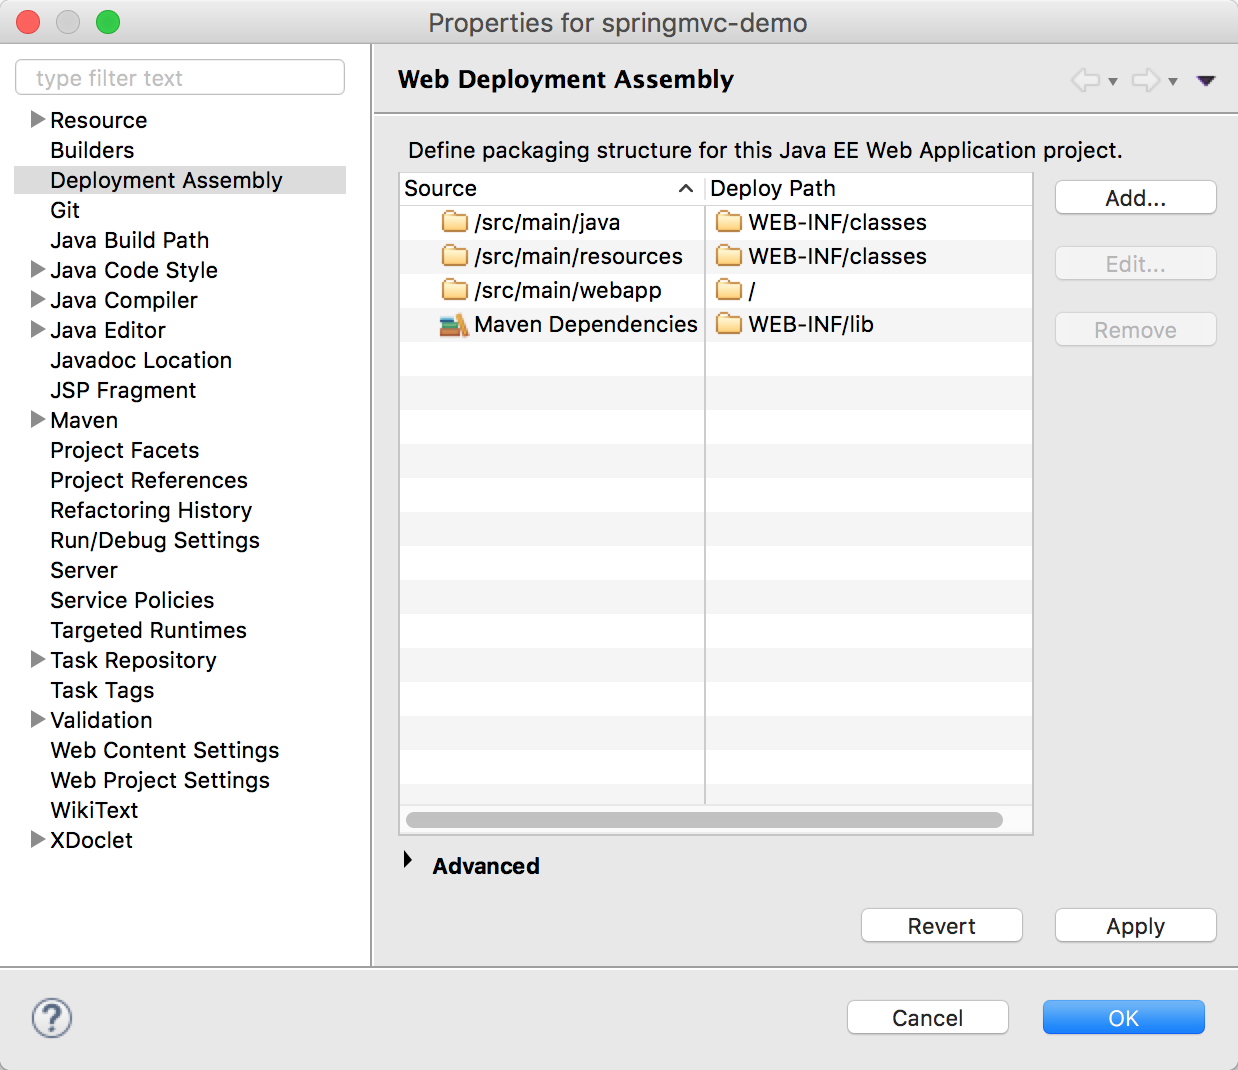
点OK
选中项目,打开Eclipse菜单Project->Propertise->Java Build Path 添加类库依赖,如下图: 
点Next,选择Apache Tomcat V8.0,如果没有此选项,可以通过Perferences->Servers菜单进行创建
至此Maven项目基本创建完成
2.集成SpringMvc
通过Maven引入SpringMvc类库,打开根目录的pom.xml文件,添加如下配置:
<properties> <!-- spring版本号 --> <spring.version>4.3.2.RELEASE</spring.version> </properties> <dependencies> <!-- spring --> <dependency> <groupId>org.springframework</groupId> <artifactId>spring-webmvc</artifactId> <version>${spring.version}</version> </dependency> </dependencies>保存,maven会自动导入spring-webmvc 4.3.2.RELEASE 版类库及其依赖的类库
在src/main/webapp/WEB-INF目录下创建web.xml文件,内容如下:
<?xml version="1.0" encoding="UTF-8"?><web-app version="3.1" xmlns="http://xmlns.jcp.org/xml/ns/javaee" xmlns:xsi="http://www.w3.org/2001/XMLSchema-instance" xsi:schemaLocation="http://xmlns.jcp.org/xml/ns/javaee http://xmlns.jcp.org/xml/ns/javaee/web-app_3_1.xsd"> <!-- 配置DispatchcerServlet --> <servlet> <servlet-name>springDispatcherServlet</servlet-name> <servlet-class>org.springframework.web.servlet.DispatcherServlet</servlet-class> <!-- 配置Spring mvc下的配置文件的位置和名称 --> <init-param> <param-name>contextConfigLocation</param-name> <param-value>classpath:spring-mvc.xml</param-value> </init-param> <load-on-startup>1</load-on-startup> </servlet> <servlet-mapping> <servlet-name>springDispatcherServlet</servlet-name> <url-pattern>/</url-pattern> </servlet-mapping></web-app>在src/main/resources目录下创建spring-mvc.xml配置文件,内容如下:
<?xml version="1.0" encoding="UTF-8"?><beans xmlns="http://www.springframework.org/schema/beans" xmlns:xsi="http://www.w3.org/2001/XMLSchema-instance" xmlns:context="http://www.springframework.org/schema/context" xmlns:mvc="http://www.springframework.org/schema/mvc" xsi:schemaLocation="http://www.springframework.org/schema/beans http://www.springframework.org/schema/beans/spring-beans.xsd http://www.springframework.org/schema/context http://www.springframework.org/schema/context/spring-context-4.0.xsd http://www.springframework.org/schema/mvc http://www.springframework.org/schema/mvc/spring-mvc-4.0.xsd"> <!-- 配置自动扫描的包 --> <context:component-scan base-package="com.springmvcdemo"></context:component-scan></beans>创建com.springmvcdemo.controllers.IndexController类,代码如下:
package com.springmvcdemo.controllers;import org.springframework.stereotype.Controller;import org.springframework.web.bind.annotation.RequestMapping;import org.springframework.web.bind.annotation.ResponseBody;@Controllerpublic class IndexController { @RequestMapping("/") @ResponseBody public String index(){ return "Hello world!"; }}运行项目(Run As->Run on Server),打开浏览器 http://localhost:8080/springmvc-demo/ ,如果看到页面中输出”Hello world!”,表明SpringMvc基本集成成功。
3.集成Mybatis
通过Maven引入Mybatis相关类库,在pom.xml文件的dependencies中,添加如下配置:
<!-- spring jdbc包 --> <dependency> <groupId>org.springframework</groupId> <artifactId>spring-jdbc</artifactId> <version>${spring.version}</version> </dependency> <!-- spring测试包 --> <dependency> <groupId>org.springframework</groupId> <artifactId>spring-test</artifactId> <version>${spring.version}</version> </dependency> <!-- mybatis核心包 --> <dependency> <groupId>org.mybatis</groupId> <artifactId>mybatis</artifactId> <version>3.4.1</version> </dependency> <!-- mybatis/spring包 --> <dependency> <groupId>org.mybatis</groupId> <artifactId>mybatis-spring</artifactId> <version>1.3.0</version> </dependency> <!-- 导入Mysql数据库链接jar包 --> <dependency> <groupId>mysql</groupId> <artifactId>mysql-connector-java</artifactId> <version>5.1.39</version> </dependency> <!-- 导入druid数据库连接池 --> <dependency> <groupId>com.alibaba</groupId> <artifactId>druid</artifactId> <version>1.0.28</version> </dependency> <!-- 导入junit测试包 --> <dependency> <groupId>junit</groupId> <artifactId>junit</artifactId> <version>4.12</version> <scope>test</scope> </dependency>保存,maven会自动导入以上类库及其依赖的类库
在src/main/resources目录下创建spring-mybatis.xml配置文件,内容如下:
<?xml version="1.0" encoding="UTF-8"?><beans xmlns="http://www.springframework.org/schema/beans" xmlns:xsi="http://www.w3.org/2001/XMLSchema-instance" xmlns:p="http://www.springframework.org/schema/p" xmlns:context="http://www.springframework.org/schema/context" xmlns:mvc="http://www.springframework.org/schema/mvc" xsi:schemaLocation="http://www.springframework.org/schema/beans http://www.springframework.org/schema/beans/spring-beans-3.1.xsd http://www.springframework.org/schema/context http://www.springframework.org/schema/context/spring-context-3.1.xsd http://www.springframework.org/schema/mvc http://www.springframework.org/schema/mvc/spring-mvc-4.0.xsd"> <!-- 配置自动扫描的包 --> <context:component-scan base-package="com.springmvcdemo" /> <!-- 加载数据库配置文件 --> <context:property-placeholder location="classpath:jdbc.properties" /> <bean id="dataSource" class="com.alibaba.druid.pool.DruidDataSource" init-method="init" destroy-method="close"> <!-- 基本属性 url、user、password --> <property name="url" value="${jdbc_url}" /> <property name="username" value="${jdbc_user}" /> <property name="password" value="${jdbc_password}" /> <!-- 配置初始化大小、最小、最大 --> <property name="initialSize" value="1" /> <property name="minIdle" value="1" /> <property name="maxActive" value="20" /> <!-- 配置获取连接等待超时的时间 --> <property name="maxWait" value="60000" /> <!-- 配置间隔多久才进行一次检测,检测需要关闭的空闲连接,单位是毫秒 --> <property name="timeBetweenEvictionRunsMillis" value="60000" /> <!-- 配置一个连接在池中最小生存的时间,单位是毫秒 --> <property name="minEvictableIdleTimeMillis" value="300000" /> <property name="validationQuery" value="SELECT 'x'" /> <property name="testWhileIdle" value="true" /> <property name="testOnBorrow" value="false" /> <property name="testOnReturn" value="false" /> <!-- 打开PSCache,并且指定每个连接上PSCache的大小 --> <property name="poolPreparedStatements" value="true" /> <property name="maxPoolPreparedStatementPerConnectionSize" value="20" /> <!-- 配置监控统计拦截的filters --> <property name="filters" value="stat" /> </bean> <!-- spring和MyBatis完美整合,不需要mybatis的配置映射文件 --> <bean id="sqlSessionFactory" class="org.mybatis.spring.SqlSessionFactoryBean"> <property name="dataSource" ref="dataSource" /> <!-- 自动扫描mapping.xml文件 --> <property name="mapperLocations" value="classpath:mapping/*.xml"></property> </bean> <!-- DAO接口所在包名,Spring会自动查找其下的类 --> <bean class="org.mybatis.spring.mapper.MapperScannerConfigurer"> <property name="basePackage" value="com.springmvcdemo.mappers" /> <property name="sqlSessionFactoryBeanName" value="sqlSessionFactory"></property> </bean> <!-- (事务管理)transaction manager, use JtaTransactionManager for global tx --> <bean id="transactionManager" class="org.springframework.jdbc.datasource.DataSourceTransactionManager"> <property name="dataSource" ref="dataSource" /> </bean></beans>在src/main/resources目录下创建jdbc.properties配置文件,添加数据库连接信息,内容如下:
jdbc_url=jdbc:mysql://127.0.0.1:3306/testjdbc_user=testuserjdbc_password=testpass将spring-mybatis.xml,添加至src/main/webapp/WEB-INF/web.xml中:
<!--配置mybatis --> <context-param> <param-name>contextConfigLocation</param-name> <param-value>classpath:spring-mybatis.xml</param-value> </context-param> <!-- Spring监听器 --> <listener> <listener-class>org.springframework.web.context.ContextLoaderListener</listener-class> </listener>在test数据库中,创建一个测试的users表:
DROP TABLE IF EXISTS `users`; CREATE TABLE `users` ( `id` int(11) NOT NULL AUTO_INCREMENT COMMENT '用户id', `username` varchar(40) NOT NULL COMMENT '用户名', `password` varchar(32) NOT NULL COMMENT '用户密码', `pic` varchar(100) DEFAULT NULL COMMENT '用户图片', PRIMARY KEY (`id`) ) ENGINE=InnoDB AUTO_INCREMENT=2 DEFAULT CHARSET=utf8; insert into `users`(`id`,`username`,`password`,`pic`) values (1,'user_1',md5('password1'),'');使用Mybatis generator自动创建users表对应的entity及mapper,Mybatis generator配置参考如下:
<?xml version="1.0" encoding="UTF-8"?> <!DOCTYPE generatorConfiguration PUBLIC "-//mybatis.org//DTD MyBatis Generator Configuration 1.0//EN" "http://mybatis.org/dtd/mybatis-generator-config_1_0.dtd"><generatorConfiguration> <!-- 数据库驱动 --> <classPathEntry location="/Users/alun/Documents/mybatis-generator/mysql-connector-java-5.1.39.jar" /> <context id="DB2Tables" targetRuntime="MyBatis3"> <commentGenerator> <property name="suppressDate" value="true" /> <!-- 是否去除自动生成的注释 true:是 : false:否 --> <property name="suppressAllComments" value="true" /> </commentGenerator> <!--数据库链接URL,用户名、密码 --> <jdbcConnection driverClass="com.mysql.jdbc.Driver" connectionURL="jdbc:mysql://127.0.0.1/test" userId="testuser" password="testpass"> </jdbcConnection> <javaTypeResolver> <property name="forceBigDecimals" value="false" /> </javaTypeResolver> <!-- 生成模型的包名和位置 --> <javaModelGenerator targetPackage="com.springmvcdemo.entities" targetProject="springmvc-demo/src/main/java"> <property name="enableSubPackages" value="true" /> <property name="trimStrings" value="true" /> </javaModelGenerator> <!-- 生成映射文件的包名和位置 --> <sqlMapGenerator targetPackage="mapping" targetProject="springmvc-demo/src/main/resources"> <property name="enableSubPackages" value="true" /> </sqlMapGenerator> <!-- 生成DAO的包名和位置 --> <javaClientGenerator type="XMLMAPPER" targetPackage="com.springmvcdemo.mappers" targetProject="springmvc-demo/src/main/java"> <property name="enableSubPackages" value="true" /> </javaClientGenerator> <!-- 要生成的表 tableName是数据库中的表名或视图名 domainObjectName是实体类名 --> <table tableName="users" domainObjectName="User" enableCountByExample="false" enableUpdateByExample="false" enableDeleteByExample="false" enableSelectByExample="false" selectByExampleQueryId="false"></table> </context></generatorConfiguration>在src/test/java下新建MybatisTest.java,内容如下:
import javax.annotation.Resource;import org.junit.Before;import org.junit.Test;import org.junit.runner.RunWith;import org.springframework.test.context.ContextConfiguration;import org.springframework.test.context.junit4.SpringJUnit4ClassRunner;import com.springmvcdemo.entities.User;import com.springmvcdemo.mappers.UserMapper;@RunWith(SpringJUnit4ClassRunner.class)//表示继承了SpringJUnit4ClassRunner类 @ContextConfiguration(locations = {"classpath:spring-mybatis.xml"}) public class MybatisTest { @Resource(name="userMapper") private UserMapper userMapper; @Before public void before() { } @Test public void test1() { System.out.println(userMapper.selectByPrimaryKey(1)); } @Test public void test2() { User user = new User(); user.setId(2); user.setUsername("user_2"); user.setPassword("userpass2"); System.out.println(userMapper.insert(user)); } @Test public void test3() { System.out.println(userMapper.deleteByPrimaryKey(2)); }}使用JUnit Test执行,如果没有问题,表明Spring跟Mybatis基本集成成功。
3.集成Velocity
通过Maven引入Mybatis相关类库,在pom.xml文件的dependencies中,添加如下配置:
<dependency> <groupId>org.springframework</groupId> <artifactId>spring-context-support</artifactId> <version>${spring.version}</version> </dependency> <!-- Velocity模板 --> <dependency> <groupId>org.apache.velocity</groupId> <artifactId>velocity</artifactId> <version>1.7</version> </dependency> <dependency> <groupId>org.apache.velocity</groupId> <artifactId>velocity-tools</artifactId> <version>2.0</version> </dependency>在src/main/resources/spring-mvc.xml中添加如下配置:
<!-- 视图模式配置velocity --> <bean id="velocityConfig" class="org.springframework.web.servlet.view.velocity.VelocityConfigurer"> <property name="resourceLoaderPath" value="/WEB-INF/views/" /> <property name="velocityProperties"> <props> <prop key="input.encoding">UTF-8</prop> <prop key="output.encoding">UTF-8</prop> </props> </property> </bean> <!-- 使用VelocityLayoutViewResolver,能够通过布局渲染页面 --> <bean id="viewResolver" class="org.springframework.web.servlet.view.velocity.VelocityLayoutViewResolver"> <property name="cache" value="true" /> <property name="prefix" value="" /> <property name="layoutUrl" value="layout.vm" /><!--默认布局页--> <property name="suffix" value=".vm" /> <property name="contentType"> <value>text/html;charset=UTF-8</value> </property> <property name="allowSessionOverride" value="true" /> <property name="allowRequestOverride" value="true" /> <property name="exposeSessionAttributes" value="true" /> <property name="requestContextAttribute" value="rc" /> <property name="exposeRequestAttributes" value="true" /> </bean>在src/main/webapp/WEB-INF目录下创建views目录,并添加layout.vm文件,内容如下:
<!DOCTYPE html><html><head><meta http-equiv="Content-Type" content="text/html; charset=UTF-8"><meta name="viewport" content="width=device-width, initial-scale=1.0" /><title>我的测试站点-$title</title><style>* {font-family: Microsoft YaHei, Tahoma, Helvetica, Arial,sans-serif;}html, body {height: 100%;}.header {background-color: #f5f5f5;padding: 20px;}.container {padding: 20px;}.footer {height: 40px;background-color: #f5f5f5;border-top: 1px solid #ddd;padding: 20px;}</style></head><body> <header class="header"> <div> <a href="$rc.contextPath/">首页</a> </div> </header> <div class="container">$screen_content</div> <footer class="footer"> <div> <p style="float:left">© Hylun 2017</p> <p style="float:right"> Powered by <a href="http://my.oschina.net/alun" target="_blank">Alun</a> </p> </div> </footer></body></html>在src/main/webapp/WEB-INF/views目录下添加index.vm文件,内容如下:
#set($title = "首页")<div>首页内容</div>修改com.springmvcdemo.controllers.IndexController的内容如下:
package com.springmvcdemo.controllers;import org.springframework.stereotype.Controller;import org.springframework.web.bind.annotation.RequestMapping;@Controllerpublic class IndexController { @RequestMapping("/") public String index(){ return "index"; }}在Tomcat中执行项目,打开浏览器查看http://localhost:8080/springmvc-demo/ ,如果页面显示正常,表明velocity已基本集成成功。
Demo已经发布至 https://github.com/hylun/SpringWeb 及 http://gitee.com/hylun/SpringWeb
欢迎大家围观!
- 使用Maven创建Springmvc+Mybatis+Velocity项目
- 使用IDEA创建maven Mybatis-SpringMvc项目
- 使用Idea创建ssm项目,SpringMVC+Spring+MyBatis+Maven整合
- 使用maven创建java web项目+SpringMVC+Mybatis
- 使用Idea创建ssm项目,SpringMVC+Spring+MyBatis+Maven整合
- 使用Idea创建ssm项目,SpringMVC+Spring+MyBatis+Maven整合
- Springmvc+Mybatis+Velocity实现小demo(Maven项目)
- maven+springMVC+mybatis+velocity+mysql+junit项目框架搭建
- idea创建maven+springmvc+mybatis+jetty项目
- 【SSM】Maven创建web项目:SpringMVC+Mybatis
- maven+springMVC+mysql+mybatis+velocity+事务整合
- maven+springmvc+spring+mybatis+velocity整合
- 使用maven构建springmvc-mybatis项目
- 使用Maven搭建Spring+SpringMVC+Mybatis项目
- 使用maven 创建 springmvc整合mybatis项目 踩过的坑
- 创建SpringMVC+Mybatis项目
- maven创建多模块项目+springMVC+mybatis
- IDEA14创建Maven管理的SpringMVC+Mybatis,web项目
- 罗德里格斯转换公式推导
- php调用java的jar包方法
- ZOJ Problem Set
- 五、系统调用(1)
- iBooks 书籍存放位置
- 使用Maven创建Springmvc+Mybatis+Velocity项目
- 永久解决vs2013+qt+opencv中代码下面很多红色波浪线
- phpcms 允许英文目录有空格
- 企业行业云计算解决方案
- lodash源码分析之chunk的尺与刀
- 2017最新全栈python第2期系列视频教程#92Day
- ARM处理器内核列表
- 基于ResourceLoader读取Properties配置文件
- 陶哲轩的十岁与三十岁