转载自:http://blog.csdn.net/luoshengyang/article/details/6714543
在Android应用程序中,可以配置Activity以四种方式来启动,其中最令人迷惑的就是"singleTask"这种方式了,官方文档称以这种方式启动的Activity总是属于一个任务的根Activity。果真如此吗?本文将为你解开Activity的"singleTask"之谜。
在解开这个谜之前,我们先来简单了解一下在Android应用程序中,任务(Task)是个什么样的概念。我们知道,Activity是Android应用程序的基础组件之一,在应用程序运行时,每一个Activity代表一个用户操作。用户为了完成某个功能而执行的一系列操作就形成了一个Activity序列,这个序列在Android应用程序中就称之为任务,它是从用户体验的角度出发,把一组相关的Activity组织在一起而抽象出来的概念。
对初学者来说,在开发Android应用程序时,对任务的概念可能不是那么的直观,一般我们只关注如何实现应用程序中的每一个Activity。事实上,Android系统中的任务更多的是体现是应用程序运行的时候,因此,它相对于Activity来说是动态存在的,这就是为什么我们在开发时对任务这个概念不是那么直观的原因。不过,我们在开发Android应用程序时,还是可以配置Activity的任务属性的,即告诉系统,它是要在新的任务中启动呢,还是在已有的任务中启动,亦或是其它的Activity能不能与它共享同一个任务,具体配置请参考官方文档:
http://developer.android.com/guide/topics/fundamentals/tasks-and-back-stack.html
它是这样介绍以"singleTask"方式启动的Activity的:
The system creates a new task and instantiates the activity at the root of the new task. However, if an instance of the activity already exists in a separate task, the system routes the intent to the existing instance through a call to its onNewIntent() method, rather than creating a new instance. Only one instance of the activity can exist at a time.
它明确说明,以"singleTask"方式启动的Activity,全局只有唯一个实例存在,因此,当我们第一次启动这个Activity时,系统便会创建一个新的任务,并且初始化一个这样的Activity的实例,放在新任务的底部,如果下次再启动这个Activity时,系统发现已经存在这样的Activity实例,就会调用这个Activity实例的onNewIntent成员函数,从而把它激活起来。从这句话就可以推断出,以"singleTask"方式启动的Activity总是属于一个任务的根Activity。
但是文档接着举例子说明,当用户按下键盘上的Back键时,如果此时在前台中运行的任务堆栈顶端是一个"singleTask"的Activity,系统会回到当前任务的下一个Activity中去,而不是回到前一个Activity中去,如下图所示:

真是坑爹啊!有木有!前面刚说"singleTask"会在新的任务中运行,并且位于任务堆栈的底部,这里在Task B中,一个赤裸裸的带着"singleTask"标签的箭头无情地指向Task B堆栈顶端的Activity Y,刚转身就翻脸不认人了呢!
狮屎胜于熊便,我们来做一个实验吧,看看到底在启动这个"singleTask"的Activity的时候,它是位于新任务堆栈的底部呢,还是在已有任务的顶部。
首先在Android源代码工程中创建一个Android应用程序工程,名字就称为Task吧。关于如何获得Android源代码工程,请参考在Ubuntu上下载、编译和安装Android最新源代码一文;关于如何在Android源代码工程中创建应用程序工程,请参考在Ubuntu上为Android系统内置Java应用程序测试Application Frameworks层的硬件服务一文。这个应用程序工程定义了一个名为shy.luo.task的package,这个例子的源代码主要就是实现在这里了。下面,将会逐一介绍这个package里面的文件。
应用程序的默认Activity定义在src/shy/luo/task/MainActivity.java文件中:
- package shy.luo.task;
-
- import android.app.Activity;
- import android.content.Intent;
- import android.os.Bundle;
- import android.util.Log;
- import android.view.View;
- import android.view.View.OnClickListener;
- import android.widget.Button;
-
- public class MainActivity extends Activity implements OnClickListener {
- private final static String LOG_TAG = "shy.luo.task.MainActivity";
-
- private Button startButton = null;
-
- @Override
- public void onCreate(Bundle savedInstanceState) {
- super.onCreate(savedInstanceState);
- setContentView(R.layout.main);
-
- startButton = (Button)findViewById(R.id.button_start);
- startButton.setOnClickListener(this);
-
- Log.i(LOG_TAG, "Main Activity Created.");
- }
-
- @Override
- public void onClick(View v) {
- if(v.equals(startButton)) {
- Intent intent = new Intent("shy.luo.task.subactivity");
- startActivity(intent);
- }
- }
- }
- package shy.luo.task;
-
- import android.app.Activity;
- import android.os.Bundle;
- import android.util.Log;
- import android.view.View;
- import android.view.View.OnClickListener;
- import android.widget.Button;
-
- public class SubActivity extends Activity implements OnClickListener {
- private final static String LOG_TAG = "shy.luo.task.SubActivity";
-
- private Button finishButton = null;
-
- @Override
- public void onCreate(Bundle savedInstanceState) {
- super.onCreate(savedInstanceState);
- setContentView(R.layout.sub);
-
- finishButton = (Button)findViewById(R.id.button_finish);
- finishButton.setOnClickListener(this);
-
- Log.i(LOG_TAG, "Sub Activity Created.");
- }
-
- @Override
- public void onClick(View v) {
- if(v.equals(finishButton)) {
- finish();
- }
- }
- }
再来看一下应用程序的配置文件AndroidManifest.xml:
- <?xml version="1.0" encoding="utf-8"?>
- <manifest xmlns:android="http://schemas.android.com/apk/res/android"
- package="shy.luo.task"
- android:versionCode="1"
- android:versionName="1.0">
- <application android:icon="@drawable/icon" android:label="@string/app_name">
- <activity android:name=".MainActivity"
- android:label="@string/app_name">
- <intent-filter>
- <action android:name="android.intent.action.MAIN" />
- <category android:name="android.intent.category.LAUNCHER" />
- </intent-filter>
- </activity>
- <activity android:name=".SubActivity"
- android:label="@string/sub_activity"
- android:launchMode="singleTask">
- <intent-filter>
- <action android:name="shy.luo.task.subactivity"/>
- <category android:name="android.intent.category.DEFAULT"/>
- </intent-filter>
- </activity>
- </application>
- </manifest>
注意,这里的SubActivity的launchMode属性配置为"singleTask"。
再来看界面配置文件,它们定义在res/layout目录中,main.xml文件对应MainActivity的界面:
- <?xml version="1.0" encoding="utf-8"?>
- <LinearLayout xmlns:android="http://schemas.android.com/apk/res/android"
- android:orientation="vertical"
- android:layout_width="fill_parent"
- android:layout_height="fill_parent"
- android:gravity="center">
- <Button
- android:id="@+id/button_start"
- android:layout_width="wrap_content"
- android:layout_height="wrap_content"
- android:gravity="center"
- android:text="@string/start" >
- </Button>
- </LinearLayout>
- <?xml version="1.0" encoding="utf-8"?>
- <LinearLayout xmlns:android="http://schemas.android.com/apk/res/android"
- android:orientation="vertical"
- android:layout_width="fill_parent"
- android:layout_height="fill_parent"
- android:gravity="center">
- <Button
- android:id="@+id/button_finish"
- android:layout_width="wrap_content"
- android:layout_height="wrap_content"
- android:gravity="center"
- android:text="@string/finish" >
- </Button>
- </LinearLayout>
- <?xml version="1.0" encoding="utf-8"?>
- <resources>
- <string name="app_name">Task</string>
- <string name="sub_activity">Sub Activity</string>
- <string name="start">Start singleTask activity</string>
- <string name="finish">Finish activity</string>
- </resources>
- LOCAL_PATH:= $(call my-dir)
- include $(CLEAR_VARS)
-
- LOCAL_MODULE_TAGS := optional
-
- LOCAL_SRC_FILES := $(call all-subdir-java-files)
-
- LOCAL_PACKAGE_NAME := Task
-
- include $(BUILD_PACKAGE)
如何单独编译Android源代码中的模块
一文。 执行以下命令进行编译和打包:- USER-NAME@MACHINE-NAME:~/Android$ mmm packages/experimental/Task
- USER-NAME@MACHINE-NAME:~/Android$ make snod
在Ubuntu上下载、编译和安装Android最新源代码
一文。 执行以下命令启动模拟器:- USER-NAME@MACHINE-NAME:~/Android$ emulator
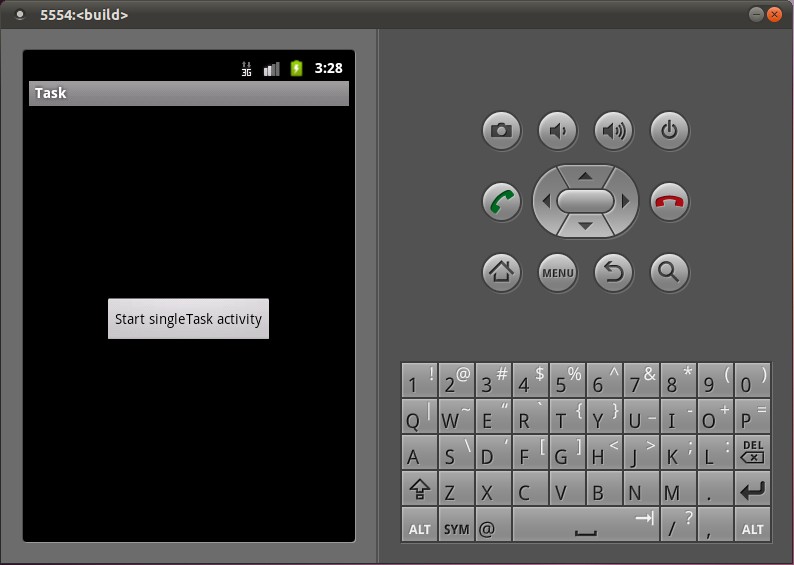
点击中间的按钮,就会以"singleTask"的方式来启动SubActivity:
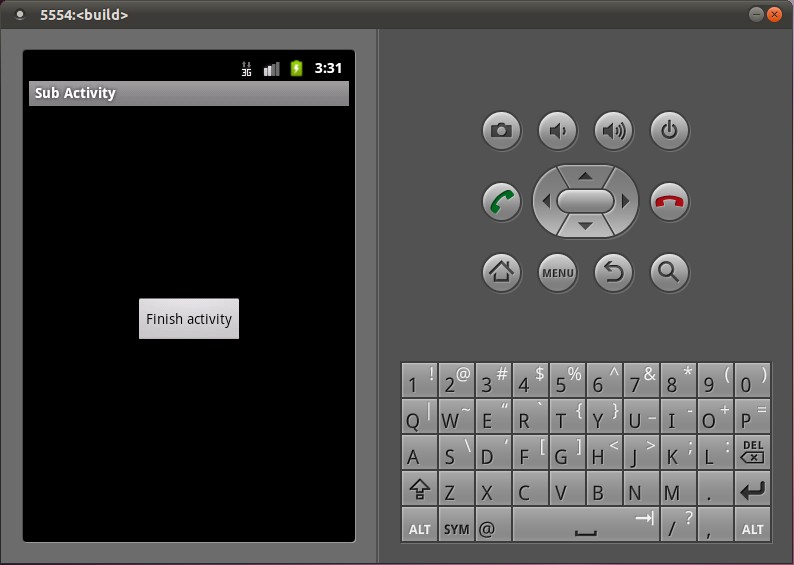
现在,我们如何来确认SubActivity是不是在新的任务中启动并且位于这个新任务的堆栈底部呢?Android源代码工程为我们准备了adb工具,可以查看模拟器上系统运行的状况,执行下面的命令查看;
- USER-NAME@MACHINE-NAME:~/Android$ adb shell dumpsys activity
- Running activities (most recent first):
- TaskRecord{4070d8f8 #3 A shy.luo.task}
- Run #2: HistoryRecord{406a13f8 shy.luo.task/.SubActivity}
- Run #1: HistoryRecord{406a0e00 shy.luo.task/.MainActivity}
- TaskRecord{4067a510 #2 A com.android.launcher}
- Run #0: HistoryRecord{40677518 com.android.launcher/com.android.launcher2.Launcher}
前面我们在两篇文章Android应用程序启动过程源代码分析和Android应用程序内部启动Activity过程(startActivity)的源代码分析时,分别在Step 9和Step 8中分析了Activity在启动过程中与任务相关的函数ActivityStack.startActivityUncheckedLocked函数中,它定义在frameworks/base/services/java/com/android/server/am/ActivityStack.java文件中:
- public class ActivityStack {
-
- ......
-
- final int startActivityUncheckedLocked(ActivityRecord r,
- ActivityRecord sourceRecord, Uri[] grantedUriPermissions,
- int grantedMode, boolean onlyIfNeeded, boolean doResume) {
- final Intent intent = r.intent;
- final int callingUid = r.launchedFromUid;
-
- int launchFlags = intent.getFlags();
-
- ......
-
- ActivityRecord notTop = (launchFlags&Intent.FLAG_ACTIVITY_PREVIOUS_IS_TOP)
- != 0 ? r : null;
-
- ......
-
- if (sourceRecord == null) {
- ......
- } else if (sourceRecord.launchMode == ActivityInfo.LAUNCH_SINGLE_INSTANCE) {
- ......
- } else if (r.launchMode == ActivityInfo.LAUNCH_SINGLE_INSTANCE
- || r.launchMode == ActivityInfo.LAUNCH_SINGLE_TASK) {
-
-
- launchFlags |= Intent.FLAG_ACTIVITY_NEW_TASK;
- }
-
- ......
-
- boolean addingToTask = false;
- if (((launchFlags&Intent.FLAG_ACTIVITY_NEW_TASK) != 0 &&
- (launchFlags&Intent.FLAG_ACTIVITY_MULTIPLE_TASK) == 0)
- || r.launchMode == ActivityInfo.LAUNCH_SINGLE_TASK
- || r.launchMode == ActivityInfo.LAUNCH_SINGLE_INSTANCE) {
-
-
-
- if (r.resultTo == null) {
-
-
-
-
- ActivityRecord taskTop = r.launchMode != ActivityInfo.LAUNCH_SINGLE_INSTANCE
- ? findTaskLocked(intent, r.info)
- : findActivityLocked(intent, r.info);
- if (taskTop != null) {
-
- ......
-
- if ((launchFlags&Intent.FLAG_ACTIVITY_CLEAR_TOP) != 0
- || r.launchMode == ActivityInfo.LAUNCH_SINGLE_TASK
- || r.launchMode == ActivityInfo.LAUNCH_SINGLE_INSTANCE) {
-
-
-
-
- ActivityRecord top = performClearTaskLocked(
- taskTop.task.taskId, r, launchFlags, true);
- if (top != null) {
- ......
- } else {
-
-
-
-
- addingToTask = true;
-
-
-
- sourceRecord = taskTop;
- }
- } else if (r.realActivity.equals(taskTop.task.realActivity)) {
- ......
- } else if ((launchFlags&Intent.FLAG_ACTIVITY_RESET_TASK_IF_NEEDED) == 0) {
- ......
- } else if (!taskTop.task.rootWasReset) {
- ......
- }
-
- ......
- }
- }
- }
-
- ......
-
- if (r.packageName != null) {
-
-
-
- ActivityRecord top = topRunningNonDelayedActivityLocked(notTop);
- if (top != null && r.resultTo == null) {
- if (top.realActivity.equals(r.realActivity)) {
- if (top.app != null && top.app.thread != null) {
- ......
- }
- }
- }
-
- } else {
- ......
- }
-
- boolean newTask = false;
-
-
- if (r.resultTo == null && !addingToTask
- && (launchFlags&Intent.FLAG_ACTIVITY_NEW_TASK) != 0) {
-
- mService.mCurTask++;
- if (mService.mCurTask <= 0) {
- mService.mCurTask = 1;
- }
- r.task = new TaskRecord(mService.mCurTask, r.info, intent,
- (r.info.flags&ActivityInfo.FLAG_CLEAR_TASK_ON_LAUNCH) != 0);
- if (DEBUG_TASKS) Slog.v(TAG, "Starting new activity " + r
- + " in new task " + r.task);
- newTask = true;
- if (mMainStack) {
- mService.addRecentTaskLocked(r.task);
- }
- } else if (sourceRecord != null) {
- if (!addingToTask &&
- (launchFlags&Intent.FLAG_ACTIVITY_CLEAR_TOP) != 0) {
- ......
- } else if (!addingToTask &&
- (launchFlags&Intent.FLAG_ACTIVITY_REORDER_TO_FRONT) != 0) {
- ......
- }
-
-
-
- r.task = sourceRecord.task;
-
- ......
-
- } else {
- ......
- }
-
- ......
-
- startActivityLocked(r, newTask, doResume);
- return START_SUCCESS;
- }
-
- ......
-
- }
首先是获得用来启动Activity的Intent的Flags,并且保存在launchFlags变量中,这里,launcFlags的Intent.FLAG_ACTIVITY_PREVIOUS_IS_TOP位没有置位,因此,notTop为null。
接下来的这个if语句:
- if (sourceRecord == null) {
- ......
- } else if (sourceRecord.launchMode == ActivityInfo.LAUNCH_SINGLE_INSTANCE) {
- ......
- } else if (r.launchMode == ActivityInfo.LAUNCH_SINGLE_INSTANCE
- || r.launchMode == ActivityInfo.LAUNCH_SINGLE_TASK) {
-
-
- launchFlags |= Intent.FLAG_ACTIVITY_NEW_TASK;
- }
- ActivityRecord taskTop = r.launchMode != ActivityInfo.LAUNCH_SINGLE_INSTANCE
- ? findTaskLocked(intent, r.info)
- : findActivityLocked(intent, r.info)
- public class ActivityStack {
-
- ......
-
-
-
-
-
- private ActivityRecord findTaskLocked(Intent intent, ActivityInfo info) {
- ComponentName cls = intent.getComponent();
- if (info.targetActivity != null) {
- cls = new ComponentName(info.packageName, info.targetActivity);
- }
-
- TaskRecord cp = null;
-
- final int N = mHistory.size();
- for (int i=(N-1); i>=0; i--) {
- ActivityRecord r = (ActivityRecord)mHistory.get(i);
- if (!r.finishing && r.task != cp
- && r.launchMode != ActivityInfo.LAUNCH_SINGLE_INSTANCE) {
- cp = r.task;
-
-
-
- if (r.task.affinity != null) {
- if (r.task.affinity.equals(info.taskAffinity)) {
-
- return r;
- }
- } else if (r.task.intent != null
- && r.task.intent.getComponent().equals(cls)) {
-
-
-
- return r;
- } else if (r.task.affinityIntent != null
- && r.task.affinityIntent.getComponent().equals(cls)) {
-
-
-
- return r;
- }
- }
- }
-
- return null;
- }
-
- ......
-
- }
回到前面的startActivityUncheckedLocked函数中,这里的taskTop就表示MainActivity,它不为null,于是继续往前执行。由于条件r.launchMode == ActivityInfo.LAUNCH_SINGLE_TASK成立,于是执行下面语句:
- ActivityRecord top = performClearTaskLocked(
- kTop.task.taskId, r, launchFlags, true);
- public class ActivityStack {
-
- ......
-
-
-
-
-
-
-
-
-
-
-
-
- private final ActivityRecord performClearTaskLocked(int taskId,
- ActivityRecord newR, int launchFlags, boolean doClear) {
- int i = mHistory.size();
-
-
- while (i > 0) {
- i--;
- ActivityRecord r = (ActivityRecord)mHistory.get(i);
- if (r.task.taskId == taskId) {
- i++;
- break;
- }
- }
-
-
- while (i > 0) {
- i--;
- ActivityRecord r = (ActivityRecord)mHistory.get(i);
- if (r.finishing) {
- continue;
- }
- if (r.task.taskId != taskId) {
- return null;
- }
- if (r.realActivity.equals(newR.realActivity)) {
-
- ActivityRecord ret = r;
- if (doClear) {
- while (i < (mHistory.size()-1)) {
- i++;
- r = (ActivityRecord)mHistory.get(i);
- if (r.finishing) {
- continue;
- }
- if (finishActivityLocked(r, i, Activity.RESULT_CANCELED,
- null, "clear")) {
- i--;
- }
- }
- }
-
-
-
-
- if (ret.launchMode == ActivityInfo.LAUNCH_MULTIPLE
- && (launchFlags&Intent.FLAG_ACTIVITY_SINGLE_TOP) == 0) {
- if (!ret.finishing) {
- int index = indexOfTokenLocked(ret);
- if (index >= 0) {
- finishActivityLocked(ret, index, Activity.RESULT_CANCELED,
- null, "clear");
- }
- return null;
- }
- }
-
- return ret;
- }
- }
-
- return null;
- }
-
- ......
-
- }
回到前面的startActivityUncheckedLocked函数中,这里的变量top就为null了,于是执行下面的else语句:
- if (top != null) {
- ......
- } else {
-
-
-
-
- addingToTask = true;
-
-
-
- sourceRecord = taskTop;
- }
继续往下看,下面这个if语句:
- if (r.packageName != null) {
-
-
-
- ActivityRecord top = topRunningNonDelayedActivityLocked(notTop);
- if (top != null && r.resultTo == null) {
- if (top.realActivity.equals(r.realActivity)) {
- if (top.app != null && top.app.thread != null) {
- ......
- }
- }
- }
-
- } else {
- ......
- }
- boolean newTask = false;
-
-
- if (r.resultTo == null && !addingToTask
- && (launchFlags&Intent.FLAG_ACTIVITY_NEW_TASK) != 0) {
- ......
-
- } else if (sourceRecord != null) {
- if (!addingToTask &&
- (launchFlags&Intent.FLAG_ACTIVITY_CLEAR_TOP) != 0) {
- ......
- } else if (!addingToTask &&
- (launchFlags&Intent.FLAG_ACTIVITY_REORDER_TO_FRONT) != 0) {
- ......
- }
-
-
-
- r.task = sourceRecord.task;
-
- ......
-
- } else {
- ......
- }
最后,就是调用startActivityLocked函数继续进行启动Activity的操作了。后面的操作这里就不跟下去了,有兴趣的读者可以参考两篇文章Android应用程序启动过程源代码分析和Android应用程序内部启动Activity过程(startActivity)的源代码分析。
到这里,思路就理清了,虽然SubActivity的launchMode被设置为"singleTask"模式,但是它并不像官方文档描述的一样:The system creates a new task and instantiates the activity at the root of the new task,而是在跟它有相同taskAffinity的任务中启动,并且位于这个任务的堆栈顶端,于是,前面那个图中,就会出现一个带着"singleTask"标签的箭头指向一个任务堆栈顶端的Activity Y了。
那么,我们有没有办法让一个"singleTask"的Activity在新的任务中启动呢?答案是肯定的。从上面的代码分析中,只要我们能够进入函数startActivityUncheckedLocked的这个if语句中:
- if (r.resultTo == null && !addingToTask
- && (launchFlags&Intent.FLAG_ACTIVITY_NEW_TASK) != 0) {
-
- mService.mCurTask++;
- if (mService.mCurTask <= 0) {
- mService.mCurTask = 1;
- }
- r.task = new TaskRecord(mService.mCurTask, r.info, intent,
- (r.info.flags&ActivityInfo.FLAG_CLEAR_TASK_ON_LAUNCH) != 0);
- if (DEBUG_TASKS) Slog.v(TAG, "Starting new activity " + r
- + " in new task " + r.task);
- newTask = true;
- if (mMainStack) {
- mService.addRecentTaskLocked(r.task);
- }
- }
我们可以稍微修改一下上面的AndroidManifest.xml配置文件来做一下这个实验:
- <?xml version="1.0" encoding="utf-8"?>
- <manifest xmlns:android="http://schemas.android.com/apk/res/android"
- package="shy.luo.task"
- android:versionCode="1"
- android:versionName="1.0">
- <application android:icon="@drawable/icon" android:label="@string/app_name">
- <activity android:name=".MainActivity"
- android:label="@string/app_name"
- android:taskAffinity="shy.luo.task.main.activity">
- <intent-filter>
- <action android:name="android.intent.action.MAIN" />
- <category android:name="android.intent.category.LAUNCHER" />
- </intent-filter>
- </activity>
- <activity android:name=".SubActivity"
- android:label="@string/sub_activity"
- android:launchMode="singleTask"
- android:taskAffinity="shy.luo.task.sub.activity">
- <intent-filter>
- <action android:name="shy.luo.task.subactivity"/>
- <category android:name="android.intent.category.DEFAULT"/>
- </intent-filter>
- </activity>
- </application>
- </manifest>
- Running activities (most recent first):
- TaskRecord{4069c020 #4 A shy.luo.task.sub.activity}
- Run #2: HistoryRecord{40725040 shy.luo.task/.SubActivity}
- TaskRecord{40695220 #3 A shy.luo.task.main.activity}
- Run #1: HistoryRecord{406b26b8 shy.luo.task/.MainActivity}
- TaskRecord{40599c90 #2 A com.android.launcher}
- Run #0: HistoryRecord{40646628 com.android.launcher/com.android.launcher2.Launcher}
至此,我们总结一下,设置了"singleTask"启动模式的Activity的特点:
1. 设置了"singleTask"启动模式的Activity,它在启动的时候,会先在系统中查找属性值affinity等于它的属性值taskAffinity的任务存在;如果存在这样的任务,它就会在这个任务中启动,否则就会在新任务中启动。因此,如果我们想要设置了"singleTask"启动模式的Activity在新的任务中启动,就要为它设置一个独立的taskAffinity属性值。
2. 如果设置了"singleTask"启动模式的Activity不是在新的任务中启动时,它会在已有的任务中查看是否已经存在相应的Activity实例,如果存在,就会把位于这个Activity实例上面的Activity全部结束掉,即最终这个Activity实例会位于任务的堆栈顶端中。