WebGL Now Available in WebKit Nightlies
来源:互联网 发布:淘宝客怎么开通了 编辑:程序博客网 时间:2024/05/30 05:41
http://webkit.org/blog/603/webgl-now-available-in-webkit-nightlies/
WebGL Now Available in WebKit Nightlies
Posted by Chris Marrin on Monday, October 19th, 2009 at 1:55 pmIntroduction
WebGL is a new standard being worked on in the Khronos consortium. The work done in Khronos is only available to its members, so I can’t show you the spec just yet. But it will become public within the next few months after a review by Khronos members. The good news is that WebGL is now available in WebKit nightlies as of October 4, 2009 (r49073). So if you’re running Leopard or Snow Leopard you can try it out for yourself. WebGL runs in the HTML Canvas element, so it works very similarly to the 2D Canvas capability currently in WebKit.
OpenGL for the Web
OpenGL has been around for ages, so it’s very mature. It can handle all the features of the most advanced graphics cards, but works across a wide variety of hardware. WebGL is based on OpenGL ES 2.0 which is a shader based API.
WebGL is a very low level API, so it’s not for the faint of heart. OpenGL’s shading language, GLSL, is itself an entire programming environment. So doing even simple things in WebGL takes a lot of code. You have to load, compile and link the shaders, setup vertex buffer objects to hold the shapes, and setup the variables to be passed into the shaders. Then you have to do matrix math to animate the shapes. If you want to learn more about all this before continuing, head over to the OpenGL Site for some nice tutorials.
Getting Started
WebGL is really cool! But because it’s new and still under development it isn’t turned on by default. To do that, you need to go into Terminal and type this:
defaults write com.apple.Safari WebKitWebGLEnabled -bool YES
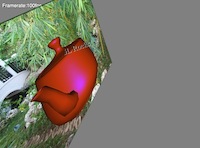
Once you’ve done that, restart the WebKit nightly build. Then click on the image below. If you see a spinning cube, you have WebGL installed and enabled. If not go back and make sure you have the latest Safari and you typed the above line correctly.
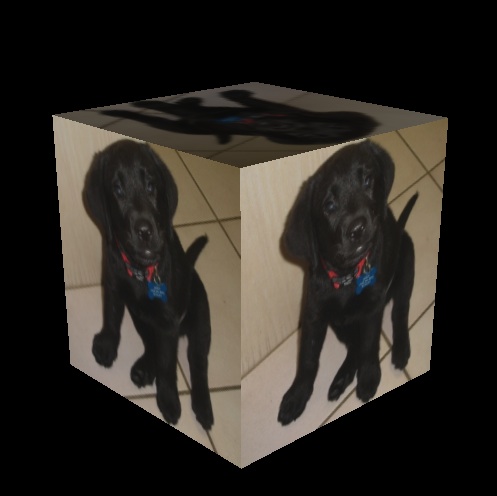
Click to see Spinning Box (requires WebGL)
If you don’t have a nightly build, you can still see WebGL in action here.
A Simple Example
Let’s see how to create the spinning cube above. For the examples and demos here I’ve created a couple of files of JavaScript utilities to help out: one with some general utilities and another with a set of matrix functions. These will let us focus on the different steps needed to use WebGL without worrying about the details.
Like I said, WebGL is built on top of the Canvas Element. So just like you do for a 2D Canvas you start out by getting a CanvasRenderingContext with a call to the getContext method of the Canvas Element, passing the string “webkit-3d” (this is temporary, and will eventually change to “webgl”). The returned object has a set of functions very similar to OpenGL ES 2.0.
Using Shaders
Nothing happen in WebGL without shaders. They take shape data and turn it into pixels on the screen. When using GLSL you define two separate shaders. The vertex shader runs on each corner of every triangle being rendered. Here you transform the points, pass along the texture coordinates and use the normals to compute a lighting factor based on the normals of each triangle. There is a really nice GLSL Tutorial on lighting. GLSL gives you one special variable to store the transformed corner point, gl_Position. The value stored there for each of the corners of a triangle is used to interpolate all the pixels being output. The texture coordinates and lighting factor are passed in varying variables we created for the purpose.
All these values are passed to the fragment shader, which runs on each pixel of every transformed triangle passed in. This is where you get the appropriate pixel from the texture, adjust its lighting, and output the pixel. GLSL gives you a special variable for this,gl_FragColor. Whatever color your store there will be the color of that pixel.
So let’s define the shaders. I’ll use normal script notation here, even though HTML ignores it. It’s a useful way to include GLSL. The contents of the script will be passed as a string to theshaderSource function:
<script id="vshader"type="x-shader/x-vertex">
uniform mat4 u_modelViewProjMatrix; uniform mat4 u_normalMatrix; uniform vec3 lightDir; attribute vec3 vNormal; attribute vec4 vTexCoord; attribute vec4 vPosition; varying float v_Dot; varying vec2 v_texCoord; void main() { gl_Position = u_modelViewProjMatrix * vPosition; v_texCoord = vTexCoord.st; vec4 transNormal = u_normalMatrix * vec4(vNormal,1); v_Dot = max(dot(transNormal.xyz, lightDir), 0.0); }</script><script id="fshader" type="x-shader/x-fragment"> uniform sampler2D sampler2d; varying float v_Dot; varying vec2 v_texCoord; void main() { vec2 texCoord = vec2(v_texCoord.s, 1.0 - v_texCoord.t); vec4 color = texture2D(sampler2d,texCoord); color += vec4(0.1,0.1,0.1,1); gl_FragColor = vec4(color.xyz * v_Dot, color.a); }</script>
The vertex shader in this example simply sends along the vertex position, vPosition to the fragment shader after transforming it by a composite model-view/projection matrix. We’ll get to that later. Then it passes along the texture coodinate, vTexCoord, and uses the normal invNormal to compute a lighting factor, v_Dot for the fragment shader. The fragment shader is even simpler. It just gets a pixel from the texture, (after flipping the texture coordinate so the image is right-side up). Then multiplies that by the lighting factor passed in from the vertex shader. This causes the pixels to be brighter when a side of the cube is facing you and darker when it is at an angle, giving it a realistic lighting effect.
Initializing the Engine
Now we have to get WebGL up and running. The utility library we first loaded will help us here:
function init() { // Initialize var gl = initWebGL( // The id of the Canvas Element "example1", // The ids of the vertex and fragment shaders "vshader", "fshader", // The vertex attribute names used by the shaders. // The order they appear here corresponds to their index // used later. [ "vNormal", "vTexCoord", "vPosition"], // The clear color and depth values [ 0, 0, 0, 1 ], 10000); // Set some uniform variables for the shaders gl.uniform3f(gl.getUniformLocation(gl.program, "lightDir"), 0, 0, 1); gl.uniform1i(gl.getUniformLocation(gl.program, "sampler2d"), 0); // Enable texturing gl.enable(gl.TEXTURE_2D); // Create a box. On return 'gl' contains a 'box' property with the // BufferObjects containing the arrays for vertices, normals, texture // coords, and indices. gl.box = makeBox(gl); // Load an image to use. Returns a CanvasTexture object spiritTexture = loadImageTexture(gl, "spirit.jpg"); // Create some matrices to use later and save their locations in the shaders gl.mvMatrix = new CanvasMatrix4(); gl.u_normalMatrixLoc = gl.getUniformLocation(gl.program, "u_normalMatrix"); gl.normalMatrix = new CanvasMatrix4(); gl.u_modelViewProjMatrixLoc = gl.getUniformLocation(gl.program, "u_modelViewProjMatrix"); gl.mvpMatrix = new CanvasMatrix4(); // Enable all the vertex arrays gl.enableVertexAttribArray(0); gl.enableVertexAttribArray(1); gl.enableVertexAttribArray(2); // Setup all the vertex attributes for vertices, normals and texCoords gl.bindBuffer(gl.ARRAY_BUFFER, gl.box.vertexObject); gl.vertexAttribPointer(2, 3, gl.FLOAT, false, 0, 0); gl.bindBuffer(gl.ARRAY_BUFFER, gl.box.normalObject); gl.vertexAttribPointer(0, 3, gl.FLOAT, false, 0, 0); gl.bindBuffer(gl.ARRAY_BUFFER, gl.box.texCoordObject); gl.vertexAttribPointer(1, 2, gl.FLOAT, false, 0, 0); // Bind the index array gl.bindBuffer(gl.ELEMENT_ARRAY_BUFFER, gl.box.indexObject); return gl; }
After this initialization we have the shaders loaded and attached to a GLSL program, which is how you define the interface to your shaders. You pass uniforms to a shader for values that don’t change, and vertex attributes for things that do, like vertices. Most of this is taken care of in the library, but you can pass additional values here, like we do with the lightDir andsampler2d uniforms. Here we also tell WebGL that we want to use the arrays the makeBox()function set up containing the vertices, normals and texture coordinates.
Setting Up the Viewport
Before we can render, we have to tell the canvas how to map the objects we are drawing frommodeling coodinates, which is the coordinate space we defined the box in, to viewport coordinates. We do that with a transformation matrix. We will use a perspective projection which will make closer objects look larger than further ones, just like in the real world. Here we will use the matrix library we loaded:
function reshape(gl) { var canvas = document.getElementById('example1'); if (canvas.clientWidth == width && canvas.clientHeight == height) return; width = canvas.clientWidth; height = canvas.clientHeight; // Set the viewport and projection matrix for the scene gl.viewport(0, 0, width, height); gl.perspectiveMatrix = new CanvasMatrix4(); gl.perspectiveMatrix.lookat(0,0,7, 0, 0, 0, 0, 1, 0); gl.perspectiveMatrix.perspective(30, width/height, 1, 10000); }
We save the perspectiveMatrix for use later. It transforms from world coordinates to viewport coordinates. We will go from modeling coordinate to world coordinates in the next step.
Drawing the Box
Now we’re all set up and we can finally draw our box. Most of the hard work is done but we still have to tell the box we want it to spin, and to do that we define a model-view matrix, which transforms from modeling coordinates to world coordinates. This tells the box where and at what angle we want it to appear. Then we multiply that by the perspective matrix we saved before to complete the transformation all the way from modeling coordinates to viewport coordinates. We also turn the model-view matrix into a normal matrix so it can be used to compute the proper lighting on the box:
function drawPicture(gl) { // Make sure the canvas is sized correctly. reshape(gl); // Clear the canvas gl.clear(gl.COLOR_BUFFER_BIT | gl.DEPTH_BUFFER_BIT); // Make a model/view matrix. gl.mvMatrix.makeIdentity(); gl.mvMatrix.rotate(currentAngle, 0,1,0); gl.mvMatrix.rotate(20, 1,0,0); // Construct the normal matrix from the model-view matrix and pass it in gl.normalMatrix.load(gl.mvMatrix); gl.normalMatrix.invert(); gl.normalMatrix.transpose(); gl.uniformMatrix4fv(gl.u_normalMatrixLoc, false, gl.normalMatrix.getAsCanvasFloatArray()); // Construct the model-view * projection matrix and pass it in gl.mvpMatrix.load(gl.mvMatrix); gl.mvpMatrix.multRight(gl.perspectiveMatrix); gl.uniformMatrix4fv(gl.u_modelViewProjMatrixLoc, false, gl.mvpMatrix.getAsCanvasFloatArray()); // Bind the texture to use gl.bindTexture(gl.TEXTURE_2D, spiritTexture); // Draw the cube gl.drawElements(gl.TRIANGLES, gl.box.numIndices, gl.UNSIGNED_BYTE, 0); // Finish up. gl.flush(); // Show the framerate framerate.snapshot(); currentAngle += incAngle; if (currentAngle > 360) currentAngle -= 360; }
Once this is all done you simply add a JavaScript timer to keep changing the angle and rendering the box in its new position and you have a spinning box!
Where to Next?
So, as you can see there’s a lot to learn about 3D rendering. There are some nice tutorials at theOpenGL Site. Most of these are not specific to OpenGL ES 2.0, so you’ll have to figure out what features are and are not available. Unfortunately there aren’t a lot of specific ES 2.0 examples yet. But I think these tutorials will give you a good start. There’s also a great book specifically about OpenGL ES 2.0 called the OpenGL ES 2.0 Programming Guide.
There are also a few WebGL examples in the wild already. Check them out here, here and here. WebKit has a few samples as well:
Spinning Box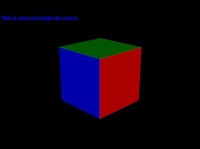
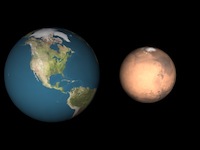
Earth
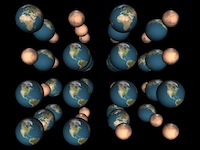
Many Planets
Teapot per-vertex
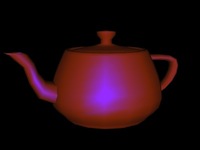
Teapot per-pixel
WebGL+CSS Animation
- WebGL Now Available in WebKit Nightlies
- "Thinking in Code" Audio Interviews now Available
- "Thinking in Code" Audio Interviews now Available
- "Thinking in Code" Audio Interviews now Available
- "Thinking in Code" Audio Interviews now Available
- "Thinking in Code" Audio Interviews now Available
- "Thinking in Code" Audio Interviews now Available
- "Thinking in Code" Audio Interviews now Available
- "Thinking in Code" Audio Interviews now Available
- "Thinking in Code" Audio Interviews now Available
- App and In-App Catalog Reports Now Available
- WebKit新特性WebGL
- WebKit之WebGL初识
- WebKit之WebGL实现
- Source Code for the Built-in ASP.NET 2.0 Providers Now Available for Download
- Building a 3D Game in XNA From Scratch - Free Video Tutorial Series Now Available!
- "Thinking in Code" Audio Interviews now Available铪
- "Thinking in Code" Audio Interviews now Available铪
- 3D向量类
- 汇编表达式和运算符
- 在MyEclipse中debug使用手册
- 从外部的js文件中获取ASPX页面的控件ClientID
- 搞笑故事一则。
- WebGL Now Available in WebKit Nightlies
- linux 命令
- 获取 GetLastError 文本信息
- sql2000安装帮助
- PB DataWindow 38个技巧
- spring - 详解spring事务属性
- Linux 系统移植arm s3c2410
- ORACLE SQL执行步骤
- 软件及系统开发项目可行性分析报告-样例