SMS Messaging in Android
来源:互联网 发布:淘宝卖家怎么注销店铺 编辑:程序博客网 时间:2024/06/05 19:23
Thanks:http://mobiforge.com/developing/story/sms-messaging-android
SMS Messaging in Android
It would be safe to say that nearly every mobile phonesold in the past decade has SMS messaging capabilities. In fact, SMSmessaging is one great killer application for the mobile phone and ithas created a steady revenue stream for mobile operators. Understandinghow to use SMS messaging in your application can provide you with manyideas to create the next killer application.
In this article, we take a look at how you can programmatically sendand receive SMS messages in your Android applications. The good newsfor Android developers is that you don't need a real device to test outSMS messaging - the free Android emulator provides the capability to doso.
Sending SMS Messages
To get started, first launch Eclipse and create a new Android project. Name the project as shown in Figure 1.
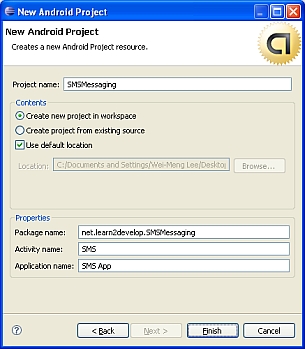
Figure 1 Creating a new Android project using Eclipse
Android uses a permission-based policy where all the permissions needed by an application need to be specified in the AndroidManifest.xmlfile. By doing so, when the application is installed it will be clearto the user what specific access permissions are required by theapplication. For example, as sending SMS messages will potentiallyincur additional cost on the user's end, indicating the SMS permissionsin the AndroidManifest.xml file will let the user decide whether to allow the application to install or not.
In the AndroidManifest.xml file, add the two permissions - SEND_SMS and RECEIVE_SMS:
<?xml version="1.0" encoding="utf-8"?>
<manifest xmlns:android="http://schemas.android.com/apk/res/android"
      package="net.learn2develop.SMSMessaging"
      android:versionCode="1"
      android:versionName="1.0.0">
    <application android:icon="@drawable/icon" android:label="@string/app_name">
        <activity android:name=".SMS"
                  android:label="@string/app_name">
            <intent-filter>
                <action android:name="android.intent.action.MAIN" />
                <category android:name="android.intent.category.LAUNCHER" />
            </intent-filter>
        </activity>
    </application>
    <uses-permission android:name="android.permission.SEND_SMS">
    </uses-permission>
    <uses-permission android:name="android.permission.RECEIVE_SMS">
    </uses-permission>
</manifest>
In the main.xml file located in the res/layout folder, add the following code so that the user can enter a phone number as well as a message to send:
<?xml version="1.0" encoding="utf-8"?>
<LinearLayout xmlns:android="http://schemas.android.com/apk/res/android"
    android:orientation="vertical"
    android:layout_width="fill_parent"
    android:layout_height="fill_parent"
    >
    <TextView
        android:layout_width="fill_parent"
        android:layout_height="wrap_content"
        android:text="Enter the phone number of recipient"
        />
    <EditText
        android:id="@+id/txtPhoneNo"
        android:layout_width="fill_parent"
        android:layout_height="wrap_content"
        />
    <TextView
        android:layout_width="fill_parent"
        android:layout_height="wrap_content"
        android:text="Message"
        />
    <EditText
        android:id="@+id/txtMessage"
        android:layout_width="fill_parent"
        android:layout_height="150px"
        android:gravity="top"
        />
    <Button
        android:id="@+id/btnSendSMS"
        android:layout_width="fill_parent"
        android:layout_height="wrap_content"
        android:text="Send SMS"
        />
</LinearLayout>
The above code creates the UI shown in Figure 2.

Figure 2 Creating the UI for sending SMS messages
Next, in the SMS activity, we wire up the Button view so that whenthe user clicks on it, we will check to see that the phone number ofthe recipient and the message is entered before we send the messageusing the sendSMS() function, which we will define shortly:
package net.learn2develop.SMSMessaging;

import android.app.Activity;
import android.app.PendingIntent;
import android.content.Intent;
import android.os.Bundle;
import android.telephony.gsm.SmsManager;
import android.view.View;
import android.widget.Button;
import android.widget.EditText;
import android.widget.Toast;

public class SMS extends Activity
{
    Button btnSendSMS;
    EditText txtPhoneNo;
    EditText txtMessage;

    /** Called when the activity is first created. */
    @Override
    public void onCreate(Bundle savedInstanceState)
    {
        super.onCreate(savedInstanceState);
        setContentView(R.layout.main);

        btnSendSMS = (Button) findViewById(R.id.btnSendSMS);
        txtPhoneNo = (EditText) findViewById(R.id.txtPhoneNo);
        txtMessage = (EditText) findViewById(R.id.txtMessage);

        btnSendSMS.setOnClickListener(new View.OnClickListener()
        {
            public void onClick(View v)
            {
                String phoneNo = txtPhoneNo.getText().toString();
                String message = txtMessage.getText().toString();
                if (phoneNo.length()>0 && message.length()>0)
                    sendSMS(phoneNo, message);
                else
                    Toast.makeText(getBaseContext(),
                        "Please enter both phone number and message.",
                        Toast.LENGTH_SHORT).show();
            }
        });
    }
}
The sendSMS() function is defined as follows:
public class SMS extends Activity
{
    //...

    /** Called when the activity is first created. */
    @Override
    public void onCreate(Bundle savedInstanceState)
    {
        //...
    }

    //---sends an SMS message to another device---
    private void sendSMS(String phoneNumber, String message)
    {
        PendingIntent pi = PendingIntent.getActivity(this, 0,
            new Intent(this, SMS.class), 0);
        SmsManager sms = SmsManager.getDefault();
        sms.sendTextMessage(phoneNumber, null, message, pi, null);
    }
}
To send an SMS message, you use the SmsManager class. Unlike other classes, you do not directly instantiate this class; instead you will call the getDefault() static method to obtain an SmsManager object. The sendTextMessage() method sends the SMS message with a PendingIntent. The PendingIntent object is used to identify a target to invoke at a later time. For example, after sending the message, you can use a PendingIntent object to display another activity. In this case, the PendingIntent object (pi) is simply pointing to the same activity (SMS.java), so when the SMS is sent, nothing will happen.
If you need to monitor the status of the SMS message sending process, you can actually use two PendingIntent objects together with two BroadcastReceiver objects, like this:
    //---sends an SMS message to another device---
    private void sendSMS(String phoneNumber, String message)
    {
        String SENT = "SMS_SENT";
        String DELIVERED = "SMS_DELIVERED";

        PendingIntent sentPI = PendingIntent.getBroadcast(this, 0,
            new Intent(SENT), 0);

        PendingIntent deliveredPI = PendingIntent.getBroadcast(this, 0,
            new Intent(DELIVERED), 0);

        //---when the SMS has been sent---
        registerReceiver(new BroadcastReceiver(){
            @Override
            public void onReceive(Context arg0, Intent arg1) {
                switch (getResultCode())
                {
                    case Activity.RESULT_OK:
                        Toast.makeText(getBaseContext(), "SMS sent",
                                Toast.LENGTH_SHORT).show();
                        break;
                    case SmsManager.RESULT_ERROR_GENERIC_FAILURE:
                        Toast.makeText(getBaseContext(), "Generic failure",
                                Toast.LENGTH_SHORT).show();
                        break;
                    case SmsManager.RESULT_ERROR_NO_SERVICE:
                        Toast.makeText(getBaseContext(), "No service",
                                Toast.LENGTH_SHORT).show();
                        break;
                    case SmsManager.RESULT_ERROR_NULL_PDU:
                        Toast.makeText(getBaseContext(), "Null PDU",
                                Toast.LENGTH_SHORT).show();
                        break;
                    case SmsManager.RESULT_ERROR_RADIO_OFF:
                        Toast.makeText(getBaseContext(), "Radio off",
                                Toast.LENGTH_SHORT).show();
                        break;
                }
            }
        }, new IntentFilter(SENT));

        //---when the SMS has been delivered---
        registerReceiver(new BroadcastReceiver(){
            @Override
            public void onReceive(Context arg0, Intent arg1) {
                switch (getResultCode())
                {
                    case Activity.RESULT_OK:
                        Toast.makeText(getBaseContext(), "SMS delivered",
                                Toast.LENGTH_SHORT).show();
                        break;
                    case Activity.RESULT_CANCELED:
                        Toast.makeText(getBaseContext(), "SMS not delivered",
                                Toast.LENGTH_SHORT).show();
                        break;
                }
            }
        }, new IntentFilter(DELIVERED));

        SmsManager sms = SmsManager.getDefault();
        sms.sendTextMessage(phoneNumber, null, message, sentPI, deliveredPI);
    }
The above code uses a PendingIntent object (sentPI) to monitor the sending process. When an SMS message is sent, the first BroadcastReceiver's onReceive event will fire. This is where you check the status of the sending process. The second PendingIntent object (deliveredPI) monitors the delivery process. The second BroadcastReceiver's onReceive event will fire when an SMS is successfully delivered.
You can now test the application by pressing F11 in Eclipse. To sendan SMS message from one emulator instance to another, simply launchanother instance of the Android emulator by going to the Tools folderof the SDK and running Emulator.exe.
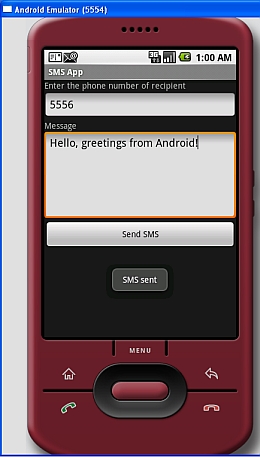
Figure 3 Sending an SMS message
Figure 3 shows how you can send an SMS message from one emulator toanother; simply use the target emulator's port number (shown in the topleft corner of the window) as its phone number. When an SMS is sentsuccessfully, it will display a "SMS sent" message. When it issuccessfully delivered, it will display a "SMS delivered" message. Notethat for testing using the emulator, when an SMS is successfullydelivered, the "SMS delivered" message does not appear; this only worksfor real devices.
Figure 4 shows the SMS message received on the recipient emulator.The message first appeared in the notification bar (top of the screen).Dragging down the notification bar reveals the message received. Toview the entire message, click on the message.
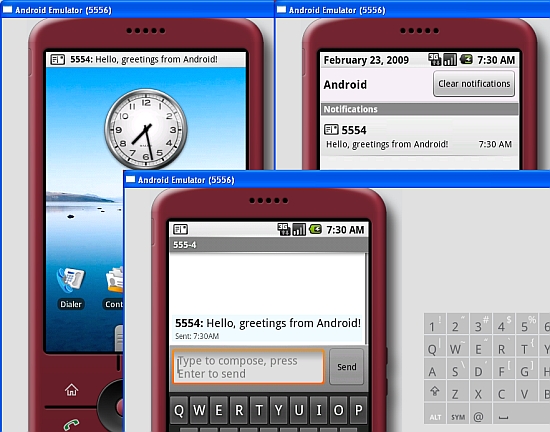
Figure 4 The SMS message received by the Android emulator
If you do not want to go through all the trouble of sending the SMS message yourself, you can use an Intentobject to help you send an SMS message. The following code shows howyou can invoke the built-in SMS application to help you send an SMSmessage:
        Intent sendIntent = new Intent(Intent.ACTION_VIEW);
        sendIntent.putExtra("sms_body", "Content of the SMS goes here...");
        sendIntent.setType("vnd.android-dir/mms-sms");
        startActivity(sendIntent);
Figure 5 shows the built-in SMS application invoked to send the SMS message.
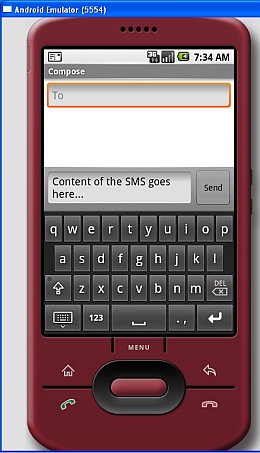
Figure 5 Invoking the built-in SMS application
Receiving SMS Messages
Besides programmatically sending SMS messages, you can also intercept incoming SMS messages using a BroadcastReceiver object.
To see how to receive SMS messages from within your Android application, in the AndroidManifest.xml file add the <receiver> element so that incoming SMS messages can be intercepted by the SmsReceiver class:
<?xml version="1.0" encoding="utf-8"?>
<manifest xmlns:android="http://schemas.android.com/apk/res/android"
      package="net.learn2develop.SMSMessaging"
      android:versionCode="1"
      android:versionName="1.0.0">
    <application android:icon="@drawable/icon" android:label="@string/app_name">
        <activity android:name=".SMS"
                  android:label="@string/app_name">
            <intent-filter>
                <action android:name="android.intent.action.MAIN" />
                <category android:name="android.intent.category.LAUNCHER" />
            </intent-filter>
        </activity>

        <receiver android:name=".SmsReceiver">
            <intent-filter>
                <action android:name=
                    "android.provider.Telephony.SMS_RECEIVED" />
            </intent-filter>
        </receiver>

    </application>
    <uses-permission android:name="android.permission.SEND_SMS">
    </uses-permission>
    <uses-permission android:name="android.permission.RECEIVE_SMS">
    </uses-permission>
</manifest>
Add a new class file to your project and name it as SmsReceiver.java (see Figure 6).
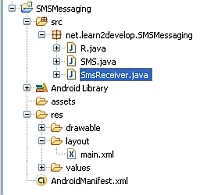
Figure 6Adding the SmsReceiver.java file to the project
In the SmsReceiver class, extend the BroadcastReceiver class and override the onReceive() method:
package net.learn2develop.SMSMessaging;

import android.content.BroadcastReceiver;
import android.content.Context;
import android.content.Intent;

public class SmsReceiver extends BroadcastReceiver
{
@Override
public void onReceive(Context context, Intent intent)
       {
}
}
When SMS messages are received, the onCreate() method will be invoked. The SMS message is contained and attached to the Intent object (intent - the second parameter in the onReceive() method) via a Bundle object. The messages are stored in an Object array in the PDU format. To extract each message, you use the static createFromPdu() method from the SmsMessage class. The SMS message is then displayed using the Toast class:
package net.learn2develop.SMSMessaging;

import android.content.BroadcastReceiver;
import android.content.Context;
import android.content.Intent;
import android.os.Bundle;
import android.telephony.gsm.SmsMessage;
import android.widget.Toast;

public class SmsReceiver extends BroadcastReceiver
{
    @Override
    public void onReceive(Context context, Intent intent)
    {
        //---get the SMS message passed in---
        Bundle bundle = intent.getExtras();
        SmsMessage[] msgs = null;
        String str = "";
        if (bundle != null)
        {
            //---retrieve the SMS message received---
            Object[] pdus = (Object[]) bundle.get("pdus");
            msgs = new SmsMessage[pdus.length];
            for (int i=0; i<msgs.length; i++){
                msgs[i] = SmsMessage.createFromPdu((byte[])pdus[i]);
                str += "SMS from " + msgs[i].getOriginatingAddress();
                str += " :";
                str += msgs[i].getMessageBody().toString();
                str += "/n";
            }
            //---display the new SMS message---
            Toast.makeText(context, str, Toast.LENGTH_SHORT).show();
        }
    }
}
That's it! To test the application, press F11 in Eclipse. Deploy theapplication to each Android emulator. Figure 7 shows Eclipse showingthe emulators currently running. All you need to do is to select eachemulator and deploy the application onto each one.
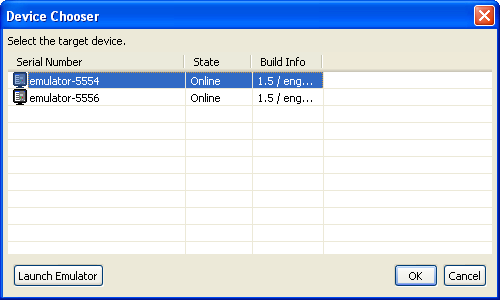
Figure 7 Selecting an emulator/device to deploy the application onto
Figure 8 shows that when you send an SMS message to another emulatorinstance (port number 5556), the message is received by the targetemulator and displayed via the Toast class.

Figure 8 Sending and receiving SMS messages using the Android emulators
Summary
In this article, you have seen how you can send and receive SMSmessages programmatically from within your Android application. Thecapability to send and receive SMS messages is very useful as you canbuild very compelling applications. As an example, you can build alocation tracker application where you can send a secret-coded SMSmessage to a device and when the device receives the secret SMS messageit will reply with another SMS message containing its currentgeographical location using its built-in GPS receiver. How cool isthat?!
- SMS Messaging in Android
- SMS Messaging in Android
- SMS Messaging in Android(1)
- SMS Messaging in Android (Android 短信)
- SMS Messaging in Android(接1)
- Android ApiDemos示例解析(91):OS->SMS Messaging
- android in practice_Using Cloud to Device Messaging(portfolio project)
- Messaging in IMS
- database in messaging
- RPC in oslo.messaging
- android Sms
- android sms
- android:sms
- android sms
- Android SMS
- android SMS
- Mobile messaging technologies and services: SMS, EMS and MMS
- Topics in High-Performance Messaging
- 创建 Circle 对象
- Linux开机启动Oracle
- 向上下左右不间断无缝滚动图片的效果(兼容火狐和IE)
- struts2的Converter
- Discuz表结构
- SMS Messaging in Android
- 为了更加好的理解ANDROID 以及widows mobile系统,在这里重新整理了一下ARM的理解
- 外网访问局域网tomcat服务器设置过程
- 源码网站
- MySQL 添加外键
- 【原】SqlServer性能优化——Partition(管理分区)
- 从Hash函数到MD5破解
- 面试项目经验有感
- 数据库访问性能优化