Silverlight中的拖拽实现的图片上传---1
来源:互联网 发布:来凤餐饮数据分析 编辑:程序博客网 时间:2024/04/30 17:02
在Silverlight中因为可以直接从系统的文件夹里面拖出来一个文件直接放到浏览器中,我在想使用这个功能来做成图片上传(或者文件上传),这样的用户体验将会是非常好的。
传统的上传都是打开对话框,选择文件,然后点击上传。步骤比较多。使用Silverlight做的文件上传如下图所示:

直接左键鼠标,拖拽过去就OK了。如下图:

这边文章里不能完全实现服务器端的上传,以及一些效果的实现,使用Animation。。。。
废话多了。。。
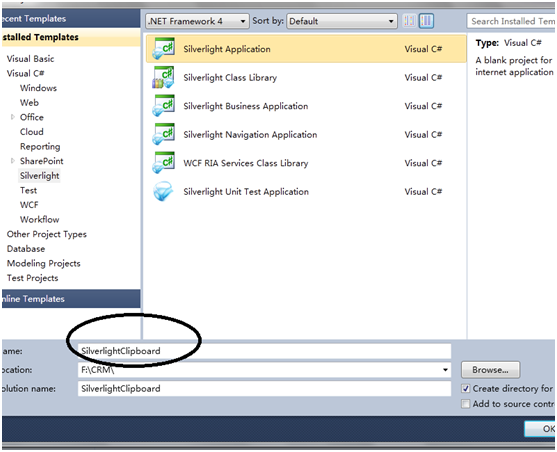
首先是创建一个silverlight应用程序,如下图。
然后主页面中创建一个Grid,注意第一要把AllowDrop设置为True。。
接下来设置Grid的背景:
<Grid.Background>
<LinearGradientBrush StartPoint="0.5,0.0" EndPoint="0.5,1.0">
<GradientStop Offset="0.0" Color="White" />
<GradientStop Offset="1.0" Color="#FF404040" />
</LinearGradientBrush>
</Grid.Background>
最后是列的定义。
在第一列中放入一个Canvas,用来显示拖上去的图片。
<Canvas Grid.Column="0" x:Name="PhotoBoard" Height="184" Width="264" >
<!-- Photos dynamically inserted here -->
</Canvas>
后台代码:
后台代码主要是实现了当有文件放到页面时,Silverlight会把文件放到一个队列中。然后把每个文件显示在页面。
事件的委托:
// Register a handler for Rendering events
CompositionTarget.Rendering += new EventHandler(CompositionTarget_Rendering);
// Register a handler for Drop events
LayoutRoot.Drop += new DragEventHandler(LayoutRoot_Drop);
文件的入队。
void LayoutRoot_Drop(object sender, DragEventArgs e)
{
// Hide the instructional text
Instructions.Visibility = Visibility.Collapsed;
// Queue the FileInfo objects representing dropped files
if (e.Data != null)
{
FileInfo[] files = e.Data.GetData(DataFormats.FileDrop) as FileInfo[];
foreach (FileInfo fi in files)
{
_files.Enqueue(fi);
}
}
}
实现把每个文件都显示到页面的方法:
private void CompositionTarget_Rendering(Object sender, EventArgs e)
{
if (_files.Count != 0)
{
// Create a photo
FileInfo fi = _files.Dequeue();
CreatePhoto(fi);
}
}
CreatePhone:=》主要是把一个Bitmap的图换成一个writeable的来显示:
using (Stream stream = fi.OpenRead())
{
try
{
// Decode the image bits
BitmapImage bi = null;
try
{
bi = new BitmapImage();
bi.SetSource(stream);
}
catch (OutOfMemoryException)
{
// Just in case
_files.Clear();
MessageBox.Show("Out of memory");
return;
}
catch (Exception)
{
// Probably came here because the image isn't valid; ignore
return;
}
// Compute the image dimensions
double cx = (double)bi.PixelWidth;
double cy = (double)bi.PixelHeight;
if (cx >= cy)
{
// Set width to 400 and compute height
cy *= 400.0 / cx;
cx = 400.0;
}
else
{
// Set width to 300 and compute height
cy *= 300.0 / cx;
cx = 300.0;
}
// Create a WriteableBitmap the same size as the image to be displayed
Image image = new Image();
image.Source = bi;
WriteableBitmap wb1 = new WriteableBitmap((int)cx, (int)cy);
ScaleTransform transform = new ScaleTransform();
transform.ScaleX = cx / bi.PixelWidth;
transform.ScaleY = cy / bi.PixelHeight;
wb1.Render(image, transform);
wb1.Invalidate();
// Now make a copy of the WriteableBitmap so the BitmapImage can be garbage-collected (important!)
WriteableBitmap wp3 = new WriteableBitmap((int)cx, (int)cy);
for (int i = 0; i < wp3.Pixels.Length; i++)
wp3.Pixels[i] = wb1.Pixels[i];
wp3.Invalidate();
Image thumbnail = new Image();
thumbnail.Width = cx;
thumbnail.Height = cy;
// Create a Border containing an image
Border item = (Border)XamlReader.Load(String.Format(CultureInfo.InvariantCulture,
_template,
_count++,
(PhotoBoard.ActualWidth - cx) / 2, (PhotoBoard.ActualHeight - cy) / 2, // Initial position (center of workspace)
cx + _border, cy + _border, // Width and height of photo border
(cx + _border) / 2, (cy + _border) / 2, // Center of rotation
cx, cy)); // Width and height of photo
// Assign the WriteableBitmap to the Image
(item.Child as Image).Source = wp3;
// Add the photo to the scene
PhotoBoard.Children.Add(item);
// Compute spatial parameters
double x = _rand.NextDouble() * (PhotoBoard.ActualWidth - cx);
double y = _rand.NextDouble() * (PhotoBoard.ActualHeight - cy);
double angle = _angle - (_rand.NextDouble() * _angle * 2);
// Position the photo and make it visible
item.SetValue(Canvas.LeftProperty, x);
item.SetValue(Canvas.TopProperty, y);
(item.FindName("SpinTransform") as RotateTransform).Angle = angle;
item.Visibility = Visibility.Visible;
下面是给这个图片添加一个动画功能使其旋转:
主页面需要添加的XAML:
<UserControl.Resources>
<Storyboard x:Name="spinStoryboard">
<DoubleAnimation Storyboard.TargetName="projection" RepeatBehavior="Forever"
Storyboard.TargetProperty="RotationY" From="0" To="360" Duration="0:0:3">
</DoubleAnimation>
<DoubleAnimation Storyboard.TargetName="projection" RepeatBehavior="Forever"
Storyboard.TargetProperty="RotationZ" From="0" To="360" Duration="0:0:30">
</DoubleAnimation>
<DoubleAnimation Storyboard.TargetName="projection" RepeatBehavior="Forever"
Storyboard.TargetProperty="RotationX" From="0" To="360" Duration="0:0:40">
</DoubleAnimation>
</Storyboard>
<Storyboard x:Name="colboard">
</Storyboard>
</UserControl.Resources>
<Border CornerRadius="2" Padding="10"
BorderThickness="4" Margin="1,1,0,-4" HorizontalAlignment="Left" Width="326">
<Border.Projection>
<PlaneProjection x:Name="projection">
</PlaneProjection>
</Border.Projection>
<Canvas Grid.Column="0" x:Name="PhotoBoard" Height="184" Width="264" >
<!-- Photos dynamically inserted here -->
</Canvas>
</Border>
后台代码只需要在图片显示时让动画开始播放就行了。
spinStoryboard.Begin();
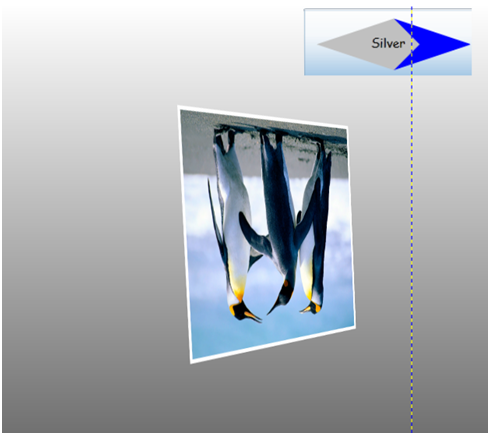
运行效果:

- Silverlight中的拖拽实现的图片上传---1
- Silverlight中的拖拽实现的图片上传---2
- 图片上传的实现
- 实现图片的上传
- 实现图片的上传
- 实现图片的上传
- 上传图片的实现
- Silverlight中的“拖拽操作”: 把图片拖拽到Silverlight页面里。
- Silverlight WCF 上传实现
- Silverlight WebClient 上传实现
- thinkphp实现上传图文消息中的图片的接口
- Silverlight实现对图片的拖放
- swt实现文件图片拖拽上传
- Silverlight实现的简单拖拽效果
- struts:实现图片的上传
- 实现上传图片的功能
- CKeditor上传图片的实现
- ckeditor上传图片的实现
- x200 vistar系统硬盘安装ubuntu9.10
- 记忆和幸福交错
- android 实现gif播放
- ActionScript 3.0 详解(一)
- coords
- Silverlight中的拖拽实现的图片上传---1
- [转]吐血推荐250部必看电影下载 IMDB TOP 250 download
- EOF结束符
- 职场英语四--呈报
- ActionScript 3.0 详解(二)
- ActionScript 3.0 详解(三)—完
- windows API编程之二----控制台模拟Win32程序
- 活出自己来
- 9*9乘法表