Android提高第十五篇之ListView自适应实现表格
来源:互联网 发布:c语言求5个数平均值 编辑:程序博客网 时间:2024/06/01 08:47
本文来自http://blog.csdn.net/hellogv/ ,引用必须注明出处!
上次介绍了使用GridView实现表格,这次就说说如何用ListView实现自适应的表格。GridView比ListView更容易实现自适应的表格,但是GridView每个格单元的大小固定,而ListView实现的表格可以自定义每个格单元的大小,但因此实现自适应表格也会复杂些(格单元大小不一)。另外,GridView实现的表格可以定位在具体某个格单元,而ListView实现的表格则只能定位在表格行。因此还是那句老话:根据具体的使用环境而选择GridView 或者 ListView实现表格。
先贴出本文程序运行的效果图:
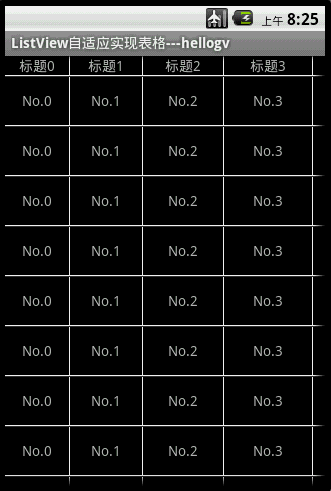
本文实现的ListView表格,可以每个格单元大小不一,文本(TextView)或图片(ImageView)做格单元的数据,不需要预先定义XML实现样式(自适应的根本目标)。由于ListView置于HorizontalScrollView中,因此对于列比较多/列数据比较长的数据表也能很好地适应其宽度。
main.xml源码如下:
主类testMyListView.java的源码如下:
ListView自适应实现Table的类TableAdapter.java代码如下:
PS:TableCell是格单元的类,TableRow是表格行的类,TableRowView是实现表格行的组件。实现步骤:TableCell --> TableRow(TableRowView)-->ListView
package com.testMyListView; import java.util.List; import android.content.Context; import android.graphics.Color; import android.view.Gravity; import android.view.View; import android.view.ViewGroup; import android.widget.BaseAdapter; import android.widget.ImageView; import android.widget.LinearLayout; import android.widget.TextView; public class TableAdapter extends BaseAdapter { private Context context; private List<TableRow> table; public TableAdapter(Context context, List<TableRow> table) { this.context = context; this.table = table; } @Override public int getCount() { return table.size(); } @Override public long getItemId(int position) { return position; } public TableRow getItem(int position) { return table.get(position); } public View getView(int position, View convertView, ViewGroup parent) { TableRow tableRow = table.get(position); return new TableRowView(this.context, tableRow); } /** * TableRowView 实现表格行的样式 * @author hellogv */ class TableRowView extends LinearLayout { public TableRowView(Context context, TableRow tableRow) { super(context); this.setOrientation(LinearLayout.HORIZONTAL); for (int i = 0; i < tableRow.getSize(); i++) {//逐个格单元添加到行 TableCell tableCell = tableRow.getCellValue(i); LinearLayout.LayoutParams layoutParams = new LinearLayout.LayoutParams( tableCell.width, tableCell.height);//按照格单元指定的大小设置空间 layoutParams.setMargins(0, 0, 1, 1);//预留空隙制造边框 if (tableCell.type == TableCell.STRING) {//如果格单元是文本内容 TextView textCell = new TextView(context); textCell.setLines(1); textCell.setGravity(Gravity.CENTER); textCell.setBackgroundColor(Color.BLACK);//背景黑色 textCell.setText(String.valueOf(tableCell.value)); addView(textCell, layoutParams); } else if (tableCell.type == TableCell.IMAGE) {//如果格单元是图像内容 ImageView imgCell = new ImageView(context); imgCell.setBackgroundColor(Color.BLACK);//背景黑色 imgCell.setImageResource((Integer) tableCell.value); addView(imgCell, layoutParams); } } this.setBackgroundColor(Color.WHITE);//背景白色,利用空隙来实现边框 } } /** * TableRow 实现表格的行 * @author hellogv */ static public class TableRow { private TableCell[] cell; public TableRow(TableCell[] cell) { this.cell = cell; } public int getSize() { return cell.length; } public TableCell getCellValue(int index) { if (index >= cell.length) return null; return cell[index]; } } /** * TableCell 实现表格的格单元 * @author hellogv */ static public class TableCell { static public final int STRING = 0; static public final int IMAGE = 1; public Object value; public int width; public int height; private int type; public TableCell(Object value, int width, int height, int type) { this.value = value; this.width = width; this.height = height; this.type = type; } } } - Android提高第十五篇之ListView自适应实现表格
- Android提高第十五篇之ListView自适应实现表格
- Android提高第十五篇之ListView自适应实现表格
- Android提高第十五篇之ListView自适应实现表格
- Android提高第十五篇之ListView自适应实现表格
- Android提高第十五篇之ListView自适应实现表格
- Android提高第十五篇之ListView自适应实现表格
- Android提高第十五篇之ListView自适应实现表格
- Android提高第十五篇之ListView自适应实现表格
- Android提高之ListView自适应实现表格
- Android提高篇之ListView自适应实现表格
- Android中使用ListView实现自适应表格
- ListView自适应实现表格
- ListView自适应实现表格
- ListView自适应实现表格
- ListView自适应实现表格
- ListView自适应实现表格
- Android提高篇之listView点击button翻页功能实现
- HTTP协议经典讲解
- Android提高第十四篇之探秘TelephonyManager
- Minicom
- 宽字符转为char *
- Url的DEC加密与解密
- Android提高第十五篇之ListView自适应实现表格
- 提高反射的调用性能
- 铁路股两天市值蒸发超376亿元 航空股集体上涨
- 简明 HTML CSS 开发规范 (转自“清清月儿”)
- Java 默认修饰符
- VMware虚拟机文件后缀详解【zz】
- 时隔两年,又回来做技术了
- Model Dialog with free JQuery User Interface
- v4l2 spec 中文 Ch01