android底部菜单应用/Android TabHost的标签放在底部,已写成框架,继承即可
来源:互联网 发布:淘宝怎么使用花呗分期 编辑:程序博客网 时间:2024/04/28 12:11
Android TabHost的标签放在底部,已写成框架,继承即可
感受一下不错的述说:
【每日话题】Android是自学好还是培训好,你有啥高招?
http://www.eoeandroid.com/thread-193467-1-1.html
【每日话题】留在这城市的理由
http://www.eoeandroid.com/thread-191466-1-1.html
【每日话题】面试那些事儿—面霸是怎样炼成的
http://www.eoeandroid.com/thread-193078-1-1.html
网上已经有很多关于如何将TabHost的标签放在底部,这里就不说了
主要是把这些都做成框架,只需要提供图片和文字就可以实现这样的效果。
直接上图,代码解释的很清楚
程序的图片借用新浪微博.

使用代码:

package com.api.example.app; import java.util.ArrayList;import java.util.List; import android.content.Intent;import android.os.Bundle;import android.view.LayoutInflater;import android.view.View;import android.widget.TabWidget;import android.widget.TextView; import com.api.R;import com.api.TabHostActivity; /*** 整个流程就像使用ListView自定BaseAdapter一样 * * 如果要自定义TabHostActivity的Theme,并且不想要头部阴影* 一定要添加这个android:windowContentOverlay = null * * 如果想在别的项目里面使用TabHostActivity* 可以项目的属性里面找到Android,然后在Library部分添加这个项目(Api)* <a href='\"http://www.cnblogs.com/qianxudetianxia/archive/2011/05/01/2030232.html\"' target='\"_blank\"'>如何添加</a> * */public class ExampleActivity extends TabHostActivity { List mItems;private LayoutInflater mLayoutInflater; /**在初始化TabWidget前调用* 和TabWidget有关的必须在这里初始化*/@Overrideprotected void prepare() {TabItem home = new TabItem("首页", // titleR.drawable.icon_home, // iconR.drawable.example_tab_item_bg, // backgroundnew Intent(this, Tab1Activity.class)); // intent TabItem info = new TabItem("资料",R.drawable.icon_selfinfo,R.drawable.example_tab_item_bg,new Intent(this, Tab2Activity.class)); TabItem msg = new TabItem("信息",R.drawable.icon_meassage,R.drawable.example_tab_item_bg,new Intent(this, Tab3Activity.class)); TabItem square = new TabItem("广场",R.drawable.icon_square,R.drawable.example_tab_item_bg,new Intent(this, Tab4Activity.class)); TabItem more = new TabItem("更多",R.drawable.icon_more,R.drawable.example_tab_item_bg,new Intent(this, Tab5Activity.class)); mItems = new ArrayList();mItems.add(home);mItems.add(info);mItems.add(msg);mItems.add(square);mItems.add(more); // 设置分割线TabWidget tabWidget = getTabWidget();tabWidget.setDividerDrawable(R.drawable.tab_divider); mLayoutInflater = getLayoutInflater();} @Overrideprotected void onCreate(Bundle savedInstanceState) {super.onCreate(savedInstanceState);setCurrentTab(0);} /**tab的title,icon,边距设定等等*/@Overrideprotected void setTabItemTextView(TextView textView, int position) {textView.setPadding(3, 3, 3, 3);textView.setText(mItems.get(position).getTitle());textView.setBackgroundResource(mItems.get(position).getBg());textView.setCompoundDrawablesWithIntrinsicBounds(0, mItems.get(position).getIcon(), 0, 0); } /**tab唯一的id*/@Overrideprotected String getTabItemId(int position) {return mItems.get(position).getTitle(); // 我们使用title来作为id,你也可以自定} /**点击tab时触发的事件*/@Overrideprotected Intent getTabItemIntent(int position) {return mItems.get(position).getIntent();} @Overrideprotected int getTabItemCount() {return mItems.size();} /**自定义头部文件*/@Overrideprotected View getTop() {return mLayoutInflater.inflate(R.layout.example_top, null);} }
框架代码:
package com.api; import android.app.TabActivity;import android.content.Intent;import android.os.Bundle;import android.view.LayoutInflater;import android.view.View;import android.widget.LinearLayout;import android.widget.TabHost;import android.widget.TabHost.TabSpec;import android.widget.TabWidget;import android.widget.TextView; public abstract class TabHostActivity extends TabActivity { private TabHost mTabHost;private TabWidget mTabWidget;private LayoutInflater mLayoutflater; @Overrideprotected void onCreate(Bundle savedInstanceState) {super.onCreate(savedInstanceState);// set theme because we do not want the shadowsetTheme(R.style.Theme_Tabhost);setContentView(R.layout.api_tab_host); mLayoutflater = getLayoutInflater(); mTabHost = getTabHost();mTabWidget = getTabWidget();//mTabWidget.setStripEnabled(false); // need android2.2 prepare(); initTop();initTabSpec();} private void initTop() {View child = getTop();LinearLayout layout = (LinearLayout) findViewById(R.id.tab_top);layout.addView(child);} private void initTabSpec() { int count = getTabItemCount(); for (int i = 0; i < count; i++) {// set text viewView tabItem = mLayoutflater.inflate(R.layout.api_tab_item, null); TextView tvTabItem = (TextView) tabItem.findViewById(R.id.tab_item_tv);setTabItemTextView(tvTabItem, i);// set idString tabItemId = getTabItemId(i);// set tab specTabSpec tabSpec = mTabHost.newTabSpec(tabItemId);tabSpec.setIndicator(tabItem);tabSpec.setContent(getTabItemIntent(i)); mTabHost.addTab(tabSpec);} } /** 在初始化界面之前调用 */protected void prepare() {// do nothing or you override it} /** 自定义头部布局 */protected View getTop() {// do nothing or you override itreturn null;} protected int getTabCount() {return mTabHost.getTabWidget().getTabCount();} /** 设置TabItem的图标和标题等*/abstract protected void setTabItemTextView(TextView textView, int position); abstract protected String getTabItemId(int position); abstract protected Intent getTabItemIntent(int position); abstract protected int getTabItemCount(); protected void setCurrentTab(int index) {mTabHost.setCurrentTab(index);} protected void focusCurrentTab(int index) {mTabWidget.focusCurrentTab(index);} }
源码下载
在android中实现菜单功能有多种方法。
http://www.iteye.com/topic/1116261
Options Menu:用户按下menu Button时显示的菜单。
Context Menu:用户长时间按下屏幕,所显示出来的菜单也称为上下文菜单。
Submenu:子菜单。
但是有时候这些内置的菜单并不能满足我们功能,这就需要自己自定义一种菜单。接下来我说的这种就是通过TabHost与RadioGroup结合完成的菜单。这也是很常用的一种底部菜单做法。先上图:

首先看布局文件:
- <?xml version="1.0" encoding="UTF-8"?>
- <TabHost android:id="@android:id/tabhost" android:layout_width="fill_parent" android:layout_height="fill_parent"
- xmlns:android="http://schemas.android.com/apk/res/android">
- <LinearLayout
- android:orientation="vertical"
- android:layout_width="fill_parent"
- android:layout_height="fill_parent">
- <FrameLayout
- android:id="@android:id/tabcontent"
- android:layout_width="fill_parent"
- android:layout_height="0.0dip"
- android:layout_weight="1.0" />
- <TabWidget
- android:id="@android:id/tabs"
- android:visibility="gone"
- android:layout_width="fill_parent"
- android:layout_height="wrap_content"
- android:layout_weight="0.0" />
- <RadioGroup
- android:gravity="center_vertical"
- android:layout_gravity="bottom"
- android:orientation="horizontal"
- android:id="@+id/main_radio"
- android:background="@drawable/maintab_toolbar_bg"
- android:layout_width="fill_parent"
- android:layout_height="wrap_content">
- <RadioButton
- android:id="@+id/radio_button0"
- android:tag="radio_button0"
- android:layout_marginTop="2.0dip"
- android:text="@string/alarm"
- android:drawableTop="@drawable/icon_1"
- style="@style/main_tab_bottom" />
- <RadioButton
- android:id="@+id/radio_button1"
- android:tag="radio_button1"
- android:layout_marginTop="2.0dip"
- android:text="@string/message"
- android:drawableTop="@drawable/icon_2"
- style="@style/main_tab_bottom" />
- <RadioButton
- android:id="@+id/radio_button2"
- android:tag="radio_button2"
- android:layout_marginTop="2.0dip"
- android:text="@string/photo"
- android:drawableTop="@drawable/icon_3"
- style="@style/main_tab_bottom" />
- <RadioButton
- android:id="@+id/radio_button3"
- android:tag="radio_button3"
- android:layout_marginTop="2.0dip"
- android:text="@string/music"
- android:drawableTop="@drawable/icon_4"
- style="@style/main_tab_bottom" />
- <RadioButton
- android:id="@+id/radio_button4"
- android:tag="radio_button4"
- android:layout_marginTop="2.0dip"
- android:text="@string/setting"
- android:drawableTop="@drawable/icon_5"
- style="@style/main_tab_bottom" />
- </RadioGroup>
- </LinearLayout>
- </TabHost>
需要注意的是,如果用TabHost这个控件,其中有几个ID是必须这么写的,android:id="@android:id/tabhost ;android:id="@android:id/tabcontent" ;android:id="@android:id/tabs" ;之所以要这么写是因为在TabHost这个类中。需要实例化上述这个ID的控件。看源码:
在TabActivity中有么个方法:
- @Override
- public void onContentChanged() {
- super.onContentChanged();
- mTabHost = (TabHost) findViewById(com.android.internal.R.id.tabhost);
- if (mTabHost == null) {
- throw new RuntimeException(
- "Your content must have a TabHost whose id attribute is " +
- "'android.R.id.tabhost'");
- }
- mTabHost.setup(getLocalActivityManager());
- }
- private void ensureTabHost() {
- if (mTabHost == null) {
- this.setContentView(com.android.internal.R.layout.tab_content);
- }
- }
当内容发生改变时它会调用这个方法,来更新列表或者其他视图,而这个方法中需要实例化TabHost,所以必须通过ID为tabhost实例化。
再看看TabHost这个类中,
- public void setup() {
- mTabWidget = (TabWidget) findViewById(com.android.internal.R.id.tabs);
- if (mTabWidget == null) {
- throw new RuntimeException(
- "Your TabHost must have a TabWidget whose id attribute is 'android.R.id.tabs'");
- }
- // KeyListener to attach to all tabs. Detects non-navigation keys
- // and relays them to the tab content.
- mTabKeyListener = new OnKeyListener() {
- public boolean onKey(View v, int keyCode, KeyEvent event) {
- switch (keyCode) {
- case KeyEvent.KEYCODE_DPAD_CENTER:
- case KeyEvent.KEYCODE_DPAD_LEFT:
- case KeyEvent.KEYCODE_DPAD_RIGHT:
- case KeyEvent.KEYCODE_DPAD_UP:
- case KeyEvent.KEYCODE_DPAD_DOWN:
- case KeyEvent.KEYCODE_ENTER:
- return false;
- }
- mTabContent.requestFocus(View.FOCUS_FORWARD);
- return mTabContent.dispatchKeyEvent(event);
- }
- };
- mTabWidget.setTabSelectionListener(new TabWidget.OnTabSelectionChanged() {
- public void onTabSelectionChanged(int tabIndex, boolean clicked) {
- setCurrentTab(tabIndex);
- if (clicked) {
- mTabContent.requestFocus(View.FOCUS_FORWARD);
- }
- }
- });
- mTabContent = (FrameLayout) findViewById(com.android.internal.R.id.tabcontent);
- if (mTabContent == null) {
- throw new RuntimeException(
- "Your TabHost must have a FrameLayout whose id attribute is "
- + "'android.R.id.tabcontent'");
- }
- }
这个方法,是在增加选项卡之前由系统调用。在这个方法中需要通过tabs 这个ID实例化一个TabWidget,通过tabcontent这个ID实例化一个FrameLayout,用来放置选项卡内容。所以这两个ID也是固定的。
在上述布局文件中隐藏了系统默认的Widget,取而代之的是带有图片的Button。
看一下主要代码:
- package com.iteye.androidtoast;
- import android.app.TabActivity;
- import android.content.Intent;
- import android.os.Bundle;
- import android.widget.RadioGroup;
- import android.widget.RadioGroup.OnCheckedChangeListener;
- import android.widget.TabHost;
- public class MainActivity extends TabActivity implements OnCheckedChangeListener{
- /** Called when the activity is first created. */
- private TabHost mHost;
- private RadioGroup radioderGroup;
- @Override
- public void onCreate(Bundle savedInstanceState) {
- super.onCreate(savedInstanceState);
- setContentView(R.layout.maintabs);
- //实例化TabHost
- mHost=this.getTabHost();
- //添加选项卡
- mHost.addTab(mHost.newTabSpec("ONE").setIndicator("ONE")
- .setContent(new Intent(this,OneActivity.class)));
- mHost.addTab(mHost.newTabSpec("TWO").setIndicator("TWO")
- .setContent(new Intent(this,TwoActivity.class)));
- mHost.addTab(mHost.newTabSpec("THREE").setIndicator("THREE")
- .setContent(new Intent(this,ThreeActivity.class)));
- mHost.addTab(mHost.newTabSpec("FOUR").setIndicator("FOUR")
- .setContent(new Intent(this,FourActivity.class)));
- mHost.addTab(mHost.newTabSpec("FIVE").setIndicator("FIVE")
- .setContent(new Intent(this,FiveActivity.class)));
- radioderGroup = (RadioGroup) findViewById(R.id.main_radio);
- radioderGroup.setOnCheckedChangeListener(this);
- }
- @Override
- public void onCheckedChanged(RadioGroup group, int checkedId) {
- switch(checkedId){
- case R.id.radio_button0:
- mHost.setCurrentTabByTag("ONE");
- break;
- case R.id.radio_button1:
- mHost.setCurrentTabByTag("TWO");
- break;
- case R.id.radio_button2:
- mHost.setCurrentTabByTag("THREE");
- break;
- case R.id.radio_button3:
- mHost.setCurrentTabByTag("FOUR");
- break;
- case R.id.radio_button4:
- mHost.setCurrentTabByTag("FIVE");
- break;
- }
- }
- }
这个应该没有什么好难理解的。OK该睡了。有什么问题留言!
GridView + ViewFlipper布局界面,模仿“机锋市场”
http://www.iteye.com/topic/1116298


android Tab 位于底部 ,且每一个Tab选项对应一个Activity
http://blog.csdn.net/jamesliulyc/article/details/6727325
紧接上一篇巧妙运用ViewStub写出类似Tab选项卡(想怎么写tab就怎么写,横着写竖着写随你) ,上一篇耦合度实在是太高了(其实那个性能也不咋滴),饱受那一堆乱稻草捆绑在一起的痛苦,所以进行了一系列的改造。
第一步:首先你得了解TabHost和TabWidget, 将TabHost分为两个部分,一个是放内容的,还有一个就是放选项卡的,我们这里选项卡用TabWidget。TabHost的id应该写为
android:id="@android:id/tabhost",而不是以前的那个加号,这样可以直接在Activity里面通过getTabHost方法得到此TabHost对象。那如何才能将选项卡放在最底部呢,这其实很简单,还记得 RelativeLayout中android:layout_alignBottom 这个不,也就是说将TabWidget和选项卡内容放到RelativeLayout布局里,废话不多说了,看代码
- <?xml version="1.0" encoding="utf-8"?>
- <TabHost android:layout_width="fill_parent"
- android:layout_height="fill_parent"
- android:id="@android:id/tabhost"
- xmlns:android="http://schemas.android.com/apk/res/android"
- >
- <RelativeLayout
- android:layout_width="fill_parent"
- android:layout_height="fill_parent"
- android:orientation="vertical"
- android:padding="3dp"
- >
- <FrameLayout
- android:layout_width="fill_parent"
- android:layout_height="fill_parent"
- android:id="@android:id/tabcontent"
- android:layout_weight="1"
- >
- </FrameLayout>
- <TabWidget
- android:layout_width="fill_parent"
- android:layout_height="50dip"
- android:id="@android:id/tabs"
- android:layout_alignBottom = "@android:id/tabcontent"
- />
- </RelativeLayout>
- </TabHost>
以上xml代码可以通用哈,FrameLayout里用来放内容的,Tab的xml基本结构就这样搭好了,
第二步:接下来就是往Activity里面写点东东了,这个Activity必须要继承下TabActivity,要不然就算你setContentView了上面那个xml也没法通过getTabHost()获得布局中的tabHost。
然后通过getTabHost得到TabHost对象。我这里打算建立四个选项卡,newTabSpec 这是为你的每一个选项卡上面打上一个Tag,也就是标记标记而已,特殊情况下你可以通过这个来查找到你的选项卡。setIndicator就是在你的选项卡上设置一些内容,至于什么内容,你懂的,要么是文字,要么是图片,要么就是文字加图片,当然有时候复杂的话还会写上布局文件。我这里就放上一个图片吧,然后这个图片加上一些特效,懒得在xml写什么布局了,直接在代码写了,返回的是一个View对象,废话有点多,直接看代码吧
- private class TabView extends LinearLayout {
- ImageView imageView ;
- public TabView(Context c, int drawable, int drawableselec) {
- super(c);
- imageView = new ImageView(c);
- StateListDrawable listDrawable = new StateListDrawable();
- listDrawable.addState(SELECTED_STATE_SET, this.getResources()
- .getDrawable(drawableselec));
- listDrawable.addState(ENABLED_STATE_SET, this.getResources()
- .getDrawable(drawable));
- imageView.setImageDrawable(listDrawable);
- imageView.setBackgroundColor(Color.TRANSPARENT);
- setGravity(Gravity.CENTER);
- addView(imageView);
- }
上面的代码也就是自定义的一个View吧。
下面这个就是构建选项卡以及内容(选中的是第二个选项卡),我这里就把每个不同的选项卡内容分别放在不同的Activity里面,然后通过Tab来将这些Activity合并在一起,这样显得比较有层次感。
- @Override
- public void onCreate(Bundle savedInstanceState) {
- super.onCreate(savedInstanceState);
- requestWindowFeature(Window.FEATURE_NO_TITLE);
- setContentView(R.layout.main_tab);
- TabHost tabHost=getTabHost();
- TabView view = null;
- // 最近联系人
- view = new TabView(this, R.drawable.bg_tab_dial_normal, R.drawable.bg_tab_dial_normal);
- view.setBackgroundDrawable(this.getResources().getDrawable(R.drawable.selecttabbackground));
- TabSpec recentContactSpec=tabHost.newTabSpec("RecentContact");
- recentContactSpec.setIndicator(view);
- Intent recentContactIntent = new Intent(this, RecentContactActivity.class);
- recentContactSpec.setContent(recentContactIntent);
- // 联系人
- view = new TabView(this, R.drawable.bg_tab_contact_normal, R.drawable.bg_tab_contact_normal);
- view.setBackgroundDrawable(this.getResources().getDrawable(R.drawable.selecttabbackground));
- TabSpec contactBookSpec=tabHost.newTabSpec("ContactBook");
- contactBookSpec.setIndicator(view);
- Intent contactBookIntent = new Intent(this,ContactBookActivity.class);
- contactBookSpec.setContent(contactBookIntent);
- // 短信
- view = new TabView(this, R.drawable.bg_tab_sms_normal, R.drawable.bg_tab_sms_normal);
- view.setBackgroundDrawable(this.getResources().getDrawable(R.drawable.selecttabbackground));
- TabSpec smsMessageSpec = tabHost.newTabSpec("SmsMessage");
- smsMessageSpec.setIndicator(view);
- Intent smsMessageIntent = new Intent(this, SmsMessageActivity.class);
- smsMessageSpec.setContent(smsMessageIntent);
- //设置
- view = new TabView(this, R.drawable.bg_tab_setting_normal, R.drawable.bg_tab_setting_normal);
- view.setBackgroundDrawable(this.getResources().getDrawable(R.drawable.selecttabbackground));
- TabSpec settingSpec = tabHost.newTabSpec("Setting");
- settingSpec.setIndicator(view);
- Intent settingIntent = new Intent(this, SettingActivity.class);
- settingSpec.setContent(settingIntent);
- tabHost.addTab(recentContactSpec);
- tabHost.addTab(contactBookSpec);
- tabHost.addTab(smsMessageSpec);
- tabHost.addTab(settingSpec);
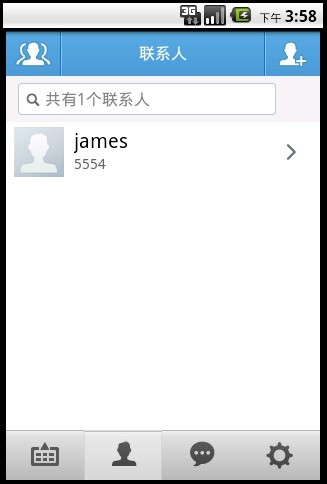
- tabHost.setCurrentTab(1);
- }
这个我没有写Demo,也就不提供详细的Demo了,不过还是截个图吧
Tab的多种典型用法总结(带动画)
http://www.iteye.com/topic/1118818
里面总结的是tab的一些比较典型的用法,带有多种动画效果,希望对各位有所帮助。
下面是相关截图:


- android底部菜单应用/Android TabHost的标签放在底部,已写成框架,继承即可
- Android TabHost的标签放在底部,已写成框架,继承即可
- Android TabHost的标签放在底部,已写成框架,继承即可
- Android TabHost的标签放在底部,已写成框架,继承即可
- Android TabHost菜单放在底部方法
- Android 底部菜单的实现(TabHost)
- android底部菜单应用
- android底部菜单应用
- android底部菜单应用
- android底部菜单应用
- android底部菜单应用
- tabHost研究二 ,android应用中,大部分的软件都会采用把按钮放在底部显示(tabHost)。利用三个Radiobutton嵌套在RadioGroup 。
- 在android应用底部显示菜单
- 【Android】底部标签页,Tabhost置底
- Android的底部菜单
- Android开发底部菜单框架
- android tabhost位于底部
- (转)android底部菜单应用
- 笔记2011.10.10
- 四种强制类型转换
- 【温故知新C/C++】static_cast||reinterpret_cast
- 用latex multirow包 绘制表格
- 学习笔记之string
- android底部菜单应用/Android TabHost的标签放在底部,已写成框架,继承即可
- fopen,file_get_contents,curl的区别
- struts2学习笔记-模型驱动和属性驱动
- 龙芯2E运行的第一行程序
- 教教你如何配置汤姆猫 和 Java 环境变量的设置
- 添加浏览器右键
- android音乐播放器-------使用android系统自带的数据库
- C++的表驱动法
- 使用递归方法逆转字符串