Installation of URL Rewriting module (IIRF) for IIS6/IIS7
来源:互联网 发布:手机制作软件的软件 编辑:程序博客网 时间:2024/04/30 11:09
IIS servers do not support URL rewriting by default, so we would need to use a third party tool.
This guide cover installation of Ionic's ISAPI Rewriting Filter (IIRF) on a IIS server and setup of the rewrite configuration required by KMP. If you would like to find out more about IIRF, you can refer to its documentation.
IIS7 servers support native component for URL rewriting. It is much easier to install. If you're using IIS7, we recommend to follow the Installation of native URL Rewriting module (URL Rewrite) for IIS7 instead of current guide.
- Installing on IIS5 or IIS6 (Windows 2000, Windows XP, or Windows Server 2003)
- Installing on IIS7 (Windows Server 2008, Windows Vista, or Windows 7)
- Setting Up Rewrite Configuration for Knowledgebase Manager Pro (common for all IIS servers and systems)
If you're using Helicon ISAPI Rewrite, you do not need to install any other URL rewrite software. KMP works with this module from the box.
If you're already using some other URL Rewrite tool, we strongly recommend to completely uninstall it, because it may interfere with IIRF and it is most likely that URL rewriting will not work correctly, and KMP may be inaccessible even if you follow the instructions in this article carefully.
Installing on IIS5 or IIS6
Follow these steps to install IIRF on IIS5 or IIS6.
IIS v5.0 is included with Windows 2000. IIS v5.1 is included with Windows XP. IIS v6.0 is included with Windows Server 2003. These are the steps for installing IIRF v2.0 on to any of those operating systems.
- First of all, download the IIRF v2.0+ package from the official website and extract it.
- Copy the IIRF DLL (IIRF.dll) from the "bin" folder to an appropriate folder on your server, such as c:\windows\system32\inetsrv\IIRF . Or it could be in a totally separate directory tree. It's up to you.
- Grant READ permissions on the DLL, and the ini file, to the appropriate principals. To do this, first view the IIRF.dll in Windows Explorer.
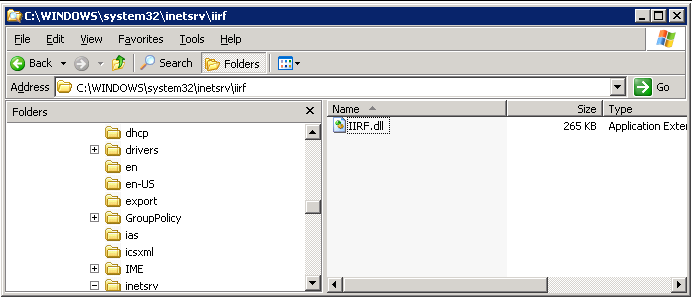
Figure 1:Viewing the IIRF.dll in Explorer
On Windows XP or Windows 2000, the appropriate Windows principal is, by default, IUSR_<hostname>, although an IIS administrator is free to configure IIS to use an alternative identity. Grant READ permissions to this identity.
On Windows Server 2003, grant Read permissions to the IIS_WPG group for the DLL and the ini file. According to Microsoft's documentation on IIS6 and Application Pool identities, on a clean installation of IIS 6.0, the IIS worker process (w3wp.exe) runs under the new built-in Network Service account by default. As with IIS 5, an IIS administrator can change this, but typically this is the account used. Also, On a clean installation of IIS 6.0, the IIS_WPG group contains the Network Service, Local Service, LocalSystem, and IWAM_ComputerName accounts. If you change the identity for the Application Pool to be something other than NetworkService, then you'll have to grant that identity the appropriate READ permissions.
Right click on the IIRF.dll, and select Properties...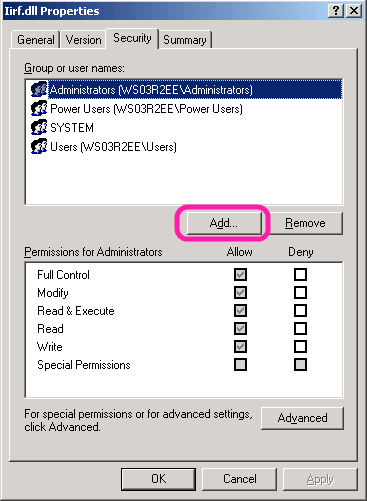
Click the Add button and, if running on Windows Server 2003, specify IIS_WPG as the group. If running on Windows XP, specify the appropriate IUSR_<hostname> principal.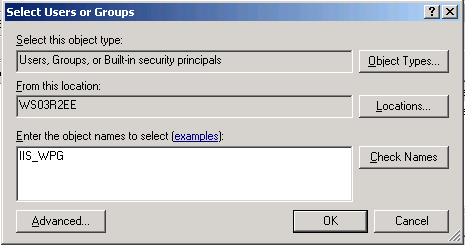
Click OK, and OK again. Confirm you want to make the changes if necessary.
Create the iirfGlobal.ini file. In Explorer, in the same folder where you installed IIRF.dll, right click and create a new text file.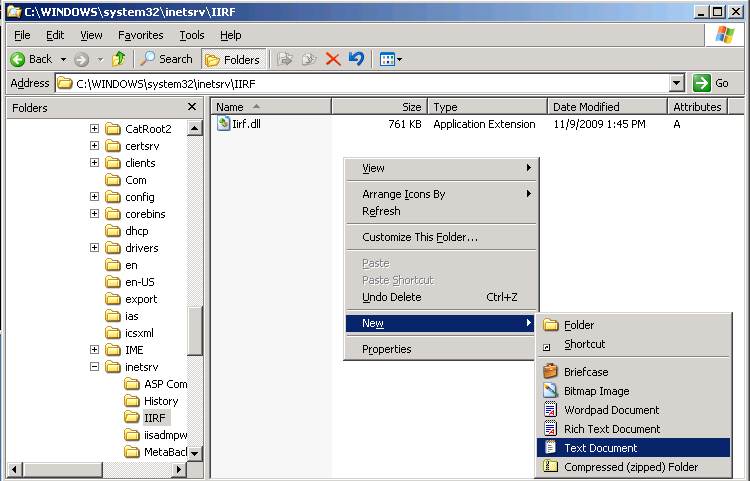
Specify the name as "iirfGlobal.ini" (without quotes). Confirm the change of the file extension. Finally, set the permissions on the INI file in the same way you've set permissions on the DLL.
You do not need to put anything to it, you just need an empty file.
Verify that the permissions are set properly. Browse to the IIRF.dll in Windows Explorer. Right click on the file. Select Properties...Security tab, then click the button labeled "Advanced". You should see something like this:
Click on the Effective Permissions tab, click the Select button, and on Windows Server 2003, specify NETWORK SERVICE for the identity. On Windows XP or 2000, specify IUSR_<hostname>. Click OK and you should see something like this: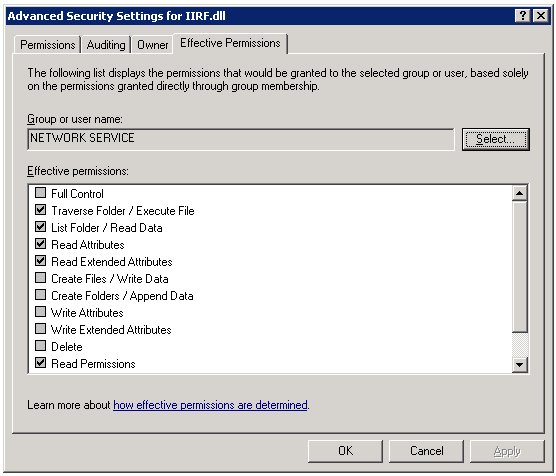
Notice that the checkbox next to List folder / read data is checked. This shows that the appropriate permissions are available to the NetworkService identity on the Iirf.ini file. If you don't get this checkbox, then you'll need to go back and edit the permissions so that the identity used by w3wp.exe can read the Iirf.ini file.
Browse to the iirfGlobal.ini file, and verify permissions in the same way.NoteIncorrectly set permissions on the DLL or INI file is the #1 problem in IIRF installations, so please do take the time to get this right. If the IIS process cannot read the DLL or ini file because of security restrictions, the filter will not work.
- Now, add the DLL as an ISAPI Filter. To do so, open the Internet Information Services Manager. In Windows XP, You can do this via Start... Run... %systemRoot%\System32\inetsrv\iis.msc . Or, browse to Start...Control Panel...Administrative Tools, and select IIS Manager.
On Windows Server 2003, Start > Administrative Tools > Internet Information Services (IIS) Manager.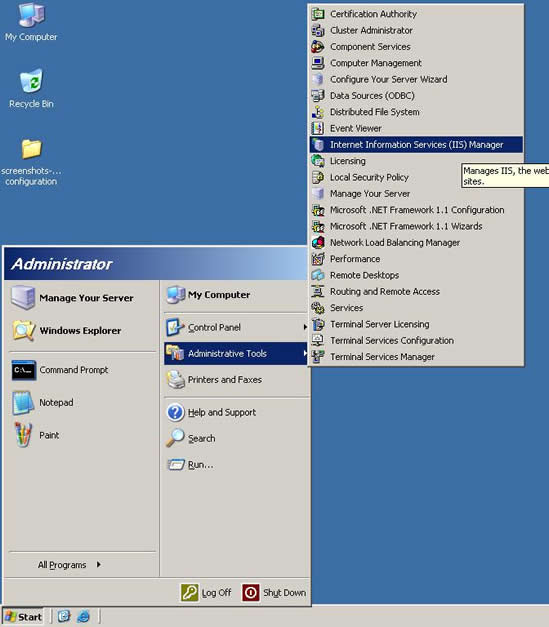
- Choose the appropriate level for the ISAPI filter:
- to use the ISAPI filter with all Web sites, select the "Web Sites" icon just under the machine name.
- to use the ISAPI filter with a specific Web site, select the icon for that Web site (for example, the default Web site). This is recommended if you're going to use IIRF with KMP only - you just enable it for the website where KMP is installed.Do not install it twice!
Do not enable the ISAPI filter on the "Web Sites" level AND on the website with KMP at the same time! In this case URLs will be rewritten twice and KMP will not work properly.
- Right-click the level (icon) that you selected. Click the Properties button.

- Click the ISAPI Filters tab.
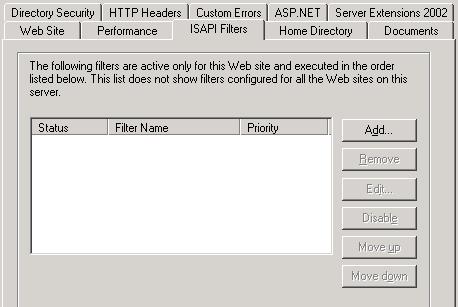
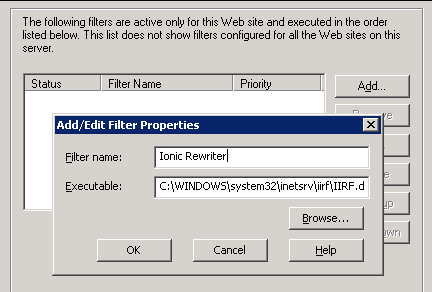
- Click Add. Type a name for the ISAPI filter. Eg, "Ionic Rewriter". Click Browse and select the ISAPI filter DLL that you copied in step 1. Click OK.
If you have multiple ISAPI filters running, you may want to modify the filter load order. For example, if you have Ruby-on-Rails installed on IIS, it typically uses an ISAPI filter. You may need to specify that IIRF should load first, prior to Rails. What this means is that IIRF gets the first chance to rewrite the URL, before Rails sees the URL.Information Box TitleThe relative load order of ISAPI filters is observed only for those filters that have the same priority.
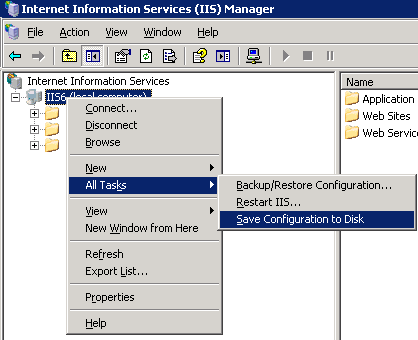
- Finally, save configuration and restart IIS. To do this, right click on the Server node in IIS Manager, and select All Tasks.Then Save Configuration to Disk
Then right click on the Server node in IIS Manager again, and select All Tasks.Then Restart IIS
- IIRF is now installed. You must now proceed to configuring IIRF.
Installing on IIS7
IIS v7 is included with Windows Server 2008, Windows Vista, and Windows 7. These are the steps required to install IIRF on either of those operating systems.
To configure IIRF on IIS7, follow these steps:
- First of all, download the IIRF v2.0+ package from the official website and extract it.
- Copy the IIRF DLL (iirf.dll) from the "bin" folder to an appropriate folder on your server, such as c:\windows\system32\inetsrv\IIRF . Or it could be in a totally separate directory tree. It's up to you.
- Create the iirgGlobal.ini file. In Explorer, in the same folder where you installed IIRF.dll, right click and create a new text file. You do not need to put anything to it, you just need an empty file.
- Be sure to allow the appropriate user or security group read + execute access to the DLL and the ini file. On IIS7, it should be sufficient to grant READ permissions to NetworkService or IIS_WPG.
To verify that the permissions are set properly on each file, browse to the file in Windows Explorer. Right click on the file. Select Properties...Security tab, then click the button labeled "Advanced". You should see something like this: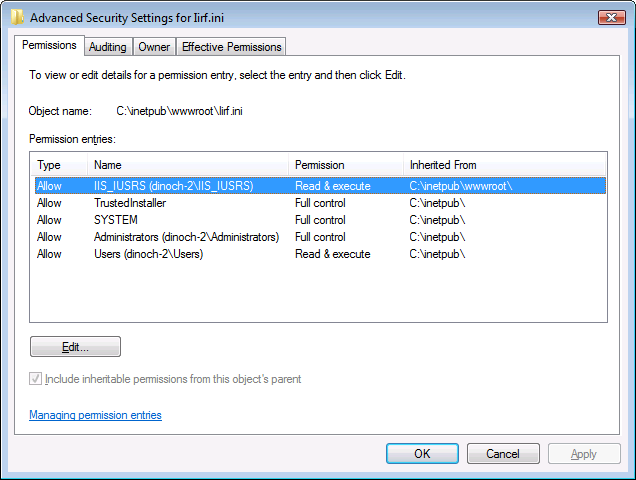
Click on the Effective Permissions tab, click the Select button, and specify NETWORK SERVICE for the identity. Click OK and you should see something like this:
Notice that the checkbox next to List folder / read data is checked. This shows that the appropriate permissions are available to the NetworkService identity on the Iirf.ini or Iirf.dll file. If you don't get this checkbox, then you'll need to go back and edit the permissions so that the identity used by w3wp.exe can read the iirf.ini or iirf.dll file. Repeat these steps for both IIrf.dll and Iirf.ini.NoteIncorrectly set permissions on the DLL or INI file is the #1 problem in IIRF installations, so please do take the time to get this right. If the IIS process cannot read the DLL or ini file because of security restrictions, the filter will not work.
- Open the IIS Manager. Simply use Start... Run... %systemRoot%\System32\inetsrv\iis.msc
- If you would like to configure IIRF to be a "global filter" (applies to all websites and virtual directories), then, select the machine or server name on the left-hand side tree. This should be the top-most (root) node in the tree.

If you would like to configure IIRF for an individual web site, expand the server node, and select the appropriate web site on the left-hand side tree. tree.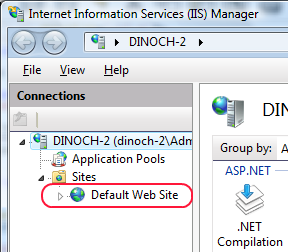
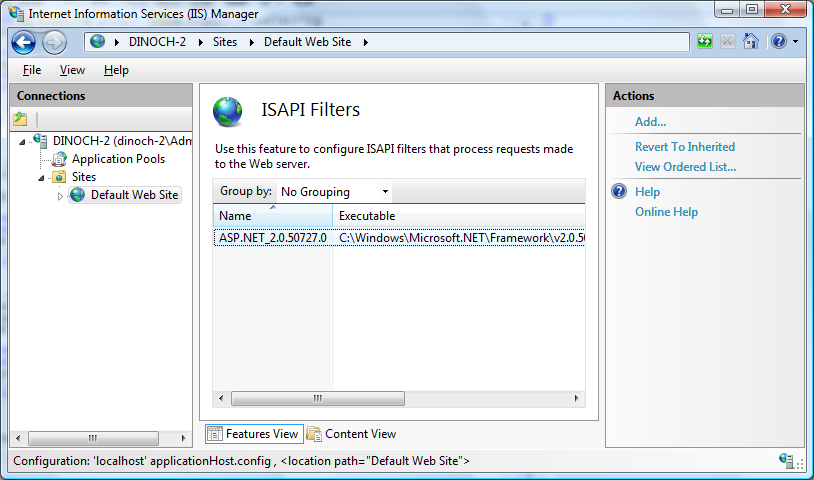
- In either case, in the center-right panel of the MMC window you should now see a set of icons. One of them is labeled "ISAPI Filters". Double click it. Your window should look similar to the following:
- On the far right hand side in the "Actions" pane for the MMC window, click the top-most item, which reads "Add...".
- You get a simple dialog with a box for filter name and a box for the path to the Filter DLL. Type in "IIRF" or "Ionic Rewrite" for the filter name (the particular name is not important), and the full path for the DLL, eg, c:\windows\system32\inetsrv\IIRF\IIRF.dll .

Click OK. - IIRF is now installed. You must now proceed to configuring IIRF.
If your OS is 64-bit, you must select "Enable 32-Bit Application" in the Advanced Settings on the App Pool, in order to let IIRF run.

Setting Up Rewriting Configuration for Knowledgebase Manager Pro
Now we need to create a file that contains all rewriting rules for KMP.
- Open the web root folder for the website with KMP (e.g. C:\Inetpub\wwwroot).
- Create "iirf.ini" file in this folder with following contents:
Replace "PATH-TO-KMP" with correct path to Knowledgebase Manager Pro files starting from the web root folder. For example, if you uploaded KMP to the C:\Inetpub\wwwroot\KB directory, you need to replace "PATH-TO-KMP" with "KB" like this:
NotePlease note that you need to replace 8 occurrences! Do not forget the trailing slash: "/kb/index.php?/$1", NOT "kb/index.php?/$1"
- That's all! You can check if you have installed everything correctly by opening this URL in your browser: http://localhost/iirfStatus (it works only if you open it on the same machine where IIS with IIRF runs). You'll get something like this:

- Go to Styling and Front-end Settings to switch URL Rewriting ON and save the new settings.

- Open a KMP front-end page in your browser to check if URL Rewrite works correctly now.
- If you still got the 404, please contact our support for help.
You can find documentation for IIRF here. There are installation troubleshooting instructions under the Installing IIRF > Verifying and Troubleshooting Installation.
Resource:http://www.web-site-scripts.com/knowledge-base/article/AA-00461/0/Installation-of-URL-Rewriting-module-IIRF-for-IIS6-IIS7.html
- Installation of URL Rewriting module (IIRF) for IIS6/IIS7
- URL Rewriting using ASP.NET for SEO
- Rewrite.NET -- A URL Rewriting Engine for .NET
- A Complete URL Rewriting Solution for ASP.NET 2.0(转)
- A Complete URL Rewriting Solution for ASP.NET 2.0
- A record for OF installation
- URL ReWriting 示例(C#)
- IIS Url ReWriting 示例
- Url ReWriting 示例
- Url ReWriting 示例
- URL Rewriting 重写解决方案
- URL Rewriting 重写解决方案
- Servlet URL Rewriting
- .net2.0 url重写 IIRF
- .net2.0 url重写 IIRF
- .net2.0 url重写 IIRF
- .net2.0 url重写 IIRF
- iis6的url重写迁移至 iis7 url重写的问题
- 揭秘运营商定制手机的诞生全程(上)
- Navigation Controllers
- [推荐]《C/C++高质量编程》笔记
- 开始开通博客,关注软件开发
- Ajax应用中Session超时的一种解决方案
- Installation of URL Rewriting module (IIRF) for IIS6/IIS7
- Visual Studio 2008快捷键之 文本操作快捷键
- windows 7 下MSN最小化的问题
- 头部标记中meta关键词的用法
- iPhone SDK Examples
- redhat mysql设置远程访问
- Visual Studio 2008快捷键之 文本选择快捷键
- In an iOS 5 Storyboard, how do you push a new scene to the original view controller from a Popover?
- sqlHelper.cs文件样板