自定义Dialog
来源:互联网 发布:北京外语大学网络教育 编辑:程序博客网 时间:2024/04/30 02:59
在实际的开发中自定义dialog还是比较常用的,google也很好的满足了大家的定制需求,其核心是两个xml文件:1.自定义布局文件,2.自定义样式文件。还是先贴出运行效果图,布局有点丑,望轻拍。
全屏、dialog无title

非全屏
开始上代码,先是清单文件:
<?xml version="1.0" encoding="utf-8"?><manifest xmlns:android="http://schemas.android.com/apk/res/android" package="com.focustech.android" android:versionCode="1" android:versionName="1.0" > <uses-sdk android:minSdkVersion="14" /> <application android:icon="@drawable/ic_launcher" android:label="@string/app_name" > <activity android:label="@string/app_name" android:name=".CustomDialogActivity"> <!--代码中已经加了全屏控制,所以注释掉 android:theme="@style/theme_fullScreen" --> <intent-filter > <action android:name="android.intent.action.MAIN" /> <category android:name="android.intent.category.LAUNCHER" /> </intent-filter> </activity> <activity android:name=".MyBlogActivity"/> </application></manifest>
自定义dialog的布局文件custom_dialog.xml,大家可以自己去做微调,我的布局比较丑,
<?xml version="1.0" encoding="utf-8"?><LinearLayout xmlns:android="http://schemas.android.com/apk/res/android" android:layout_width="match_parent" android:layout_height="match_parent" android:orientation="vertical" > <LinearLayout android:layout_width="wrap_content" android:layout_height="wrap_content"> <ImageView android:layout_width="wrap_content" android:layout_height="wrap_content" android:layout_marginLeft="5dip" android:layout_marginTop="10dip" android:src="@drawable/info"/> <TextView android:layout_width="wrap_content" android:layout_height="wrap_content" android:text="Tips" android:layout_marginLeft="5dip" android:layout_marginTop="5dip" android:textSize="20dip" /> </LinearLayout> <TextView android:layout_width="wrap_content" android:layout_height="wrap_content" android:text="Are you sure that you want to visit MongDB's blog?" android:layout_marginLeft="8dip" android:layout_marginRight="5dip" android:textSize="18dip" android:layout_marginTop="10dip" /> <LinearLayout android:layout_width="match_parent" android:layout_height="wrap_content" android:gravity="center" > <Button android:id="@+id/btn_comfirm" android:layout_width="wrap_content" android:layout_height="50px" android:src="@drawable/comfirm_cancel" android:text="comfirm" android:layout_marginTop="10dip" android:layout_gravity="center" /> <Button android:id="@+id/btn_cancel" android:layout_width="wrap_content" android:layout_height="50px" android:layout_marginLeft="10dip" android:src="@drawable/comfirm_cancel" android:text="cancel" android:layout_marginTop="10dip" android:layout_gravity="center" /> </LinearLayout></LinearLayout>
自定义dialog的样式文件custom_dialog_style.xml:
<?xml version="1.0" encoding="utf-8"?><resources><style name="custom_dialog_style" parent="@android:style/Theme.Dialog"><!--Dialog的windowFrame框为无 --><item name="android:windowFrame">@null</item><!--是否浮现在activity之上 --><item name="android:windowIsFloating">true</item><!-- 是否半透明 --><item name="android:windowIsTranslucent">false</item> <item name="android:windowNoTitle">true</item><item name="android:windowBackground">@drawable/dialog_bg</item><!-- 背景是否模糊显示 --><item name="android:backgroundDimEnabled">false</item></style></resources>
全屏设置有两种方式,demo里我注释掉了xml的实现方式,采用的是代码进行设置。推荐大家采用xml的方式,这样更利于定制、统一管理。
<?xml version="1.0" encoding="utf-8"?> <resources> <!-- name是Style的名称,parent继承父类样式 --> <style name="theme_fullScreen" parent="android:Theme.Black"> <!-- 设置无标题 --> <item name="android:windowNoTitle">true</item> <!-- 是否填充满屏幕,引用android:windowNoTitle的值 --> <item name="android:windowFullscreen">?android:windowNoTitle</item> </style> </resources>
CustomDialogActivity的布局文件main.xml,其实就是加了个背景色而已
<?xml version="1.0" encoding="utf-8"?><LinearLayout xmlns:android="http://schemas.android.com/apk/res/android" android:layout_width="fill_parent" android:layout_height="fill_parent" android:orientation="vertical" android:background="#104E8B" ></LinearLayout>
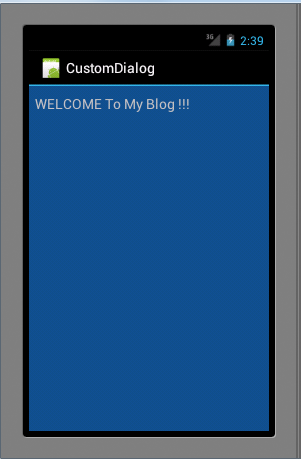
MyBlogActivity的布局文件my_blog.xml,也很简单
<?xml version="1.0" encoding="utf-8"?><LinearLayout xmlns:android="http://schemas.android.com/apk/res/android" android:layout_width="match_parent" android:layout_height="match_parent" android:background="#104E8B" android:orientation="vertical" > <TextView android:layout_width="wrap_content" android:layout_height="wrap_content" android:text="WELCOME To My Blog !!!" android:layout_marginLeft="8dip" android:layout_marginRight="5dip" android:textSize="18dip" android:layout_marginTop="10dip" /></LinearLayout>
CustomDialogActivity.java,需要注意的是一定要在渲染布局文件之前设置全屏;这里由于dialog采用了自定义的布局与样式,与其所在的Activity的生命周期并不是同步的,即使销毁了Activity,也需要手动关闭dialog。
package com.focustech.android;import android.app.Activity;import android.app.Dialog;import android.content.Intent;import android.os.Bundle;import android.view.View;import android.view.View.OnClickListener;import android.view.Window;import android.view.WindowManager;import android.widget.Button;public class CustomDialogActivity extends Activity implements OnClickListener {private Dialog dialog;private Button btn_comfirm;private Button btn_cancel;/** Called when the activity is first created. */@Overridepublic void onCreate(Bundle savedInstanceState) {super.onCreate(savedInstanceState);// 设置全屏,一定要在渲染布局文件之前调用this.requestWindowFeature(Window.FEATURE_NO_TITLE);this.getWindow().setFlags(WindowManager.LayoutParams.FLAG_FULLSCREEN,WindowManager.LayoutParams.FLAG_FULLSCREEN);setContentView(R.layout.main);init();}public void init() {// 加载Dialog布局文件View digView = View.inflate(this, R.layout.custom_dialog, null);// 实例化Dialog,并用R.style.custom_dialog_style作为其样式dialog = new Dialog(this, R.style.custom_dialog_style);// dialog使用digView作为布局文件dialog.setContentView(digView);// 设置对话框关闭之前对话框之外的区域不可点击dialog.setCanceledOnTouchOutside(false);dialog.show();btn_comfirm = (Button) digView.findViewById(R.id.btn_comfirm);btn_cancel = (Button) digView.findViewById(R.id.btn_cancel);btn_comfirm.setOnClickListener(this);btn_cancel.setOnClickListener(this);}@Overridepublic void onClick(View v) {if (v == btn_comfirm) {Intent intent = new Intent(CustomDialogActivity.this,MyBlogActivity.class);startActivity(intent);// 自杀CustomDialogActivity.this.finish();// 由于自定义了该dialog的布局跟样式,此处需手动关闭对话框,否则会报错dialog.dismiss();} else if (v == btn_cancel) {dialog.dismiss();}}}
MyBlogActivity.java,没什么好说的了
package com.focustech.android;import android.app.Activity;import android.os.Bundle;public class MyBlogActivity extends Activity {@Overrideprotected void onCreate(Bundle savedInstanceState) {super.onCreate(savedInstanceState);setContentView(R.layout.my_blog);}}
好了,今天就到这里,大家轻拍。
- 自定义Dialog---继承Dialog
- 自定义Dialog android Dialog
- 自定义Dialog
- 自定义Dialog
- 自定义dialog
- 自定义 Dialog
- 自定义dialog
- 自定义 dialog
- 自定义Dialog
- 自定义 Dialog
- 自定义Dialog
- 自定义dialog
- 自定义Dialog
- 自定义 Dialog
- 自定义Dialog
- 自定义Dialog
- 自定义Dialog
- 自定义Dialog
- http://developer.51cto.com/col/1308/
- SQL SERVER分割字符串
- 黑马程序员--利用参数返回值
- HTTP协议之数据包头信息
- [转]MyBatis详解 与配置MyBatis+Spring+MySql
- 自定义Dialog
- 一些有用的连接
- android中基于网络和GPS的不同精度定位
- 一些有用的连接
- log4j 集锦 1
- 装机
- Android之路-第一个android应用程序
- sicily 1625
- 关于头文件定义全局变量等问题