Android Tabs 中使用listview,mapview
来源:互联网 发布:淘宝p图神器软件 编辑:程序博客网 时间:2024/04/30 08:41
 Last tutorial, we wrote a simple app that displays two interacting list views in a
TabActivity. In this tutorial, we will up the ante and add aMapView as the content of one of the tabs. Why again are we using multiple views in an activity instead of using a separate activity for each tab content? Remember, we want our tabs to be able to easily interact with one another, and keeping them as views allows us to handle the logic and interaction within one activity.
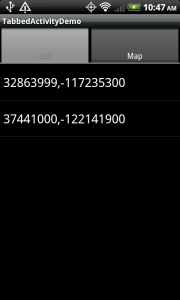
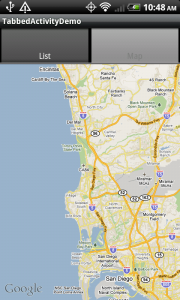
So, our goal in this tutorial is to have a list of geo coordinates and when we click on an item in the list, our map view goes to that location.
Step 1: Create a layout
First off, let's create an XML layout that contains a TabHost, TabWidget, a ListView, and a MapView.
01<?xmlversion="1.0"encoding="utf-8"?>02<TabHostxmlns:android="http://schemas.android.com/apk/res/android"03 android:id="@android:id/tabhost"android:layout_width="fill_parent"04 android:layout_height="fill_parent">05 <LinearLayoutandroid:orientation="vertical"06 android:layout_width="fill_parent"android:layout_height="fill_parent">07 <TabWidgetandroid:id="@android:id/tabs"08 android:layout_width="fill_parent"android:layout_height="wrap_content"/>09 <FrameLayoutandroid:id="@android:id/tabcontent"10 android:layout_width="fill_parent"android:layout_height="fill_parent">11 <LinearLayoutandroid:orientation="vertical"12 android:layout_width="fill_parent"android:layout_height="fill_parent"13 android:id="@+id/main">14 <ListViewandroid:id="@+id/list"android:layout_width="fill_parent"15 android:layout_height="0dip"android:layout_weight="1"/>16 <TextViewandroid:id="@+id/empty"android:layout_width="wrap_content"17 android:layout_height="wrap_content"android:gravity="center"18 android:text="Loading"/>19 </LinearLayout>20 <RelativeLayoutxmlns:android="http://schemas.android.com/apk/res/android"21 android:id="@+id/mainlayout"android:orientation="vertical"22 android:layout_width="fill_parent"android:layout_height="fill_parent">23 <com.google.android.maps.MapView24 android:id="@+id/mapview"android:layout_width="fill_parent"25 android:layout_height="fill_parent"android:clickable="true"26 android:apiKey="[your MAPS API KEY here]"/>27 </RelativeLayout>28 </FrameLayout>29 </LinearLayout>30</TabHost>Step 2: Write the Activity Code
Once we have a layout, we need to create our main Activity. While last tutorial ourActivity was of typeTabActivity, in this tutorial ourActivity has to be of typeMapActivity.
Why is this? Using a MapView in Android must be in a MapActivity class, otherwise your app with throw an Exception (take a look at the activities source code if you're interested in more details). As a result of this, we will have to perform the functions of TabActivity ourselves in the MapActivity class (you'll see that below).
Let's create a class called TabbedListMapActivity and have it extendMapActivity.
In the onCreate() method, we need to set the content to our XML layout, extract theTabHost object, and callsetup() on theTabHost (we need to do this because our Activity is not a TabActivity).
1setContentView(R.layout.main);2 3tabHost = (TabHost) findViewById(android.R.id.tabhost);4 5// setup must be called if you are not inflating the tabhost from XML6tabHost.setup();Next, we want to extract our ListView from the XML, set it to a member variable, and add some initial coordinates to its list adapter.
1// setup list view2listView = (ListView) findViewById(R.id.list);3listView.setEmptyView((TextView) findViewById(R.id.empty));4 5// create some dummy coordinates to add to the list6List<GeoPoint> pointsList = newArrayList<GeoPoint>();7pointsList.add(newGeoPoint((int)(32.864*1E6), (int)(-117.2353*1E6)));8pointsList.add(newGeoPoint((int)(37.441*1E6), (int)(-122.1419*1E6)));9listView.setAdapter(newArrayAdapter(this, android.R.layout.simple_list_item_1, pointsList));Then, we want to extract our MapView from the XML and set it to a member variable.
1// setup map view2mapView = (MapView) findViewById(R.id.mapview);3mapView.setBuiltInZoomControls(true);4mapView.postInvalidate();Once we have our MapView, we can add a listener to the ListView for selection events. Let's add a listener that when an item is clicked, we set the map to the coordinates of the selected item.
01// add an onclicklistener to see point on the map02listView.setOnItemClickListener(newOnItemClickListener() {03 publicvoidonItemClick(AdapterView parent, View view,intposition,longid) {04 GeoPoint geoPoint = (GeoPoint) listView.getAdapter().getItem(position);05 if(geoPoint !=null) {06 // have map view moved to this point07 setMapZoomPoint(geoPoint,12);08 // programmatically switch tabs to the map view09 tabHost.setCurrentTab(1);10 }11 }12});The setMapZoomPoint method is implemented like this:
1private voidsetMapZoomPoint(GeoPoint geoPoint,intzoomLevel) {2 mapView.getController().setCenter(geoPoint);3 mapView.getController().setZoom(zoomLevel);4 mapView.postInvalidate();5}The final step is to add our two views (MapView and ListView) as content to our tab host.
01// add views to tab host02tabHost.addTab(tabHost.newTabSpec("List").setIndicator("List").setContent(newTabContentFactory() {03 publicView createTabContent(String arg0) {04 returnlistView;05 }06}));07tabHost.addTab(tabHost.newTabSpec("Map").setIndicator("Map").setContent(newTabContentFactory() {08 publicView createTabContent(String arg0) {09 returnmapView;10 }11}));Step 3: Fix Common Issues
Now if you were to run this app now, you may notice strange behavior (might just be on my phone). You should see our two tabs starting with the list view tab. Instead you may see theMapView "bleeding" through theListView. I'm not exactly sure what causes this, but a workaround is to manually set the tab view to the map, then manually set the tab view back to the list. This causes the activity to redraw the tabs correctly. Here's my workaround in code:
1//HACK to get the list view to show up first,2// otherwise the mapview would be bleeding through and visible3tabHost.setCurrentTab(1);//the mapview4tabHost.setCurrentTab(0);//the listviewNow everything should look right and you should be able to click a coordinate on the list view, and the map view tab goes to that spot on the earth.
If you are having issues with seeing the Map, remember you need to use the Google-Apis instead of the standard Android apis, you need to generate a Maps API key, you need to add interest permissions to the manifest, and you need to make sure the uses-library line is inside your application tag in the manifest.
Here's my manifest for reference:
01<?xmlversion="1.0"encoding="utf-8"?>02<manifestxmlns:android="http://schemas.android.com/apk/res/android"03 package="com.joshclemm.android.tutorial"android:versionCode="1"04 android:versionName="1.0">05 <applicationandroid:icon="@drawable/icon"android:label="@string/app_name">06 <activityandroid:name=".TabbedListMapActivity"android:label="@string/app_name">07 <intent-filter>08 <actionandroid:name="android.intent.action.MAIN"/>09 <categoryandroid:name="android.intent.category.LAUNCHER"/>10 </intent-filter>11 </activity>12 <uses-libraryandroid:name="com.google.android.maps"/>13 </application>14 <uses-sdkandroid:minSdkVersion="4"></uses-sdk>15 <uses-permissionandroid:name="android.permission.INTERNET"/>16</manifest>To see an activity with a map and list view in action, check out my Earthquake Alert! Android App
Full Source
Here's the full Java source code:
001package com.joshclemm.android.tutorial;002 003import java.util.ArrayList;004import java.util.List;005 006import android.os.Bundle;007import android.view.View;008import android.widget.AdapterView;009import android.widget.ArrayAdapter;010import android.widget.ListView;011import android.widget.TabHost;012import android.widget.TextView;013import android.widget.AdapterView.OnItemClickListener;014import android.widget.TabHost.OnTabChangeListener;015import android.widget.TabHost.TabContentFactory;016 017import com.google.android.maps.GeoPoint;018import com.google.android.maps.MapActivity;019import com.google.android.maps.MapView;020 021public classTabbedListMapActivityextendsMapActivityimplements OnTabChangeListener {022 023 privatestaticfinalString LIST_TAB_TAG = "List";024 privatestaticfinalString MAP_TAB_TAG = "Map";025 026 privateTabHost tabHost;027 028 privateListView listView;029 privateMapView mapView;030 031 @Override032 publicvoidonCreate(Bundle savedInstanceState) {033 super.onCreate(savedInstanceState);034 setContentView(R.layout.main);035 036 tabHost = (TabHost) findViewById(android.R.id.tabhost);037 038 // setup must be called if you are not inflating the tabhost from XML039 tabHost.setup();040 tabHost.setOnTabChangedListener(this);041 042 // setup list view043 listView = (ListView) findViewById(R.id.list);044 listView.setEmptyView((TextView) findViewById(R.id.empty));045 046 // create some dummy coordinates to add to the list047 List<GeoPoint> pointsList =newArrayList<GeoPoint>();048 pointsList.add(newGeoPoint((int)(32.864*1E6), (int)(-117.2353*1E6)));049 pointsList.add(newGeoPoint((int)(37.441*1E6), (int)(-122.1419*1E6)));050 listView.setAdapter(newArrayAdapter(this, android.R.layout.simple_list_item_1, pointsList));051 052 // add an onclicklistener to see point on the map053 listView.setOnItemClickListener(newOnItemClickListener() {054 publicvoidonItemClick(AdapterView parent, View view,intposition,longid) {055 GeoPoint geoPoint = (GeoPoint) listView.getAdapter().getItem(position);056 if(geoPoint !=null) {057 // have map view moved to this point058 setMapZoomPoint(geoPoint,12);059 // programmatically switch tabs to the map view060 tabHost.setCurrentTab(1);061 }062 }063 });064 065 // setup map view066 mapView = (MapView) findViewById(R.id.mapview);067 mapView.setBuiltInZoomControls(true);068 mapView.postInvalidate();069 070 // add views to tab host071 tabHost.addTab(tabHost.newTabSpec(LIST_TAB_TAG).setIndicator("List").setContent(newTabContentFactory() {072 publicView createTabContent(String arg0) {073 returnlistView;074 }075 }));076 tabHost.addTab(tabHost.newTabSpec(MAP_TAB_TAG).setIndicator("Map").setContent(newTabContentFactory() {077 publicView createTabContent(String arg0) {078 returnmapView;079 }080 }));081 082 //HACK to get the list view to show up first,083 // otherwise the mapview would be bleeding through and visible084 tabHost.setCurrentTab(1);085 tabHost.setCurrentTab(0);086 }087 088 /**089 * Instructs the map view to navigate to the point and zoom level specified.090 * @param geoPoint091 * @param zoomLevel092 */093 privatevoidsetMapZoomPoint(GeoPoint geoPoint,intzoomLevel) {094 mapView.getController().setCenter(geoPoint);095 mapView.getController().setZoom(zoomLevel);096 mapView.postInvalidate();097 }098 099 /**100 * From MapActivity, we ignore it for this demo101 */102 @Override103 protectedbooleanisRouteDisplayed() {104 returnfalse;105 }106 107 /**108 * Implement logic here when a tab is selected109 */110 publicvoidonTabChanged(String tabName) {111 if(tabName.equals(MAP_TAB_TAG)) {112 //do something on the map113 }114 elseif(tabName.equals(LIST_TAB_TAG)) {115 //do something on the list116 }117 }118}Screenshots


- Android Tabs 中使用listview,mapview
- Android MapView简单使用
- android中使用listview
- Android中ListView使用
- Android中ListView使用
- android mapview
- android mapview
- mapview使用
- Android 的 Mapview & Location 使用教程
- android 使用百度地图Mapview黑屏状态
- 关于android MapView使用一例
- android:ScrollView内嵌套ListView、MapView等滑动冲突
- Android应用中使用google map时,申请mapview的apiKey,不用翻墙
- android中使用Baidu Map遇到的问题之:移动Mapview上的放大缩小控件
- Google Map Android api V2 中使用MapView遇到CameraUpdateFactory is not initialized!的解决办法
- Google Map Android api V2 中使用MapView遇到CameraUpdateFactory is not initialized!的解决办法
- Android中使用高德地图inflating class com.amap.api.maps.MapView 异常处理
- Android版百度地图MapView维护(dialog中放一个MapView)
- 内核相关
- Java中文比较
- @SuppressWarnings
- 读书记录
- gvim配置
- Android Tabs 中使用listview,mapview
- PushbackInputStream
- shell 的参数
- 解决2.3机型无法定位问题
- 软件开发的几种模式
- Sqlite3 数据库介绍及常用方法的简单封装
- 《垃圾收集》笔记——第一章
- spring的事务管理有几种方式实现
- 集时通讯成功签约800座席呼叫中心,吹响进入大规模市场冲锋号


