CSS3 animated tooltips
来源:互联网 发布:windows编程基础 pdf 编辑:程序博客网 时间:2024/05/19 13:23

CSS3 animated tooltips
Today I will tell you how to create simple and attractive CSS3 tooltips with using transitions and several another css3 properties. You will see all these tooltips directly in that article. You can apply custom tooltips and for text elements and for images too.
Ok, lets start !
Step 1. HTML
Lets imagine, that you have some plain text, as example:
<div class="content">The King sat naked. Like a foolish pauper on the street, he sat leaning against a cold wall, drawing in his blue, goose-bumped legs. He shivered, with his eyes closed, he listened, but everything was quiet.</div>
Now, lets wrap few words with tooltip:
<div class="content">The King sat naked. Like a <span>foolish pauper<i>foolish pauper tooltip</i></span> on the street, he sat leaning against a cold wall, drawing in his blue, goose-bumped legs. He shivered, with his eyes closed, he listened, but everything was quiet.</div>
The King sat naked. Like a foolish pauperfoolish pauper tooltip on the street, he sat leaning against a cold wall, drawing in his blue, goose-bumped legs. He shivered, with his eyes closed, he listened, but everything was quiet.
How I did it – pretty easy:
Step 2. CSS
First, lets define style for our visible tooltip element:
.content span { background:#eee; border:1px solid #444; cursor:pointer; display:inline-block; outline:none; padding:0 5px; position:relative; text-decoration:none; -webkit-border-radius:5px; -moz-border-radius:5px; -ms-border-radius:5px; -o-border-radius:5px; border-radius:5px;}And now – for its hidden (floating) area:
.content span i { visibility:hidden; border:1px solid #444; bottom:60px; left:50%; margin-left:-110px; opacity:0; padding:10px; position:absolute; width:200px; z-index:99; background-image:-webkit-linear-gradient(rgba(255,255,255,.6), rgba(255,255,255,.2)); background-image:-moz-linear-gradient(rgba(255,255,255,.6), rgba(255,255,255,.2)); background-image:-ms-linear-gradient(rgba(255,255,255,.6), rgba(255,255,255,.2)); background-image:-o-linear-gradient(rgba(255,255,255,.6), rgba(255,255,255,.2)); background-image:linear-gradient(rgba(255,255,255,.6), rgba(255,255,255,.2)); background-color: #eee; -webkit-border-radius:5px; -moz-border-radius:5px; -ms-border-radius:5px; -o-border-radius:5px; border-radius:5px; -webkit-transition:all 0.3s ease-in-out; -moz-transition:all 0.3s ease-in-out; -o-transition:all 0.3s ease-in-out; -ms-transition:all 0.3s ease-in-out; transition:all 0.3s ease-in-out;}.content span:hover i { bottom:30px; opacity:0.95; visibility:visible;}Fine and easy, right? But that’s not all. I have prepared several more effects (and even with different colors).
This is tooltip#1Tooltip number one. Which can be in redTooltip#1 – red color, greenTooltip#1 – green color andblueTooltip#1 – blue color.
This is tooltip#2Tooltip number two. Which can be in redTooltip#2 – red color, greenTooltip#2 – green color andblueTooltip#2 – blue color.
This is tooltip#3Tooltip number three. Which can be in redTooltip#3 – red color, greenTooltip#3 – green color andblueTooltip#3 – blue color.
This is tooltip#4Tooltip number four. Which can be in redTooltip#4 – red color, greenTooltip#4 – green color andblueTooltip#4 – blue color.
This is HTML markup of all these samples:
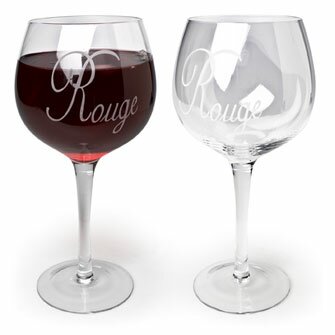
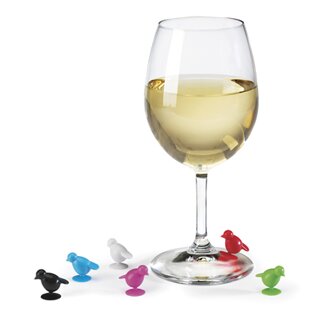
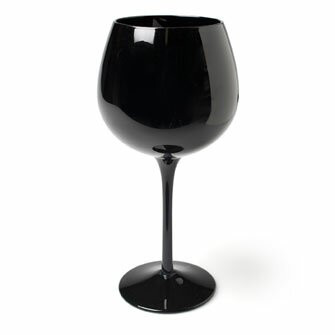
<div class="content">This is <span>tooltip#1<i class="v1">Tooltip number one</i></span>. Which can be in <span class="r">red<i class="v1">Tooltip#1 - red color</i></span>, <span class="g">green<i class="v1">Tooltip#1 - green color</i></span> and <span class="b">blue<i class="v1">Tooltip#1 - blue color</i></span>.<hr />This is <span>tooltip#2<i class="v2">Tooltip number two</i></span>. Which can be in <span class="r">red<i class="v2">Tooltip#2 - red color</i></span>, <span class="g">green<i class="v2">Tooltip#2 - green color</i></span> and <span class="b">blue<i class="v2">Tooltip#2 - blue color</i></span>.<hr />This is <span>tooltip#3<i class="v3">Tooltip number three</i></span>. Which can be in <span class="r">red<i class="v3">Tooltip#3 - red color</i></span>, <span class="g">green<i class="v3">Tooltip#3 - green color</i></span> and <span class="b">blue<i class="v3">Tooltip#3 - blue color</i></span>.<hr />This is <span>tooltip#4<i class="v4">Tooltip number four</i></span>. Which can be in <span class="r">red<i class="v4">Tooltip#4 - red color</i></span>, <span class="g">green<i class="v4">Tooltip#4 - green color</i></span> and <span class="b">blue<i class="v4">Tooltip#4 - blue color</i></span>.<hr /><span class="img"> <img src="http://www.script-tutorials.com/demos/209/images/1.jpg"> <i><img src="http://www.script-tutorials.com/demos/209/images/1.jpg"></i></span><span class="img g"> <img src="http://www.script-tutorials.com/demos/209/images/2.jpg"> <i class="v2"><img src="http://www.script-tutorials.com/demos/209/images/2.jpg"></i></span><span class="img r"> <img src="http://www.script-tutorials.com/demos/209/images/3.jpg"> <i class="v3"><img src="http://www.script-tutorials.com/demos/209/images/3.jpg"></i></span></div>
And – the final CSS stylesheet:
.content { background-color:rgba(255,255,255, 0.9); margin:50px auto; width:800px;}.content span { background:#eee; border:1px solid #444; cursor:pointer; display:inline-block; outline:none; padding:0 5px; position:relative; text-decoration:none; -webkit-border-radius:5px; -moz-border-radius:5px; -ms-border-radius:5px; -o-border-radius:5px; border-radius:5px;}.content span i { visibility:hidden; border:1px solid #444; bottom:60px; left:50%; margin-left:-110px; opacity:0; padding:10px; position:absolute; width:200px; z-index:99; background-image:-webkit-linear-gradient(rgba(255,255,255,.6), rgba(255,255,255,.2)); background-image:-moz-linear-gradient(rgba(255,255,255,.6), rgba(255,255,255,.2)); background-image:-ms-linear-gradient(rgba(255,255,255,.6), rgba(255,255,255,.2)); background-image:-o-linear-gradient(rgba(255,255,255,.6), rgba(255,255,255,.2)); background-image:linear-gradient(rgba(255,255,255,.6), rgba(255,255,255,.2)); background-color: #eee; -webkit-border-radius:5px; -moz-border-radius:5px; -ms-border-radius:5px; -o-border-radius:5px; border-radius:5px; -webkit-transition:all 0.3s ease-in-out; -moz-transition:all 0.3s ease-in-out; -o-transition:all 0.3s ease-in-out; -ms-transition:all 0.3s ease-in-out; transition:all 0.3s ease-in-out;}.content span:hover i { bottom:30px; opacity:0.95; visibility:visible;}.content span:hover i.v2 { bottom:30px; -webkit-transform:scale(1.3); -moz-transform:scale(1.3); -ms-transform:scale(1.3); -o-transform:scale(1.3); transform:scale(1.3);}.content span:hover i.v3 { -webkit-transform:rotateX(360deg) scale(1.2); -moz-transform:rotateX(360deg) scale(1.2); -ms-transform:rotateX(360deg) scale(1.2); -o-transform:rotateX(360deg) scale(1.2); transform:rotateX(360deg) scale(1.2);}.content span i.v4 { height:70px; margin-left:-60px; padding-top:40px; text-align:center; width:100px; -webkit-border-radius: 50% 50% 50% 50%; -moz-border-radius: 50% 50% 50% 50%; -ms-border-radius: 50% 50% 50% 50%; -o-border-radius: 50% 50% 50% 50%; border-radius: 50% 50% 50% 50%;}.content span i:before,.content span i:after { border-bottom:0; border-left:8px solid transparent; border-right:8px solid transparent; border-top:8px solid #444; bottom:-8px; content:""; left:50%; margin-left:-8px; position:absolute; z-index:100;}/* custom colors */.content span.r { background:#f88;}.content span.r i { background-color:#f44; border:1px solid #f44;}.content span.r i:before, .content span.r i:after { border-top-color:#f44;}.content span.g { background:#8f8;}.content span.g i { background-color:#4f4; border:1px solid #4f4;}.content span.g i:before, .content span.g i:after { border-top-color:#4f4;}.content span.b { background:#88f;}.content span.b i { background-color:#44f; border:1px solid #44f;}.content span.b i:before, .content span.b i:after { border-top-color:#44f;}/* images */.content span img { height:128px; width:128px;}.content span.img i { height:auto; margin-left:-65px; margin-top:-10px; width:auto;}.content span.img i:before, .content span.img i:after { display:none;}.content span:hover i img { height:auto; width:auto;}Conclusion
I hope you enjoyed this tutorial and find it useful! Welcome back to read our new tutorials!
Related Stuff You Will Love!
Creating Fantastic Animated Buttons using CSS3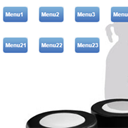
Creating A CSS3 Animated Menu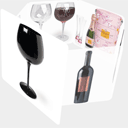
CSS3 Animated Photo Slider
- CSS3 animated tooltips
- CSS3 Animated Gears
- CSS3实现漂亮ToolTips效果
- A Simple Scene Animated with CSS3
- tooltips
- tooltips
- tooltips
- 提示框 9款css3 tooltips鼠标悬停显示消息提示框样式(精)
- ShineTime – A Kick-Ass New jQuery & CSS3 Gallery With Animated Shine Effects
- toolbar + tooltips
- 设置Tooltips
- Reskinning ToolTips
- tooltips链接
- 制作tooltips
- tooltips插件
- javascript Tooltips
- ToolTips Notifications
- animated-rotate
- java中HashSet中的去重以及容量扩增原理
- WSO2 Business Process Server简介
- 安装hudson
- linux export的删除
- 防止UI界面被输入法遮挡(画面随输入法自适应)
- CSS3 animated tooltips
- 事件的绑定和移除
- poj3623
- <摘自网上>strncpy和snprintf的正确用法详解
- Ubuntu安装Oracle
- 毕业后的日子一直在工作和睡觉中重复,看到这篇文章突然醒悟生活不能在这样的重复中渐渐失去色彩
- dpkg 与apt-get
- 步进电动机的工作原理及驱动方法
- Linux虚拟文件系统(概述)