提高你的数据库编程效率:Microsoft CLR Via Sql Server
来源:互联网 发布:ak74知乎 编辑:程序博客网 时间:2024/05/29 02:52
你还在为数据库编程而抓狂吗?那些恶心的脚本拼接,低效的脚本调试的日子将会与我们越来越远啦。现在我们能用支持.NET的语言来开发数据库中的对象,如:存储过程,函数,触发器,集合函数已及复杂的类型。看到这些你还能淡定吗?哈哈,不仅仅是这些。那些能被.NET支持的第三方扩展通过该技术统统都能应用在数据库编程上,如:正则表达式,.NET庞大的加密解密库,以及各种.NET集成的排序和搜索算法。
下面我就来一一介绍怎么使用该技术来解放我们的双手!
实现存储过程
using System;using System.Collections.Generic;using System.Linq;using System.Text;using Microsoft.SqlServer.Server;using System.Data;using System.Data.SqlClient;using System.Data.SqlTypes;using System.Collections; public class SampleStoreProcedure { [SqlProcedure] public static void PrintStudentDetail() { SqlConnection conn = new SqlConnection("Context connection=true"); conn.Open(); SqlCommand cmd = new SqlCommand("select * from student", conn); SqlCommand cmd2 = new SqlCommand("insert into studentdetail values(@detail)"); SqlDataReader reader; string tmpData=string.Empty; ArrayList tmpDataArray=new ArrayList(); reader = cmd.ExecuteReader(); while (reader.Read()) { for (int i = 0; i < reader.FieldCount; i++) { tmpData += reader[i].ToString(); } tmpDataArray.Add(tmpData); } reader.Close(); cmd2.Connection = conn; foreach (string tmp in tmpDataArray) { cmd2.Parameters.Clear(); cmd2.Parameters.AddWithValue("@detail", tmp); cmd2.ExecuteNonQuery(); } conn.Close(); //conn2.Close(); } [SqlProcedure] public static void GetStudentDetail(int id) { SqlConnection conn = new SqlConnection("Context connection=true"); SqlCommand cmd = new SqlCommand("select * from student where id=@id", conn); SqlDataReader reader; cmd.Parameters.AddWithValue("@id", id); try { conn.Open(); reader = cmd.ExecuteReader(); SqlPipe pipe = SqlContext.Pipe; pipe.Send(reader); reader.Close(); } catch { conn.Close(); } finally { } } };
部署步骤
1.编译项目,获取生成的DLL文件。2.在数据库中输入命令sp_configure [clr enabled],1 reconfigure --开启对程序集的信任权限。3.输入命令:create assembly chapter34_UDT from 'c:\chapter34_UDT.dll' 注册程序集4.输入命令:--注册存储过程create procedure PrintStudentDetailasexternal name chapter34_UDT.SampleStoreProcedure.PrintStudentDetail
--注册带参数的存储过程create procedure GetStudentDetail( @Id int)asexternal name chapter34_UDT.SampleStoreProcedure.GetStudentDetail
执行结果
exec PrintStudentDetailexec GetStudentDetail 1
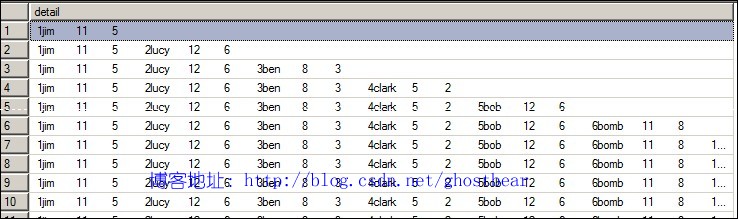
存储过程PrintStudentDetail执行结果

存储过程GetStudentDetail执行的结果
实现函数
using System;using System.Collections.Generic;using System.Linq;using System.Text;using System.Data;using System.Data.SqlClient;using System.Data.SqlTypes;using Microsoft.SqlServer.Server;using System.Security;using System.Security.Cryptography; public class SampleFunction { public SampleFunction() { } [SqlFunction] public static SqlString Hash(SqlString data) { SHA1 sha1 = SHA1.Create(); byte[] tmp = Encoding.ASCII.GetBytes(data.Value); string result= Convert.ToBase64String(sha1.ComputeHash(tmp)); return new SqlString(result); } }部署步骤
1.编译项目,获取生成的DLL文件。2.在数据库中输入命令:sp_configure [clr enabled],1 reconfigure --开启对程序集的信任权限。3.输入命令:create assembly chapter34_UDT from 'c:\chapter34_UDT.dll' 注册程序集--如果上述步骤已经做了就忽略4.输入命令:
--注册函数create function HashSomeThing(@data nvarchar) returns nvarcharasexternal name chapter34_UDT.SampleFunction.[Hash]
执行结果
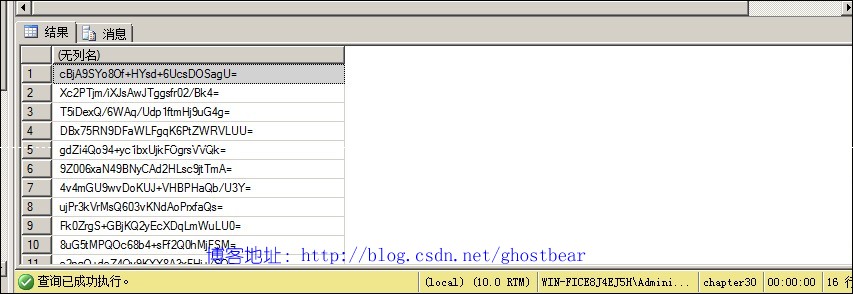
输入调用命令:
select dbo.HashSomeThing(name) from Student
实现表值函数
using System;using System.Collections.Generic;using System.Linq;using System.Text;using System.Data;using System.Data.SqlClient;using System.Data.SqlTypes;using Microsoft.SqlServer.Server;using System.Text.RegularExpressions;using System.Xml.Linq;using System.Xml;using System.IO;using System.Collections;public class SampleTableValueFunction { /// /// 表值函数的主体,该函数需要结合“内容填充函数”才能发挥功能。这里的“内容填充函数”是通过 /// 属性“FillRowMethodName”属性来指定的。属性“TableDefinition”用来定义返回表格的格式。 /// [SqlFunction(TableDefinition = "tmp_value nvarchar(max)", FillRowMethodName = "FillRow")] public static IEnumerable PrintOneToTen() { IList<string> result2 = new List<string>(); var matches = new string[]{ "one", "two", "three", "four", "five", "six", "seven", "eight", "nine", "ten" }; return matches.AsEnumerable(); } public static void FillRow(object obj, out SqlString tmp) { tmp = new SqlString(obj.ToString()); } }
部署步骤
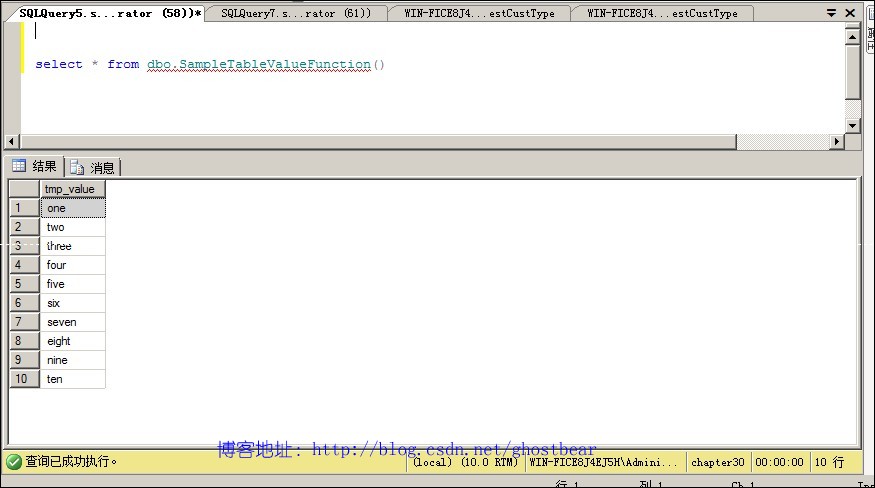
1.编译项目,获取生成的DLL文件。2.在数据库中输入命令:sp_configure [clr enabled],1 reconfigure --开启对程序集的信任权限。3.输入命令:create assembly chapter34_UDT from 'c:\chapter34_UDT.dll' 注册程序集--如果上述步骤已经做了就忽略4.输入命令:create function SampleTableValueFunction() returns table(tmp_value nvarchar(max) null)asexternal name chapter34_UDT.SampleTableValueFunction.PrintOneToTen
执行结果
实现触发器
using System;using System.Collections.Generic;using System.Linq;using System.Text;using Microsoft.SqlServer.Server;using System.Data;using System.Data.SqlClient;using System.Data.SqlTypes; public class SampleTrigger { public SampleTrigger() { } [SqlTrigger(Event = "For Insert,Update,Delete", Name = "PrintInfo", Target = "Student")] public static void PrintInfo() { SqlTriggerContext triggerContext = SqlContext.TriggerContext; SqlConnection conn = new SqlConnection("Context connection=true"); SqlCommand cmd = new SqlCommand(); cmd.Connection = conn; switch (triggerContext.TriggerAction) { case TriggerAction.Insert: cmd.CommandText = "insert into StudentDetail values('insert operation!')"; break; case TriggerAction.Delete: cmd.CommandText = "insert into StudentDetail values('delete operation!')"; break; case TriggerAction.Update: cmd.CommandText = "insert into StudentDetail values('update operation!')"; break; default: break; } try { conn.Open(); cmd.ExecuteNonQuery(); } catch { } finally { conn.Close(); } } [SqlTrigger(Name="InsertSomething",Target="chapter30.dbo.Student",Event="FOR INSERT")] public static void InsertSomething() { SqlTriggerContext triggerContext = SqlContext.TriggerContext; if (triggerContext.TriggerAction == TriggerAction.Insert) { var conn = new SqlConnection("Context connection=true"); var cmd = new SqlCommand(); cmd.Connection = conn; cmd.CommandText = "Insert into StudentDetail values('insert event')"; conn.Open(); cmd.ExecuteNonQuery(); conn.Close(); } } }
部署步骤
1.编译项目,获取生成的DLL文件。2.在数据库中输入命令:sp_configure [clr enabled],1 reconfigure --开启对程序集的信任权限。3.输入命令:create assembly chapter34_UDT from 'c:\chapter34_UDT.dll' 注册程序集--如果上述步骤已经做了就忽略4.输入命令:--注册触发器create trigger PrintSomething on Studentfor insert,update,deleteasexternal name chapter34_UDT.SampleTrigger.PrintInfo
执行结果
输入命令:insert into Student values(12345,'tmp','11','11')update Student set Name='new'+Name where Id=12345delete from Student where Id=12345select * from StudentDetail

实现聚合函数
using System;using System.Collections.Generic;using System.Linq;using System.Text;using Microsoft.SqlServer.Server;using System.Data;using System.Data.SqlClient;using System.Data.SqlTypes; [Serializable] [SqlUserDefinedAggregate(Format.Native)] public struct SampleSum { private int sum; public void Init() { sum = 0; } public void Accumulate(SqlInt32 Value) { sum += Value.Value; } public void Merge(SampleSum Group) { sum += Group.sum; } public SqlInt32 Terminate() { return new SqlInt32(sum); } }
部署步骤
1.编译项目,获取生成的DLL文件。2.在数据库中输入命令:sp_configure [clr enabled],1 reconfigure --开启对程序集的信任权限。3.输入命令:create assembly chapter34_UDT from 'c:\chapter34_UDT.dll' 注册程序集--如果上述步骤已经做了就忽略4.输入命令:--注册聚合函数create aggregate SampleSum(@value int) returns intexternal name [chapter34_UDT].SampleSum
执行结果
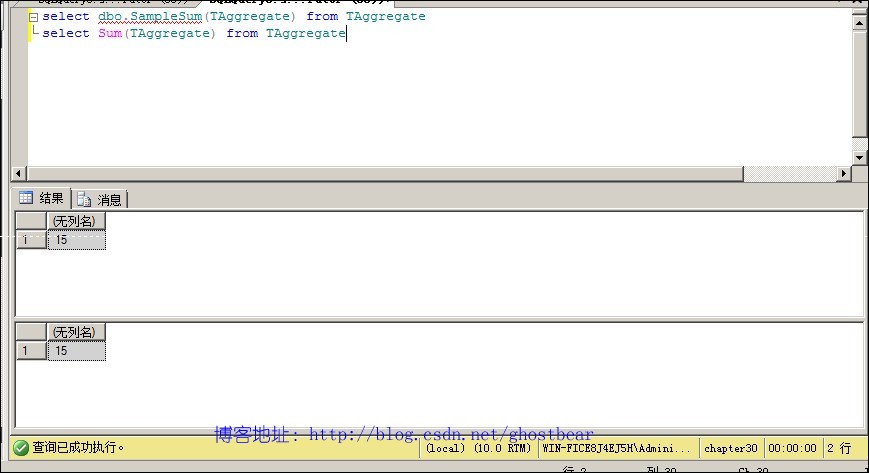
输入命令:select dbo.SampleSum(TAggregate) from TAggregateselect Sum(TAggregate) from TAggregate
实现类型
using System;using System.Collections.Generic;using System.Linq;using System.Text;using Microsoft.SqlServer.Server;using System.Data.SqlTypes;using System.Data;using System.Data.SqlClient; [Serializable] [Microsoft.SqlServer.Server.SqlUserDefinedType(Format.Native)] public struct Facade : INullable { public bool isNull; int hairColor; int tall; int skin; int country; public Facade(int hairColor, int tall, int skin, int country) { isNull = false; this.hairColor = hairColor; this.tall = tall; this.skin = skin; this.country = country; } public static Facade Null { get { return new Facade { isNull = true }; } } public override string ToString() { StringBuilder sb = new StringBuilder(); sb.AppendFormat("{0};", hairColor); sb.AppendFormat("{0};", tall); sb.AppendFormat("{0};", skin); sb.AppendFormat("{0}", country); return sb.ToString(); } public static Facade Parse(SqlString data) { if (data.IsNull) { return new Facade { isNull = true }; } Facade result; string[] tmpData = data.Value.Split(';'); result = new Facade(int.Parse(tmpData[0]), int.Parse(tmpData[1]), int.Parse(tmpData[2]), int.Parse(tmpData[3])); return result; } public bool IsNull { get { return isNull; } } }
部署步骤
1.编译项目,获取生成的DLL文件。2.在数据库中输入命令:sp_configure [clr enabled],1 reconfigure --开启对程序集的信任权限。3.输入命令:create assembly chapter34_UDT from 'c:\chapter34_UDT.dll' 注册程序集--如果上述步骤已经做了就忽略4.输入命令:create type Facade external name[chapter34_UDT].Facade
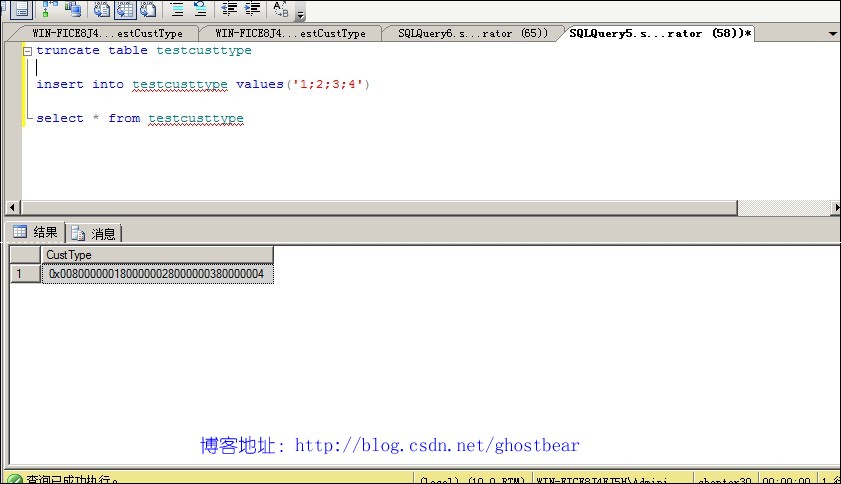
执行结果
小结
CLR Sql Server 的推出大大的提高了Sql Server的脚本编程效率问题,并且这项技术给了我们很大的相信空间。现在我们就来用有限的手段实现无限的可能吧!
代码下载
本章使用的数据库脚本
- 提高你的数据库编程效率:Microsoft CLR Via Sql Server
- SQL Server 提高数据库查询效率
- 提高SQL Server数据库效率常用方法
- 提高SQL Server效率
- 提高SQL Server应用程序的效率
- SQL Server索引提高数据处理的效率
- SQL Server Assembly (SQL CLR) 还原数据库后的问题
- 提高你的效率
- Inside Microsoft SQL Server 2005: T-SQL Programming (数据类型|第一章) 基于CLR的自定义数据类型
- 提高数据库的效率
- 利用索引提高SQL Server数据处理的效率
- 利用索引提高SQL Server数据处理的效率
- 一个提高SQL Server操作效率的软件
- SQL Server 提高执行效率的16种方法
- 探讨SQL Server 2005.NET CLR编程
- SQL Server 2005 .NET CLR编程
- 利用索引提高SQL Server数据处理效率
- 利用索引提高SQL Server数据处理效率
- 黑客以分享林书豪为名进行目标攻击
- 区别:String类与string变量、堆与栈
- <开源> 基于Android的SIP电话-----Speex 回音消除 在android 平台
- Hive执行流程分析
- 一剂尽除之MYSQL 双向主主同步
- 提高你的数据库编程效率:Microsoft CLR Via Sql Server
- 如何查看手机系统版本
- 调用系统函数向进程发信号core
- Dojo 1.7 Release Notes翻译完成,包含若干重大更新
- PROCEDURE can't return a result set in the given context
- 系统分析师考试论文范例(三)---通信行业的应用
- Android四大应用构件之Intent解析
- sql server提取汉字、数字、字母的函数
- 打印机提示 change drum soon 解决