android学习----基础UI编程(二)之TextView 和 EditView(转)
来源:互联网 发布:elk优化 编辑:程序博客网 时间:2024/05/16 04:39
android学习----基础UI编程(二)(转)
7. TextView 和 EditView 共舞
预达到效果:在EditText中输入同时TextView进行输出
//前提:在main.xml中添加EditText 和 TextView控件
核心代码示例:
public class EX_Ctrl_1extends Activity {
private TextView mTextView01;
private EditText mEditText01;
// Called when the activity is first created.
@Override
public void on
super.on
setContentView(R.layout.main);
// 取得TextView、EditText
mTextView01 = (TextView) findViewById(R.id.myTextView);
mEditText01 = (EditText) findViewById(R.id.myEditText);
// 设置EditText 用On
@Override
public boolean on
// TODO Auto-generated method stub
//当有key事件时,就获取当前edit的text 显示到 textview 上
mTextView01.setText(mEditText01.getText().toString());
return false;
}
});
}
}
关键点
1. View.setOnKeyListener
接口原型:
public voidsetOnKeyListener(View.On
Register a callback to be invoked when a key is pressed in this view.
参数:
8. 设计具有背景图的按钮
ImageButton 的背景图片设置方法
1) ImageButton.setImageResource(资源ID)
或ImageButton.setImageDrawable(Drawable drawable)
或
2) XML文件中 <ImageButton> 的android:src 或 android:background 属性
1)在 ImageButton 的焦点和事件处理中,通过 setImageResource 进行图片设置
示例代码
① 新建工程
② 准备png 图片资源clickimage.png、lostfocusimage.png、on

③ 在string.xml 中添加字符串
<?xml version="1.0" encoding="utf-8"?>
<resources>
<string name="app_name">EX_Ctrl_2</string>
<string name="unknown">图片按钮状态:未知</string>
<string name="on
<string name="lostfocus">图片按钮状态:Lost Focus</string>
<string name="on
<string name="normalbutton">一般按钮</string>
</resources>
④ 修改main.xml 布局,添加布局元素
<?xml version="1.0"encoding="utf-8"?>
<LinearLayout xmlns:android="http://schemas.android.com/apk/res/android"
android:orientation="vertical"
android:layout_width="fill_parent"
android:layout_height="fill_parent"
android:background="#EE559611">
<TextView
android:id="@+id/show_TextView"
android:layout_width="fill_parent"
android:layout_height="wrap_content"
android:text="@string/unknown"
/>
<ImageButton
android:id="@+id/image_Button"
android:layout_width="wrap_content"
android:layout_height="wrap_content"
/>
<Button
android:id="@+id/normal_Button"
android:layout_width="wrap_content"
android:layout_height="wrap_content"
android:text="@string/normalbutton"
/>
</LinearLayout>
⑤ 修改mainActivity.java
package zyf.EX_Ctrl_2;
imp
imp
imp
imp
imp
imp
imp
imp
public class EX_Ctrl_2extends Activity {
// Called when the activity is first created.
// 声明三个对象变量(图片按钮,按钮,与TextView)
private ImageButton mImageButton1;
private Button mButton1;
private TextView mTextView1;
@Override
public void on
super.on
setContentView(R.layout.main);
// 通过findViewById 构造三个对象
mImageButton1 = (ImageButton) findViewById(R.id.image_Button );
mButton1 = (Button) findViewById(R.id.normal_Button );
mTextView1 = (TextView) findViewById(R.id.show_TextView);
// 通过On
public void on
// TODO Auto-generated method stub
//若ImageButton 状态为on
//并改变textView 的文字
if (isFocused == true) {
mTextView1.setText(R.string.on
mImageButton1.setImageResource(R.drawable.on
} //若ImageButton 状态为offFocus 改变ImageButton 的图片并改变textView 的文字
else {
mTextView1.setText(R.string.lostfocus );
mImageButton1.setImageResource(R.drawable.lostfocusimage);
}
}
});
//通过on
mImageButton1.setOnClickListener(newOn
public void on
// TODO Auto-generated method stub
//若ImageButton 状态为on
mImageButton1.setImageResource(R.drawable.clickimage);
}
});
//通过on
@Override
public void on
// TODO Auto-generated method stub
//若Button 状态为on
mImageButton1.setImageResource(R.drawable.lostfocusimage);
}
});
}
}
⑥ 结果

关键点
1. ImageButton
Displays a button with an image (instead of text) that can be pressed or clicked by the user.
By default, an ImageButton looks like a regular(普通的) Button, with the standard(标准) button background that changes color during different button states.
2. ImageButton 的焦点切换监听
实现继承于 android.view.view 的接口:
public voidsetOnFocusChangeListener(View.On
Register a callback to be invoked when focus of this view changed
参数:
l :The callback that will run。 在这个里面还要重写 On
3. ImageButton 的点击监听
方法一:
实现继承于 android.view.view 的接口:
public voidsetOnClickListener(View.On
Register a callback to be invoked when this view is clicked. If this view is not clickable, it becomes clickable.
参数:
l :The callback that will run。 在这个里面还要重写 On
方法二:
在XML文件中,设置<ImageButton>的 android:on
通过button的android:on
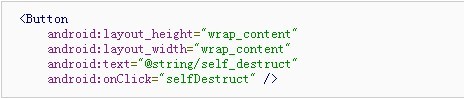
现在,当用户点击按钮时,Android 系统调用 activity 的 selfDestruct(View) 方法。为了正确执行,这个方法必须是public并且仅接受一个View类型的参数。例如:

PS. 继承于 android.view.view 的接口另有setOnKeyListener setOnTouchListener ...等
2)使用 res/drawable/文件夹下的XML文件实现按钮状态改变时的背景图设置,赋该XML的ID给<ImageButton>的android:src或 android:background属性
前提须知,在XML文件中设置按钮背景图片:on
示例代码
① 新建工程
② 准备png 背景图片defaultimage.png 、on

③在 res/drawable 文件夹中添加一个 advancedbutton.xml 设置<selector> 和 <item>标签:
④ 设置<ImageButton> 的android:background 属性值

这就OK了~
关键点
1. <selector> 和 <item>标签
<selector>元素:背景选择器。配置于res/drawable/****.xml。在系统使用该 xml文件时,根据 selector中的列表项的状态来使用相应的背景图片。
例如如下 res/drawable/list_item_bg.xml
- <?xmlversion="1.0"encoding="utf-8"?>
- <selectorxmlns:android="http://schemas.android.com/apk/res/android">
- //默认时的背景图片
- <itemandroid:drawable="@drawable/pic1"/>
- //没有焦点时的背景图片
- <itemandroid:state_window_focused="false"
- android:drawable="@drawable/pic1"/>
- //非触摸模式下获得焦点并单击时的背景图片
- <itemandroid:state_focused="true"android:state_pressed="true"
- android:drawable="@drawable/pic2"/>
- //触摸模式下单击时的背景图片
- <itemandroid:state_focused="false"android:state_pressed="true"
- android:drawable="@drawable/pic3"/>
- //选中时的图片背景
- <itemandroid:state_selected="true"
- android:drawable="@drawable/pic4"/>
- //获得焦点时的图片背景
- <itemandroid:state_focused="true"
- android:drawable="@drawable/pic5"/>
- </selector>
如何使用这种xml文件:
第一种:是在布局文件中配置:
android:listSelector="@drawable/list_item_bg
或者在布局文件的item中添加属性:
android:background=“@drawable/list_item_bg"即可实现。
第二种:是在Java代码中使用:
Drawable drawable = getResources().getDrawable(R.drawable.list_item_bg);
ListView.setSelector(drawable);同样的效果。
但是这样会出现列表有时为黑的情况,需要加上:android:cacheColorHint="@android:color/transparent"
使其透明。
其次再来看看Button的一些背景效果
android:state_selected是选中
android:state_focused是获得焦点
android:state_pressed是点击
android:state_enabled是设置是否响应事件,指所有事件
根据这些状态同样可以设置button的selector效果。也可以设置selector改变button中的文字状态。
以下就是配置button中的文字效果:
- <?xmlversion="1.0"encoding="utf-8"?>
- <selectorxmlns:android="http://schemas.android.com/apk/res/android">
- <itemandroid:state_selected="true"android:color="#FFF"/>
- <itemandroid:state_focused="true"android:color="#FFF"/>
- <itemandroid:state_pressed="true"android:color="#FFF"/>
- <itemandroid:color="#000"/>
- </selector>
- android学习----基础UI编程(二)之TextView 和 EditView(转)
- android常用控件学习之TextView和EditView
- Android学习(3)TextView和EditView
- Android基本控件之TextView和EditView
- Android UI学习之TextView
- Android 控件之TextView、EditView、CheckBox
- android editview和textview一致的表现
- Android TextView/EditView
- TextView和EditView使用
- Android学习笔记十一之Android基础UI二
- Android学习笔记十一之Android基础UI二
- Android自学笔记之 EditView和TextView的一些属特殊性
- Android自定义View之双表头表格(表头不动,EditView和TextView两种方式)
- Android--UI之TextView
- Android--UI之TextView
- Android UI之TextView
- Android:基础控件之(二)TextView
- Android初级之组件基础02-EditView
- xml笔记
- 建立长期有效的外链才是稳定排名的根本
- set_union的几个例子
- 实现简单的购物车
- C语言字节对齐详解
- android学习----基础UI编程(二)之TextView 和 EditView(转)
- jquery基础语法
- Mesa & Hoare Monitor
- 编程之道
- C语言深入学习系列 - 字节对齐&内存管理
- hadoop 操作数据库。DBInputFormat,DBOutputFormat
- 如何成为一名优秀的程序员?
- openGL ES入门一些资料
- 信令点编码