(3)Spring的三种实例 bean 的方式 以及 Spring中bean的作用域。 以及 bean的生命周期
来源:互联网 发布:怎样的穿着叫淘宝风 编辑:程序博客网 时间:2024/04/28 13:05
第一种:
1.使用类构造器实例化
<bean id="personService" class="cn.itm.service.impl.PersonServiceBean"></bean>
import cn.itm.service.PersonService;public class PersonServiceBean implements PersonService{public void save(){System.out.println("我是 save() 方法");}}public class SpringTest {@BeforeClasspublic static void setUpBeforeClass() throws Exception {}// 专门用来实例化 Spring 容器的。@Test public void instanceSpring(){// 在类路径下,寻找配置文件来实例化容器。ApplicationContext ctx = new ClassPathXmlApplicationContext("beans.xml");// 填写 bean的名称,也就是 id属性的值:personService。获取后,就可以通过 接口 引用。PersonService personService = (PersonService) ctx.getBean("personService");//调用 业务方法:personService.save();}}第二种:
2.使用静态工厂方法实例化
<bean id="personService2" class="cn.itm.service.impl.PersonServiceBeanFactory"
factory-method="createPersonServiceBean"></bean>
-----------------------------------------------------------------------------------------------------------------------------
public staticPersonServiceBean createPersonServiceBean(){
return new PersonServiceBean();
}
package cn.itm.service.impl;public class PersonServiceBeanFactory {// 新建一个工厂方法,这个工厂方法用来创建一个bean对象。/** * PersonServiceBean 使用 PersonServiceBeanFactory的createPersonServiceBean()创建的。 * */public static PersonServiceBean createPersonServiceBean(){return new PersonServiceBean();}}public class SpringTest {@BeforeClasspublic static void setUpBeforeClass() throws Exception {}// 专门用来实例化 Spring 容器的。@Test public void instanceSpring(){// 在类路径下,寻找配置文件来实例化容器。ApplicationContext ctx = new ClassPathXmlApplicationContext("beans.xml");// 填写 bean的名称,也就是 id属性的值:personService。获取后,就可以通过 接口 引用。PersonService personService = (PersonService) ctx.getBean("personService2");//调用 业务方法:personService.save();}}第三种:使用实例工厂方法实例化:
<bean id="personServiceFactory" class="cn.itm.service.impl.PersonServiceBeanFactory" ></bean>
<bean id="personService3" factory-bean="personServiceFactory"
factory-method="createPersonServiceBean"></bean>
<?xml version="1.0" encoding="UTF-8"?><beans xmlns="http://www.springframework.org/schema/beans" xmlns:xsi="http://www.w3.org/2001/XMLSchema-instance" xsi:schemaLocation="http://www.springframework.org/schema/beans http://www.springframework.org/schema/beans/spring-beans-2.5.xsd"> <bean id="personServiceFactory" class="cn.itm.service.impl.PersonServiceBeanFactory" ></bean> <bean id="personService3" factory-bean="personServiceFactory" factory-method="createPersonServiceBean"></bean> </beans>
相比第二种:把 static 关键字去掉了。
package cn.itm.service.impl;public class PersonServiceBeanFactory {public PersonServiceBean createPersonServiceBean(){return new PersonServiceBean();}}public class SpringTest {@BeforeClasspublic static void setUpBeforeClass() throws Exception {}// 专门用来实例化 Spring 容器的。@Test public void instanceSpring(){// 在类路径下,寻找配置文件来实例化容器。ApplicationContext ctx = new ClassPathXmlApplicationContext("beans.xml");// 填写 bean的名称,也就是 id属性的值:personService。获取后,就可以通过 接口 引用。PersonService personService = (PersonService) ctx.getBean("personService3");//调用 业务方法:personService.save();}}Spring中 bean的作用域:
<?xml version="1.0" encoding="UTF-8"?><beans xmlns="http://www.springframework.org/schema/beans" xmlns:xsi="http://www.w3.org/2001/XMLSchema-instance" xsi:schemaLocation="http://www.springframework.org/schema/beans http://www.springframework.org/schema/beans/spring-beans-2.5.xsd"> <bean id="personServiceFactory" class="cn.itm.service.impl.PersonServiceBeanFactory" ></bean> <bean id="personService3" factory-bean="personServiceFactory" factory-method="createPersonServiceBean" ></bean> </beans>
public class SpringTest {@BeforeClasspublic static void setUpBeforeClass() throws Exception {}// 专门用来实例化 Spring 容器的。@Test public void instanceSpring(){// 在类路径下,寻找配置文件来实例化容器。ApplicationContext ctx = new ClassPathXmlApplicationContext("beans.xml");// 填写 bean的名称,也就是 id属性的值:personService。获取后,就可以通过 接口 引用。PersonService personService1 = (PersonService) ctx.getBean("personService3");PersonService personService2 = (PersonService) ctx.getBean("personService3");System.out.println( personService1 == personService2);}}打印结果:true。
<bean id="personServiceFactory" class="cn.itm.service.impl.PersonServiceBeanFactory" ></bean>
<bean id="personService3" factory-bean="personServiceFactory"
factory-method="createPersonServiceBean" scope="prototype"></bean>
public class SpringTest {@BeforeClasspublic static void setUpBeforeClass() throws Exception {}// 专门用来实例化 Spring 容器的。@Test public void instanceSpring(){// 在类路径下,寻找配置文件来实例化容器。ApplicationContext ctx = new ClassPathXmlApplicationContext("beans.xml");// 填写 bean的名称,也就是 id属性的值:personService。获取后,就可以通过 接口 引用。PersonService personService1 = (PersonService) ctx.getBean("personService3");PersonService personService2 = (PersonService) ctx.getBean("personService3");System.out.println( personService1 == personService2);}}打印结果:false。
【1】singleton
在每个Spring IoC容器中一个bean定义只有一个对象实例。
默认情况下会在容器启动时初始化bean,但我们可以指定Bean节点的lazy-init=“true”来延迟初始化bean,这时候,只有第一次获取bean会才初始化bean。如:
<bean id="xxx" class="cn.itcast.OrderServiceBean" lazy-init="true"/>
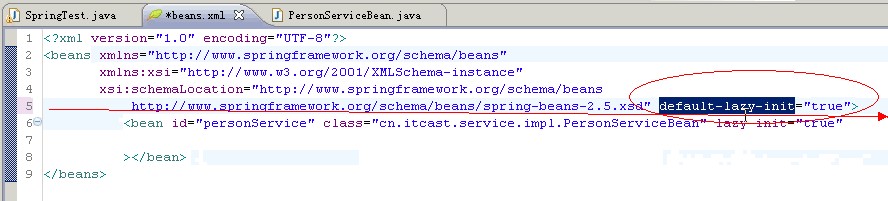
如果想对所有bean都应用延迟初始化,可以在根节点beans设置default-lazy-init=“true“,如下:
<beans default-lazy-init="true“ ...>
【2】prototype
每次从容器获取bean都是新的对象。
生命周期的测试:
<?xml version="1.0" encoding="UTF-8"?><beans xmlns="http://www.springframework.org/schema/beans" xmlns:xsi="http://www.w3.org/2001/XMLSchema-instance" xsi:schemaLocation="http://www.springframework.org/schema/beans http://www.springframework.org/schema/beans/spring-beans-2.5.xsd"> <!-- 在容器实例化的时候,就会对bean进行实例化。。而加入 scope="prototype" 时,是在调用getBean方法的时候,实例化的 --> <bean id="personService" class="cn.itm.service.impl.PersonServiceBean"></bean> </beans>
import cn.itm.service.PersonService;public class PersonServiceBean implements PersonService{public PersonServiceBean(){System.out.println("我被实例化了");}public void save(){System.out.println("我是 save() 方法");}}测试类:
public class SpringTest {@BeforeClasspublic static void setUpBeforeClass() throws Exception {}// 专门用来实例化 Spring 容器的。@Test public void instanceSpring(){// 在类路径下,寻找配置文件来实例化容器。ApplicationContext ctx = new ClassPathXmlApplicationContext("beans.xml");//PersonService personService1 = (PersonService) ctx.getBean("personService3");}}打印结果:我被实例化了。
在每个Spring IoC容器中一个bean定义只有一个对象实例。
默认情况下会在容器启动时初始化bean,但我们可以指定Bean节点的lazy-init=“true”来延迟初始化bean,这时候,只有第一次获取bean会才初始化bean。如:
<bean id="xxx" class="cn.itcast.OrderServiceBean" lazy-init="true"/>
如果想对所有bean都应用延迟初始化,可以在根节点beans设置default-lazy-init=“true“,如下:
<beans default-lazy-init="true“ ...>
指定Bean的初始化方法和销毁方法
<bean id="xxx" class="cn.itcast.OrderServiceBean" init-method="init"
destroy-method="close"/>
<?xml version="1.0" encoding="UTF-8"?><beans xmlns="http://www.springframework.org/schema/beans" xmlns:xsi="http://www.w3.org/2001/XMLSchema-instance" xsi:schemaLocation="http://www.springframework.org/schema/beans http://www.springframework.org/schema/beans/spring-beans-2.5.xsd"> <bean id="personService" class="cn.itm.service.impl.PersonServiceBean" lazy-init="false" destroy-method="destory"></bean> </beans>
package cn.itm.service.impl;import cn.itm.service.PersonService;public class PersonServiceBean implements PersonService{public PersonServiceBean(){System.out.println("我被实例化了");}public void save(){System.out.println("我是 save() 方法");}public void destory(){System.out.println("关闭");}}AbstractApplicationContext
public class SpringTest {@BeforeClasspublic static void setUpBeforeClass() throws Exception {}// 专门用来实例化 Spring 容器的。@Test public void instanceSpring(){AbstractApplicationContext ctx = new ClassPathXmlApplicationContext("beans.xml");ctx.close();}}- (3)Spring的三种实例 bean 的方式 以及 Spring中bean的作用域。 以及 bean的生命周期
- (2)Spring的三种实例 bean 的方式 以及 Spring中bean的作用域。 以及 bean的生命周期
- spring三种实例化Bean的方式和管理Bean的作用域和Bean的生命周期
- 【SSH三大框架】Spring基础第一篇:搭建Spring环境、实例化Bean、管理Bean的作用域以及Bean的生命周期
- Spring中Bean的理解以及@Bean的作用
- Spring中Bean的作用域、生命周期
- spring实例bean的三种方式
- Spring中bean工厂创建bean的三种方式
- Bean作用域的配置以及 Spring各种注入方式实例 list set map props
- Bean作用域的配置以及 Spring各种注入方式实例 list set map props
- Spring之Bean容器初始化以及bean实例的获取
- Spring中实例化Bean的三种方式
- Spring中 三种实例化bean的方式
- Spring中bean实例化的三种方式
- Spring Bean--Bean的配置项、作用域、生命周期
- Spring - bean的作用域与生命周期
- spring bean的作用域和生命周期
- Spring Bean的生命周期和作用域
- uva340 - Master-Mind Hints
- iPhone/Mac Objective-C内存管理教程和原理剖析(四)系统自动创建新的autorelease pool
- 在Ubuntu下配置Glut在Codeblocks平台实现基本的opengl实验
- NDK & WIN32 另一组log函数
- ios开发之delegate那点事儿
- (3)Spring的三种实例 bean 的方式 以及 Spring中bean的作用域。 以及 bean的生命周期
- Photoshop CS5快捷键技巧大全
- Android 资料大全
- 黑马程序员_java学习笔记七 网络编程篇
- Unity3D中的shader基础知识
- Bone Collector(01背包)
- div+CSS浏览器兼容问题整理(IE6.0、IE7.0 ,ie8 , FireFox..
- 三个哲理故事教会我(我想所有人都有必要看)如何降低技术创业的风险
- 中止进程导致系统HANG住