Iphone将window的跟视图替换成自定义的TabBar视图
来源:互联网 发布:手机app淘宝怎么投诉 编辑:程序博客网 时间:2024/06/01 19:53
转自:http://blog.csdn.net/RiverAM/article/details/7365070#comments
我们在项目中应该会遇到UINavigationController和UITabBarController不能同时存在于window视图,但是往往项目是这样的,先需要UINavigationController视图作为根视图(比如说登录界面,登录界面是不需要下面的tabbar的),然后登录进去后就需要一个UITabBarController视图,所以让人比较的纠结,下面将解决这个问题,先建一个基于Navigation的项目,项目会自动将UINavigationController加入window根视图中,然后在rootviewcontroller(自动生成的)页面中加入一个button,点击这个button后就会将window视图中的UINavigationController删除并将自定义的UITabBarController加入window根视图中,之所以要自定义UITabBarController,是因为自定义的东西样式背景等随便自己变,很方便,并且这些自定义的UITabBarController代码以后都可以重用的,修改的部分很少,当然你可以用iphone自带的UITabBarController:
1.建一个基于导航的项目,然后在RootViewController.h中将项目自动生成的delegate导入进来,在TraverNotepadForIphoneAppDelegate.m文件中将为下面定义的rootdelegate赋值:
- #import <UIKit/UIKit.h>
- #import "TraverNotepadForIphoneAppDelegate.h"
- @class TraverNotepadForIphoneAppDelegate;
- @interface RootViewController : UIViewController {
- TraverNotepadForIphoneAppDelegate *rootdelegate;//项目委托
- }
- @property(nonatomic,retain)TraverNotepadForIphoneAppDelegate *rootdelegate;
- @end
2. 在RootViewController.xib中添加一个UIButton,下面是这个button的点击事件的方法:
- -(IBAction)userregisterbutton{
- [self.rootdelegate.window addSubview:self.rootdelegate.mycustomtabbarview.view];
- [self.rootdelegate.navigationController.view removeFromSuperview];
- }
3.下面的代码是自定义的UITabBarController以及自定义tabbar需要的另外两个文件:
先是新建一个继承于UIViewController的类,记得将自动生成xib文件的复选筐选上,两个文件的代码如下,这里面用到了几个类,这需要自己定义,知识当作测试而已,这里就没添出来了:
- #import <UIKit/UIKit.h>
- #import "CustomTabBar.h"
- @interface MyCustomTabBarViewController : UIViewController<CustomTabBarDelegate,UITabBarControllerDelegate> {
- CustomTabBar* tabBar;
- }
- @property (nonatomic, retain) CustomTabBar* tabBar;
- @end
- #import "MyCustomTabBarViewController.h"
- #import "TraverHomeViewController.h"
- #import "WelcomeViewController.h"
- @implementation MyCustomTabBarViewController
- #define SELECTED_VIEW_CONTROLLER_TAG 98456345
- static NSArray* tabBarItems = nil;
- @synthesize tabBar;
- - (void) awakeFromNib
- {
- // Set up some fake view controllers each with a different background color so we can visually see the controllers getting swapped around
- WelcomeViewController *browseCar = [[WelcomeViewController alloc] initWithNibName:@"WelcomeViewController" bundle:nil];
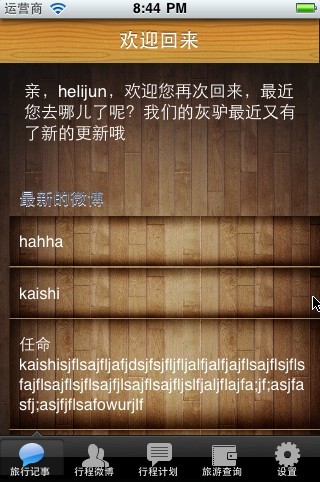
- browseCar.title= @"欢迎回来";
- //browseCar.formNavItem = browseCar.navigationItem;
- UINavigationController *onectrlNav = [[UINavigationController alloc]initWithRootViewController:browseCar];
- TraverHomeViewController *twoCtrl = [[TraverHomeViewController alloc] initWithNibName:@"TraverHomeViewController" bundle:nil];
- twoCtrl.title= @"旅行记事本";
- UINavigationController *twoctrlNav = [[UINavigationController alloc]initWithRootViewController:twoCtrl];
- TraverHomeViewController *accessoricesCtrl = [[TraverHomeViewController alloc] initWithNibName:@"TraverHomeViewController" bundle:nil];
- accessoricesCtrl.title= @"行程微博";
- UINavigationController *threectrlNav = [[UINavigationController alloc]initWithRootViewController:accessoricesCtrl];
- TraverHomeViewController *fourCtrl = [[TraverHomeViewController alloc] initWithNibName:@"TraverHomeViewController" bundle:nil];
- fourCtrl.title= @"行程计划";
- UINavigationController *fourctrlNav = [[UINavigationController alloc]initWithRootViewController:fourCtrl];
- TraverHomeViewController *fiveCtrl = [[TraverHomeViewController alloc] initWithNibName:@"TraverHomeViewController" bundle:nil];
- fiveCtrl.title= @"查询旅游产品";
- UINavigationController *fivectrlNav = [[UINavigationController alloc]initWithRootViewController:fiveCtrl];
- TraverHomeViewController *sixCtrl = [[TraverHomeViewController alloc] initWithNibName:@"TraverHomeViewController" bundle:nil];
- sixCtrl.title= @"设置";
- UINavigationController *sixctrlNav = [[UINavigationController alloc]initWithRootViewController:sixCtrl];
- tabBarItems = [[NSArray arrayWithObjects:
- [NSDictionary dictionaryWithObjectsAndKeys:@"chat.png", @"image", onectrlNav, @"viewController", nil],
- [NSDictionary dictionaryWithObjectsAndKeys:@"chat.png", @"image", twoctrlNav, @"viewController", nil],
- [NSDictionary dictionaryWithObjectsAndKeys:@"chat.png", @"image", threectrlNav, @"viewController", nil],
- [NSDictionary dictionaryWithObjectsAndKeys:@"chat.png", @"image", fourctrlNav, @"viewController", nil],
- [NSDictionary dictionaryWithObjectsAndKeys:@"chat.png", @"image", fivectrlNav,
- @"viewController", nil],
- [NSDictionary dictionaryWithObjectsAndKeys:@"chat.png", @"image", sixctrlNav,
- @"viewController", nil],nil] retain];
- [browseCar release];
- [twoCtrl release];
- [accessoricesCtrl release];
- [fourCtrl release];
- [fiveCtrl release];
- [sixCtrl release];
- [onectrlNav release];
- [twoctrlNav release];
- [threectrlNav release];
- [fourctrlNav release];
- [fivectrlNav release];
- [sixctrlNav release];
- }
- - (id)initWithNibName:(NSString *)nibNameOrNil bundle:(NSBundle *)nibBundleOrNil
- {
- self = [super initWithNibName:nibNameOrNil bundle:nibBundleOrNil];
- if (self) {
- // Custom initialization
- }
- return self;
- }
- - (void)dealloc
- {
- [tabBar release];
- [super dealloc];
- }
- - (void)didReceiveMemoryWarning
- {
- // Releases the view if it doesn't have a superview.
- [super didReceiveMemoryWarning];
- // Release any cached data, images, etc that aren't in use.
- }
- #pragma mark - View lifecycle
- - (void)viewDidLoad
- {
- [super viewDidLoad];
- // Do any additional setup after loading the view from its nib.
- // Use the TabBarGradient image to figure out the tab bar's height (22x2=44)
- UIImage* tabBarGradient = [UIImage imageNamed:@"TabBarGradient.png"];
- // Create a custom tab bar passing in the number of items, the size of each item and setting ourself as the delegate
- self.tabBar = [[[CustomTabBar alloc] initWithItemCount:tabBarItems.count itemSize:CGSizeMake(self.view.frame.size.width/tabBarItems.count, tabBarGradient.size.height*2-4) tag:0 delegate:self] autorelease];
- // Place the tab bar at the bottom of our view
- tabBar.frame = CGRectMake(0,self.view.frame.size.height-(tabBarGradient.size.height*2),self.view.frame.size.width, tabBarGradient.size.height*2+20);
- [self.view addSubview:tabBar];
- // Select the first tab
- [tabBar selectItemAtIndex:0];
- [self touchDownAtItemAtIndex:0];
- }
- #pragma mark -
- #pragma mark CustomTabBarDelegate
- - (UIImage*) imageFor:(CustomTabBar*)tabBar atIndex:(NSUInteger)itemIndex
- {
- // Get the right data
- NSDictionary* data = [tabBarItems objectAtIndex:itemIndex];
- // Return the image for this tab bar item
- return [UIImage imageNamed:[data objectForKey:@"image"]];
- }
- - (UIImage*) backgroundImage
- {
- // The tab bar's width is the same as our width
- CGFloat width = self.view.frame.size.width;
- // Get the image that will form the top of the background
- UIImage* topImage = [UIImage imageNamed:@"TabBarGradient.png"];
- // Create a new image context
- UIGraphicsBeginImageContextWithOptions(CGSizeMake(width, topImage.size.height*2), NO, 0.0);
- // Create a stretchable image for the top of the background and draw it
- UIImage* stretchedTopImage = [topImage stretchableImageWithLeftCapWidth:0 topCapHeight:0];
- [stretchedTopImage drawInRect:CGRectMake(0, 0, width, topImage.size.height)];
- // Draw a solid black color for the bottom of the background
- [[UIColor blackColor] set];
- CGContextFillRect(UIGraphicsGetCurrentContext(), CGRectMake(0, topImage.size.height, width, topImage.size.height));
- // Generate a new image
- UIImage* resultImage = UIGraphicsGetImageFromCurrentImageContext();
- UIGraphicsEndImageContext();
- return resultImage;
- }
- // This is the blue background shown for selected tab bar items
- - (UIImage*) selectedItemBackgroundImage
- {
- return [UIImage imageNamed:@"TabBarItemSelectedBackground.png"];
- }
- // This is the glow image shown at the bottom of a tab bar to indicate there are new items
- - (UIImage*) glowImage
- {
- UIImage* tabBarGlow = [UIImage imageNamed:@"TabBarGlow.png"];
- // Create a new image using the TabBarGlow image but offset 4 pixels down
- UIGraphicsBeginImageContextWithOptions(CGSizeMake(tabBarGlow.size.width, tabBarGlow.size.height-4.0), NO, 0.0);
- // Draw the image
- [tabBarGlow drawAtPoint:CGPointZero];
- // Generate a new image
- UIImage* resultImage = UIGraphicsGetImageFromCurrentImageContext();
- UIGraphicsEndImageContext();
- return resultImage;
- }
- // This is the embossed-like image shown around a selected tab bar item
- - (UIImage*) selectedItemImage
- {
- // Use the TabBarGradient image to figure out the tab bar's height (22x2=44)
- UIImage* tabBarGradient = [UIImage imageNamed:@"TabBarGradient.png"];
- CGSize tabBarItemSize = CGSizeMake(self.view.frame.size.width/tabBarItems.count, tabBarGradient.size.height*2);
- UIGraphicsBeginImageContextWithOptions(tabBarItemSize, NO, 0.0);
- // Create a stretchable image using the TabBarSelection image but offset 4 pixels down
- [[[UIImage imageNamed:@"TabBarSelection.png"] stretchableImageWithLeftCapWidth:4.0 topCapHeight:0] drawInRect:CGRectMake(0, 4.0, tabBarItemSize.width, tabBarItemSize.height-4.0)];
- // Generate a new image
- UIImage* selectedItemImage = UIGraphicsGetImageFromCurrentImageContext();
- UIGraphicsEndImageContext();
- return selectedItemImage;
- }
- - (UIImage*) tabBarArrowImage
- {
- return [UIImage imageNamed:@"TabBarNipple.png"];
- }
- - (void) touchDownAtItemAtIndex:(NSUInteger)itemIndex
- {
- [self awakeFromNib];// 重新给每个item指定view,保证每次点击都是同一个页面
- // Remove the current view controller's view
- UIView* currentView = [self.view viewWithTag:SELECTED_VIEW_CONTROLLER_TAG];
- [currentView removeFromSuperview];
- // Get the right view controller
- NSDictionary* data = [tabBarItems objectAtIndex:itemIndex];
- UIViewController* viewController = [data objectForKey:@"viewController"];
- // Use the TabBarGradient image to figure out the tab bar's height (22x2=44)
- UIImage* tabBarGradient = [UIImage imageNamed:@"TabBarGradient.png"];
- // Set the view controller's frame to account for the tab bar
- viewController.view.frame = CGRectMake(0,0,self.view.frame.size.width, self.view.frame.size.height-(tabBarGradient.size.height*2));
- // Se the tag so we can find it later
- viewController.view.tag = SELECTED_VIEW_CONTROLLER_TAG;
- // Add the new view controller's view
- [self.view insertSubview:viewController.view belowSubview:tabBar];
- // UIView* currentView2 = [self.view viewWithTag:SELECTED_VIEW_CONTROLLER_TAG];
- // NSLog(@"=====%d",[self.navigationController.view.subviews count]);
- // [currentView2 removeFromSuperview];
- //[self.navigationController popViewControllerAnimated:YES];
- // In 1 second glow the selected tab
- [NSTimer scheduledTimerWithTimeInterval:1.0 target:self selector:@selector(addGlowTimerFireMethod:) userInfo:[NSNumber numberWithInteger:itemIndex] repeats:NO];
- }
- - (void)addGlowTimerFireMethod:(NSTimer*)theTimer
- {
- // Remove the glow from all tab bar items
- for (NSUInteger i = 0 ; i < tabBarItems.count ; i++)
- {
- [tabBar removeGlowAtIndex:i];
- }
- // Then add it to this tab bar item
- [tabBar glowItemAtIndex:[[theTimer userInfo] integerValue]];
- }
- - (void)viewDidUnload
- {
- [super viewDidUnload];
- // Release any retained subviews of the main view.
- // e.g. self.myOutlet = nil;
- }
- - (BOOL)shouldAutorotateToInterfaceOrientation:(UIInterfaceOrientation)interfaceOrientation
- {
- // Return YES for supported orientations
- return (interfaceOrientation == UIInterfaceOrientationPortrait);
- }
- @end
然后是新建一个继承于UIView的类,这是自定义tabar的工具类,代码如下:
- @class CustomTabBar;
- @protocol CustomTabBarDelegate
- - (UIImage*) imageFor:(CustomTabBar*)tabBar atIndex:(NSUInteger)itemIndex;
- - (UIImage*) backgroundImage;
- - (UIImage*) selectedItemBackgroundImage;
- - (UIImage*) glowImage;
- - (UIImage*) selectedItemImage;
- - (UIImage*) tabBarArrowImage;
- @optional
- - (void) touchUpInsideItemAtIndex:(NSUInteger)itemIndex;
- - (void) touchDownAtItemAtIndex:(NSUInteger)itemIndex;
- @end
- @interface CustomTabBar : UIView
- {
- NSObject <CustomTabBarDelegate> *delegate;
- NSMutableArray* buttons;
- NSArray *titles;
- }
- @property (nonatomic, retain) NSMutableArray* buttons;
- @property (nonatomic, retain) NSArray *titles;
- - (id) initWithItemCount:(NSUInteger)itemCount itemSize:(CGSize)itemSize tag:(NSInteger)objectTag delegate:(NSObject <CustomTabBarDelegate>*)customTabBarDelegate;
- - (void) selectItemAtIndex:(NSInteger)index;
- - (void) glowItemAtIndex:(NSInteger)index;
- - (void) removeGlowAtIndex:(NSInteger)index;
- @end
- #import "CustomTabBar.h"
- #define GLOW_IMAGE_TAG 2394858
- #define TAB_ARROW_IMAGE_TAG 2394859
- @interface CustomTabBar (PrivateMethods)
- - (CGFloat) horizontalLocationFor:(NSUInteger)tabIndex;
- - (void) addTabBarArrowAtIndex:(NSUInteger)itemIndex;
- -(UIButton*) buttonAtIndex:(NSUInteger)itemIndex width:(CGFloat)width;
- -(UIImage*) tabBarImage:(UIImage*)startImage size:(CGSize)targetSize backgroundImage:(UIImage*)backgroundImage;
- -(UIImage*) blackFilledImageWithWhiteBackgroundUsing:(UIImage*)startImage;
- -(UIImage*) tabBarBackgroundImageWithSize:(CGSize)targetSize backgroundImage:(UIImage*)backgroundImage;
- @end
- @implementation CustomTabBar
- @synthesize buttons;
- @synthesize titles;
- - (id) initWithItemCount:(NSUInteger)itemCount itemSize:(CGSize)itemSize tag:(NSInteger)objectTag delegate:(NSObject <CustomTabBarDelegate>*)customTabBarDelegate
- {
- self = [super init];
- if (self)
- {
- // The tag allows callers withe multiple controls to distinguish between them
- self.tag = objectTag;
- // Set the delegate
- delegate = customTabBarDelegate;
- self.titles = [[NSArray alloc] initWithObjects:@"欢迎回来",@"旅行记事本",@"行程微博",@"行程计划",@"查询旅游产品",@"设置",nil];
- // Add the background image
- UIImage* backgroundImage = [delegate backgroundImage];
- UIImageView* backgroundImageView = [[[UIImageView alloc] initWithImage:backgroundImage] autorelease];
- backgroundImageView.frame = CGRectMake(0, 0, backgroundImage.size.width, backgroundImage.size.height);
- [self addSubview:backgroundImageView];
- // Adjust our width based on the number of items & the width of each item
- self.frame = CGRectMake(0, 0, itemSize.width * itemCount, itemSize.height);
- // Initalize the array we use to store our buttons
- self.buttons = [[NSMutableArray alloc] initWithCapacity:itemCount];
- // horizontalOffset tracks the proper x value as we add buttons as subviews
- CGFloat horizontalOffset = 0;
- // Iterate through each item
- for (NSUInteger i = 0 ; i < itemCount ; i++)
- {
- // Create a button
- UIButton* button = [self buttonAtIndex:i width:self.frame.size.width/itemCount];
- // Register for touch events
- [button addTarget:self action:@selector(touchDownAction:) forControlEvents:UIControlEventTouchDown];
- [button addTarget:self action:@selector(touchUpInsideAction:) forControlEvents:UIControlEventTouchUpInside];
- [button addTarget:self action:@selector(otherTouchesAction:) forControlEvents:UIControlEventTouchUpOutside];
- [button addTarget:self action:@selector(otherTouchesAction:) forControlEvents:UIControlEventTouchDragOutside];
- [button addTarget:self action:@selector(otherTouchesAction:) forControlEvents:UIControlEventTouchDragInside];
- // Add the button to our buttons array
- [buttons addObject:button];
- // Set the button's x offset
- button.frame = CGRectMake(horizontalOffset, 0.0, button.frame.size.width, button.frame.size.height);
- NSString *titls = [self.titles objectAtIndex:i];
- CGSize titleSize = [titls sizeWithFont:[UIFont boldSystemFontOfSize:10.0] constrainedToSize:CGSizeMake(MAXFLOAT,30)];
- //添加底部的文字
- UILabel *myLabel = [[[UILabel alloc] initWithFrame: CGRectMake(button.frame.size.width/2.0 -titleSize.width/2, button.frame.origin.y + button.frame.size.height - 10, button.frame.size.width, titleSize.height)] autorelease];
- [myLabel setTextColor: [UIColor whiteColor]];
- myLabel.text = [self.titles objectAtIndex:i];
- myLabel.font = [UIFont boldSystemFontOfSize:10.0];
- myLabel.lineBreakMode = UILineBreakModeWordWrap;
- myLabel.numberOfLines = 4;
- [myLabel setBackgroundColor:[UIColor clearColor]];
- [button addSubview:myLabel];
- // Add the button as our subview
- [self addSubview:button];
- // Advance the horizontal offset
- horizontalOffset = horizontalOffset + itemSize.width;
- }
- }
- return self;
- }
- -(void) dimAllButtonsExcept:(UIButton*)selectedButton
- {
- for (UIButton* button in buttons)
- {
- if (button == selectedButton)
- {
- button.selected = YES;
- button.highlighted = button.selected ? NO : YES;
- UIImageView* tabBarArrow = (UIImageView*)[self viewWithTag:TAB_ARROW_IMAGE_TAG];
- NSUInteger selectedIndex = [buttons indexOfObjectIdenticalTo:button];
- if (tabBarArrow)
- {
- [UIView beginAnimations:nil context:nil];
- [UIView setAnimationDuration:0.2];
- CGRect frame = tabBarArrow.frame;
- frame.origin.x = [self horizontalLocationFor:selectedIndex];
- tabBarArrow.frame = frame;
- [UIView commitAnimations];
- }
- else
- {
- [self addTabBarArrowAtIndex:selectedIndex];
- }
- }
- else
- {
- button.selected = NO;
- button.highlighted = NO;
- }
- }
- }
- - (void)touchDownAction:(UIButton*)button
- {
- [self dimAllButtonsExcept:button];
- if ([delegate respondsToSelector:@selector(touchDownAtItemAtIndex:)])
- [delegate touchDownAtItemAtIndex:[buttons indexOfObject:button]];
- }
- - (void)touchUpInsideAction:(UIButton*)button
- {
- [self dimAllButtonsExcept:button];
- if ([delegate respondsToSelector:@selector(touchUpInsideItemAtIndex:)])
- [delegate touchUpInsideItemAtIndex:[buttons indexOfObject:button]];
- }
- - (void)otherTouchesAction:(UIButton*)button
- {
- [self dimAllButtonsExcept:button];
- }
- - (void) selectItemAtIndex:(NSInteger)index
- {
- // Get the right button to select
- UIButton* button = [buttons objectAtIndex:index];
- [self dimAllButtonsExcept:button];
- }
- // Add a glow at the bottom of the specified item
- - (void) glowItemAtIndex:(NSInteger)index
- {
- // Get the right button. We'll use to calculate where to put the glow
- UIButton* button = [buttons objectAtIndex:index];
- // Ask the delegate for the glow image
- UIImage* glowImage = [delegate glowImage];
- // Create the image view that will hold the glow image
- UIImageView* glowImageView = [[[UIImageView alloc] initWithImage:glowImage] autorelease];
- // Center the glow image at the center of the button horizontally and at the bottom of the button vertically
- glowImageView.frame = CGRectMake(button.frame.size.width/2.0 - glowImage.size.width/2.0, button.frame.origin.y + button.frame.size.height - glowImage.size.height, glowImage.size.width, glowImage.size.height);
- // Set the glow image view's tag so we can find it later when we want to remove the glow
- glowImageView.tag = GLOW_IMAGE_TAG;
- // Add the glow image view to the button
- //去掉灯光的效果
- //[button addSubview:glowImageView];
- }
- // Remove the glow at the bottom of the specified item
- - (void) removeGlowAtIndex:(NSInteger)index
- {
- // Find the right button
- UIButton* button = [buttons objectAtIndex:index];
- // Find the glow image view
- UIImageView* glowImageView = (UIImageView*)[button viewWithTag:GLOW_IMAGE_TAG];
- // Remove it from the button
- [glowImageView removeFromSuperview];
- }
- - (CGFloat) horizontalLocationFor:(NSUInteger)tabIndex
- {
- UIImageView* tabBarArrow = (UIImageView*)[self viewWithTag:TAB_ARROW_IMAGE_TAG];
- // A single tab item's width is the entire width of the tab bar divided by number of items
- CGFloat tabItemWidth = self.frame.size.width / buttons.count;
- // A half width is tabItemWidth divided by 2 minus half the width of the arrow
- CGFloat halfTabItemWidth = (tabItemWidth / 2.0) - (tabBarArrow.frame.size.width / 2.0);
- // The horizontal location is the index times the width plus a half width
- return (tabIndex * tabItemWidth) + halfTabItemWidth;
- }
- - (void) addTabBarArrowAtIndex:(NSUInteger)itemIndex
- {
- UIImage* tabBarArrowImage = [delegate tabBarArrowImage];
- UIImageView* tabBarArrow = [[[UIImageView alloc] initWithImage:tabBarArrowImage] autorelease];
- tabBarArrow.tag = TAB_ARROW_IMAGE_TAG;
- // To get the vertical location we go up by the height of arrow and then come back down 2 pixels so the arrow is slightly on top of the tab bar.
- CGFloat verticalLocation = -tabBarArrowImage.size.height + 2;
- tabBarArrow.frame = CGRectMake([self horizontalLocationFor:itemIndex], verticalLocation, tabBarArrowImage.size.width, tabBarArrowImage.size.height);
- [self addSubview:tabBarArrow];
- }
- // Create a button at the provided index
- - (UIButton*) buttonAtIndex:(NSUInteger)itemIndex width:(CGFloat)width
- {
- // Create a new button with the right dimensions
- UIButton* button = [UIButton buttonWithType:UIButtonTypeCustom];
- button.frame = CGRectMake(0.0, 0.0, width, self.frame.size.height);
- // Ask the delegate for the button's image
- UIImage* rawButtonImage = [delegate imageFor:self atIndex:itemIndex];
- // Create the normal state image by converting the image's background to gray
- UIImage* buttonImage = [self tabBarImage:rawButtonImage size:button.frame.size backgroundImage:nil];
- // And create the pressed state image by converting the image's background to the background image we get from the delegate
- UIImage* buttonPressedImage = [self tabBarImage:rawButtonImage size:button.frame.size backgroundImage:[delegate selectedItemBackgroundImage]];
- // Set the gray & blue images as the button states
- [button setImage:buttonImage forState:UIControlStateNormal];
- [button setImage:buttonPressedImage forState:UIControlStateHighlighted];
- [button setImage:buttonPressedImage forState:UIControlStateSelected];
- // Ask the delegate for the highlighted/selected state image & set it as the selected background state
- [button setBackgroundImage:[delegate selectedItemImage] forState:UIControlStateHighlighted];
- [button setBackgroundImage:[delegate selectedItemImage] forState:UIControlStateSelected];
- button.adjustsImageWhenHighlighted = NO;
- return button;
- }
- // Create a tab bar image
- -(UIImage*) tabBarImage:(UIImage*)startImage size:(CGSize)targetSize backgroundImage:(UIImage*)backgroundImageSource
- {
- // The background is either the passed in background image (for the blue selected state) or gray (for the non-selected state)
- UIImage* backgroundImage = [self tabBarBackgroundImageWithSize:startImage.size backgroundImage:backgroundImageSource];
- // Convert the passed in image to a white backround image with a black fill
- UIImage* bwImage = [self blackFilledImageWithWhiteBackgroundUsing:startImage];
- // Create an image mask
- CGImageRef imageMask = CGImageMaskCreate(CGImageGetWidth(bwImage.CGImage),
- CGImageGetHeight(bwImage.CGImage),
- CGImageGetBitsPerComponent(bwImage.CGImage),
- CGImageGetBitsPerPixel(bwImage.CGImage),
- CGImageGetBytesPerRow(bwImage.CGImage),
- CGImageGetDataProvider(bwImage.CGImage), NULL, YES);
- // Using the mask create a new image
- CGImageRef tabBarImageRef = CGImageCreateWithMask(backgroundImage.CGImage, imageMask);
- UIImage* tabBarImage = [UIImage imageWithCGImage:tabBarImageRef scale:startImage.scale orientation:startImage.imageOrientation];
- // Cleanup
- CGImageRelease(imageMask);
- CGImageRelease(tabBarImageRef);
- // Create a new context with the right size
- UIGraphicsBeginImageContextWithOptions(targetSize, NO, 0.0);
- // Draw the new tab bar image at the center
- [tabBarImage drawInRect:CGRectMake((targetSize.width/2.0) - (startImage.size.width/2.0), (targetSize.height/2.0) - (startImage.size.height/2.0), startImage.size.width, startImage.size.height)];
- // Generate a new image
- UIImage* resultImage = UIGraphicsGetImageFromCurrentImageContext();
- UIGraphicsEndImageContext();
- return resultImage;
- }
- // Convert the image's fill color to black and background to white
- -(UIImage*) blackFilledImageWithWhiteBackgroundUsing:(UIImage*)startImage
- {
- // Create the proper sized rect
- CGRect imageRect = CGRectMake(0, 0, CGImageGetWidth(startImage.CGImage), CGImageGetHeight(startImage.CGImage));
- // Create a new bitmap context
- CGContextRef context = CGBitmapContextCreate(NULL, imageRect.size.width, imageRect.size.height, 8, 0, CGImageGetColorSpace(startImage.CGImage), kCGImageAlphaPremultipliedLast);
- CGContextSetRGBFillColor(context, 1, 1, 1, 1);
- CGContextFillRect(context, imageRect);
- // Use the passed in image as a clipping mask
- CGContextClipToMask(context, imageRect, startImage.CGImage);
- // Set the fill color to black: R:0 G:0 B:0 alpha:1
- CGContextSetRGBFillColor(context, 0, 0, 0, 1);
- // Fill with black
- CGContextFillRect(context, imageRect);
- // Generate a new image
- CGImageRef newCGImage = CGBitmapContextCreateImage(context);
- UIImage* newImage = [UIImage imageWithCGImage:newCGImage scale:startImage.scale orientation:startImage.imageOrientation];
- // Cleanup
- CGContextRelease(context);
- CGImageRelease(newCGImage);
- return newImage;
- }
- -(UIImage*) tabBarBackgroundImageWithSize:(CGSize)targetSize backgroundImage:(UIImage*)backgroundImage
- {
- // The background is either the passed in background image (for the blue selected state) or gray (for the non-selected state)
- UIGraphicsBeginImageContextWithOptions(targetSize, NO, 0.0);
- if (backgroundImage)
- {
- // Draw the background image centered
- [backgroundImage drawInRect:CGRectMake((targetSize.width - CGImageGetWidth(backgroundImage.CGImage)) / 2, (targetSize.height - CGImageGetHeight(backgroundImage.CGImage)) / 2, CGImageGetWidth(backgroundImage.CGImage), CGImageGetHeight(backgroundImage.CGImage))];
- }
- else
- {
- [[UIColor lightGrayColor] set];
- UIRectFill(CGRectMake(0, 0, targetSize.width, targetSize.height));
- }
- UIImage* finalBackgroundImage = UIGraphicsGetImageFromCurrentImageContext();
- UIGraphicsEndImageContext();
- return finalBackgroundImage;
- }
- - (void)dealloc
- {
- [super dealloc];
- [buttons release];
- [titles release];
- }
- @end
4.在自动生成的TraverNotepadForIphoneAppDelegate类中添加如下代码:
TraverNotepadForIphoneAppDelegate.h文件:
- #import <UIKit/UIKit.h>
- #import "MyCustomTabBarViewController.h"
- #import "RootViewController.h"
- @class RootViewController;
- @interface TraverNotepadForIphoneAppDelegate : NSObject <UIApplicationDelegate> {
- RootViewController *myrootview;//第一个页面
- MyCustomTabBarViewController *mycustomtabbarview;//自定义的tabBar
- }
- @property (nonatomic, retain) IBOutlet UIWindow *window;
- @property (nonatomic, retain) IBOutlet UINavigationController *navigationController;
- @property (nonatomic, retain) IBOutlet RootViewController *myrootview;
- @property(nonatomic,retain)IBOutlet MyCustomTabBarViewController *mycustomtabbarview;
- @end
- #import "TraverNotepadForIphoneAppDelegate.h"
- @implementation TraverNotepadForIphoneAppDelegate
- @synthesize window=_window;
- @synthesize myrootview;
- @synthesize mycustomtabbarview;
- @synthesize navigationController=_navigationController;
- - (BOOL)application:(UIApplication *)application didFinishLaunchingWithOptions:(NSDictionary *)launchOptions
- {
- // Override point for customization after application launch.
- // Add the navigation controller's view to the window and display.
- myrootview.rootdelegate = self;//将委托赋值
- self.window.rootViewController = self.navigationController;
- [self.window makeKeyAndVisible];
- return YES;
- }
- - (void)applicationWillResignActive:(UIApplication *)application
- {
- /*
- Sent when the application is about to move from active to inactive state. This can occur for certain types of temporary interruptions (such as an incoming phone call or SMS message) or when the user quits the application and it begins the transition to the background state.
- Use this method to pause ongoing tasks, disable timers, and throttle down OpenGL ES frame rates. Games should use this method to pause the game.
- */
- }
- - (void)applicationDidEnterBackground:(UIApplication *)application
- {
- /*
- Use this method to release shared resources, save user data, invalidate timers, and store enough application state information to restore your application to its current state in case it is terminated later.
- If your application supports background execution, this method is called instead of applicationWillTerminate: when the user quits.
- */
- }
- - (void)applicationWillEnterForeground:(UIApplication *)application
- {
- /*
- Called as part of the transition from the background to the inactive state; here you can undo many of the changes made on entering the background.
- */
- }
- - (void)applicationDidBecomeActive:(UIApplication *)application
- {
- /*
- Restart any tasks that were paused (or not yet started) while the application was inactive. If the application was previously in the background, optionally refresh the user interface.
- */
- }
- - (void)applicationWillTerminate:(UIApplication *)application
- {
- /*
- Called when the application is about to terminate.
- Save data if appropriate.
- See also applicationDidEnterBackground:.
- */
- }
- - (void)dealloc
- {
- [_window release];
- [_navigationController release];
- [myrootview release];
- [mycustomtabbarview release];
- [super dealloc];
- }
- @end
5.最后记得在MainWindow.xib中拖入一个View Controller,并将其class指定为MyCustomTabBarViewController,然后将该View Controller与
TraverNotepadForIphoneAppDelegate类中的mycustomtabbarview连接,并将TraverNotepadForIphoneAppDelegate类中的myrootview与MainWindow.xib中的RootViewController连接。

- Iphone将window的跟视图替换成自定义的TabBar视图
- Iphone将window的跟视图替换成自定义的TabBar视图
- 自定义tabbar切换视图
- tabbar视图控制器之间的切换
- 点击tabBar返回到当前tabBar的初始视图
- tabBar选项卡的背景色如何修改(自定义tabBar)&&推送nav到指定(根)视图控制器
- 自定义视图的绘制
- 自定义的照相机视图
- 如何在push一个视图控制器时隐藏掉自定义的TabBar
- IPhone视图的交互性
- iphone视图之间的过度
- iphone视图之间的过度
- iPhone版的弹出视图
- 自定义视图:视图的封装过程.
- 自定义视图,视图控制器的使用
- storyboard获取跟视图tabbarcontroller的方法
- iphone绘图的几个基本概念CGPoint、CGSize、CGRect、CGRectMake、window(窗口)、视图(view)
- iphone绘图的几个基本概念CGPoint、CGSize、CGRect、CGRectMake、window(窗口)、视图(view)
- 开源框架:Appledoc
- 机器视觉常用词及专业化词汇
- SQLSERVER 时间格式大全
- Mac os x下git merge工具P4Merge的安装与配置
- win7 下更换eclipse svn 账号
- Iphone将window的跟视图替换成自定义的TabBar视图
- c++报错
- 邮件接口开发经验介绍
- cnetOS6.2下DirectFB1.4.12与样例DirectFB-examples-1.2.0的编译、安装、运行
- eclim安装
- 封装线程类的方法
- .Net中被忽视的方法
- 单片机串口通讯RXD与TXD如何对接详解
- SDL arm linux平台交叉编译(好文章已测试)