仿微信首次启动滑动界面效果
来源:互联网 发布:吉他工厂店 淘宝 编辑:程序博客网 时间:2024/05/21 11:29
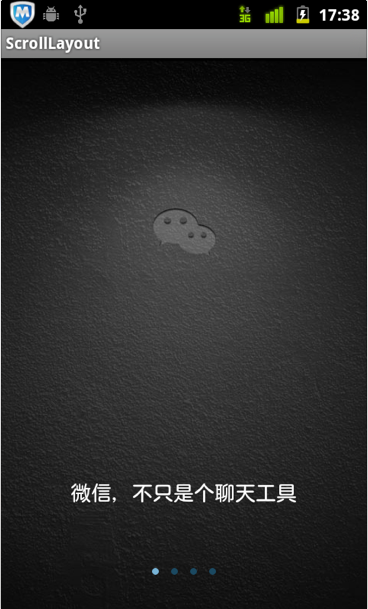
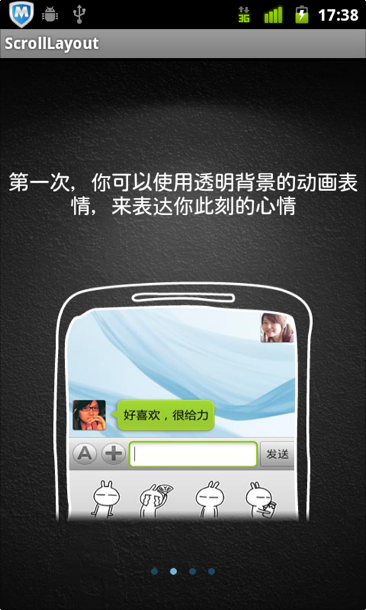
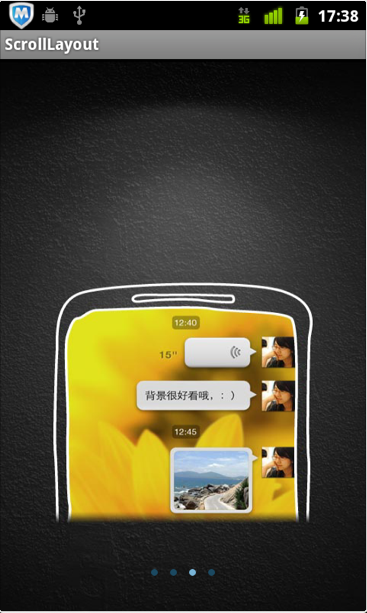
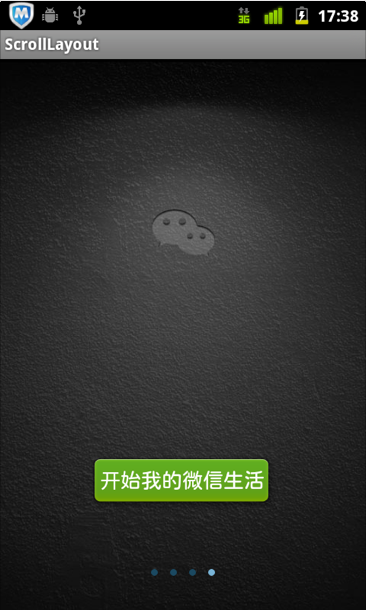
用过微信的都知道,第一次启动时会出现一系列操作说明或功能说明的画面,滑到底然后就进入正式界面,今天我也参考网络资源模仿着做了一个。
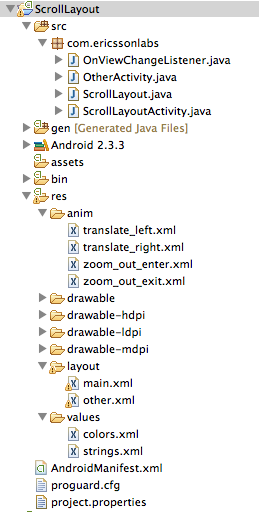
首先看下工程结构图:
首先看布局文件main.xml
<?xml version="1.0" encoding="utf-8"?><RelativeLayout xmlns:android="http://schemas.android.com/apk/res/android" android:id="@+id/mainRLayout" android:layout_width="fill_parent" android:layout_height="fill_parent" android:background="#000000" > <!-- 自定义滑动控件 --> <com.ericssonlabs.ScrollLayout xmlns:android="http://schemas.android.com/apk/res/android" android:id="@+id/ScrollLayout" android:layout_width="fill_parent" android:layout_height="fill_parent" android:visibility="visible" ><!-- 每一页的布局均以一个RelativeLayout来控制,后面类似,这里一共四个 --> <RelativeLayout android:layout_width="fill_parent" android:layout_height="fill_parent" android:background="@drawable/w01" > <TextView android:layout_width="wrap_content" android:layout_height="wrap_content" android:layout_alignParentBottom="true" android:layout_centerHorizontal="true" android:layout_marginBottom="90dp" android:text="微信,不只是个聊天工具" android:textColor="#FFFFFF" android:textSize="18sp" /> </RelativeLayout> <RelativeLayout android:layout_width="fill_parent" android:layout_height="fill_parent" android:background="@drawable/w02" > <TextView android:id="@+id/t1" android:layout_width="wrap_content" android:layout_height="wrap_content" android:layout_alignParentTop="true" android:layout_centerHorizontal="true" android:layout_marginTop="96dp" android:gravity="center_horizontal" android:text="第一次,你可以使用透明背景的动画表情,来表达你此刻的心情" android:textColor="#FFFFFF" android:textSize="18sp" /> </RelativeLayout> <RelativeLayout android:layout_width="fill_parent" android:layout_height="fill_parent" android:background="@drawable/w03" /> <RelativeLayout android:layout_width="fill_parent" android:layout_height="fill_parent" android:background="@drawable/w01" ><!-- 点击该按钮后就进入OtherActivit了 --> <Button android:id="@+id/startBtn" android:layout_width="wrap_content" android:layout_height="wrap_content" android:layout_alignParentBottom="true" android:layout_centerHorizontal="true" android:layout_gravity="center_vertical" android:layout_marginBottom="90dp" android:layout_marginLeft="8dp" android:layout_marginRight="8dp" android:background="@drawable/button_bg" android:text="开始我的微信生活" android:textColor="#FFFFFF" android:textSize="18sp" /> </RelativeLayout> </com.ericssonlabs.ScrollLayout> <!-- 这个布局是下面显示的小圆点的布局,其中ImageView的数量要与上面RelativeLayout的数量对应 --> <LinearLayout android:id="@+id/llayout" android:layout_width="wrap_content" android:layout_height="wrap_content" android:layout_alignParentBottom="true" android:layout_centerHorizontal="true" android:layout_marginBottom="25dp" android:orientation="horizontal" android:visibility="visible" > <ImageView android:layout_width="wrap_content" android:layout_height="wrap_content" android:layout_gravity="center_vertical" android:clickable="true" android:padding="5dp" android:src="@drawable/page_indicator_bg" /> <ImageView android:layout_width="wrap_content" android:layout_height="wrap_content" android:layout_gravity="center_vertical" android:clickable="true" android:padding="5dp" android:src="@drawable/page_indicator_bg" /> <ImageView android:layout_width="wrap_content" android:layout_height="wrap_content" android:layout_gravity="center_vertical" android:clickable="true" android:padding="5dp" android:src="@drawable/page_indicator_bg" /> <ImageView android:layout_width="wrap_content" android:layout_height="wrap_content" android:layout_gravity="center_vertical" android:clickable="true" android:padding="5dp" android:src="@drawable/page_indicator_bg" /> </LinearLayout> <!-- 这个布局是最后点击按钮后启动新界面的一个动画效果 --> <LinearLayout android:id="@+id/animLayout" android:layout_width="fill_parent" android:layout_height="fill_parent" android:visibility="gone" > <LinearLayout android:id="@+id/leftLayout" android:layout_width="wrap_content" android:layout_height="fill_parent" > <ImageView android:layout_width="wrap_content" android:layout_height="wrap_content" android:src="@drawable/whatsnew_left" /> <ImageView android:layout_width="wrap_content" android:layout_height="wrap_content" android:src="@drawable/whatsnew_left_m" /> </LinearLayout> <LinearLayout android:id="@+id/rightLayout" android:layout_width="fill_parent" android:layout_height="fill_parent" > <ImageView android:layout_width="wrap_content" android:layout_height="wrap_content" android:src="@drawable/whatsnew_right_m" /> <ImageView android:layout_width="wrap_content" android:layout_height="wrap_content" android:src="@drawable/whatsnew_right" /> </LinearLayout> </LinearLayout></RelativeLayout>
接下来是自定义控件ScrollLayout.java,这个是继承了ViewGroup的一个自定义控件,主要实现了左右滑动以及展示内容的功能,源码如下:
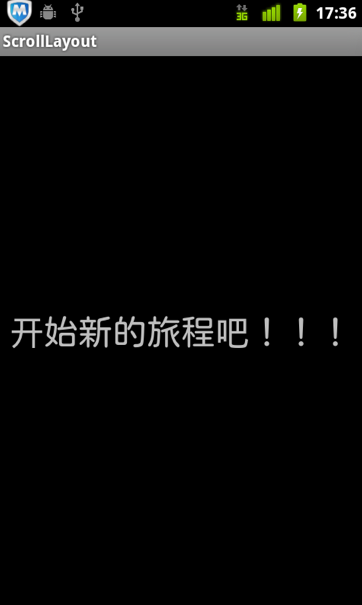
public class ScrollLayoutActivity extends Activity implements OnViewChangeListener{ private ScrollLayout mScrollLayout;private ImageView[] imgs;private int count;private int currentItem;private Button startBtn;private RelativeLayout mainRLayout;private LinearLayout pointLLayout;private LinearLayout leftLayout;private LinearLayout rightLayout;private LinearLayout animLayout;@Overridepublic void onCreate(Bundle savedInstanceState) {super.onCreate(savedInstanceState);setContentView(R.layout.main);initView();}private void initView() {mScrollLayout = (ScrollLayout) findViewById(R.id.ScrollLayout);pointLLayout = (LinearLayout) findViewById(R.id.llayout);mainRLayout = (RelativeLayout) findViewById(R.id.mainRLayout);startBtn = (Button) findViewById(R.id.startBtn);startBtn.setOnClickListener(onClick);animLayout = (LinearLayout) findViewById(R.id.animLayout);leftLayout = (LinearLayout) findViewById(R.id.leftLayout);rightLayout = (LinearLayout) findViewById(R.id.rightLayout);count = mScrollLayout.getChildCount();imgs = new ImageView[count];for (int i = 0; i < count; i++) {imgs[i] = (ImageView) pointLLayout.getChildAt(i);imgs[i].setEnabled(true);imgs[i].setTag(i);}currentItem = 0;imgs[currentItem].setEnabled(false);mScrollLayout.SetOnViewChangeListener(this);}private View.OnClickListener onClick = new View.OnClickListener() {@Overridepublic void onClick(View v) {switch (v.getId()) {case R.id.startBtn:mScrollLayout.setVisibility(View.GONE);pointLLayout.setVisibility(View.GONE);animLayout.setVisibility(View.VISIBLE);mainRLayout.setBackgroundResource(R.drawable.whatsnew_bg);Animation leftOutAnimation = AnimationUtils.loadAnimation(getApplicationContext(), R.anim.translate_left);Animation rightOutAnimation = AnimationUtils.loadAnimation(getApplicationContext(), R.anim.translate_right);leftLayout.setAnimation(leftOutAnimation);rightLayout.setAnimation(rightOutAnimation);leftOutAnimation.setAnimationListener(new AnimationListener() {@Overridepublic void onAnimationStart(Animation animation) {mainRLayout.setBackgroundColor(Color.BLACK);}@Overridepublic void onAnimationRepeat(Animation animation) {}@Overridepublic void onAnimationEnd(Animation animation) {leftLayout.setVisibility(View.GONE);rightLayout.setVisibility(View.GONE);Intent intent = new Intent(ScrollLayoutActivity.this,OtherActivity.class);ScrollLayoutActivity.this.startActivity(intent);ScrollLayoutActivity.this.finish();//结束老Activity启动新Activity之前的一个过度动画overridePendingTransition(R.anim.zoom_out_enter,R.anim.zoom_out_exit);}});break;}}};@Overridepublic void OnViewChange(int position) {setcurrentPoint(position);}private void setcurrentPoint(int position) {if (position < 0 || position > count - 1 || currentItem == position) {return;}imgs[currentItem].setEnabled(true);imgs[position].setEnabled(false);currentItem = position;}}然后是定义的一个回调接口,这个接口的主要作用在代码中有注释,源码如下:
package com.ericssonlabs;public interface OnViewChangeListener {//控制底部小圆点的回调方法public void OnViewChange(int view);}最后是如何使用该自定义控件,在Activity中调用并使用,代码如下:
public class ScrollLayoutActivity extends Activity implements OnViewChangeListener{ private ScrollLayout mScrollLayout;private ImageView[] imgs;private int count;private int currentItem;private Button startBtn;private RelativeLayout mainRLayout;private LinearLayout pointLLayout;private LinearLayout leftLayout;private LinearLayout rightLayout;private LinearLayout animLayout;@Overridepublic void onCreate(Bundle savedInstanceState) {super.onCreate(savedInstanceState);setContentView(R.layout.main);initView();}private void initView() {mScrollLayout = (ScrollLayout) findViewById(R.id.ScrollLayout);pointLLayout = (LinearLayout) findViewById(R.id.llayout);mainRLayout = (RelativeLayout) findViewById(R.id.mainRLayout);startBtn = (Button) findViewById(R.id.startBtn);startBtn.setOnClickListener(onClick);animLayout = (LinearLayout) findViewById(R.id.animLayout);leftLayout = (LinearLayout) findViewById(R.id.leftLayout);rightLayout = (LinearLayout) findViewById(R.id.rightLayout);count = mScrollLayout.getChildCount();imgs = new ImageView[count];for (int i = 0; i < count; i++) {imgs[i] = (ImageView) pointLLayout.getChildAt(i);imgs[i].setEnabled(true);imgs[i].setTag(i);}currentItem = 0;imgs[currentItem].setEnabled(false);mScrollLayout.SetOnViewChangeListener(this);}private View.OnClickListener onClick = new View.OnClickListener() {@Overridepublic void onClick(View v) {switch (v.getId()) {case R.id.startBtn:mScrollLayout.setVisibility(View.GONE);pointLLayout.setVisibility(View.GONE);animLayout.setVisibility(View.VISIBLE);mainRLayout.setBackgroundResource(R.drawable.whatsnew_bg);Animation leftOutAnimation = AnimationUtils.loadAnimation(getApplicationContext(), R.anim.translate_left);Animation rightOutAnimation = AnimationUtils.loadAnimation(getApplicationContext(), R.anim.translate_right);leftLayout.setAnimation(leftOutAnimation);rightLayout.setAnimation(rightOutAnimation);leftOutAnimation.setAnimationListener(new AnimationListener() {@Overridepublic void onAnimationStart(Animation animation) {mainRLayout.setBackgroundColor(Color.BLACK);}@Overridepublic void onAnimationRepeat(Animation animation) {}@Overridepublic void onAnimationEnd(Animation animation) {leftLayout.setVisibility(View.GONE);rightLayout.setVisibility(View.GONE);Intent intent = new Intent(ScrollLayoutActivity.this,OtherActivity.class);ScrollLayoutActivity.this.startActivity(intent);ScrollLayoutActivity.this.finish();//结束老Activity启动新Activity之前的一个过度动画overridePendingTransition(R.anim.zoom_out_enter,R.anim.zoom_out_exit);}});break;}}};@Overridepublic void OnViewChange(int position) {setcurrentPoint(position);}private void setcurrentPoint(int position) {if (position < 0 || position > count - 1 || currentItem == position) {return;}imgs[currentItem].setEnabled(true);imgs[position].setEnabled(false);currentItem = position;}}关于动画这一块我还不是很熟,这里是直接copy的网上的效果,后续会专门做一个专题来研究动画,毕竟,有动画的世界才是多彩的,嘿嘿
一切就绪后,运行看看效果:
工程下载:代码下载
加入我们的QQ群或微信公众账号请查看:Ryan's zone公众账号及QQ群
欢迎关注我的新浪微博和我交流:@唐韧_Ryan
- 仿微信首次启动滑动界面效果
- 仿微信首次启动滑动界面效果
- 仿微信首次启动滑动界面效果
- jenkins首次启动卡在启动界面
- APP首次启动启动图滑动+gallery圆圈滑动(自动)
- 界面滑动效果的制作
- Android 界面 左右滑动效果
- android Scroller 界面滑动效果
- Android中实现仿微信界面切换平滑滑动效果
- Android之高仿微信“首次登录滑动界面”(五)
- android 软件首次运行时引导页左右滑动效果
- Android 高仿QQ 界面滑动效果
- Android 高仿QQ 界面滑动效果
- Android 高仿QQ 界面滑动效果
- Android界面篇【ViewFlipper 左右滑动效果】
- android 仿天猫商品详情界面滑动效果
- ScrollView滑动监听实现界面动画效果
- App启动界面效果设计
- 使用javascript + php开发网页的一些技巧
- 2012亲身的面试题目
- Asp.net生成缩略图和UpdateProgress
- C++与Java比较
- 如何更改Eclipse中的字体颜色
- 仿微信首次启动滑动界面效果
- chrome 插件的一处bug crash
- 收藏------------Android应用程序组件Content Provider的启动过程源代码分析
- minicon移植
- 《会议管理》学习笔记
- java 中内部类
- Qt中Ui名字空间以及setupUi函数的原理和实现
- 总结的一些android公共库
- asp.net 导入CSV 文件内容 到 SQL Server 数据库 解决CSV内容数据重复添加问题