Android之BroadcastReceiver的使用
来源:互联网 发布:c语言指针编程题 编辑:程序博客网 时间:2024/05/21 16:23
一、BroadcastReceiver的简介
用于异步接收广播Intent,广播Intent的发送是通过调用Context.sendBroadcast()、广播接收者(BroadcastReceiver)用于异步接收广播Intent,广播Intent的发送是通过调用Context.sendBroadcast()、Context.sendOrderedBroadcast()或者Context.sendStickyBroadcast()来实现的。通常一个广播Intent可以被订阅了此Intent的多个广播接收者所接收,广播接收者和JMS中的Topic消息接收者很相似.
广播接收器只能接收广播,对广播的通知做出反应,很多广播都产生于系统代码.如:时区改变的通知,电池电量不足、用户改变了语言偏好或者开机启动等.
广播接收器没有用户界面,但是,它可以为它们接收到信息启动一个Activity或者使用NotificationManager来通知用户.
二、BroadcastReceiver的两种注册方式
1)静态注册
静态注册方式是在AndroidManifest.xml的application里面定义receiver并设置要接收的action
首先,新建一个Android项目--->取名BroadcastReceiverDemo01
BroadcastActivity.java的代码
- public class BroadcastActivity extends Activity {
- private Button send = null;
- @Override
- public void onCreate(Bundle savedInstanceState) {
- super.onCreate(savedInstanceState);
- setContentView(R.layout.main);
- send = (Button)findViewById(R.id.sned);
- send.setOnClickListener(new BroadcastListener());
- }
- class BroadcastListener implements OnClickListener{
- @Override
- public void onClick(View v) {
- // TODO Auto-generated method stub
- System.out.println("------------");
- Intent intent = new Intent();
- intent.setAction(Intent.ACTION_EDIT);
- BroadcastActivity.this.sendBroadcast(intent);
- }
- }
- }
TestReceiver.java的代码
- public class TestReceiver extends BroadcastReceiver {
- public TestReceiver() {
- System.out.println("TestReceiver create......");
- }
- @Override
- public void onReceive(Context arg0, Intent arg1) {
- System.out.println("receive......");
- }
- }
main.xml的布局文件
- <?xml version="1.0" encoding="utf-8"?>
- <LinearLayout xmlns:android="http://schemas.android.com/apk/res/android"
- android:orientation="vertical"
- android:layout_width="fill_parent"
- android:layout_height="fill_parent"
- >
- <TextView
- android:layout_width="fill_parent"
- android:layout_height="wrap_content"
- android:text="@string/hello"
- />
- <Button
- android:id="@+id/sned"
- android:layout_width="wrap_content"
- android:layout_height="wrap_content"
- android:text="@string/send"
- />
- </LinearLayout>
strings.xml
- <?xml version="1.0" encoding="utf-8"?>
- <resources>
- <string name="hello">Hello World, TestReceiver!</string>
- <string name="app_name">broadcast</string>
- <string name="send">发送</string>
- </resources>
AndroidManifest.xml
- <?xml version="1.0" encoding="utf-8"?>
- <manifest xmlns:android="http://schemas.android.com/apk/res/android"
- package="com.gem.activity"
- android:versionCode="1"
- android:versionName="1.0">
- <application android:icon="@drawable/icon" android:label="@string/app_name">
- <activity android:name=".BroadcastActivity"
- android:label="@string/app_name">
- <intent-filter>
- <action android:name="android.intent.action.MAIN" />
- <category android:name="android.intent.category.LAUNCHER" />
- </intent-filter>
- </activity>
- <!-- 注册Receiver -->
- <receiver android:name=".TestReceiver">
- <intent-filter>
- <action android:name="android.intent.action.EDIT"></action>
- </intent-filter>
- </receiver>
- </application>
- <uses-sdk android:minSdkVersion="8" />
- </manifest>
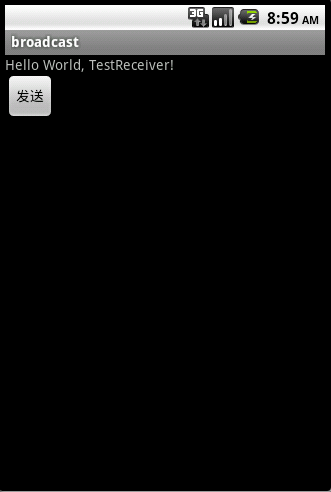
效果图


2)动态注册
动态注册方式在activity里面调用函数来注册,和静态的内容差不多。一个形参是receiver,另一个是IntentFilter,其中里面是要接收的action.
首先,新建一个Android项目--->取名BroadcastReceiverDemo02
BroadcastActivity.java的代码
- public class BroadcastActivity extends Activity {
- private Button send;
- private Button registerReceiver;
- private Button unregisterReceiver;
- private MyReceiver myReceiver;
- @Override
- public void onCreate(Bundle savedInstanceState) {
- super.onCreate(savedInstanceState);
- setContentView(R.layout.main);
- send = (Button)findViewById(R.id.send);
- send.setOnClickListener(new SendButtontListener());
- registerReceiver = (Button)findViewById(R.id.registerReceiver);
- registerReceiver.setOnClickListener(new RegisterReceiverButtonListener());
- unregisterReceiver = (Button)findViewById(R.id.unregisterReceiver);
- unregisterReceiver.setOnClickListener(new UnregisterReceiverButtonListener());
- }
- class SendButtontListener implements OnClickListener{
- @Override
- public void onClick(View v) {
- Intent intent = new Intent();
- intent.setAction("Intent.ACTION_EDIT");
- BroadcastActivity.this.sendBroadcast(intent);
- System.out.println("send-----");
- }
- }
- class RegisterReceiverButtonListener implements OnClickListener{
- @Override
- public void onClick(View v) {
- myReceiver = new MyReceiver();
- IntentFilter filter = new IntentFilter();
- filter.addAction("Intent.ACTION_EDIT");
- //动态注册BroadcastReceiver
- registerReceiver(myReceiver, filter);
- }
- }
- class UnregisterReceiverButtonListener implements OnClickListener{
- @Override
- public void onClick(View v) {
- //注销BroadcastReceiver
- unregisterReceiver(myReceiver);
- System.out.println("close-----");
- }
- }
- }
MyReceiver.java的代码
- public class MyReceiver extends BroadcastReceiver {
- @Override
- public void onReceive(Context context, Intent intent) {
- System.out.println("onReceive......");
- }
- }
main.xml的布局文件
- <?xml version="1.0" encoding="utf-8"?>
- <LinearLayout xmlns:android="http://schemas.android.com/apk/res/android"
- android:orientation="vertical"
- android:layout_width="fill_parent"
- android:layout_height="fill_parent"
- >
- <TextView
- android:layout_width="fill_parent"
- android:layout_height="wrap_content"
- android:text="@string/hello"
- />
- <Button
- android:id="@+id/send"
- android:layout_width="wrap_content"
- android:layout_height="wrap_content"
- android:text="@string/send"
- />
- <Button
- android:id="@+id/registerReceiver"
- android:layout_width="wrap_content"
- android:layout_height="wrap_content"
- android:text="@string/registerReceiver"
- />
- <Button
- android:id="@+id/unregisterReceiver"
- android:layout_width="wrap_content"
- android:layout_height="wrap_content"
- android:text="@string/unregisterReceiver"
- />
- </LinearLayout>
strings.xml
- <?xml version="1.0" encoding="utf-8"?>
- <resources>
- <string name="hello">Hello World, TestReceiver!</string>
- <string name="app_name">broadcast</string>
- <string name="send">发送广播</string>
- <string name="registerReceiver">注册广播接收器</string>
- <string name="unregisterReceiver">注销广播接收器</string>
- </resources>
AndroidManifest.xml
- <?xml version="1.0" encoding="utf-8"?>
- <manifest xmlns:android="http://schemas.android.com/apk/res/android"
- package="com.gem.activity"
- android:versionCode="1"
- android:versionName="1.0">
- <application android:icon="@drawable/icon" android:label="@string/app_name">
- <activity android:name=".BroadcastActivity"
- android:label="@string/app_name">
- <intent-filter>
- <action android:name="android.intent.action.MAIN" />
- <category android:name="android.intent.category.LAUNCHER" />
- </intent-filter>
- </activity>
- </application>
- <uses-sdk android:minSdkVersion="8" />
- </manifest>
效果图


本文出自 “Pain past is pleasure” 博客,请务必保留此出处http://emilyzhou.blog.51cto.com/3632647/685387
- android之BroadcastReceiver的使用
- Android之BroadcastReceiver的使用
- Android之BroadcastReceiver的使用
- Android之BroadcastReceiver的使用
- Android之BroadcastReceiver的使用
- Android四大组件之BroadcastReceiver的使用
- [Android] BroadCastReceiver的使用
- Android -- BroadcastReceiver的使用
- Android BroadcastReceiver的使用
- 【android】BroadcastReceiver的使用
- Android之四大组件之一-BroadcastReceiver的使用(二)
- Android之BroadcastReceiver的用法
- Android中BroadcastReceiver的使用
- Android中BroadcastReceiver的使用
- Android中BroadCastReceiver的使用
- Android -- BroadCastReceiver的简单使用
- Android入门--BroadcastReceiver的使用
- Android BroadcastReceiver的简单使用
- Unity3D 移动代码优化
- 大数运算 (五)(正整型)—— 大数的除法与求余
- PHP中流动新闻或图片的实现——MSClass使用教程
- 【多线程】synchronized同步块
- Toast 图标大全
- Android之BroadcastReceiver的使用
- Delegation or Notification
- 大数运算(高精度) (六)—— 大数求幂
- confmgr项目,django,dwz相关问题
- 调试FSL Android GPS学习select和epoll的用法
- 【多线程】synchronized同步方法
- SQL查询显示行号、随机查询、取指定行数据
- eclipse视图切换和配置Web服务器
- Android之Adapter用法总结


