xcode 4.3 怎么新建class 和一些uiviewcontroller 的使用
来源:互联网 发布:图片加工软件 编辑:程序博客网 时间:2024/05/17 23:22
class :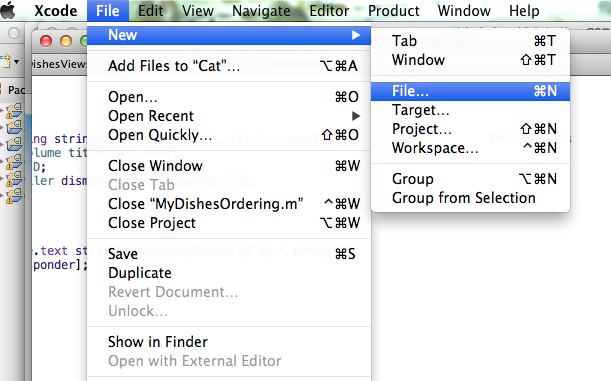
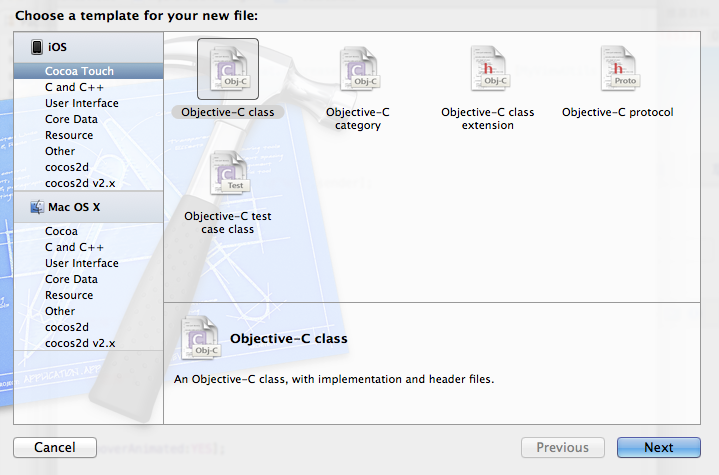
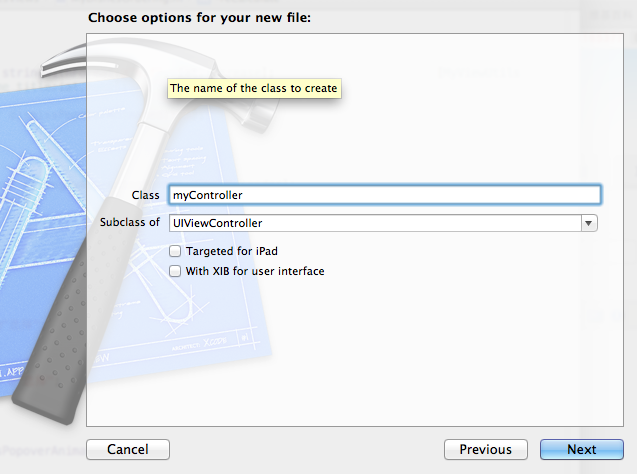
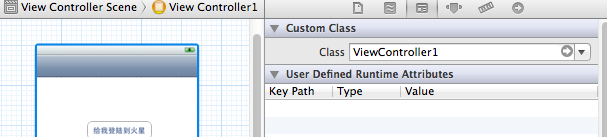
在 Subclass of 可以填写要继承的对象
with xib for user interface 是否建立绑定的xib 文件 一般绑定 storyboard 里的view 是不用打勾的 绑定Storyboard 上 ViewController 上章有说
自定义控件 一般可以选上 方便布局
下面是ios 里面最常用的 Navigation Controller 的使用哦!
继续截图
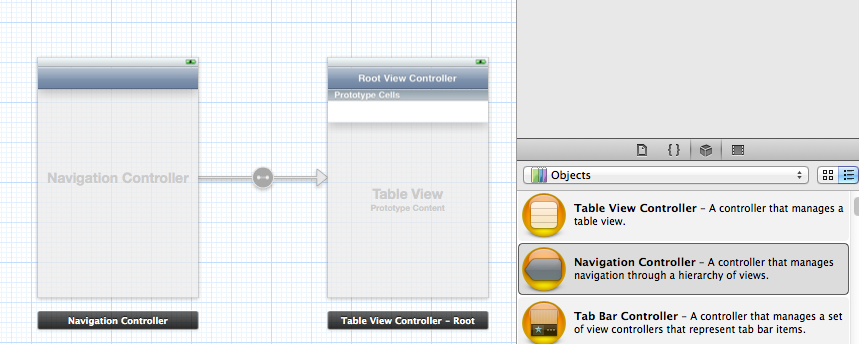
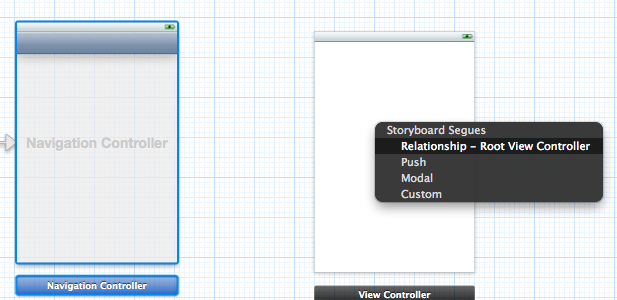
直接拖个Navigation Controller 进来 选中 navigation controller 把 is initial view controller 打勾 这样这个view controller 成为我们的第一个界面

接着 可以删掉 root view controller 换成我们自己的view controller 从 navigation controller 拉线到我们的view controller 上 选relationship -xxxxxx 这样这个view controller
就成功navigation controller 的根界面了
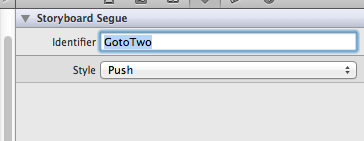
再拉两个页面出来演示 上章有说 可以从 button 直接拉线 也可 从 view controller 拉线 从view controller 拉线的 记得把 identifier 写上
style 选 push
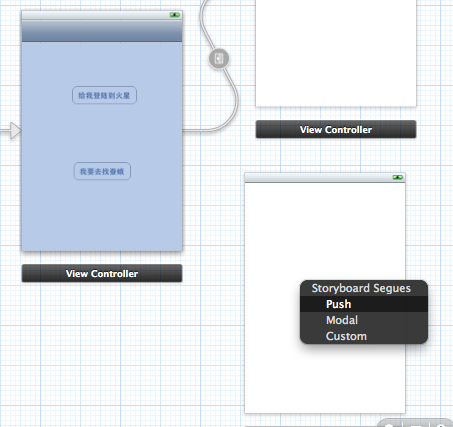
建3个 viewcontrooler 并绑定
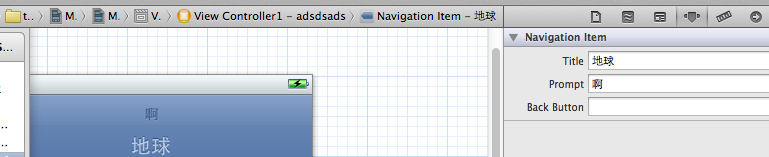
标题可以点击 Navigation item 设置 title 等一些属性 也可以在代码中设置
- (void)viewDidLoad
{
[superviewDidLoad];
self.title = @"地球";
self.navigationItem.prompt =@"我是谁!";
}
其他两个viewController 标题
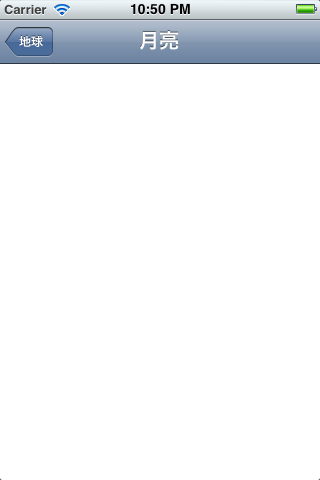
- (void)viewDidLoad
{
[superviewDidLoad];
// Do any additional setup after loading the view.
self.title = @"月亮";
}
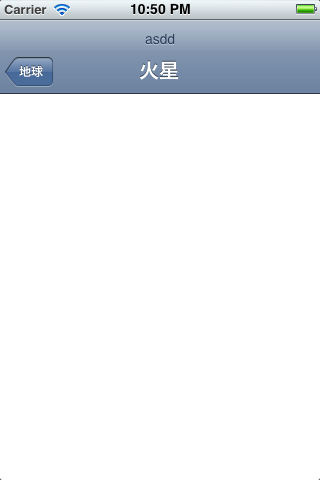
- (void)viewDidLoad
{
[superviewDidLoad];
// Do any additional setup after loading the view.
self.title = @"火星";
}
在 再 button 事件里面写
- (IBAction)bt_pressed:(UIButton *)sender {
[selfperformSegueWithIdentifier:@"GotoTwo"sender:self];
}
运行下看看效果咯!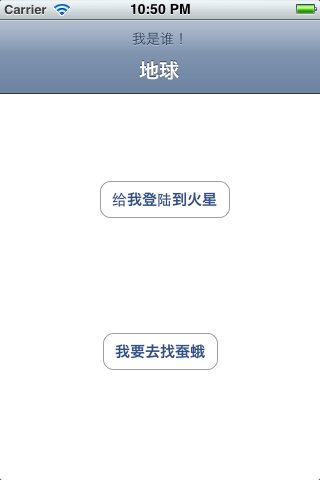
最后是一些跳转和返回的方法
//根据 segue Identifier 跳转界面
[self performSegueWithIdentifier:@"GotoTwo" sender:self];
//以modal 方式跳转
[self presentModalViewController:nil animated:YES];
//压进一个viewcontroller
[self.navigationController pushViewController:nil animated:YES];
//弹出一个viewcontroller 相当与返回上一个界面
[self.navigationController popViewControllerAnimated:YES];
// 以 modal跳转 的返回方法
[self dismissModalViewControllerAnimated:YES];
http://blog.csdn.net/li6185377/article/details/7487603
- xcode 4.3 怎么新建class 和一些uiviewcontroller 的使用
- xcode 4.3 怎么新建class 和一些uiviewcontroller 的使用
- UIViewController的一些使用总结
- UIViewController 中的 willMoveToParentViewController和didMoveToParentViewController的使用
- UIViewController 中的 willMoveToParentViewController和didMoveToParentViewController的使用
- UIViewController 中的 willMoveToParentViewController和didMoveToParentViewController的使用
- UIViewController 中的 willMoveToParentViewController和didMoveToParentViewController的使用
- 一些Xcode 5的使用提示和技巧
- 一些Xcode 5的使用提示和技巧
- 一些Xcode 5的使用提示和技巧
- Xcode的一些使用技巧
- [XCode] ViewController和class关联时找不到class的问题
- Xcode 5:一些使用提示和技巧
- UIViewController和UIViewController之间的交互
- UIViewController和UIViewController之间的交互
- 读 UIViewController Class Reference 的笔记
- Idea maven项目不能新建package和class的解决
- IDEA maven项目不能新建package和class的解决
- 23种设计模式(5):原型模式
- Minimum Inversion Number
- 【phpcms-v9】model.class.php文件分析-数据模型的基类
- 第一次项目发布的心得体会
- 揭开外边距折叠Collapsing margins的面纱
- xcode 4.3 怎么新建class 和一些uiviewcontroller 的使用
- 实用设计色谱:中国传统色彩样本与描述!
- Microsoft Robotics Studio入门系列
- 创建类模式总结篇
- 编写可移植C/C++程序的要点
- 23种设计模式(6):模版方法模式
- SQL SERVER:把表里的数据导出成为INSERT INTO脚本的存储过程
- 变量的6种作用:全局作用域,文件作用域,命名空间作用域,类作用域,局部作用域,语句作用域
- 23种设计模式(7):中介者模式