自定义TabHost
来源:互联网 发布:js验证手机号码位数 编辑:程序博客网 时间:2024/05/18 07:33
大家好,今天我为大家分享TabHost中怎样修改TabWidget样式。在很多界面美观的应用中很多都用到了TabHost,但他们要比系统默认的要漂亮得多。先看几张图:
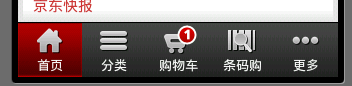
京东商城底部菜单栏
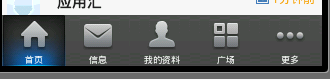
新浪微博底部菜单栏
好了,看到这些漂亮的菜单栏是不是很惊讶,你可能会说用Button就可以实现啊 ,可是用Button的话控制显示的内容很麻烦,不如用TabHost控制效率更高。很想知道用TabHost是怎么实现的吧,下面就来研究如何实现这种漂亮的TabHost。先看一下效果图:
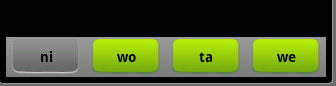
界面比较简单,要想做得漂亮换几张图片就可以了。
第一步:先在布局(这里用了main.xml创建时自动生成的)里面放上TabHost ,只要将TabHost控件托至屏幕中就可:
- <?xml version="1.0" encoding="utf-8"?>
- <TabHost android:id="@+id/tabhost"
- android:layout_width="fill_parent"
- android:layout_height="fill_parent"
- xmlns:android="http://schemas.android.com/apk/res/android">
- <LinearLayout android:layout_width="fill_parent"
- android:id="@+id/linearLayout1"
- android:layout_height="fill_parent"
- android:orientation="vertical">
- <TabWidget android:layout_width="fill_parent"
- android:layout_height="wrap_content"
- android:id="@android:id/tabs"></TabWidget>
- <FrameLayout android:layout_width="fill_parent" android:layout_height="fill_parent" android:id="@android:id/tabcontent">
- <LinearLayout android:layout_width="fill_parent" android:layout_height="fill_parent" android:id="@+id/tab1"></LinearLayout>
- <LinearLayout android:layout_width="fill_parent" android:layout_height="fill_parent" android:id="@+id/tab2"></LinearLayout>
- <LinearLayout android:layout_width="fill_parent" android:layout_height="fill_parent" android:id="@+id/tab3"></LinearLayout>
- </FrameLayout>
- </LinearLayout>
- </TabHost>
这里我们已经把LinearLayout和TextView去掉了,并将“xmlns:android="……" ”添加大TabHost里了,这里要注意我们将TabHost的id定义为自己定义的id比不用android规定的id="@android:id/tabhost"。
第二步:创建显示此TabWidget的布局tabmini.xml:
- <?xml version="1.0" encoding="utf-8"?>
- <RelativeLayout xmlns:android="http://schemas.android.com/apk/res/android"
- android:layout_width="fill_parent"
- android:layout_height="40dp"
- android:paddingLeft="5dip"
- android:paddingRight="5dip"
- android:background="@drawable/head_bg">
- <TextView android:id="@+id/tab_label"
- android:layout_width="fill_parent"
- android:layout_height="wrap_content"
- android:layout_centerInParent="true"
- android:gravity="center"
- android:textColor="#000000"
- android:textStyle="bold"
- android:background="@drawable/tabmini"/>
- </RelativeLayout>
第三步:创建一个selector在drawable里面 命名tabmini.xml,用来点击TabHost的一个tab时TextView的变化:
- <?xml version="1.0" encoding="utf-8"?>
- <selector
- xmlns:android="http://schemas.android.com/apk/res/android">
- <item android:state_selected="true"
- android:drawable="@drawable/add_managebg_down"/>
- <item android:state_selected="false"
- android:drawable="@drawable/add_managebg"/>
- </selector>
第四步:在Activity里实现TabHost:
- package cn.li.tabstyle;
- import android.app.Activity;
- import android.os.Bundle;
- import android.view.LayoutInflater;
- import android.view.View;
- import android.widget.TabHost;
- import android.widget.TextView;
- public class TabHostStyleActivity extends Activity {
- /** Called when the activity is first created. */
- @Override
- public void onCreate(Bundle savedInstanceState) {
- super.onCreate(savedInstanceState);
- setContentView(R.layout.main);
- View niTab = (View) LayoutInflater.from(this).inflate(R.layout.tabmini, null);
- TextView text0 = (TextView) niTab.findViewById(R.id.tab_label);
- text0.setText("ni");
- View woTab = (View) LayoutInflater.from(this).inflate(R.layout.tabmini, null);
- TextView text1 = (TextView) woTab.findViewById(R.id.tab_label);
- text1.setText("wo");
- View taTab = (View) LayoutInflater.from(this).inflate(R.layout.tabmini, null);
- TextView text2 = (TextView) taTab.findViewById(R.id.tab_label);
- text2.setText("ta");
- View weTab = (View) LayoutInflater.from(this).inflate(R.layout.tabmini, null);
- TextView text3 = (TextView) weTab.findViewById(R.id.tab_label);
- text3.setText("we");
- TabHost tabHost = (TabHost)findViewById(R.id.tabhost);
- tabHost.setup(); //Call setup() before adding tabs if loading TabHost using findViewById().
- tabHost.addTab(tabHost.newTabSpec("nitab").setIndicator(niTab).setContent(R.id.tab1));
- tabHost.addTab(tabHost.newTabSpec("wotab").setIndicator(woTab).setContent(R.id.tab2));
- tabHost.addTab(tabHost.newTabSpec("tatab").setIndicator(taTab).setContent(R.id.tab3));
- tabHost.addTab(tabHost.newTabSpec("wetab").setIndicator(weTab).setContent(R.id.tab4));
- }
- }
这里我们用findViewById创建了TabHost,这样的话我们就需要在添加tab时调用TabHost的setup()方法;这里我们添加内容时添加的是布局,我们完全可以换成自己创建的Activity。
好了,让我们来看看运行效果吧:
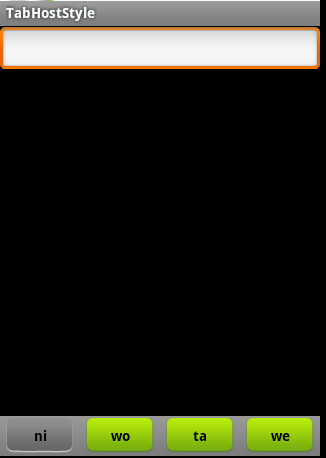
好了,我们自定义的TabHost算是结束了。不过看到Activity里的代码很多都是重复的我们可以这样把他们简化:
- package cn.li.tabstyle;
- import android.app.Activity;
- import android.os.Bundle;
- import android.view.LayoutInflater;
- import android.view.View;
- import android.widget.TabHost;
- import android.widget.TextView;
- public class TabHostStyleActivity extends Activity {
- /** Called when the activity is first created. */
- String[] title = new String[]{"ni","wo","ta","we"};
- View userTab,articeTab,feedTab,weTab;
- View[] tabs = new View[]{userTab,articeTab,feedTab,weTab};
- int[] tabIds = new int[]{R.id.tab1,R.id.tab2,R.id.tab3,R.id.tab4};
- @Override
- public void onCreate(Bundle savedInstanceState) {
- super.onCreate(savedInstanceState);
- setContentView(R.layout.main);
- TabHost tabHost = (TabHost)findViewById(R.id.tabhost);
- tabHost.setup(); //Call setup() before adding tabs if loading TabHost using findViewById().
- for(int i=0;i<tabs.length;i++){
- tabs[i] = (View) LayoutInflater.from(this).inflate(R.layout.tabmini, null);
- TextView text = (TextView) tabs[i].findViewById(R.id.tab_label);
- text.setText(title[i]);
- tabHost.addTab(tabHost.newTabSpec(title[i]).setIndicator(tabs[i]).setContent(tabIds[i]));
- }
- }
- }
- 自定义TabHost
- 自定义TabHost
- 自定义TabHost
- 自定义TabHost
- 自定义TabHost
- android 自定义tabhost
- Android 自定义tabhost
- 自定义TabHost,TabWidget样式
- 自定义 Tabhost 样式
- 【Android】自定义 Tabhost
- 自定义TabHost,TabWidget样式 .
- 自定义TabHost,TabWidget样式 .
- 自定义TabHost,TabWidget样式 .
- 【android开发】自定义TabHost
- 自定义TabHost,TabWidget样式 .
- tabhost(tabweight自定义)
- RelativeLayout 自定义TabHost效果
- 自定义TabHost,TabWidget样式
- 关于AS3的垃圾回收
- Cross Platform Shaders in 2012
- 11.8今日小总结(在T-SQl中使用变量,事务,系统存储,自定义存储)
- url 提交缓存
- 【原】大容量加载: 在数据文件中遇到意外的文件结尾。
- 自定义TabHost
- 虚拟主机 虚拟路径 ip 域名 认识
- setTextViewText
- Android的联通性---Bluetooth(六)
- 捣蛋猪(Bad Piggies) 1.3.0 PC 版免注册补丁
- 警告 1 warning C4819: 该文件包含不能在当前代码页(936)中表示的字符
- Linux驱动开发学习的一些必要步骤
- NSLog输出格式详解
- vs2010中加入多个目录的源码