在Ubuntu上为Android系统内置Java应用程序测试Application Frameworks层的硬件服务
来源:互联网 发布:唯一网络王宇杰老婆图 编辑:程序博客网 时间:2024/05/21 01:32
我们在Android系统增加硬件服务的目的是为了让应用层的APP能够通过Java接口来访问硬件服务。那么, APP如何通过Java接口来访问Application Frameworks层提供的硬件服务呢?在这一篇文章中,我们将在Android系统的应用层增加一个内置的应用程序,这个内置的应用程序通过ServiceManager接口获取指定的服务,然后通过这个服务来获得硬件服务。
一. 参照在Ubuntu上为Android系统的Application Frameworks层增加硬件访问服务一文,在Application Frameworks层定义好自己的硬件服务HelloService,并提供IHelloService接口提供访问服务。
二. 为了方便开发,我们可以在IDE环境下使用Android SDK来开发Android应用程序。开发完成后,再把程序源代码移植到Android源代码工程目录中。使用Eclipse的Android插件ADT创建Android工程很方便,这里不述,可以参考网上其它资料。工程名称为Hello,下面主例出主要文件:
主程序是src/shy/luo/hello/Hello.java:
01.package shy.luo.hello; 02. 03.import shy.luo.hello.R; 04.import android.app.Activity; 05.import android.os.ServiceManager; 06.import android.os.Bundle; 07.import android.os.IHelloService; 08.import android.os.RemoteException; 09.import android.util.Log; 10.import android.view.View; 11.import android.view.View.OnClickListener; 12.import android.widget.Button; 13.import android.widget.EditText; 14. 15.public class Hello extends Activity implements OnClickListener { 16. private final static String LOG_TAG = "shy.luo.renju.Hello"; 17. 18. private IHelloService helloService = null; 19. 20. private EditText valueText = null; 21. private Button readButton = null; 22. private Button writeButton = null; 23. private Button clearButton = null; 24. 25. /** Called when the activity is first created. */ 26. @Override 27. public void onCreate(Bundle savedInstanceState) { 28. super.onCreate(savedInstanceState); 29. setContentView(R.layout.main); 30. 31. helloService = IHelloService.Stub.asInterface( 32. ServiceManager.getService("hello")); 33. 34. valueText = (EditText)findViewById(R.id.edit_value); 35. readButton = (Button)findViewById(R.id.button_read); 36. writeButton = (Button)findViewById(R.id.button_write); 37. clearButton = (Button)findViewById(R.id.button_clear); 38. 39. readButton.setOnClickListener(this); 40. writeButton.setOnClickListener(this); 41. clearButton.setOnClickListener(this); 42. 43. Log.i(LOG_TAG, "Hello Activity Created"); 44. } 45. 46. @Override 47. public void onClick(View v) { 48. if(v.equals(readButton)) { 49. try { 50. int val = helloService.getVal(); 51. String text = String.valueOf(val); 52. valueText.setText(text); 53. } catch (RemoteException e) { 54. Log.e(LOG_TAG, "Remote Exception while reading value from device."); 55. } 56. } 57. else if(v.equals(writeButton)) { 58. try { 59. String text = valueText.getText().toString(); 60. int val = Integer.parseInt(text); 61. helloService.setVal(val); 62. } catch (RemoteException e) { 63. Log.e(LOG_TAG, "Remote Exception while writing value to device."); 64. } 65. } 66. else if(v.equals(clearButton)) { 67. String text = ""; 68. valueText.setText(text); 69. } 70. } 71.}
界面布局文件res/layout/main.xml:
01.<?xml version="1.0" encoding="utf-8"?> 02. <LinearLayout xmlns:android="http://schemas.android.com/apk/res/android" 03. android:orientation="vertical" 04. android:layout_width="fill_parent" 05. android:layout_height="fill_parent"> 06. <LinearLayout 07. android:layout_width="fill_parent" 08. android:layout_height="wrap_content" 09. android:orientation="vertical" 10. android:gravity="center"> 11. <TextView 12. android:layout_width="wrap_content" 13. android:layout_height="wrap_content" 14. android:text="@string/value"> 15. </TextView> 16. <EditText 17. android:layout_width="fill_parent" 18. android:layout_height="wrap_content" 19. android:id="@+id/edit_value" 20. android:hint="@string/hint"> 21. </EditText> 22. </LinearLayout> 23. <LinearLayout 24. android:layout_width="fill_parent" 25. android:layout_height="wrap_content" 26. android:orientation="horizontal" 27. android:gravity="center"> 28. <Button 29. android:id="@+id/button_read" 30. android:layout_width="wrap_content" 31. android:layout_height="wrap_content" 32. android:text="@string/read"> 33. </Button> 34. <Button 35. android:id="@+id/button_write" 36. android:layout_width="wrap_content" 37. android:layout_height="wrap_content" 38. android:text="@string/write"> 39. </Button> 40. <Button 41. android:id="@+id/button_clear" 42. android:layout_width="wrap_content" 43. android:layout_height="wrap_content" 44. android:text="@string/clear"> 45. </Button> 46. </LinearLayout> 47. </LinearLayout>
Android.mk的文件内容如下:
LOCAL_PATH:= $(call my-dir)
include $(CLEAR_VARS)
LOCAL_MODULE_TAGS := optional
LOCAL_SRC_FILES := $(call all-subdir-java-files)
LOCAL_PACKAGE_NAME := Hello
include $(BUILD_PACKAGE)
四. 编译:USER-NAME@MACHINE-NAME:~/Android$ mmmpackages/experimental/Hello
编译成功后,便可以在out/target/product/generic/system/app目录下看到Hello.apk文件了。
五. 重新打包系统镜像文件system.img:
五. 重新打包系统镜像文件system.img:
USER-NAME@MACHINE-NAME:~/Android$ make snod
重新打包后的system.img文件就内置了Hello.apk文件了。
重新打包后的system.img文件就内置了Hello.apk文件了。
六. 运行Android模拟器:
USER-NAME@MACHINE-NAME:~/Android$ emulator -kernel kernel/common/arch/arm/boot/zImage &
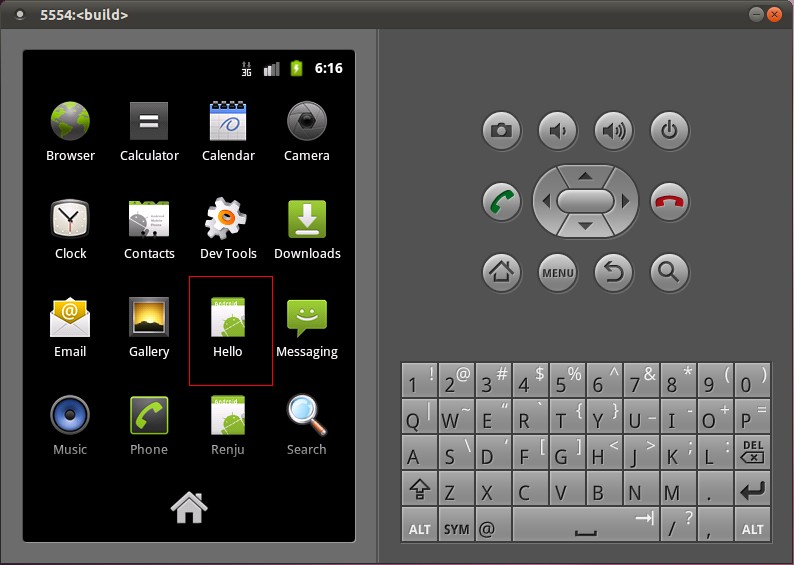
在Home Screen中可以看到Hello应用程序:
打开Hello应用程序:

点击Read按钮,可以从HelloService中读取硬件寄存器val的值;点击Clear按钮,可以清空文本框的值;在文本框中输入一个数值,再点击Write按钮,便可以将这个值写入到硬件寄存器val中去,可以再次点击Read按钮来验证是否正确写入了值。
至此,我们就完整地学习了在Android的Linux内核空间添加硬件驱动程序、在Android的硬件抽象层添加硬件接口、在Android的Application Frameworks层提供硬件服务以及在Android的应用层调用硬件服务的整个过程了,希望能为读者进入Android系统提供入门帮助。重新学习整个过程,请参考Android硬件抽象层(HAL)概要介绍和学习计划。
所有关于HAL的学习结束,这是我见到的讲解HAL最好的资料了,所以一口气全部转载,和大家一起学习,不管上层的还是底层的,都会更加理解Android系统!加油....
- 在Ubuntu上为Android系统内置Java应用程序测试Application Frameworks层的硬件服务
- 在Ubuntu上为Android系统内置Java应用程序测试Application Frameworks层的硬件服务
- 在Ubuntu上为Android系统内置Java应用程序测试Application Frameworks层的硬件服务
- 在Ubuntu上为Android系统内置Java应用程序测试Application Frameworks层的硬件服务
- 在Ubuntu上为Android系统内置Java应用程序测试Application Frameworks层的硬件服务
- 在Ubuntu上为Android系统内置Java应用程序测试Application Frameworks层的硬件服务
- 在Ubuntu上为Android系统内置Java应用程序测试Application Frameworks层的硬件服务
- 在Ubuntu上为Android系统内置Java应用程序测试Application Frameworks层的硬件服务
- 在Ubuntu上为Android系统内置Java应用程序测试Application Frameworks层的硬件服务
- 在Ubuntu上为Android系统内置Java应用程序测试Application Frameworks层的硬件服务
- 在Ubuntu上为Android系统内置Java应用程序测试Application Frameworks层的硬件服务
- 在Ubuntu上为Android系统内置Java应用程序测试Application Frameworks层的硬件服务
- 在Ubuntu上为Android系统内置Java应用程序测试Application Frameworks层的硬件服务
- 在Ubuntu上为Android系统内置Java应用程序测试Application Frameworks层的硬件服务
- 在Ubuntu上为Android系统内置Java应用程序测试Application Frameworks层的硬件服务
- 在Ubuntu上为Android系统内置Java应用程序测试Application Frameworks层的硬件服务
- 在Ubuntu上为Android系统内置Java应用程序测试Application Frameworks层的硬件服务
- 在Ubuntu上为Android系统内置Java应用程序测试Application Frameworks层的硬件服务 .
- 怒了,调了半个月调不好CS8900的驱动
- libvlc+mfc 应用
- ubuntu 防火牆基本設定
- C# 文件操作详解(一)---------File类
- 双机热备+负载均衡(Heartbeat+DRBD+NFS+Keepalived+Lnmp)线上方案
- 在Ubuntu上为Android系统内置Java应用程序测试Application Frameworks层的硬件服务
- 设计模式 - 命令模式
- 谁动了我的琴弦——会话劫持
- eclipse常用快捷键和用法
- error LNK2005: _DllMain@12 已经在 MSVCRTD.lib(dllmain.obj) 中定义 找到一个或多个多重定义的符号
- 总结
- C# 文件操作详解(二)---------FileInfo类
- HTTP的请求和响应
- mapreduce二次排序