PreferenceActivity中使用layout 布局文件
来源:互联网 发布:哪个虚拟机装mac好 编辑:程序博客网 时间:2024/06/05 09:06
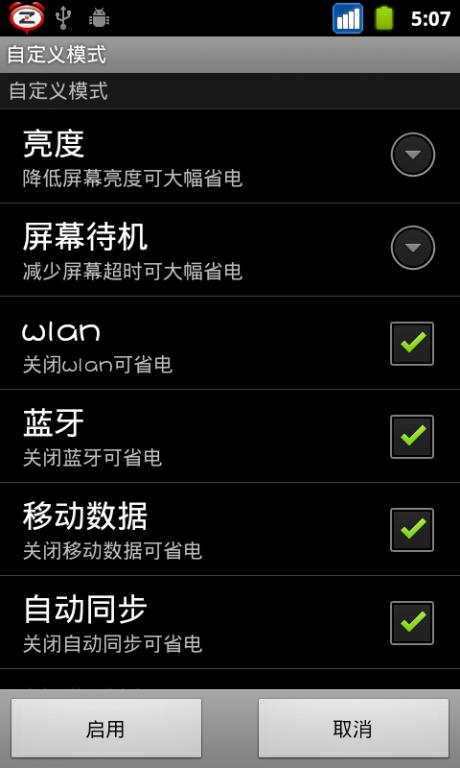
1.配置Preference.xml文件
<?xml version="1.0" encoding="utf-8"?>
<PreferenceScreen
xmlns:android="http://schemas.android.com/apk/res/android">
<CheckBoxPreference android:summaryOn="kaiqi" android:key="test"></CheckBoxPreference>
<CheckBoxPreference android:summaryOn="kaiqi" android:key="test"></CheckBoxPreference>
<CheckBoxPreference android:summaryOn="kaiqi" android:key="test"></CheckBoxPreference>
<CheckBoxPreference android:summaryOn="kaiqi" android:key="test"></CheckBoxPreference>
<CheckBoxPreference android:summaryOn="kaiqi" android:key="test"></CheckBoxPreference>
<CheckBoxPreference android:summaryOn="kaiqi" android:key="test"></CheckBoxPreference>
<CheckBoxPreference android:summaryOn="kaiqi" android:key="test"></CheckBoxPreference>
<CheckBoxPreference android:summaryOn="kaiqi" android:key="test"></CheckBoxPreference>
<CheckBoxPreference android:summaryOn="kaiqi" android:key="test"></CheckBoxPreference>
<CheckBoxPreference android:summaryOn="kaiqi" android:key="test"></CheckBoxPreference>
</PreferenceScreen>
2.底部button按钮的layout文件 ,其中layout文件必须包含listview控件,且ID为list。
<ListView android:id="@android:id/list" android:layout_width="match_parent" android:layout_height="wrap_content" android:layout_weight="1" android:drawSelectorOnTop="false" />
Placeholder to get blank space between the two buttons-->
public class CustomProfile extends PreferenceActivity{
private BatteryProfileUtils mBatteryProfileUtils;
@Override
protected void onCreate(Bundle savedInstanceState) {
// TODO Auto-generated method stub
super.onCreate(savedInstanceState);
setContentView(R.layout.buttonbar);//使用布局文件
addPreferencesFromResource(R.xml.configuration);加载配置文件
getListView().setItemsCanFocus(true);
Button enable=(Button)findViewById(R.id.button1);
enable.setOnClickListener(new OnClickListener() {
@Override
public void onClick(View arg0) {
// TODO Auto-generated method stu
}
});
Button disable=(Button)findViewById(R.id.button2);
disable.setOnClickListener(new OnClickListener() {
@Override
public void onClick(View arg0) {
// TODO Auto-generated method stub
finish();
}
});
}
}
参考Android闹钟源码
- PreferenceActivity中使用layout 布局文件
- PreferenceActivity中使用layout 布局文件
- yii2中使用$layout控制布局文件
- PreferenceActivity中添加自定义布局文件需要注意的地方
- 自定义layout中布局文件的属性
- Android res/layout中布局文件管理
- 在其他activity中使用layout下的布局文件及控件方法
- Layout 布局文件
- 自定义adapter 无法加载layout中布局文件的原因
- R.layout 中找不到已存在布局文件
- 修改Android中Layout布局文件字体的大小
- android R.layout 中找不到已存在的布局文件
- 【layout】android布局文件 merge 标签的使用
- wxFormbuileder中wxwidgets的布局控件(layout)的使用
- Android Layout中使用include标签实现UI布局重用
- android中layout布局使用与多种分辨率问题
- Android Adapter中使用的默认android.R.layout布局
- Android Layout中使用include标签实现UI布局重用
- 树节点的遍历
- poj 1947
- posix多线程有感--线程高级编程(条件变量)
- Asp.Net中利用数据库保存图片的应用!
- sql server语句编写中的总结
- PreferenceActivity中使用layout 布局文件
- MIME类型对照表
- Eclipse 安装常用插件
- Python创建目录
- a
- android 系统图标的使用
- ubuntu中LAMP环境配置
- Python标准库04 文件管理 (部分os包,shutil包)
- 什么样的测试人员是好的测试人员