OSM 软件分析
来源:互联网 发布:安装阿里旺旺mac版 编辑:程序博客网 时间:2024/05/17 20:02
友情链接:http://lovespss.blog.51cto.com/1907593/515192
http://josm.openstreetmap.de/wiki/Download#Ubuntu
http://sourceforge.net/projects/viking/
论坛:http://forum.openstreetmap.org/
OpenStreetMap's Editing Applications
终于进入我最喜欢的环节,实际操作。这章开始讲如何把收集到信息转化成数据存储到OpenStreetMap的Database里。介绍了三个工具:
Potlatch—基于WEB的编辑器
JOSM—基于Java的编辑器
Merkaartor—桌面应用
三个工具的比较图:

Potlatch取义冬季赠礼节,但对这个礼物不感冒,直接跳过了这段。Merkaartor 是用C++写的,也没有多大兴趣,重点看了下JSOM。官方网站:http://josm.openstreetmap.de/。
现在觉悟高了点,先Down人家的源代码 http://josm.openstreetmap.de/svn/trunk。找到Build文件,先打个包再说。打包过程中报了个错,提示找不到 svn。
[exec] Execute failed: java.io.IOException: Cannot run program "svn": CreateProcess error=2, The system cannot find the file specified
官网上也有这个Bug,指出需要配置SVNAnt。但经过试验,发现跟 SVNAnt 还没有多大关系。好在我前几天装上了VisualSVN Server,它下面有svn.exe,加到path 环境变量,重启Eclipse后,OK了。
打完Jar包才发觉自己干嘛打Jar包(⊙o⊙)?下载代码就是要研究学习的嘛,赶紧找到入口类MainApplication,Debug起来。

速度比较慢,等了好几分钟才出来界面。先把这个示例轨迹下下来:
http://www.openstreetmap.org/user/Jonathan%20Bennett/traces/564418
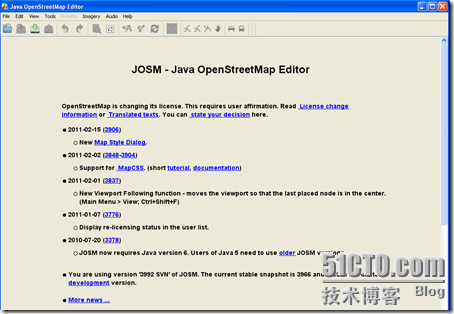
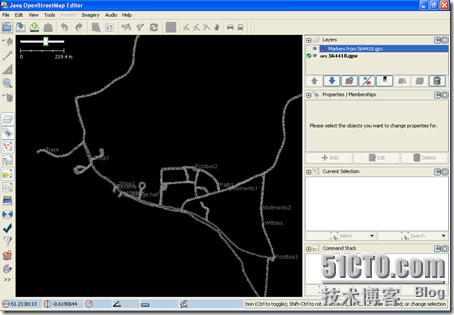
终于出来了,现在加载刚刚下载的轨迹文件。
按照书上提示,点击Download。又等待了大约一分钟,正准备骂它,窗口蹦了出来,原来他已经加载了这个轨迹相应地区的图像数据。对不起,我错了。
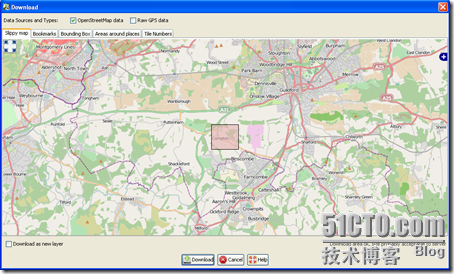
当然下载还有有限制的,大概就是50KM*50KM的区域。人家也不容易,免费的地图服务,服务器资源有限,要是同时遇到大量下载,还不挂了。而且下载数据还不需要用户名密码的。闲话少说啦,勾上Raw GPS Data,开始下载。看看下载完成后的地图情况。
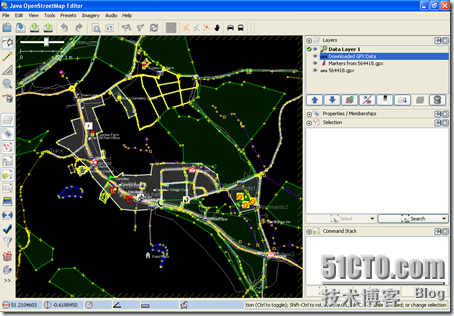
JOSM支持两种视图,standard和wireframe,意即标准和框架,可用Ctrl+w进行切换。如下是wireframe视图,没有太多装饰,简洁不少。
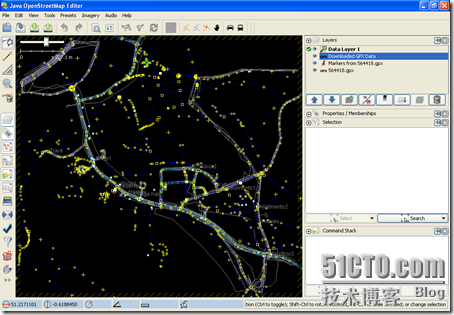
作者想要来个案件重演,重画地图,来就来呗,谁怕谁啊。先把下下来的Downloaded GPX data和Data Layer 1层都给它干掉,打回原形。
加载图片

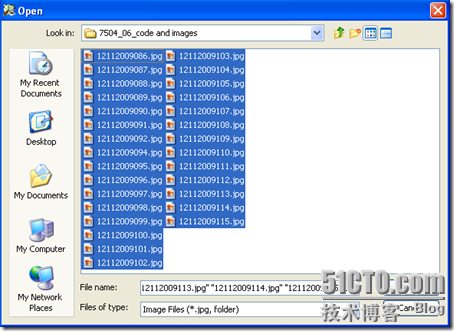
导入后,将会看到新建的Geotagged Images层。
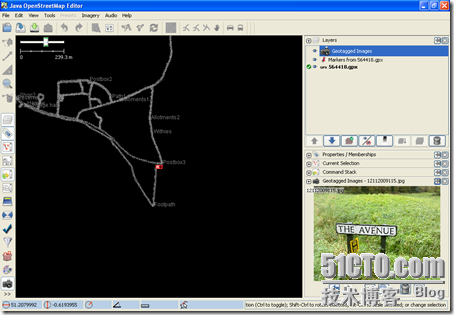
接下来的编辑操作整了半天也没弄出来,PASS了,真没绘画的天分。来看最后一个环节,编辑好了准备上传数据。这就需要用户名密码了。JOSM支持两种认证方式,一是简单的用户名/密码,另外一个是OAuth。来看看OAuth是怎么回事吧。
1.单击Edit--》Preference,定位到Connection选项,Server URL里输入http://www.openstreetmap.org/api 并进行验证,下面的认证方式选择Use OAuth。
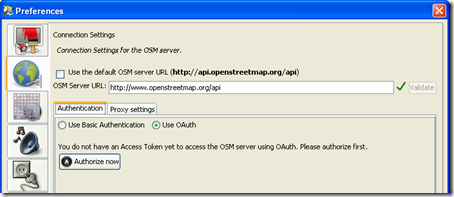
2.通过浏览器登陆到openstreetma。

3. 点击Authorise now。
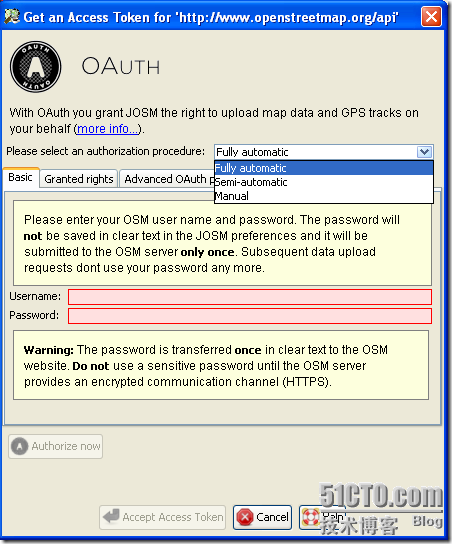
4. 认证流程选择Semi-automatic。
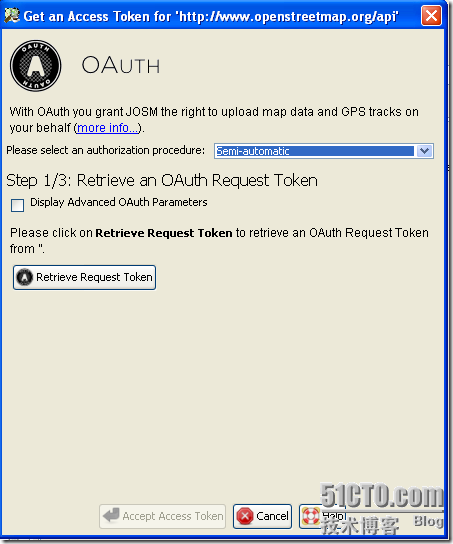
5.点击Retrieve Request Token,将会切换到浏览器窗口。确保勾选上所有选项,然后Save changes。

6. 切回JOSM,单击Retrieve Access Token。
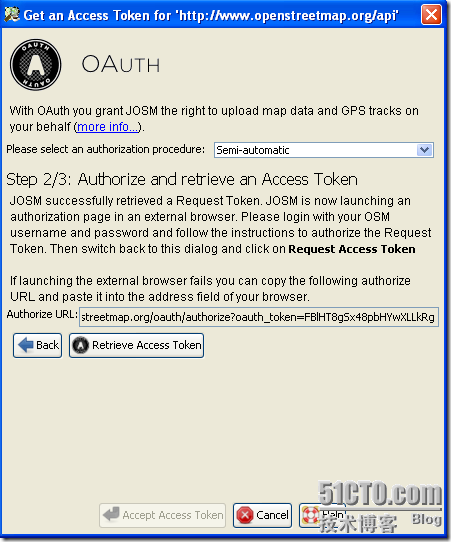
7. 单击 Test Access Token 进行测试.
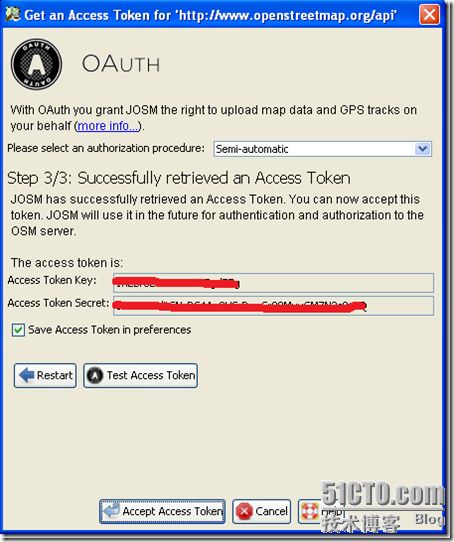
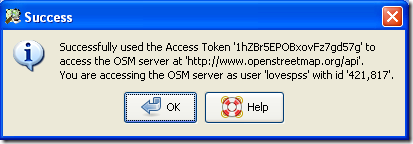
8. 最后点击Accept Access Token,完事。
Linux / *BSD
- packages
- In some Distributions prepacked packages exist to install JOSM with your favourite package manager from the repositories.Although these packages might be a bit older than the .jar files on the main page, they usually fit better into the environment and install dependencies and a starter in the menu automatically.
Note: There is no problem with installing the prepacked package and still using the .jar files listed above.
If there exists no package or you do not want to use it you can download the JOSM .jar file from themain page (tested or latest version) or build it from source.
- using the shell
- Go to the directory where the josm-latest.jar is and typeto launch. Replace josm-latest.jar with the name of the jar file you loaded, e.G.josm.jar for releases.
java -jar josm-latest.jar
If this doesn't help, try to set your JAVA_HOME variable to the java location (the root location, not the bin. As example:
export JAVA_HOME=/usr/lib/sun-j2se6.0-jdk java -jar ''josm.jar''
- KDE
- There is a tutorial on how to setup your environment to start jar-files by clicking on them.
- GNOME
- Right click on the JAR file, and select Open with "Sun Java 6.0 Runtime", or whatever java version you have.
- XGL/Compiz
- Type this into a shell:as described here: http://kubasik.net/blog/index.php/2006/06/19/java-sun-150-and-xglcompiz-on-ubuntu/
export AWT_TOOLKIT=MToolkit && java -jar josm-test.jar
- Blank window on startup
- AWT before JDK7 doesn't play well with non-reparenting window managers (i.e. xmonad, awesome, dwm, ratpoison, Ion3, ...), resulting in the main window not being displayed properly on startup. The Awesome Wiki hasworkarounds for this problem. There is also anxmonad specific way of doing the wmname thing.
- OSM 软件分析
- OSM
- 二、OSM相关软件及其相互关系总结
- OpenLayer(OSM)
- OSM初识(三)OSM Data
- 软件分析
- ArcGIS Editor for OSM
- OSM数据下载地址
- 开源地图OSM
- OSM导入PostGreSQL数据库
- 开源地图OSM
- osm文件导入PostGIS
- 开源地图OSM
- 一、OSM简介
- OSM编辑器ID安装
- OSM 初识(一)OSM数据集的组成
- OpenStreetMap开放街道图(OSM)
- 20120907---osm清共享内存
- [INS-08106] Unexpected error occurred while loading the view 'GridPlugPlayInfoUI'
- libgdx 的 FreeTypeFontGenerator在android项目下的使用
- arcgis ios 10.0.1 sdk 中比例尺 scale 和服务器不一致的问题。
- openfiler+oracle linux enterprise 6.2+oracle11gR2安装手册
- 大一总结
- OSM 软件分析
- windows solaris 修改 路由 命令
- 迟来的博客
- 2013 蓝桥杯初赛 振兴中华
- PADS2007下怎么增加一个PCB DECAL封装----本人总结
- n!末尾含0的个数
- ZOJ Problem Set - 1016 parencodings
- ZTe v889d 双卡双待手机,不需要ROOT就使用卡2实现上网。(仅测试了安卓4.0版本)
- C#数据类型转换的几种形式


