仿新浪微博布局学习——妙用TabHost
来源:互联网 发布:剑灵奇葩捏脸数据 编辑:程序博客网 时间:2024/05/15 23:48
前言
为了更好的开发Android应用程序,除了熟练掌握基本的UI组件和API外,还需要掌握一些技巧,而这些技巧可以通过阅读一些代码来提高,本系列将与大家分享一些新浪微博布局方面的收获,欢迎交流!
转载,
博客园:http://www.cnblogs.com
农民伯伯: http://www.cnblogs.com/over140
版本
新浪微博 weibo_10235010.apk
正文
一、效果图

红色部分是本文要实现的目标。
二、实现
maintabs.xml
- <?xml version="1.0" encoding="UTF-8"?>
- <TabHost android:id="@android:id/tabhost" android:layout_width="fill_parent" android:layout_height="fill_parent"
- xmlns:android="http://schemas.android.com/apk/res/android">
- <LinearLayout android:orientation="vertical" android:layout_width="fill_parent" android:layout_height="fill_parent">
- <FrameLayout android:id="@android:id/tabcontent" android:layout_width="fill_parent" android:layout_height="0.0dip" android:layout_weight="1.0" />
- <TabWidget android:id="@android:id/tabs" android:visibility="gone" android:layout_width="fill_parent" android:layout_height="wrap_content" android:layout_weight="0.0" />
- <RadioGroup android:gravity="center_vertical" android:layout_gravity="bottom" android:orientation="horizontal" android:id="@id/main_radio" android:background="@drawable/maintab_toolbar_bg" android:layout_width="fill_parent" android:layout_height="wrap_content">
- <RadioButton android:text="@string/main_home" android:checked="true" android:id="@+id/radio_button0" android:layout_marginTop="2.0dip" android:drawableTop="@drawable/icon_1_n" style="@style/main_tab_bottom" />
- <RadioButton android:id="@+id/radio_button1" android:layout_marginTop="2.0dip" android:text="@string/main_news" android:drawableTop="@drawable/icon_2_n" style="@style/main_tab_bottom" />
- <RadioButton android:id="@+id/radio_button2" android:layout_marginTop="2.0dip" android:text="@string/main_my_info" android:drawableTop="@drawable/icon_3_n" style="@style/main_tab_bottom" />
- <RadioButton android:id="@+id/radio_button3" android:layout_marginTop="2.0dip" android:text="@string/menu_search" android:drawableTop="@drawable/icon_4_n" style="@style/main_tab_bottom" />
- <RadioButton android:id="@+id/radio_button4" android:layout_marginTop="2.0dip" android:text="@string/more" android:drawableTop="@drawable/icon_5_n" style="@style/main_tab_bottom" />
- </RadioGroup>
- </LinearLayout>
- </TabHost>
styles.xml
- <style name="main_tab_bottom">
- <item name="android:textSize">@dimen/bottom_tab_font_size</item>
- <item name="android:textColor">#ffffffff</item>
- <item name="android:ellipsize">marquee</item>
- <item name="android:gravity">center_horizontal</item>
- <item name="android:background">@drawable/home_btn_bg</item>
- <item name="android:paddingTop">@dimen/bottom_tab_padding_up</item>
- <item name="android:layout_width">fill_parent</item>
- <item name="android:layout_height">wrap_content</item>
- <item name="android:button">@null</item>
- <item name="android:singleLine">true</item>
- <item name="android:drawablePadding">@dimen/bottom_tab_padding_drawable</item>
- <item name="android:layout_weight">1.0</item>
- </style>
home_btn_bg.xml
- <selector
- xmlns:android="http://schemas.android.com/apk/res/android">
- <item android:state_focused="true" android:state_enabled="true" android:state_pressed="false" android:drawable="@drawable/home_btn_bg_s" />
- <item android:state_enabled="true" android:state_pressed="true" android:drawable="@drawable/home_btn_bg_s" />
- <item android:state_enabled="true" android:state_checked="true" android:drawable="@drawable/home_btn_bg_d" />
- <item android:drawable="@drawable/transparent" />
- </selector>
代码说明:
1. 需要注意的是他这里把TabWidget的Visibility设置成了gone!也就是默认难看的风格不见了:![]() ,取而代之的是5个带风格的单选按钮.
,取而代之的是5个带风格的单选按钮.
2. 注意为单选按钮设置的style,其中最重要的是为其background设置了home_btn_bg.xml,也就是自定义了选中效果。
Java文件
- public class MainTabActivity extends TabActivity implements
- OnCheckedChangeListener {
- private TabHost mHost;
- private Intent mMBlogIntent;
- private Intent mMoreIntent;
- private Intent mInfoIntent;
- private Intent mSearchIntent;
- private Intent mUserInfoIntent;
- @Override
- protected void onCreate(Bundle savedInstanceState) {
- super.onCreate(savedInstanceState);
- requestWindowFeature(Window.FEATURE_NO_TITLE);
- setContentView(R.layout.maintabs);
- // ~~~~~~~~~~~~ 初始化
- this.mMBlogIntent = new Intent(this, HomeListActivity.class);
- this.mSearchIntent = new Intent(this, SearchSquareActivity.class);
- this.mInfoIntent = new Intent(this, MessageGroup.class);
- this.mUserInfoIntent = new Intent(this, MyInfoActivity.class);
- this.mMoreIntent = new Intent(this, MoreItemsActivity.class);
- initRadios();
- setupIntent();
- }
- /**
- * 初始化底部按钮
- */
- private void initRadios() {
- ((RadioButton) findViewById(R.id.radio_button0)).setOnCheckedChangeListener(this);
- ((RadioButton) findViewById(R.id.radio_button1)).setOnCheckedChangeListener(this);
- ((RadioButton) findViewById(R.id.radio_button2)).setOnCheckedChangeListener(this);
- ((RadioButton) findViewById(R.id.radio_button3)).setOnCheckedChangeListener(this);
- ((RadioButton) findViewById(R.id.radio_button4)).setOnCheckedChangeListener(this);
- }
- /**
- * 切换模块
- */
- @Override
- public void onCheckedChanged(CompoundButton buttonView, boolean isChecked) {
- if (isChecked) {
- switch (buttonView.getId()) {
- case R.id.radio_button0:
- this.mHost.setCurrentTabByTag("mblog_tab");
- break;
- case R.id.radio_button1:
- this.mHost.setCurrentTabByTag("message_tab");
- break;
- case R.id.radio_button2:
- this.mHost.setCurrentTabByTag("userinfo_tab");
- break;
- case R.id.radio_button3:
- this.mHost.setCurrentTabByTag("search_tab");
- break;
- case R.id.radio_button4:
- this.mHost.setCurrentTabByTag("more_tab");
- break;
- }
- }
- }
- private void setupIntent() {
- this.mHost = getTabHost();
- TabHost localTabHost = this.mHost;
- localTabHost.addTab(buildTabSpec("mblog_tab", R.string.main_home,
- R.drawable.icon_1_n, this.mMBlogIntent));
- localTabHost.addTab(buildTabSpec("message_tab", R.string.main_news,
- R.drawable.icon_2_n, this.mInfoIntent));
- localTabHost.addTab(buildTabSpec("userinfo_tab", R.string.main_my_info,
- R.drawable.icon_3_n, this.mUserInfoIntent));
- localTabHost.addTab(buildTabSpec("search_tab", R.string.menu_search,
- R.drawable.icon_4_n, this.mSearchIntent));
- localTabHost.addTab(buildTabSpec("more_tab", R.string.more,
- R.drawable.icon_5_n, this.mMoreIntent));
- }
- private TabHost.TabSpec buildTabSpec(String tag, int resLabel, int resIcon,
- final Intent content) {
- return this.mHost
- .newTabSpec(tag)
- .setIndicator(getString(resLabel),
- getResources().getDrawable(resIcon))
- .setContent(content);
- }
代码说明
1. 由于TabWidget被隐藏,所以相关的事件也会无效,这里取巧用RadioGroup与RadioButton的特性来处理切换,然后监听事件调用setCurrentTabByTag来切换Activity。
2. 注意即使TabWidget被隐藏,也要为其设置indicator,否则会保持。
三、总结
在这之前如果要做这种效果我恐怕第一时间就会想到用ActivityGroup来做,主要是因为TabHost的TabWidget非常难看,用起来也不方便。其实从源码可以看出,TabActivity也是继承自ActivityGroup,这里结合了单选按钮和TabHost,各取其长,有时间可以专门写一个这样的自定义控件:)
自定义TabHost,TabWidget样式 .
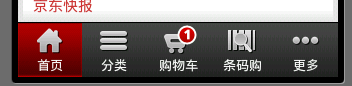
京东商城底部菜单栏
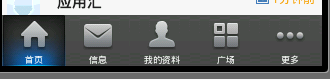
新浪微博底部菜单栏
好了,看到这些漂亮的菜单栏是不是很惊讶,你可能会说用Button就可以实现啊 ,可是用Button的话控制显示的内容很麻烦,不如用TabHost控制效率更高。很想知道用TabHost是怎么实现的吧,下面就来研究如何实现这种漂亮的TabHost。先看一下效果图:
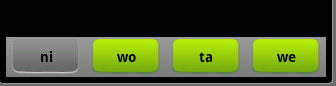
界面比较简单,要想做得漂亮换几张图片就可以了。
第一步:先在布局(这里用了main.xml创建时自动生成的)里面放上TabHost ,只要将TabHost控件托至屏幕中就可:
- <?xml version="1.0" encoding="utf-8"?>
- <TabHost android:id="@+id/tabhost"
- android:layout_width="fill_parent"
- android:layout_height="fill_parent"
- xmlns:android="http://schemas.android.com/apk/res/android">
- <LinearLayout android:layout_width="fill_parent"
- android:id="@+id/linearLayout1"
- android:layout_height="fill_parent"
- android:orientation="vertical">
- <TabWidget android:layout_width="fill_parent"
- android:layout_height="wrap_content"
- android:id="@android:id/tabs"></TabWidget>
- <FrameLayout android:layout_width="fill_parent" android:layout_height="fill_parent" android:id="@android:id/tabcontent">
- <LinearLayout android:layout_width="fill_parent" android:layout_height="fill_parent" android:id="@+id/tab1"></LinearLayout>
- <LinearLayout android:layout_width="fill_parent" android:layout_height="fill_parent" android:id="@+id/tab2"></LinearLayout>
- <LinearLayout android:layout_width="fill_parent" android:layout_height="fill_parent" android:id="@+id/tab3"></LinearLayout>
- </FrameLayout>
- </LinearLayout>
- </TabHost>
这里我们已经把LinearLayout和TextView去掉了,并将“xmlns:android="……" ”添加大TabHost里了,这里要注意我们将TabHost的id定义为自己定义的id比不用android规定的id="@android:id/tabhost"。
第二步:创建显示此TabWidget的布局tabmini.xml:
- <?xml version="1.0" encoding="utf-8"?>
- <RelativeLayout xmlns:android="http://schemas.android.com/apk/res/android"
- android:layout_width="fill_parent"
- android:layout_height="40dp"
- android:paddingLeft="5dip"
- android:paddingRight="5dip"
- android:background="@drawable/head_bg">
- <TextView android:id="@+id/tab_label"
- android:layout_width="fill_parent"
- android:layout_height="wrap_content"
- android:layout_centerInParent="true"
- android:gravity="center"
- android:textColor="#000000"
- android:textStyle="bold"
- android:background="@drawable/tabmini"/>
- </RelativeLayout>
第三步:创建一个selector在drawable里面 命名tabmini.xml,用来点击TabHost的一个tab时TextView的变化:
- <?xml version="1.0" encoding="utf-8"?>
- <selector
- xmlns:android="http://schemas.android.com/apk/res/android">
- <item android:state_selected="true"
- android:drawable="@drawable/add_managebg_down"/>
- <item android:state_selected="false"
- android:drawable="@drawable/add_managebg"/>
- </selector>
第四步:在Activity里实现TabHost:
- package cn.li.tabstyle;
- import android.app.Activity;
- import android.os.Bundle;
- import android.view.LayoutInflater;
- import android.view.View;
- import android.widget.TabHost;
- import android.widget.TextView;
- public class TabHostStyleActivity extends Activity {
- /** Called when the activity is first created. */
- @Override
- public void onCreate(Bundle savedInstanceState) {
- super.onCreate(savedInstanceState);
- setContentView(R.layout.main);
- View niTab = (View) LayoutInflater.from(this).inflate(R.layout.tabmini, null);
- TextView text0 = (TextView) niTab.findViewById(R.id.tab_label);
- text0.setText("ni");
- View woTab = (View) LayoutInflater.from(this).inflate(R.layout.tabmini, null);
- TextView text1 = (TextView) woTab.findViewById(R.id.tab_label);
- text1.setText("wo");
- View taTab = (View) LayoutInflater.from(this).inflate(R.layout.tabmini, null);
- TextView text2 = (TextView) taTab.findViewById(R.id.tab_label);
- text2.setText("ta");
- View weTab = (View) LayoutInflater.from(this).inflate(R.layout.tabmini, null);
- TextView text3 = (TextView) weTab.findViewById(R.id.tab_label);
- text3.setText("we");
- TabHost tabHost = (TabHost)findViewById(R.id.tabhost);
- tabHost.setup(); //Call setup() before adding tabs if loading TabHost using findViewById().
- tabHost.addTab(tabHost.newTabSpec("nitab").setIndicator(niTab).setContent(R.id.tab1));
- tabHost.addTab(tabHost.newTabSpec("wotab").setIndicator(woTab).setContent(R.id.tab2));
- tabHost.addTab(tabHost.newTabSpec("tatab").setIndicator(taTab).setContent(R.id.tab3));
- tabHost.addTab(tabHost.newTabSpec("wetab").setIndicator(weTab).setContent(R.id.tab4));
- }
- }
这里我们用findViewById创建了TabHost,这样的话我们就需要在添加tab时调用TabHost的setup()方法;这里我们添加内容时添加的是布局,我们完全可以换成自己创建的Activity。
好了,让我们来看看运行效果吧:
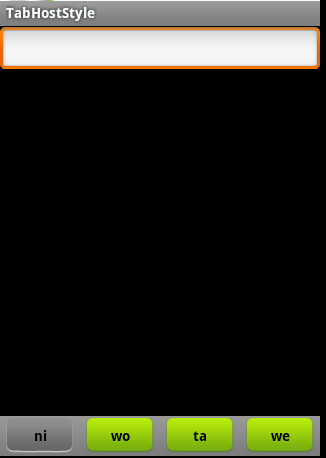
好了,我们自定义的TabHost算是结束了。不过看到Activity里的代码很多都是重复的我们可以这样把他们简化:
- package cn.li.tabstyle;
- import android.app.Activity;
- import android.os.Bundle;
- import android.view.LayoutInflater;
- import android.view.View;
- import android.widget.TabHost;
- import android.widget.TextView;
- public class TabHostStyleActivity extends Activity {
- /** Called when the activity is first created. */
- String[] title = new String[]{"ni","wo","ta","we"};
- View userTab,articeTab,feedTab,weTab;
- View[] tabs = new View[]{userTab,articeTab,feedTab,weTab};
- int[] tabIds = new int[]{R.id.tab1,R.id.tab2,R.id.tab3,R.id.tab4};
- @Override
- public void onCreate(Bundle savedInstanceState) {
- super.onCreate(savedInstanceState);
- setContentView(R.layout.main);
- TabHost tabHost = (TabHost)findViewById(R.id.tabhost);
- tabHost.setup(); //Call setup() before adding tabs if loading TabHost using findViewById().
- for(int i=0;i<tabs.length;i++){
- tabs[i] = (View) LayoutInflater.from(this).inflate(R.layout.tabmini, null);
- TextView text = (TextView) tabs[i].findViewById(R.id.tab_label);
- text.setText(title[i]);
- tabHost.addTab(tabHost.newTabSpec(title[i]).setIndicator(tabs[i]).setContent(tabIds[i]));
- }
- }
- }
在上一篇文章中,我们花了大量的篇幅来讲解Fragment这个新引进类的使用,目的就是为了让大家能够牢牢的掌握它的使用方法,以便读者在今后的开发中能够熟练的使用它。
一、实现效果图


二、项目工程结构


三、详细代码编写
1、主tab布局界面,main_tab_layout:
<?xmlversion="1.0"encoding="utf-8"?> <LinearLayoutxmlns:android="http://schemas.android.com/apk/res/android" android:layout_width="fill_parent" android:layout_height="fill_parent" android:orientation="vertical"> <FrameLayout android:id="@+id/realtabcontent" android:layout_width="fill_parent" android:layout_height="0dip" android:layout_weight="1"/> <android.support.v4.app.FragmentTabHost android:id="@android:id/tabhost" android:layout_width="fill_parent" android:layout_height="wrap_content" android:background="@drawable/maintab_toolbar_bg"> <FrameLayout android:id="@android:id/tabcontent" android:layout_width="0dp" android:layout_height="0dp" android:layout_weight="0"/> </android.support.v4.app.FragmentTabHost> </LinearLayout>2、Tab按钮选项布局,tab_item_view.xml:
<?xmlversion="1.0"encoding="utf-8"?> <LinearLayoutxmlns:android="http://schemas.android.com/apk/res/android" android:layout_width="wrap_content" android:layout_height="wrap_content" android:gravity="center" android:orientation="vertical"> <ImageView android:id="@+id/imageview" android:layout_width="wrap_content" android:layout_height="wrap_content" android:focusable="false" android:padding="3dp" android:src="@drawable/tab_home_btn"> </ImageView> <TextView android:id="@+id/textview" android:layout_width="wrap_content" android:layout_height="wrap_content" android:text="首页" android:textSize="10sp" android:textColor="#ffffff"> </TextView> </LinearLayout>3、fragment布局界面,这里只列出一个,fragment_1.xml:
<spanstyle="font-size:12px;"><?xmlversion="1.0"encoding="utf-8"?> <LinearLayoutxmlns:android="http://schemas.android.com/apk/res/android" android:layout_width="fill_parent" android:layout_height="fill_parent"> <ImageView android:id="@+id/imageview" android:layout_width="fill_parent" android:layout_height="fill_parent" android:scaleType="fitCenter" android:src="@drawable/xianjian01"> </ImageView> </LinearLayout></span>4、Tab选项的自定义按钮资源文件,列出其中一个按钮,tab_home_btn:
<spanstyle="font-size:12px;"><?xmlversion="1.0"encoding="utf-8"?> <selectorxmlns:android="http://schemas.android.com/apk/res/android"> <itemandroid:drawable="@drawable/icon_home_sel"android:state_selected="true"/> <itemandroid:drawable="@drawable/icon_home_nor"/> </selector></span>5、Tab选项按钮背景资源文件,selector_tab_background.xml:
<spanstyle="font-size:12px;"><?xmlversion="1.0"encoding="utf-8"?> <selectorxmlns:android="http://schemas.android.com/apk/res/android"> <itemandroid:drawable="@drawable/home_btn_bg"android:state_pressed="true"/> <itemandroid:drawable="@drawable/home_btn_bg"android:state_selected="true"/> </selector></span>6、主Activity类,MainTabActivity.java:
<span style="font-size:12px;">packagecom.yangyu.mycustomtab02; importandroid.os.Bundle; importandroid.support.v4.app.FragmentActivity; importandroid.support.v4.app.FragmentTabHost; importandroid.view.LayoutInflater; importandroid.view.View; importandroid.widget.ImageView; importandroid.widget.TabHost.TabSpec; importandroid.widget.TextView; /** * @author yangyu * 功能描述:自定义TabHost */publicclass MainTabActivity extendsFragmentActivity{ //定义FragmentTabHost对象 privateFragmentTabHost mTabHost; //定义一个布局 privateLayoutInflater layoutInflater; //定义数组来存放Fragment界面 privateClass fragmentArray[] = {FragmentPage1.class,FragmentPage2.class,FragmentPage3.class,FragmentPage4.class,FragmentPage5.class}; //定义数组来存放按钮图片 privateint mImageViewArray[] = {R.drawable.tab_home_btn,R.drawable.tab_message_btn,R.drawable.tab_selfinfo_btn, R.drawable.tab_square_btn,R.drawable.tab_more_btn}; //Tab选项卡的文字 privateString mTextviewArray[] = {"首页","消息","好友","广场","更多"}; publicvoid onCreate(Bundle savedInstanceState) { super.onCreate(savedInstanceState); setContentView(R.layout.main_tab_layout); initView(); } /** * 初始化组件 */ privatevoid initView(){ //实例化布局对象 layoutInflater = LayoutInflater.from(this); //实例化TabHost对象,得到TabHost mTabHost = (FragmentTabHost)findViewById(android.R.id.tabhost); mTabHost.setup(this, getSupportFragmentManager(), R.id.realtabcontent); //得到fragment的个数 intcount = fragmentArray.length; for(inti = 0; i < count; i++){ //为每一个Tab按钮设置图标、文字和内容 TabSpec tabSpec = mTabHost.newTabSpec(mTextviewArray[i]).setIndicator(getTabItemView(i)); //将Tab按钮添加进Tab选项卡中 mTabHost.addTab(tabSpec, fragmentArray[i], null); //设置Tab按钮的背景 mTabHost.getTabWidget().getChildAt(i).setBackgroundResource(R.drawable.selector_tab_background); } } /** * 给Tab按钮设置图标和文字 */ privateView getTabItemView(intindex){ View view = layoutInflater.inflate(R.layout.tab_item_view, null); ImageView imageView = (ImageView) view.findViewById(R.id.imageview); imageView.setImageResource(mImageViewArray[index]); TextView textView = (TextView) view.findViewById(R.id.textview); textView.setText(mTextviewArray[index]); returnview; } }</span>7、Fragment页面,FragmentPage1.java:
<span style="font-size:12px;">packagecom.yangyu.mycustomtab02; importandroid.os.Bundle; importandroid.support.v4.app.Fragment; importandroid.view.LayoutInflater; importandroid.view.View; importandroid.view.ViewGroup; publicclass FragmentPage1 extendsFragment{ @Override publicView onCreateView(LayoutInflater inflater, ViewGroup container,Bundle savedInstanceState) { returninflater.inflate(R.layout.fragment_1, null); } } </span>源码下载地址
- 仿新浪微博布局学习——妙用TabHost
- 新浪微博布局学习——妙用TabHost
- 新浪微博布局学习——妙用TabHost
- 新浪微博布局学习——妙用TabHost
- 转: 新浪微博布局学习——妙用TabHost
- 新浪微博布局学习——妙用TabHost
- 新浪微博布局学习——妙用TabHost
- 【转载】新浪微博布局学习——妙用TabHost
- 新浪微博布局学习——妙用TabHost
- 新浪微博布局学习——妙用TabHost
- android_新浪微博布局学习——妙用TabHost
- 新浪微博布局学习——妙用TabHost
- 新浪微博布局学习——妙用TabHost
- 新浪微博布局学习——妙用TabHost
- 新浪微博布局学习——妙用TabHost
- 新浪微博布局学习——妙用TabHost
- 新浪微博布局学习——妙用TabHost
- 新浪微博布局学习——妙用TabHost
- 河南周口2个月查出近6千人吃空饷 财政开支超1亿
- C#WinFrom程序打包/图解VS2008项目的安装与部署图解含卸载
- 基本数据结构
- iOS学习之iOS沙盒(sandbox)机制和文件操作(二)
- 年人均输液八瓶 这种解读不科学
- 仿新浪微博布局学习——妙用TabHost
- showModalDialog 的使用
- shell字符串操作方法
- 十里荷塘,步步莲香
- MyEclipse中更改新建jsp的encoding
- iOS学习之iOS沙盒(sandbox)机制和文件操作之NSFileManager(三)
- 面试哦
- 网页响应式设计
- Python字符编码详解