Compile OpenCV 2.4.2 for Win 7 (64 bit) by using CMake+VS 2010
来源:互联网 发布:刘縯 刘邦 知乎 编辑:程序博客网 时间:2024/05/17 11:05
Tested on: VS 2010 + Win 7 (64 bit)
(1) Download OpenCV 2.4.2 (link)
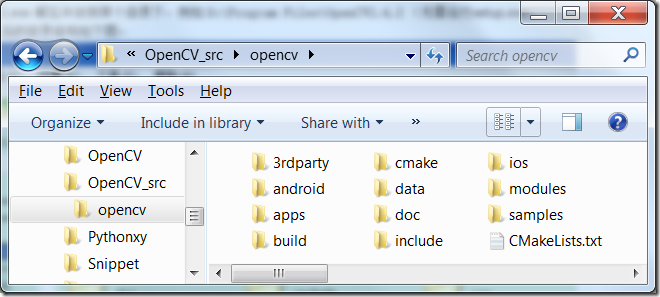
(2) Unzip opencv2.4.2.exe to a directory, take mine for example: E:\OpenCV_src

(3) Download and Install Cmake (for windows platform, win32 installer) since you need compile OpenCV by yourself when using Win 7 (64 bit). (link)
(4) Run cmake-gui.exe. The settings are shown in the figure. Push “Configure” button and select “Vusal Studio”, then Generate.

(5) Find Opencv.sln in E:\OpenCV, then open it with VS 2010.
(6) Solution Explorer – Solution OpenCV, Rught Click, “Rebuild Solution”. If no errors, select “INSTALL” and “Build”.
(7) Set Environment Variables.
Path: E:\OpenCV\install\bin;E:\OpenCV\install\include;E:\OpenCV\install\lib;
TBB: E:\OpenCV_src\opencv\build\common\tbb\intel64\vc10;
At last, test the following codes in Debug mode and x64 platform!
btw, put the image file ppl.jpg in the code folder.
#include "stdafx.h"
#include <opencv2/core/core.hpp>#include <opencv2/highgui/highgui.hpp>#pragma comment( lib, "opencv_core242d.lib ")
#pragma comment( lib, "opencv_highgui242d.lib" )
using namespace cv;
int _tmain(int argc, _TCHAR* argv[])
{ namedWindow( "show_image", WINDOW_AUTOSIZE ); Mat src = imread( "ppl.jpg" ); while(1) { imshow( "show_image", src ); char c = waitKey(0); if( 27 == c ) return 0;}
return 0;}
- Compile OpenCV 2.4.2 for Win 7 (64 bit) by using CMake+VS 2010
- OpenCV 3.0.0 alpha compile by gcc cmake
- USING OPENCV 2.4.2 WITH VISUAL STUDIO 2012 ON WINDOWS 7 (64-BIT)
- compile ffmpeg for windows 64-bit
- Compile ARPACK x64 dll & lib For VS2005 On Windows 7 by Using MinGW64
- HowTo Compile a 32-bit Application Using gcc On the 64-bit Linux Version
- CMake find_package for OpenCV
- CMake find_package for OpenCV
- (OK) iperf 3 --- compile iperf3 for android-x86_64-7.0 by using mmm
- win 10 64bit OS python3.5 安装 opencv
- QT 5.3.2 for android 在window XP 32bit 和 WIN 8.1 64bit 上面环境搭建 (一)
- win 7 64bit 完整卸载ADS1.2的历程
- Neat Image v6 plug-in for Photoshop 64-bit /Win
- Using ADO for connecting MS Access in 64 Bit
- Using OpenCV with gcc and CMake
- Using OpenCV with gcc and CMake
- Using OpenCV with gcc and CMake
- Android studio2.2配置opencv for android(CMake方式)
- [Matlab] Walking along a path
- Matlab Cody (1)
- The H Index for Computer Science
- Eclipse Virgo
- [MATLAB] Simple TF-IDF implementation
- Compile OpenCV 2.4.2 for Win 7 (64 bit) by using CMake+VS 2010
- OpenTLD Installation for Matalb 2012a (64 bit)
- History of Best Paper Awards in AI, NLP, CV, PR, and ML
- 清华梦的粉碎 -- 写给清华大学的退学申请
- 对博士学位说永别
- 局部图像特征描述概述 by 樊彬
- Gartner报告:未来一年48项即将大热的技术趋势 (Hype Cycle for Emerging Technologies)
- 2013年各大小IT公司待遇
- 第十届机器学习及其应用研讨会 MLA’2012 Slides


