Tengine + Lua + GraphicsMagick 实现图片自动裁剪/缩放
来源:互联网 发布:北京单身公寓 知乎 编辑:程序博客网 时间:2024/05/19 16:05
目录[-]
一、背景
随着互联网的快速发展、需求频繁变更、内容数量的俱增、时间的持续增长,图片数量也会越来越多。在实际需求中,会出现在若干个页面或同一个页面不同位置,展示同一条信息以及其缩略图。在这时,如果使用 CSS 控制图片显示的大小,对于那些与该位置不成比例的图片,缩小后就会出现图片变形。也不可能让编辑人员,对所有的图片进行 PS,这时候就产生了强烈的自动化裁剪、缩放图片的需求,来适应不同规格的缩略图。
Nginx 虽然有自带的 image filter module 也能实现此功能,但是有弊端:
image filter module 使用的是 GD,GD 性能、效率、处理后的图片质量不如 GraphicsMagick
image filter module 没法真正生成裁剪/缩放后的图片,而是通过 Nginx 直接输出的,这样每次请求或缓存过期后都需要重新裁剪/缩放,这样无疑会增加 Nginx 负担
二、系统环境
操作系统

CPU

内存

磁盘及分区

三、软件准备
Tengine:https://github.com/alibaba/tengine
Lua:http://www.lua.org/ftp/
LuaJIT: http://luajit.org/download.html
libjpeg、libjpeg-devel
libpng、libpng-devel
giflib、giflib-devel
freetype、freetype-devel
GraphicsMagick:http://sourceforge.net/projects/graphicsmagick/files/graphicsmagick/
四、软件安装
readline&readline-devel(Lua 所需)
12yuminstallreadlineyuminstallreadline-develLua
进入 Lua 源码目录
make 会提示类似以下信息:
1make
make PLATFORM(例如你的操作系统是Linux,就执行:make linux,如果是 FreeBSD,就执行:make freebsd)
12makelinuxmakeinstall
LuaJIT
12makemakeinstallTengine
进入 Tengine 源码目录
- 123
./configure--prefix=/usr/local/Tengine--dso-path=/usr/local/Tengine/modules--with-http_realip_module --with-http_gzip_static_module --with-http_stub_status_module --with-http_concat_module --with-http_lua_module --with-openssl=/usr/local/src/openssl-1.0.1e --with-zlib=/usr/local/src/zlib-1.2.8 --http-proxy-temp-path=/var/tmp/Tengine/proxy_temp--http-fastcgi-temp-path=/var/tmp/Tengine/fastcgi_temp--http-uwsgi-temp-path=/var/tmp/Tengine/uwsgi_temp--http-scgi-temp-path=/var/tmp/Tengine/cgi_temp--http-client-body-temp-path=/var/tmp/Tengine/client_body_temp--http-log-path=/var/log/Tengine/access.log --error-log-path=/var/log/Tengine/error.logmakemakeinstall 红色加粗是关键部分,其余为我的其它配置,不是该问题讨论范围之内
如果报有下面错误
123456src/http/modules/lua/ngx_http_lua_log.c: 在函数‘ngx_http_lua_ngx_log’中:src/http/modules/lua/ngx_http_lua_log.c:40: 错误:‘LUA_GLOBALSINDEX’未声明(在此函数内第一次使用)src/http/modules/lua/ngx_http_lua_log.c:40: 错误:(即使在一个函数内多次出现,每个未声明的标识符在其src/http/modules/lua/ngx_http_lua_log.c:40: 错误:所在的函数内也只报告一次。)src/http/modules/lua/ngx_http_lua_log.c: 在函数‘ngx_http_lua_print’中:src/http/modules/lua/ngx_http_lua_log.c:81: 错误:‘LUA_GLOBALSINDEX’未声明(在此函数内第一次使用)时,是因为使用了不兼容的 Lua 的头文件,configure 需要加上
1--with-ld-opt="-Wl,-rpath,$LUAJIT_LIB"或者
12--with-luajit-inc=PATHsetLuaJIT headers path (where lua.h/lauxlib.h/... are located)--with-luajit-lib=PATHsetLuaJIT library path (where libluajit-5.1.{a,so} are located)
如果在启动或者执行 Tengine 任意命令时,出现以上错误,那么就是,无法找到动态库 libluajit-5.1.so.2 ,64位系统貌似是去 /lib64 目录中寻找动态库的。
那么解决办法就是,将 /usr/local/lib/libluajit-5.1.so.2 软连接到 /lib64 目录下:1ln-s/usr/local/lib/libluajit-5.1.so.2/lib64/libluajit-5.1.so.2
libjpeg、libjpeg-devel
12yuminstalllibjpegyuminstalllibjpeg-devellibpng、libpng-devel
12yuminstalllibpngyuminstalllibpng-develgiflib、giflib-devel
12yuminstallgiflibyuminstallgiflib-develfreetype、freetype-devel
12yuminstallfreetypeyuminstallfreetype-develGraphicsMagick
123./configure--prefix=/usr/local/GraphicsMagick--enable-sharedmakemakeinstall执行
1/usr/local/GraphicsMagick/bin/gmversion如果得到

则,说明安装成功!!!
五、脚本编写
local command = "/usr/local/GraphicsMagick/bin/gm convert " .. ngx.var.request_filepath .. " -resize " .. ngx.var.width .. "x" .. ngx.var.height .. " +profile \"*\" " .. ngx.var.request_filepath .. "_" .. ngx.var.width .. "x" .. ngx.var.height .. ".j" .. ngx.var.ext; // 调用 GraphicsMagick 进行图片转换,相关信息查看 GraphicsMagick 帮助文档os.execute(command); // 执行裁剪命令ngx.exec(ngx.var.request_uri); // 输出裁剪后的图片// ngx.var.request_filepath、ngx.var.width、ngx.var.height 即 Nginx location 中设置的变量
六、配置
#group web;user web;worker_processes 12;error_log /var/log/Tengine/error.log;#error_log logs/error.log notice;#error_log logs/error.log info;pid /var/run/nginx.pid;events { use epoll; worker_connections 1024;}http { include mime.types; default_type html/html; charset UTF-8; log_format main '$remote_addr - $remote_user [$time_local] "$request" ' '$status $body_bytes_sent "$http_referer" ' '"$http_user_agent" "$http_x_forwarded_for"'; access_log /var/log/Tengine/access.log main; sendfile on; #tcp_nopush on; #keepalive_timeout 0; keepalive_timeout 65; client_max_body_size 10M; gzip on; gzip_min_length 1k;gzip_buffers 5 12k; gzip_http_version 1.0; gzip_comp_level 2; gzip_vary on; gzip_types text/plain text/css text/xml application/xml application/atom+xml application/rss+xml application/xhtml+xml application/xml-dtd image/gif image/jpeg image/png image/x-icon image/bmp image/x-ms-bmp text/javascript application/x-javascript; include "vhosts.conf";}server { listen 80; server_name hostname; location / { root /document_root; # 站点根目录 expires 1h; # 缓存时间 add_header Cache-Control max-age=3600; # 缓存时间 access_log /var/log/Tengine/host_access.log; } # 如果 url 格式如:xxxx.gif_数字x数字.gif location ~* ^(.+\.(jpg|jpeg|gif|png))_(\d+)+x(\d+)+\.(jpg|jpeg|gif|png)$ { root /document_root; # 这里必须设置,否则根目录,即 $document_root 会是 Nginx 默认的 Nginx Root/html,在 Lua 中会得不到期望的值 if (!-f $request_filename) { # 如果文件不存在时才需要裁剪 add_header X-Powered-By 'Lua GraphicsMagick'; # 此 HTTP Header 无实际意义,用于测试 add_header file-path $request_filename; # 此 HTTP Header 无实际意义,用于测试 lua_code_cache off; # 在编写外部 Lua 脚本时,设置为 off Nginx 不会缓存 Lua,方便调试 set $request_filepath /document_root/$1; # 设置原始图片路径,如:/document_root/1.gif set $width $3; # 设置裁剪/缩放的宽度 set $height $4; # 设置裁剪/缩放的高度 set $ext $5; # 图片文件格式后缀 content_by_lua_file /document_root/ImageResizer.lua; # 加载外部 Lua 文件 } }}七、测试
测试脚本(Lua,修改一下 /document_root/ImageResizer.lua 在做测试时生成随机图片)
local command = "/usr/local/GraphicsMagick/bin/gm convert " .. ngx.var.request_filepath .. " -resize " .. ngx.var.width .. "x" .. ngx.var.height .. " +profile \"*\" " .. ngx.var.request_filepath .. "_" .. math.random(0, 100000000) .. ngx.var.width .. "x" .. ngx.var.height .. "." .. ngx.var.ext;os.execute(command);ngx.req.set_uri(ngx.var.request_uri, true);
测试网络环境:局域网
测试工具: Apache AB
测试方法:
1ab -n 100 -c 1 image_url测试结果(哎!前前后后、断断续续测试+整理内容,花了四五个小时)
A、GIF (大图)

启用 poll 测试结果


未启用 poll 测试结果


B、GIF (小图)

启用 poll 测试结果

未启用 poll 测试结果

C、JPEG(大图)

启用 poll 测试结果


未启用 poll 测试结果


D、JPEG(小图)
启用 poll 测试结果
未启用 poll 测试结果

E、PNG(大图)

启用 poll 测试结果


未启用 poll 测试结果


F、PNG(小图)

启用 poll 测试结果

未启用 poll 测试结果

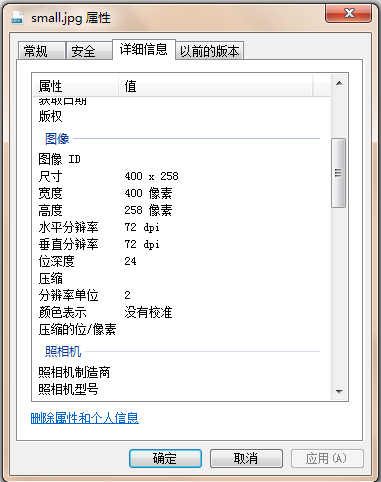
G、照片原始图片

启用 poll 测试结果

未启用 poll 测试结果


- Tengine + Lua + GraphicsMagick 实现图片自动裁剪/缩放
- Tengine + Lua + GraphicsMagick 实现图片自动裁剪/缩放
- 使用Tengine+Lua+GraphicsMagick实现图片自动裁剪缩放
- nginx+lua+GraphicsMagick实现图片自动缩放功能(强烈推荐)
- Tengine + Lua + GraphicsMagick
- nginx+lua+GraphicsMagick做实时图片裁剪
- GraphicsMagick 实现图片的裁剪, 旋转, 移动
- nginx+GraphicsMagick实现缩略图、图片实时缩放
- GraphicsMagick+im4java 方案实现图片缩放
- Tengine +Lua+GraphicsMagick实时生成缩略图
- Nginx+Lua+GraphicsMagick实现动态生成指定尺寸的图片
- OpenResty(Nginx)+Lua+GraphicsMagick实现图片截图与缓存 二
- java实现图片裁剪缩放工具类
- nginx实现图片的缩放和裁剪
- java实现图片裁剪、缩放功能
- 两种方式实现图片按比例响应式缩放、并自动裁剪的css技巧
- java 大图片处理GraphicsMagick + im4java [缩放,旋转,裁剪]
- 图片缩放裁剪
- 编译原理结构框架4自顶向下的语法分析
- jQuery sublime插件~~~~~
- java中时间比较
- linux下常见依赖包的用处与ubuntu下的安装方法
- ContentProvider简单总结
- Tengine + Lua + GraphicsMagick 实现图片自动裁剪/缩放
- Command模式
- HBase权威指南中文版
- IOS推送功能实现---极光推送
- 教育论文范本丹青论文发表网
- python 内置函数filter, lambda, map, reduce
- Android开发日志1
- Internet连接共享
- jquery全选/jquery全不选/jquery反选