How to Customize Common Open File Dialog Box Places Bar in Windows
来源:互联网 发布:淘宝店铺退货率高 编辑:程序博客网 时间:2024/05/20 01:09
How to Customize Common Open File Dialog Box Places Bar in Windows
When you save or open a file in an application that uses Windows common dialog box, the Places bar on the left side of the dialog box can help you navigate quicker to a location.
This will show you how to customize the list of items displayed in the Places Bar in the Windows XP stylecommon open file dialog box (ex: Save As, Open) for all users in Vista, Windows 7, and Windows 8.
You can specify from 1 to 5 items to be displayed in the Places Bar.
This will show you how to customize the list of items displayed in the Places Bar in the Windows XP stylecommon open file dialog box (ex: Save As, Open) for all users in Vista, Windows 7, and Windows 8.
You can specify from 1 to 5 items to be displayed in the Places Bar.
The valid items you may display in the Places Bar are:
1) Shortcuts (full path) to a local folder -- (ex. C:\Windows)
NOTE: Do not include full path in quotes.
2) Shortcuts (full path) to remote folders -- (\\server\share)
3) FTP folders
4) web folders
5) Shell Commands in Windows 7 or Windows 8 for locations
6) Common Shell folders -- (examples)
1) Shortcuts (full path) to a local folder -- (ex. C:\Windows)
NOTE: Do not include full path in quotes.
2) Shortcuts (full path) to remote folders -- (\\server\share)
3) FTP folders
4) web folders
5) Shell Commands in Windows 7 or Windows 8 for locations
6) Common Shell folders -- (examples)
- MyComputerFolder
- MyDocuments
- MyFavorites
- MyMusic
- MyPictures
- MyNetworkPlaces
- MyFavorites
- CommonDocuments
- CommonMusic
- CommonPictures
- Desktop
- Printers
- ProgramFiles
- Recent
- shell:desktop
- shell:documentsLibrary
- shell:Libraries
- shell:MusicLibrary
- shell:PicturesLibrary
- shell:VideosLibrary
- shell:MyComputerFolder
EXAMPLE: Default and Custom Places Bar Items in Common Open File Dialog Box
NOTE: These will be the smaller Windows XP (ex: Browse type) common dialog box style windows that have shortcut icons (places) instead of the normal Navigation Pane that has a folder tree.


 OPTION ONE
1. Open the all users, specific users or groups, or all users except administrators Local Group Policy Editor for how you want this policy applied.
2. In the left pane, click/tap on to expand User Configuration, Administrative Templates, Windows Components,Windows Explorer (Vista and Windows 7) or File Explorer (Windows 8), and Common Open File Dialog. (see screenshot below)3. In the right pane of Common Open File Dialog, double click/tap on Items displayed in Places Bar to edit it. (see screenshot above)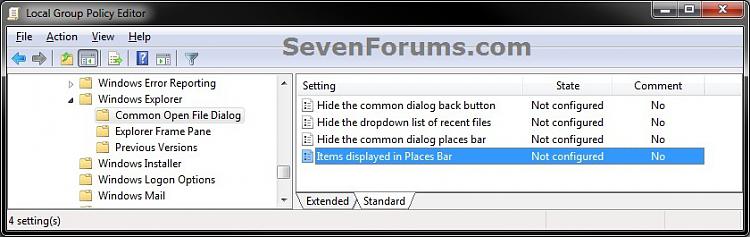
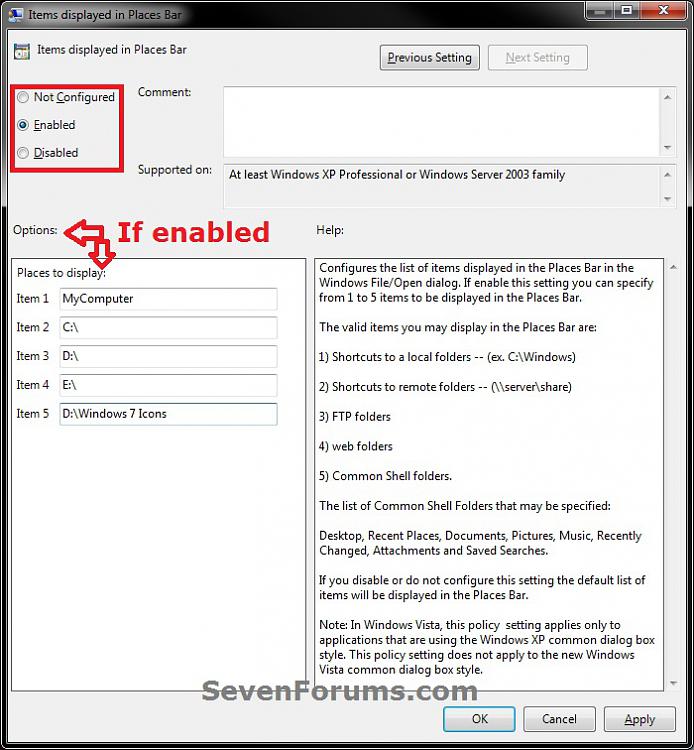
4. To Restore Default Items Displayed in the Places BarA) Select (dot) either Not Configured or Disabled. (see screenshot below step 6)B) Go to step 6.5. To Customize Items to be Displayed in the Places BarA) Select (dot) Enabled. (see screenshot below step 6)6. Click/tap on OK. (see screenshot below)
B) Under Options, you can type in up to 5 separate items (locations) for Places to display. (see screenshot below step 6)
NOTE: See the NOTE box at the top of the tutorial for more on valid items you may display in the Places Bar.7. Close the Local Group Policy Editor window.
 OPTION TWO
 1. Press the Windows + R keys to open the Run dialog, type regedit, and press enter.That's it,
2. If prompted by UAC, click/tap on Yes (Windows 7/8) or Continue (Vista).
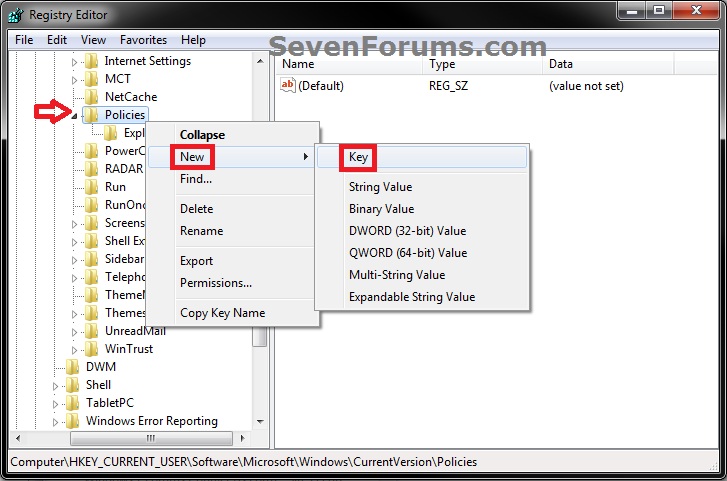
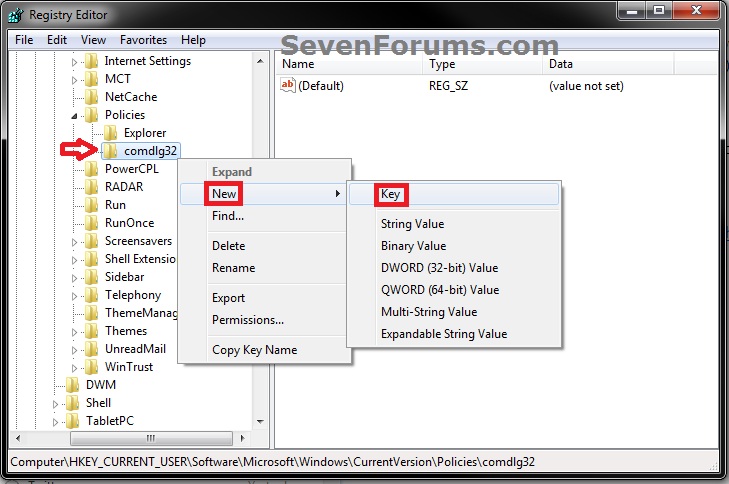
3. In regedit, navigate to the location below. (see screenshot below)HKEY_CURRENT_USER\Software\Microsoft\Windows\CurrentVersion\Policies4. To Customize Items to be Displayed in the Places Bar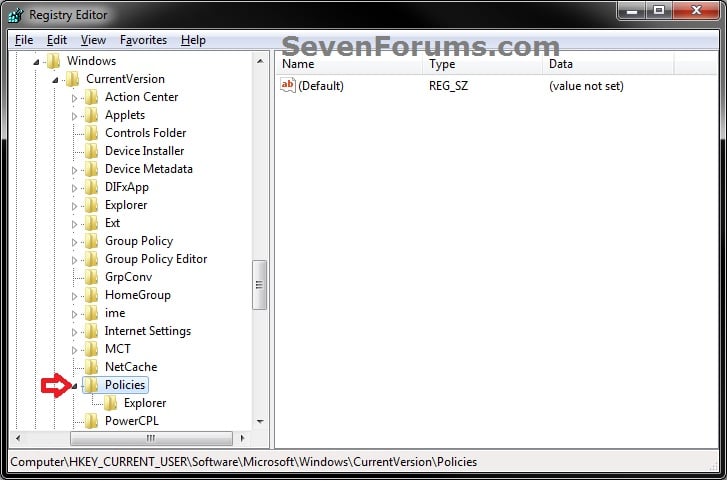 A) In the left pane, right click on Policies, and click/tap on New and Key. (see screenshot below)5. To Restore Default Items Displayed in the Places BarB) Type comdlg32, and press enter. Right click on comdlg32, and click/tap on New and Key. (see screenshot below)
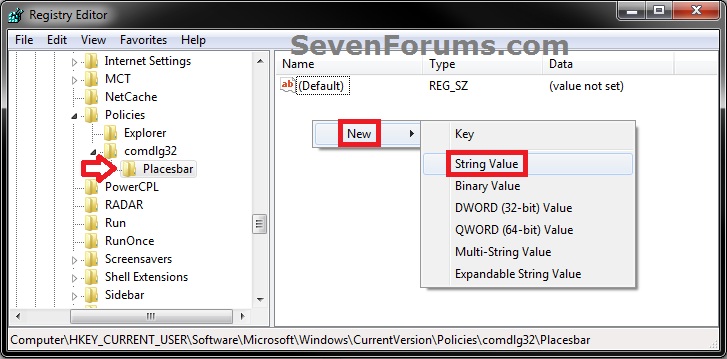
NOTE: If you already have the comdlg32 key, then you can skip on to step 4C below.C) Type Placesbar, and press enter. (see screenshot below step 4D)
D) In the right pane of Placesbar, right click or press and hold on an empty space, and click/tap on New andString Value. (see screenshot below)E) You can specify up to 5 places, so type Place0, Place1, Place2, Place3, or Place4 for each one you would like to customize, and press Enter. (see screenshot below)F) Repeat steps 4D and 4E to add each Place# string value for how many custom places you wanted to be displayed as items in the Places Bar.
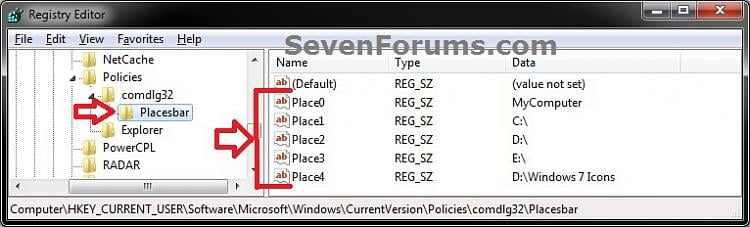
G) In the right pane, double click/tap on the Place# to modify it. Type in the item location that you want to have displayed in the Places Bar, and click/tap on OK. Repeat for each Place# that you have added in step 4E above. (see screenshot below)
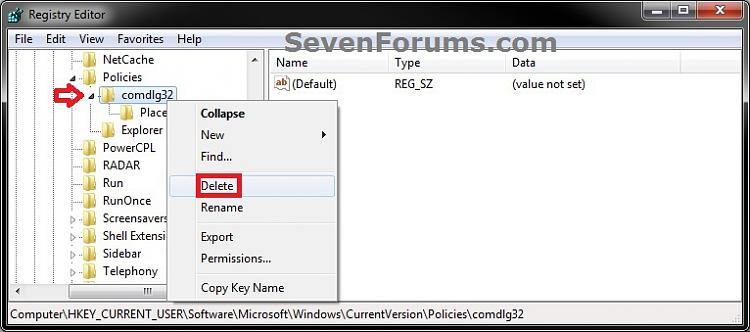
NOTE: See the NOTE box at the top of the tutorial for more on valid items you may display in the Places Bar.H) Go to step 6. A) In the left pane, right click on Placesbar, and click/tap on Delete. (see screenshot below)6. Close regedit.B) Click/tap on Yes to approve deletion. (see screenshot below)

Shawn
0 0
- How to Customize Common Open File Dialog Box Places Bar in Windows
- How to Open "File And Replace" Dialog Box ?
- How To Customize Tab Bar Background and Appearance
- How to Open a Text File in VB .NET
- [Python] How to Open Zip File in Host Location.
- iOS如何定制化Tab Bar界面(How To Customize Tab Bar Background and Appearance)
- 091112(星期四)To use a common control in a dialog box
- How To Skip Search Dialog Box
- How to make a resizable dialog bar in Microsoft Foundation Classes (MFC)
- How to customize Larbin
- How to open a file
- How to make our assemblies appeared in Add Reference dialog box
- How to customize the UI in IBM ITIM Solution
- How to customize a link at your desktop in LINUX
- How To Customize The Tab Bar Using iOS 5 Appearance API
- iOS Programming 101: How To Customize Tab Bar Background and Appearance
- How to unpack a tar file in windows
- How to customize ADF exception
- android studio 的使用
- Operation category READ is not supported in state standby解决
- java正则表达式笔记
- sql查询效率
- MySQL安装与测试
- How to Customize Common Open File Dialog Box Places Bar in Windows
- hiho一下 连通性·三 强连通分量
- 有图有真相!弱爆了!戳进来看!
- 迭代器和iter()函数
- spring ioc原理
- ASP.NET MVC程序中动态修改form的Action值
- ALERT日志中常见监听相关报错之一:ORA-609错误的排查
- Git log diff config高级进阶
- BOM:浏览器对象模型