android Nine-Patch的使用(制作聊天界面必学)
来源:互联网 发布:全国道路矢量数据 编辑:程序博客网 时间:2024/04/30 03:33
近期在学习制作聊天的界面,设计到了图片的拉伸问题等等,参考了部分书籍学习了制作Nine-Patch图片。
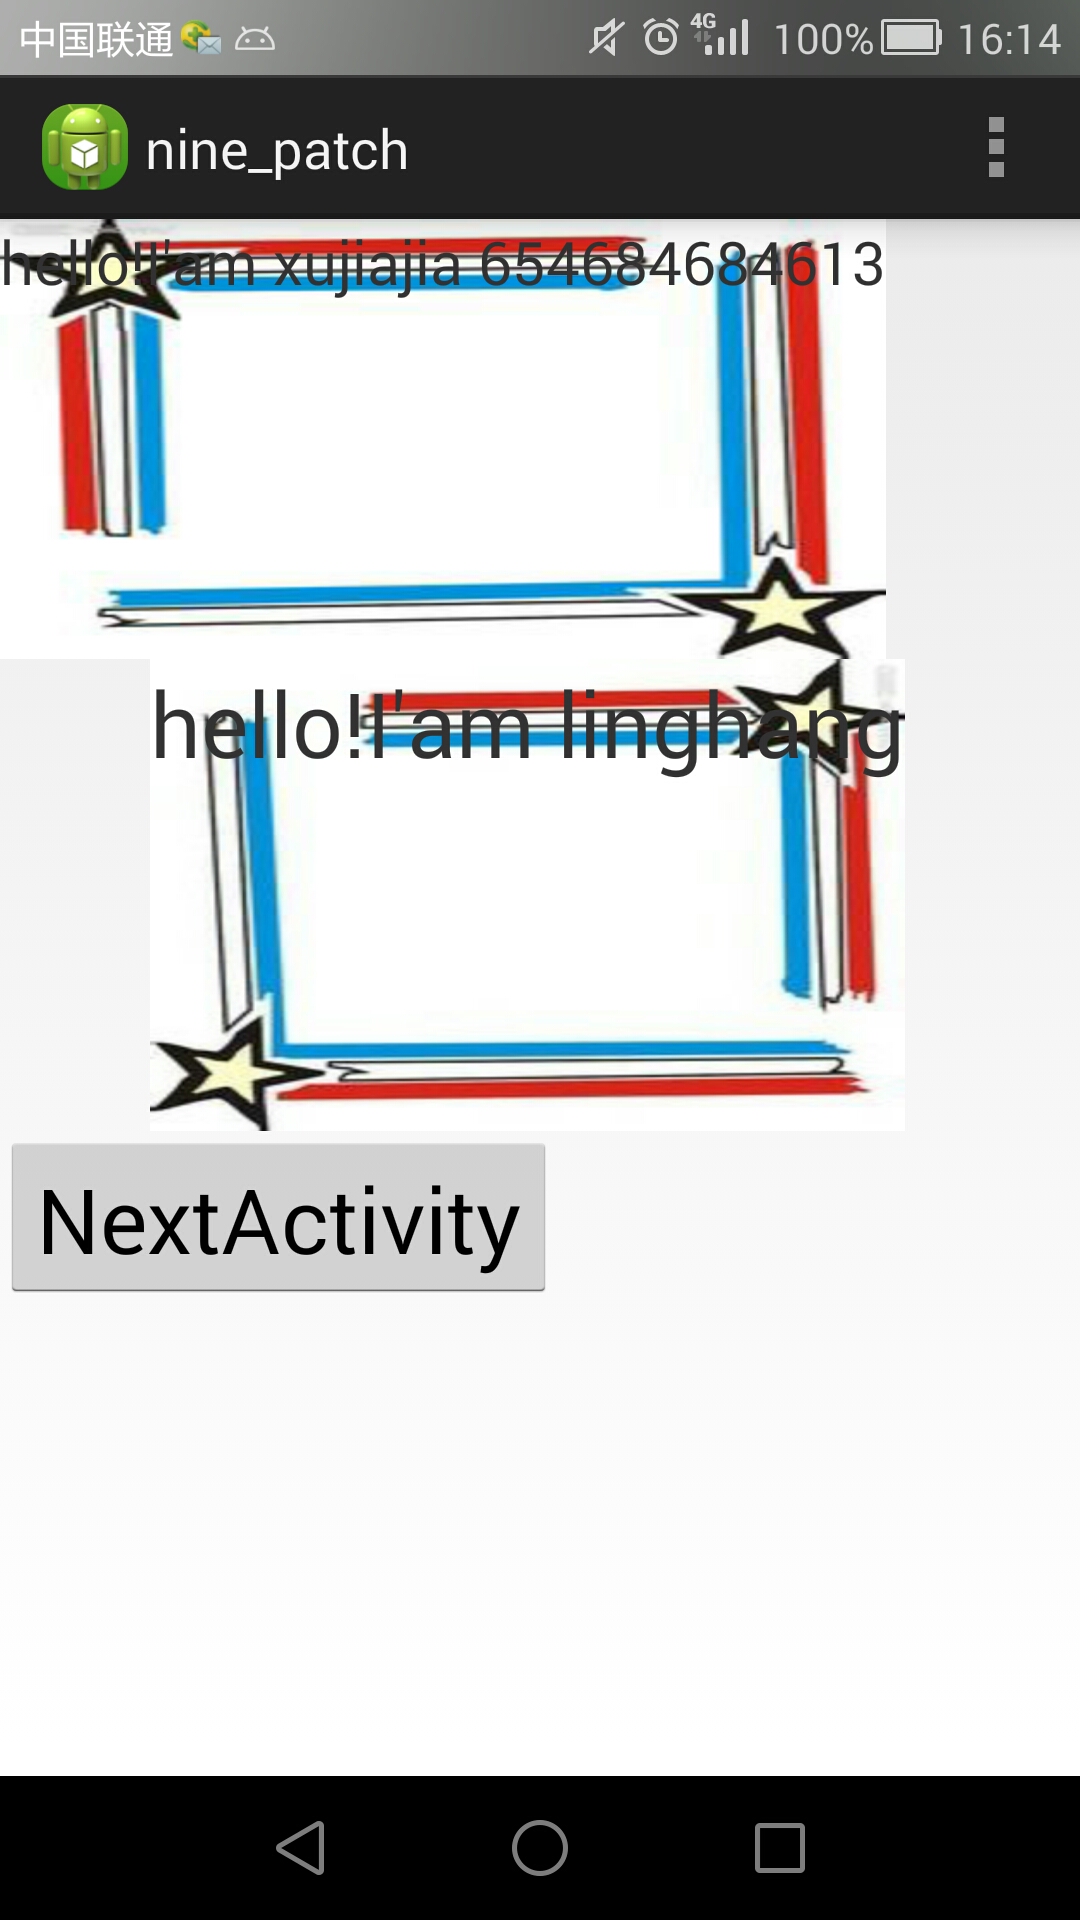
首先先看不使用Nine_patch的代码与效果:
<LinearLayout xmlns:android="http://schemas.android.com/apk/res/android"
xmlns:tools="http://schemas.android.com/tools"
android:layout_width="match_parent"
android:layout_height="match_parent"
android:orientation="vertical"
><TextView
android:layout_width="wrap_content"
android:layout_height="wrap_content"
android:background="@drawable/frame_left2"
android:text="hello!I'am xujiajia 654684684613"
android:textSize="20sp"
android:layout_marginRight="50dp"/>
<TextView
android:layout_width="wrap_content"
android:layout_height="wrap_content"
android:background="@drawable/frame_right2"
android:textSize="30sp"
android:text="hello!I'am linghang"
android:layout_marginLeft="50dp"/><LinearLayout
android:layout_width="wrap_content"
android:layout_height="wrap_content"
>
<Button
android:id="@+id/Next"
android:layout_width="match_parent"
android:layout_height="wrap_content"
android:textSize="30sp"
android:text="NextActivity"
/>
</LinearLayout>
</LinearLayout>
再看一下使用了Nine_Patch的代码以及效果:
<?xml version="1.0" encoding="utf-8"?>
<LinearLayout xmlns:android="http://schemas.android.com/apk/res/android"
android:layout_width="match_parent"
android:layout_height="match_parent"
android:orientation="vertical"
><TextView
android:layout_width="wrap_content"
android:layout_height="wrap_content"
android:background="@drawable/frame_left3"
android:text="hello!I'am xujiajia 654684684613"
android:textSize="20sp"
android:layout_marginRight="50dp"/>
<TextView
android:layout_width="wrap_content"
android:layout_height="wrap_content"
android:background="@drawable/frame_right3"
android:textSize="30sp"
android:text="hello!I'am linghang"
android:layout_marginLeft="50dp"/>
<LinearLayout
android:layout_width="wrap_content"
android:layout_height="wrap_content"
>
<Button
android:id="@+id/Return"
android:layout_width="match_parent"
android:layout_height="wrap_content"
android:textSize="30sp"
android:text="Return"
/>
</LinearLayout>
</LinearLayout>
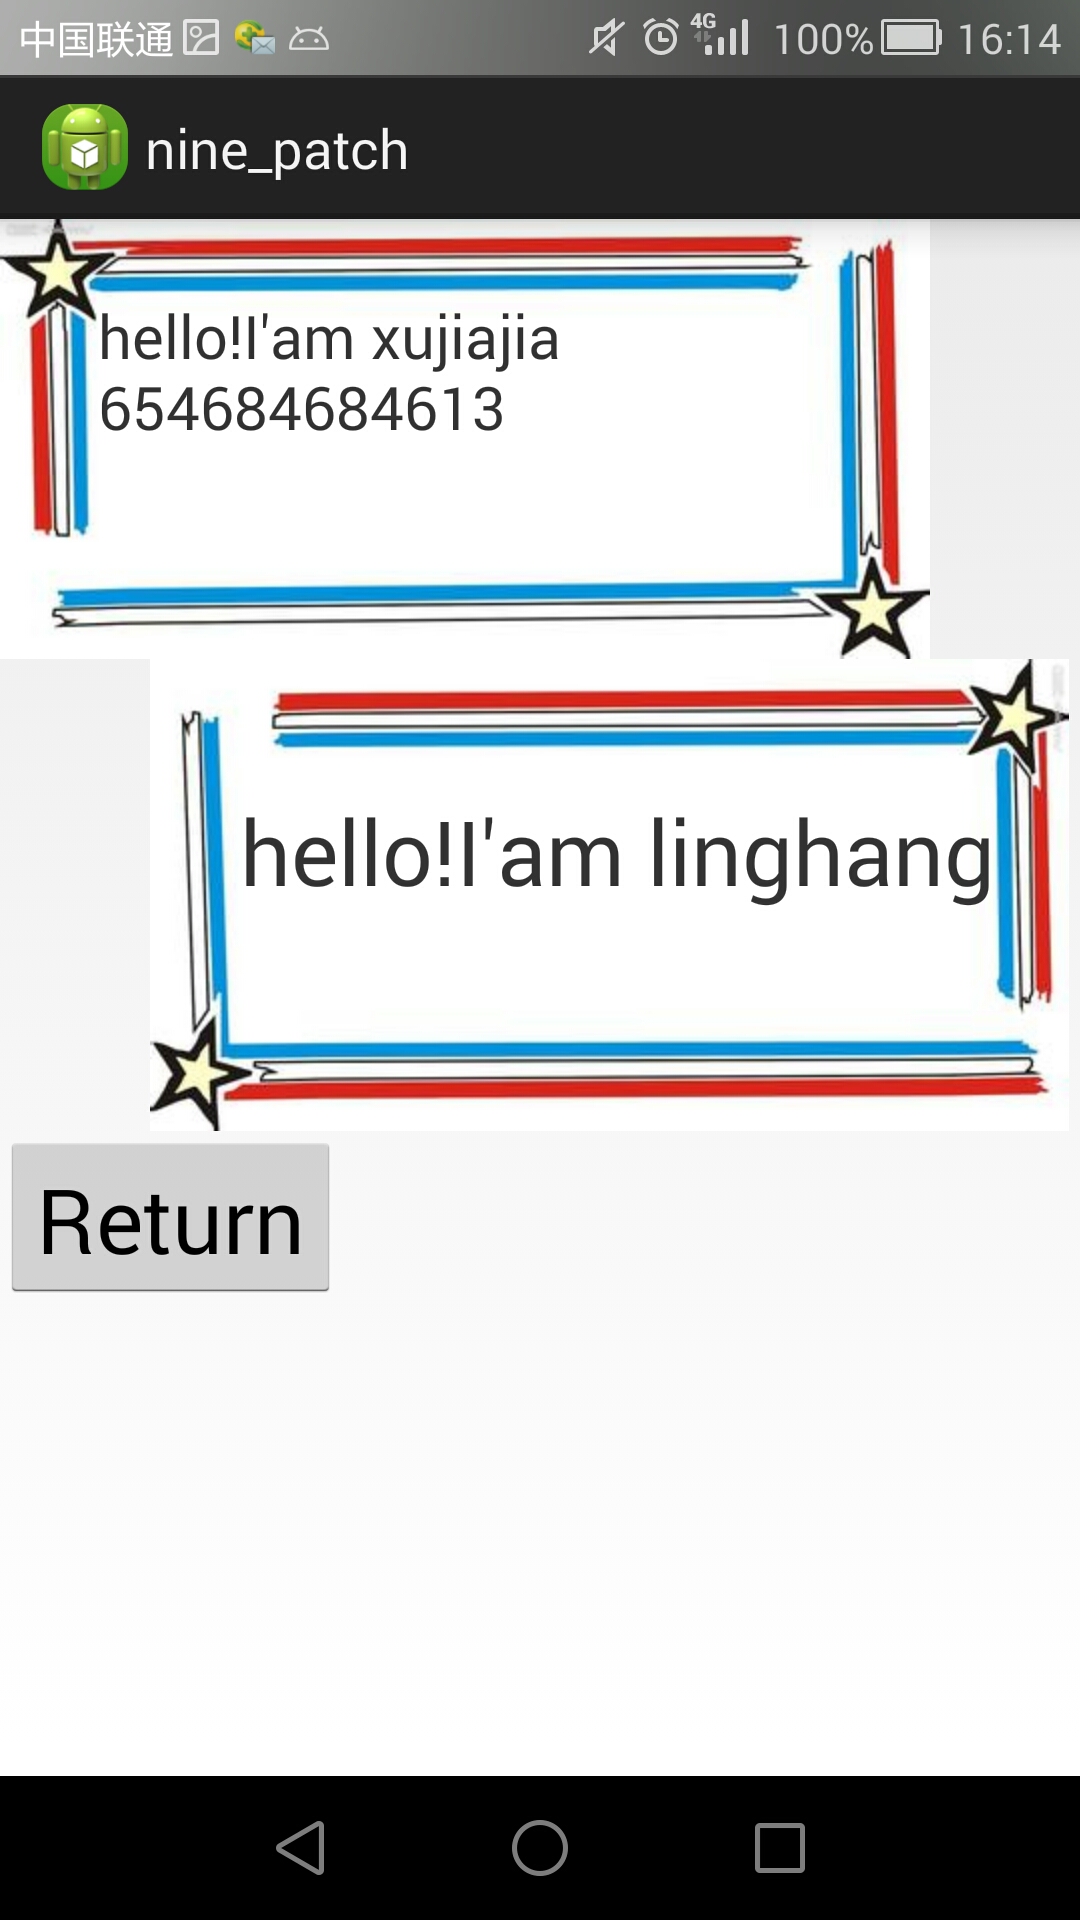
可以很清楚的看到,两者在代码上只有在background中使用到的图片不同,其他的都一样,这就是Nine_patch的作用了。
首先先看一下drawable中的图片:

使用Nine_patch处理过的图片名字后都会有“.9”,但是在使用的时候不需要写出来,比如上述代码:
android:background="@drawable/frame_left3"
android:background="@drawable/frame_right3"
接下来就是讲下 Nine_patch的使用。
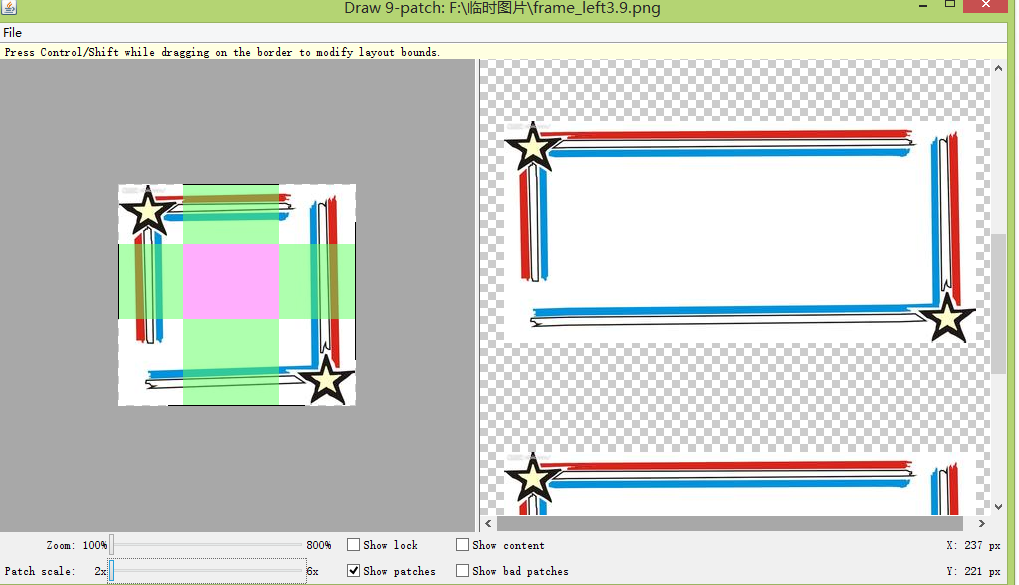
首先先要找到Nine_patch。
它位于SDK文件夹中的tools中,名为draw9patch.bat,找到后双击打开即可。
以下是在我电脑中的目录:D:\安卓环境\adt-bundle-windows-x86_64-20140702\sdk\tools
这是效果:
另外是show一下做的图片的前后对比:

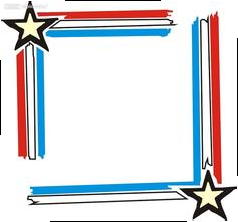
在png的图片中,仅仅就是多了几条小黑条,但是在layout的图片使用中就完全不同了。
(本人比较愚笨,在此点上纠结了很久,一直在纠结为什么做过的图片没有什么变化,使用之后才明白其理)
小黑条自己打开文件后鼠标点点就可以了,在此说一下上下左右四面的小黑条的不同作用。
左边线条:当图片进行纵向拉伸时,由此线条从图片左边水平位移到图片右边所形成的区域都是可以进行纵向拉伸的,此区域外则不进行拉伸,保留原来效果;
上边线条:当图片进行水平拉伸时,由此线条从图片上边垂直位移到图片下边所形成的区域都是可以进行横向拉伸的,此区域外则不进行拉伸,保留原来效果;
(简单地说左边和上边的线条就是决定你图片拉伸的区域)
右边线条:控制图片填充内容的垂直padding留白;
下边线条:控制图片填充内容的水平padding留白;
(这两点就是确定你的文字所成列的区域)
本人博客,android均为新手,闻过则喜,望前辈不吝指点。
- android Nine-Patch的使用(制作聊天界面必学)
- Android中制作Nine-Patch图片,并编写聊天界面
- Android制作和使用Nine-Patch图片
- Android 9-patch图片制作流程(nine-patch)
- Nine-patch图片的制作
- 第三章 制作Nine-Patch图片与编写精美聊天界面
- Android下的Nine-Patch图片制作总结
- Android Studio中如何制作和使用.9.png(Nine Patch)图片
- Android中Nine-Patch(.9)图片介绍与制作
- Android中Nine-Patch(.9)图片介绍与制作
- 【Android】47、制作Nine-Patch 图片
- 制作Nine-Patch图片
- 制作Nine-Patch图片
- 制作 Nine-Patch 图片
- 制作Nine-Patch图片
- Android Studio中使用.9(Nine Patch)图片
- Android Studio中使用.9(Nine Patch)图片
- Android Nine Patch图片的用法
- listview的简单使用(Baseadapter)
- 已经搬家到新博客 jjyy.guru
- storm是如何保证at least once语义的
- JDK安装与环境变量配置
- CVPR 2014 papers
- android Nine-Patch的使用(制作聊天界面必学)
- C#中param关键字
- eclipse中SVN分支合并到主干
- Java-Stack
- HOWTO - Install Nginx + uWSGI + Django
- Virtual、虚函数、指针、 引用、基类、父类
- 常用的一些vi命令
- Linux的shell脚本基础
- hadoop版本与支持的hbase版本对照表