iOS APP上架流程
来源:互联网 发布:零基础学qt4编程 编辑:程序博客网 时间:2024/04/29 19:11
1.打开苹果开发者中心:https://developer.apple.com 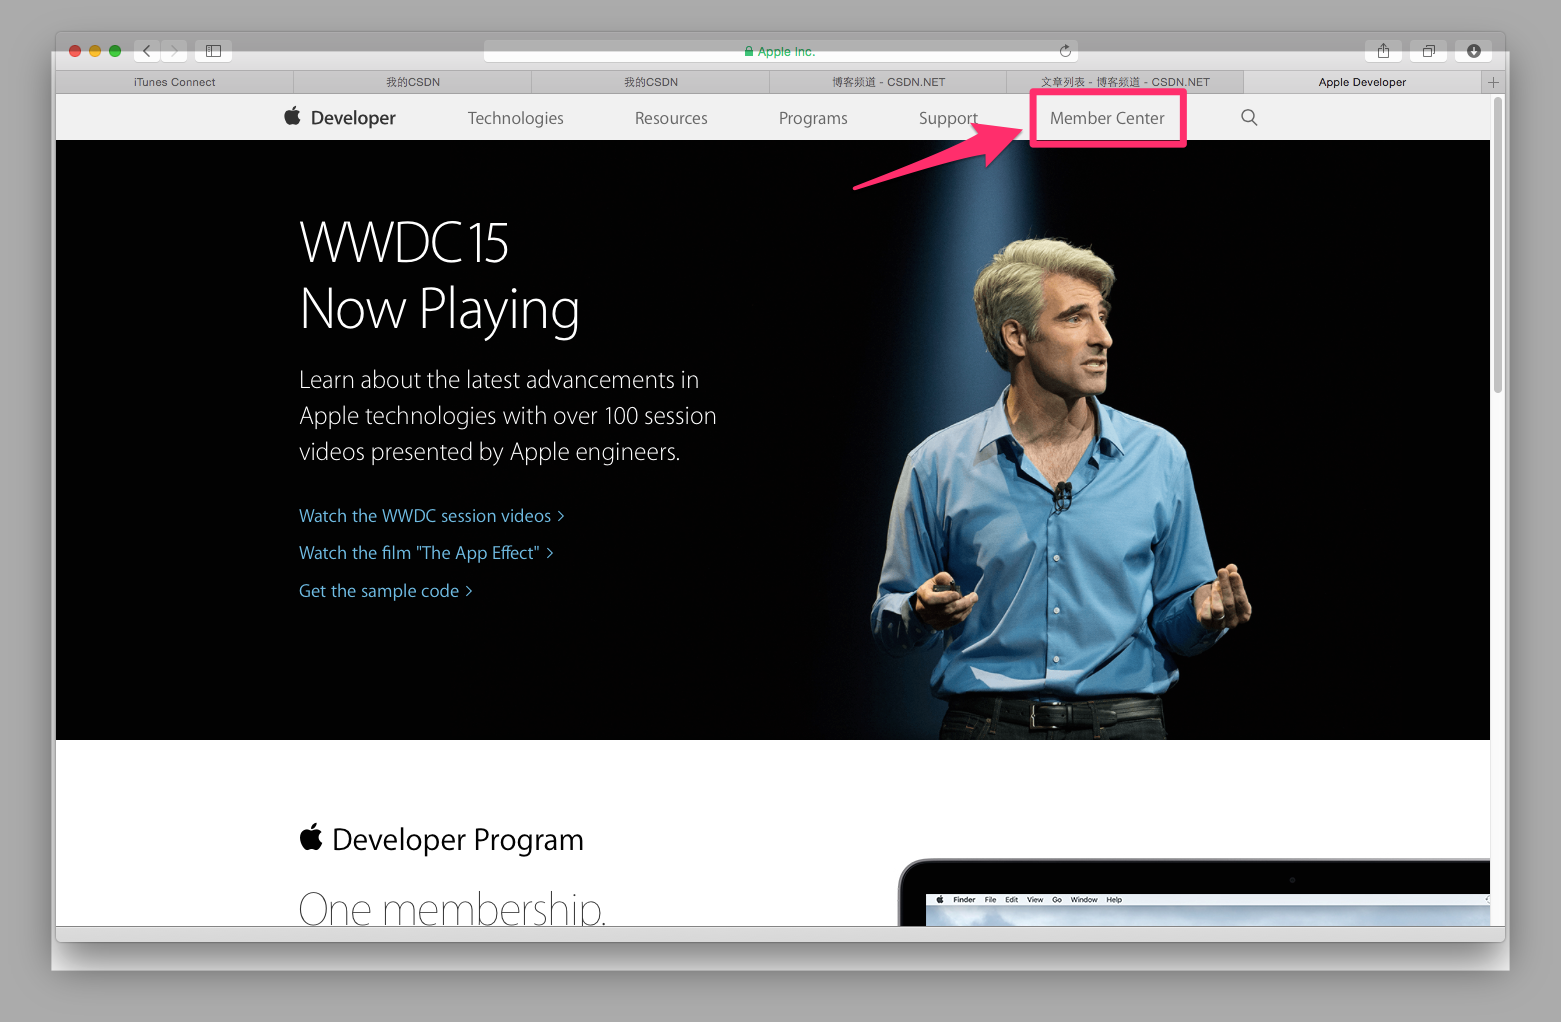 打开后点击:Member Center 如果你的电脑没有保存密码,则会提示你输入开发者帐号和密码,因为我的电脑已经保存了,所以直接进入。
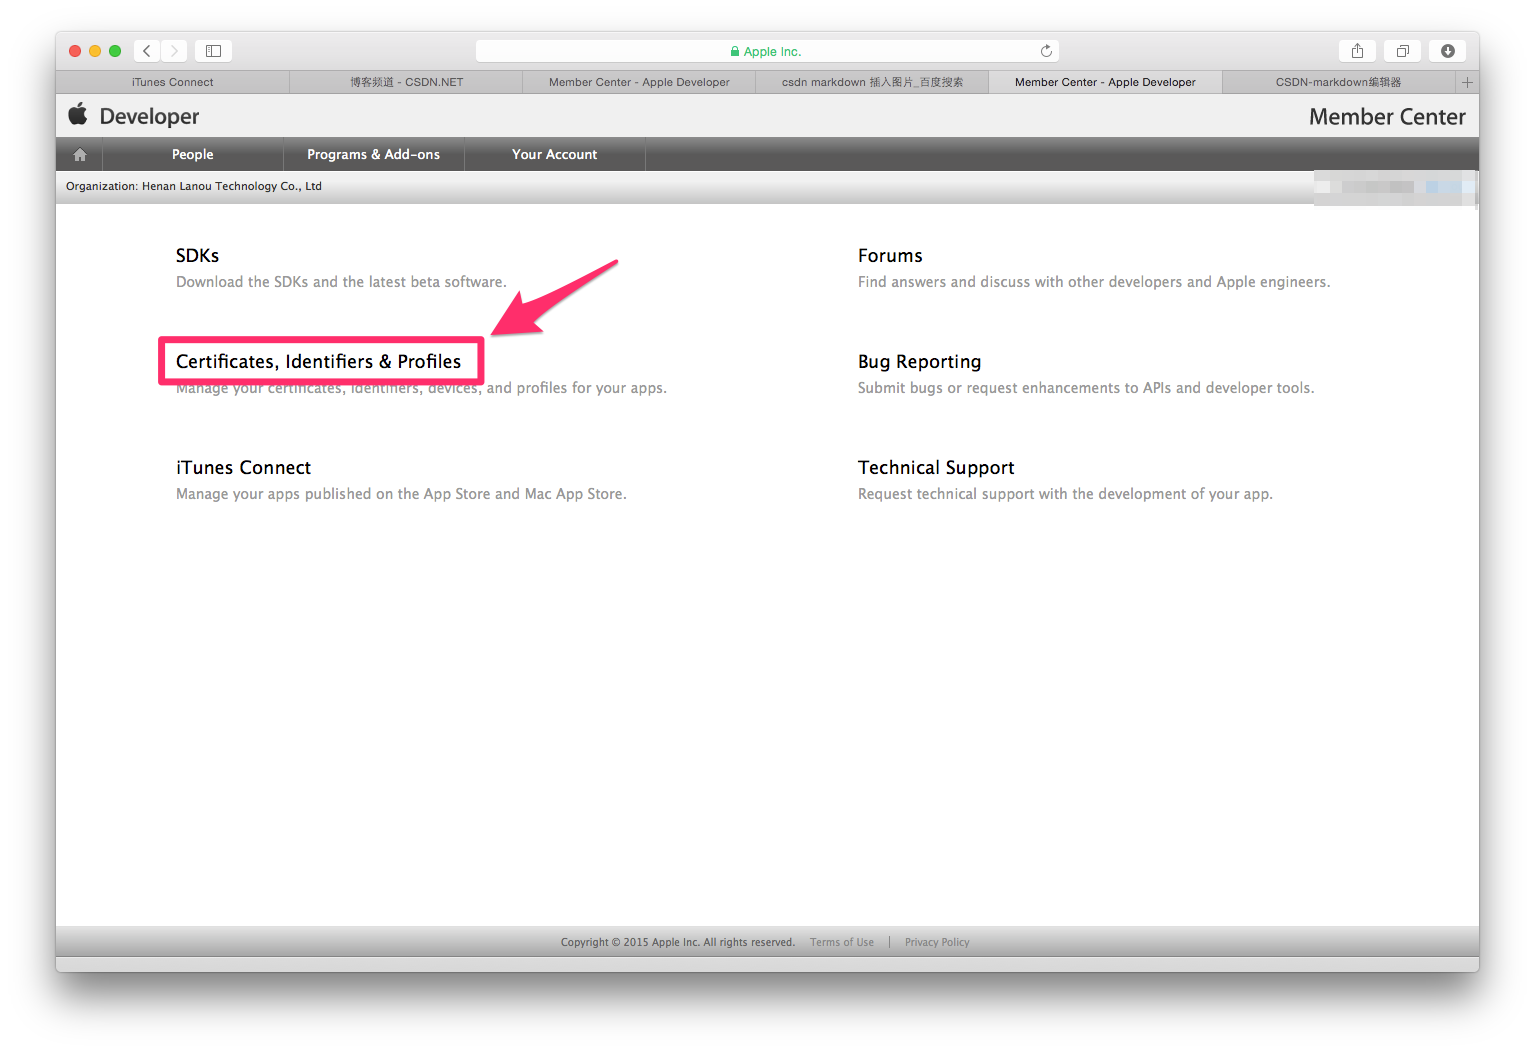
2.点击:Certificates, Identifiers & Profiles
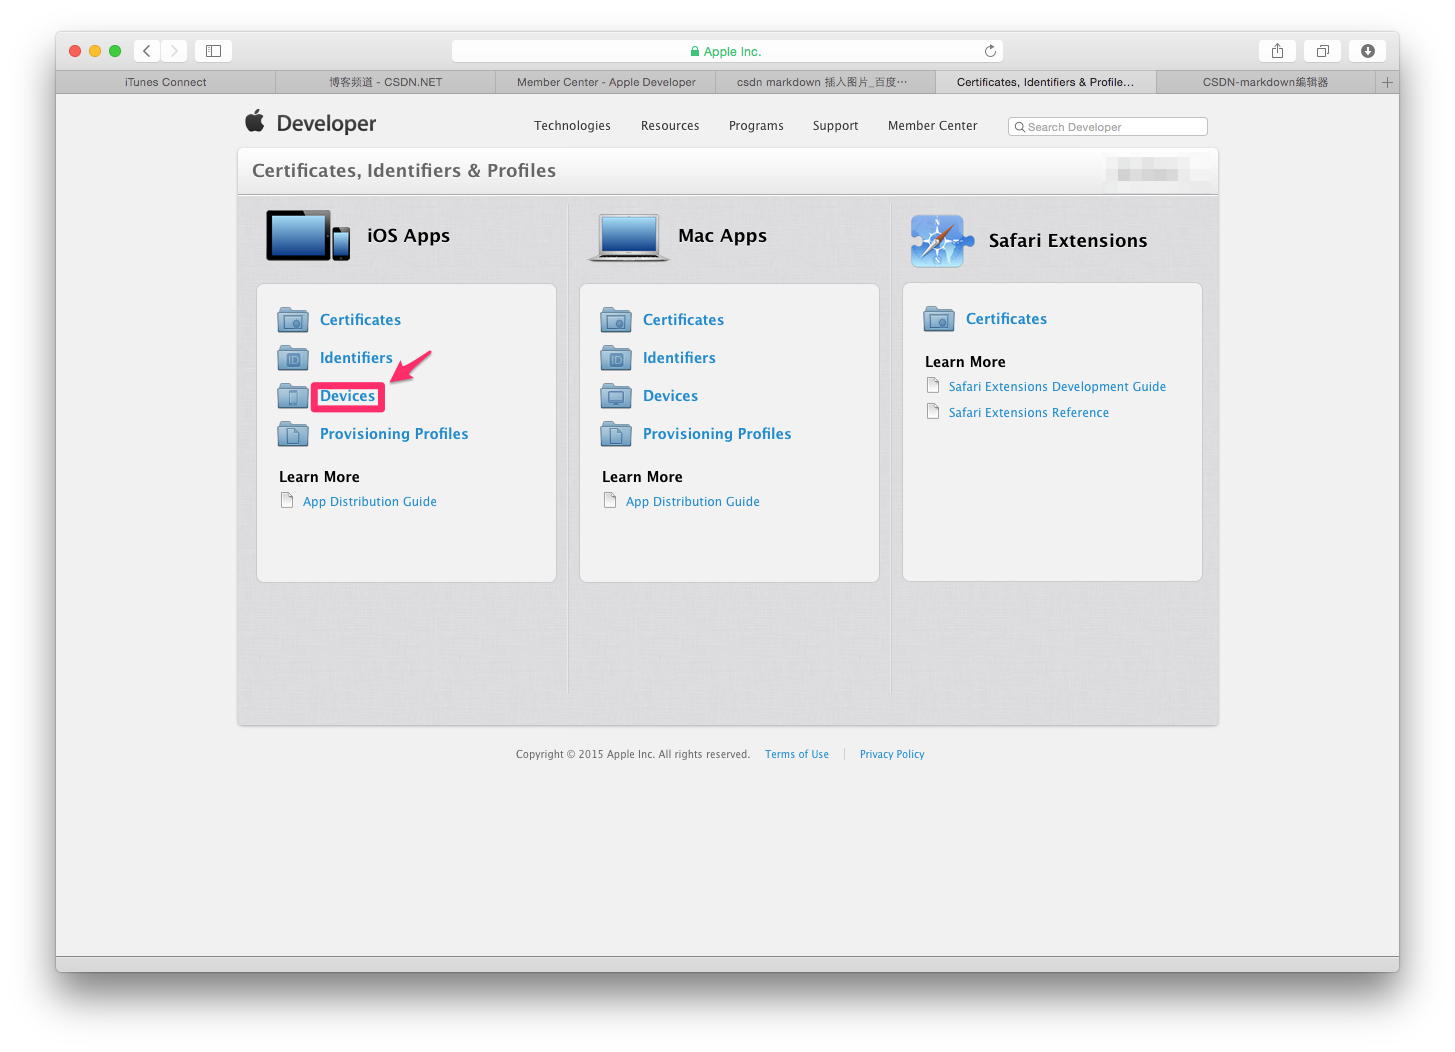
3.点击Devices
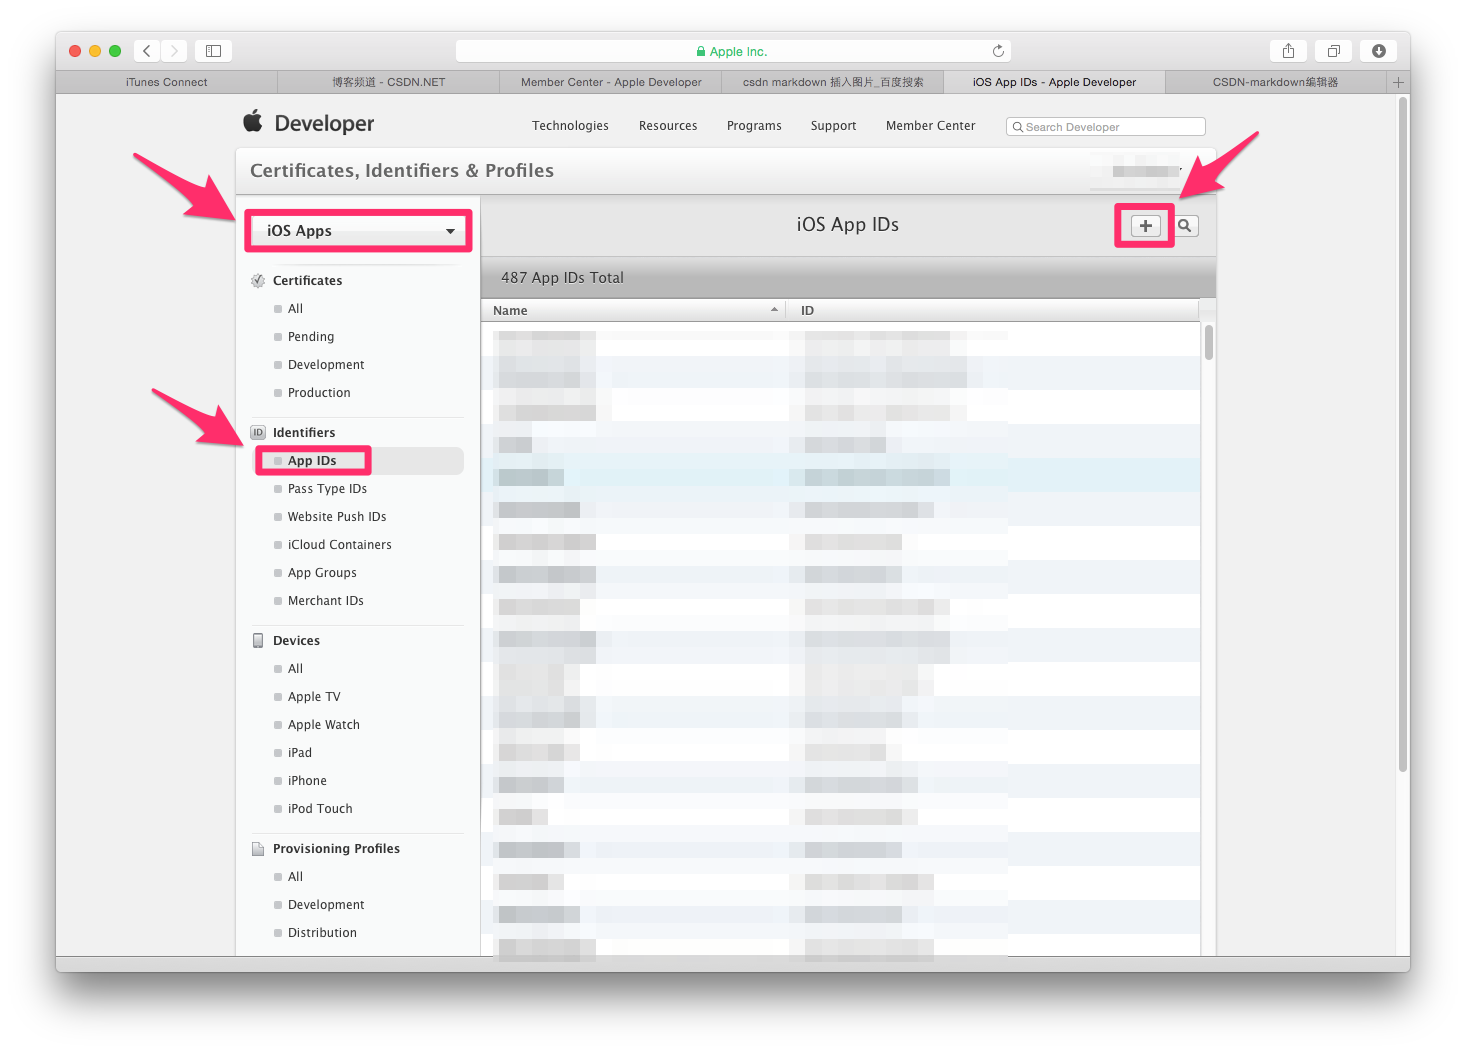
一.创建App IDs和Boudle ID 4.点击App IDs,会进入如下界面,点击右上角的 + 号
5.填写App IDs和Boudle ID
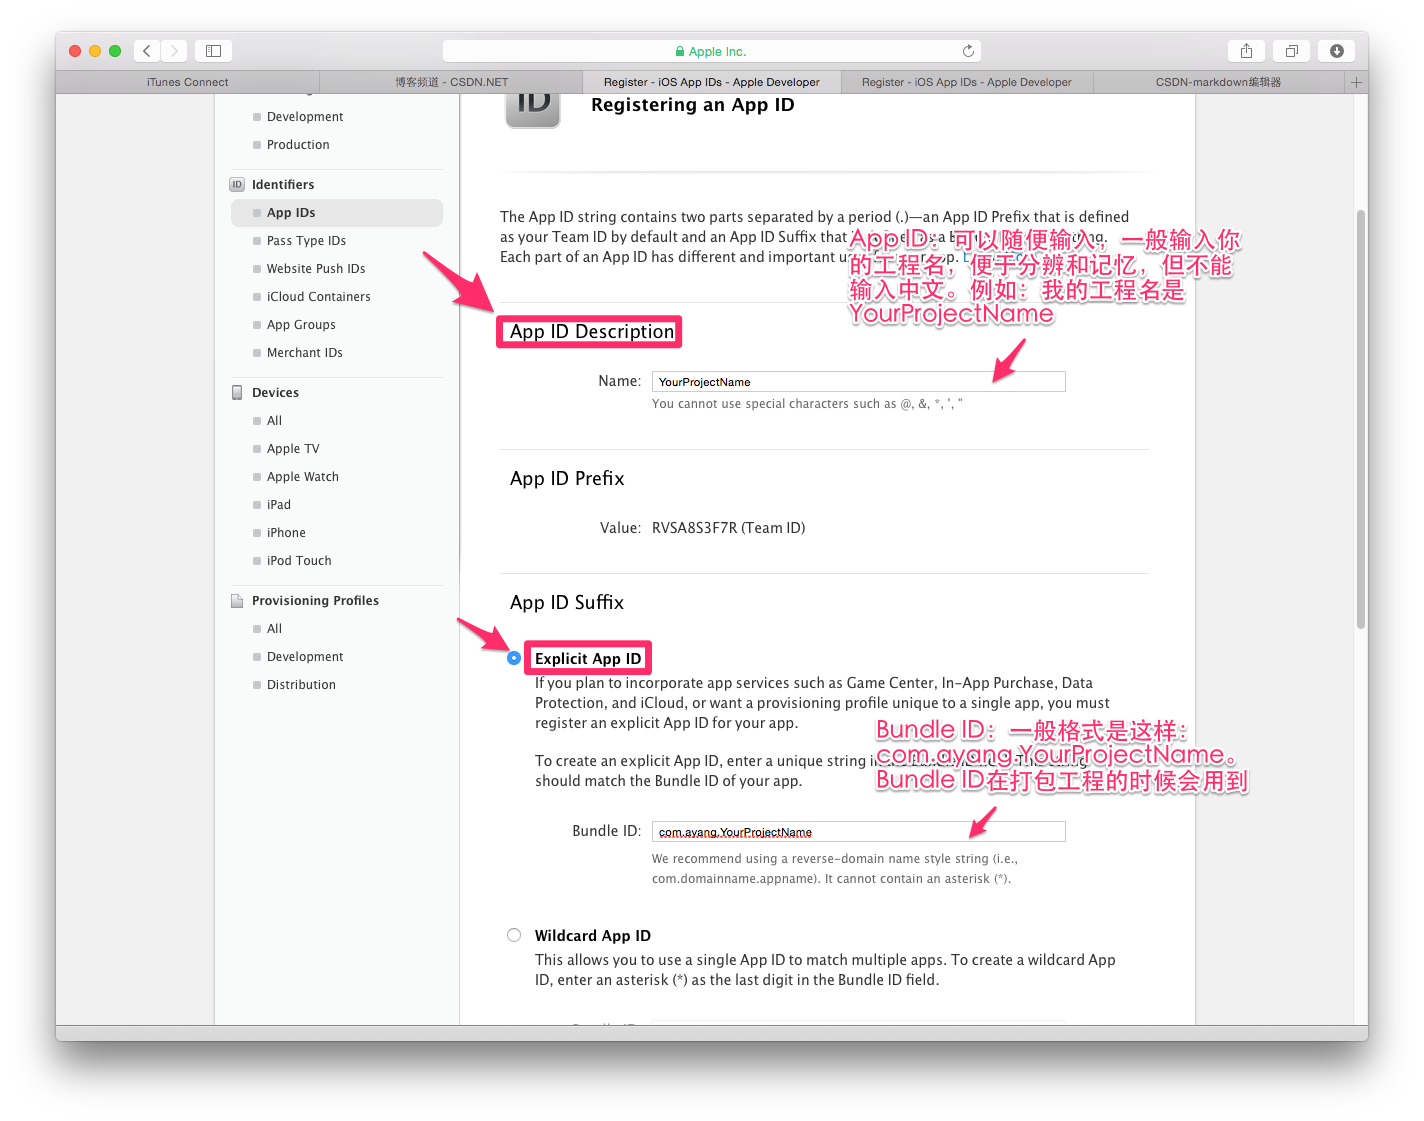
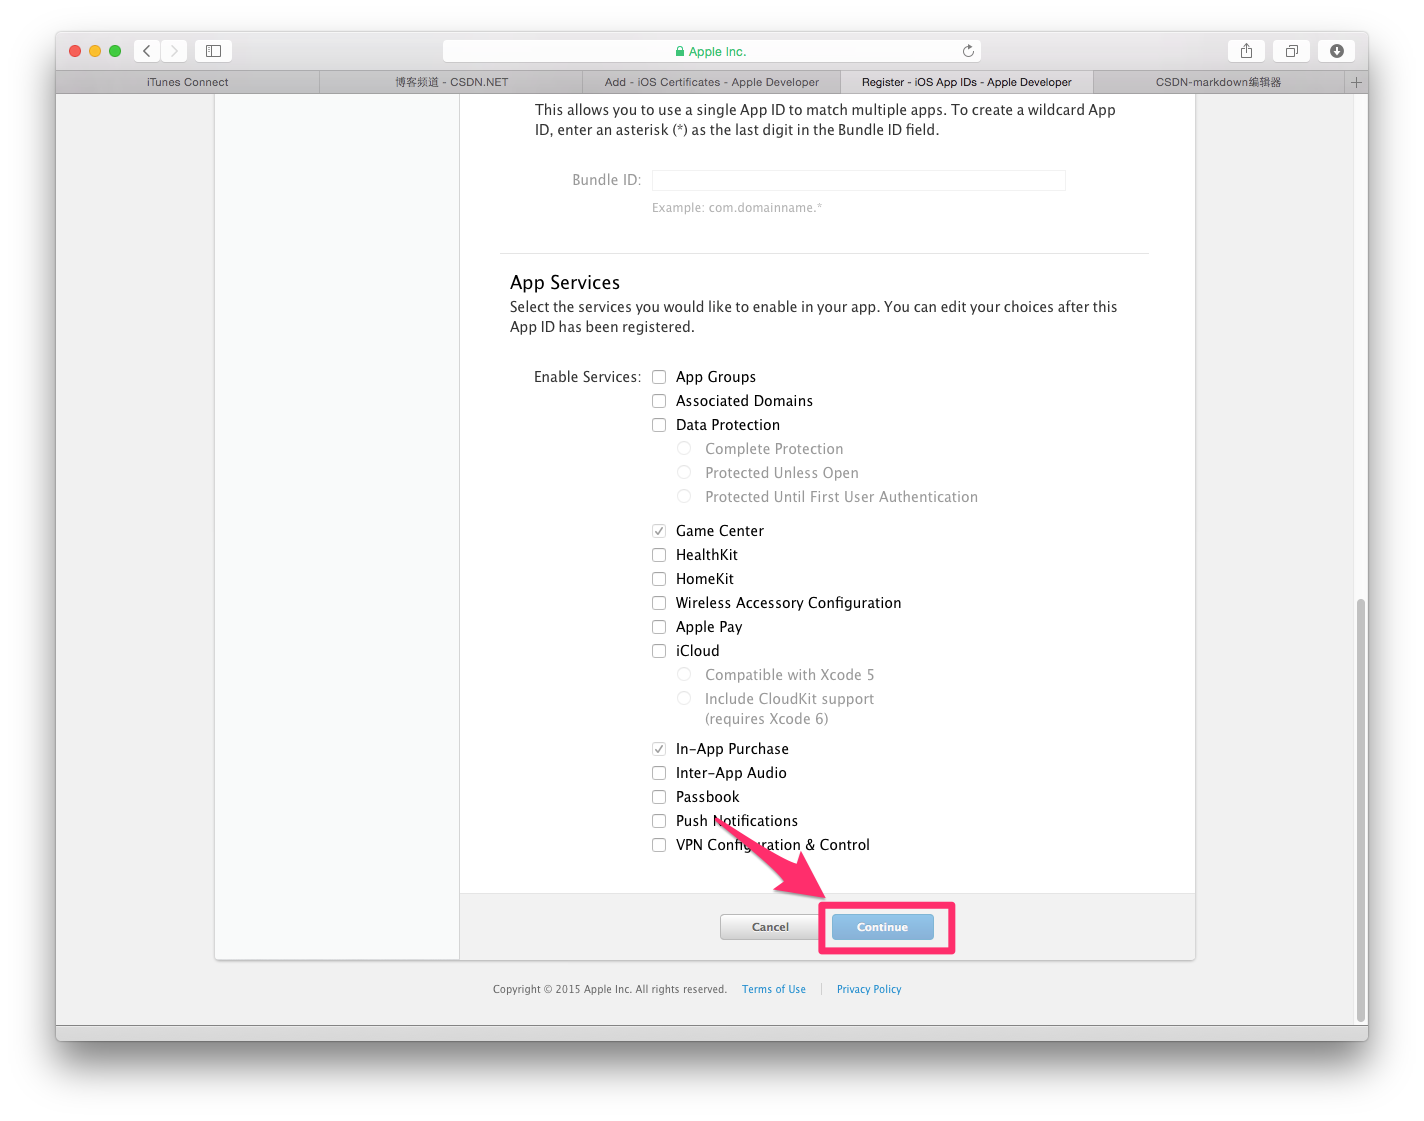
6.点击continue
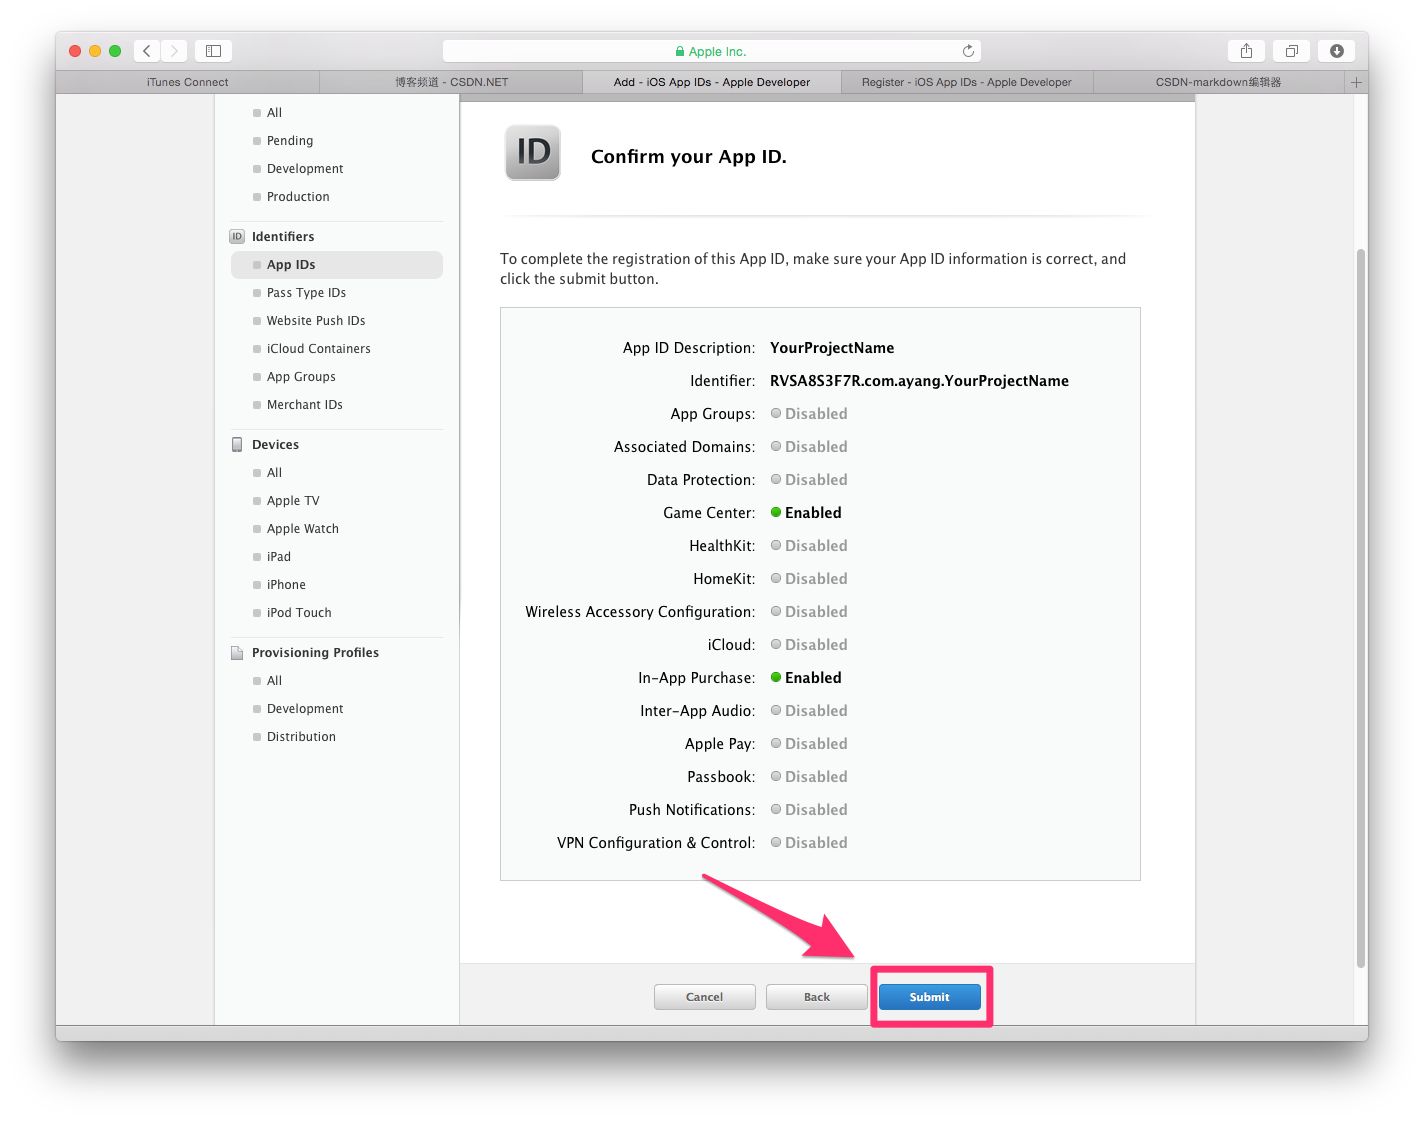
7.点击Submit
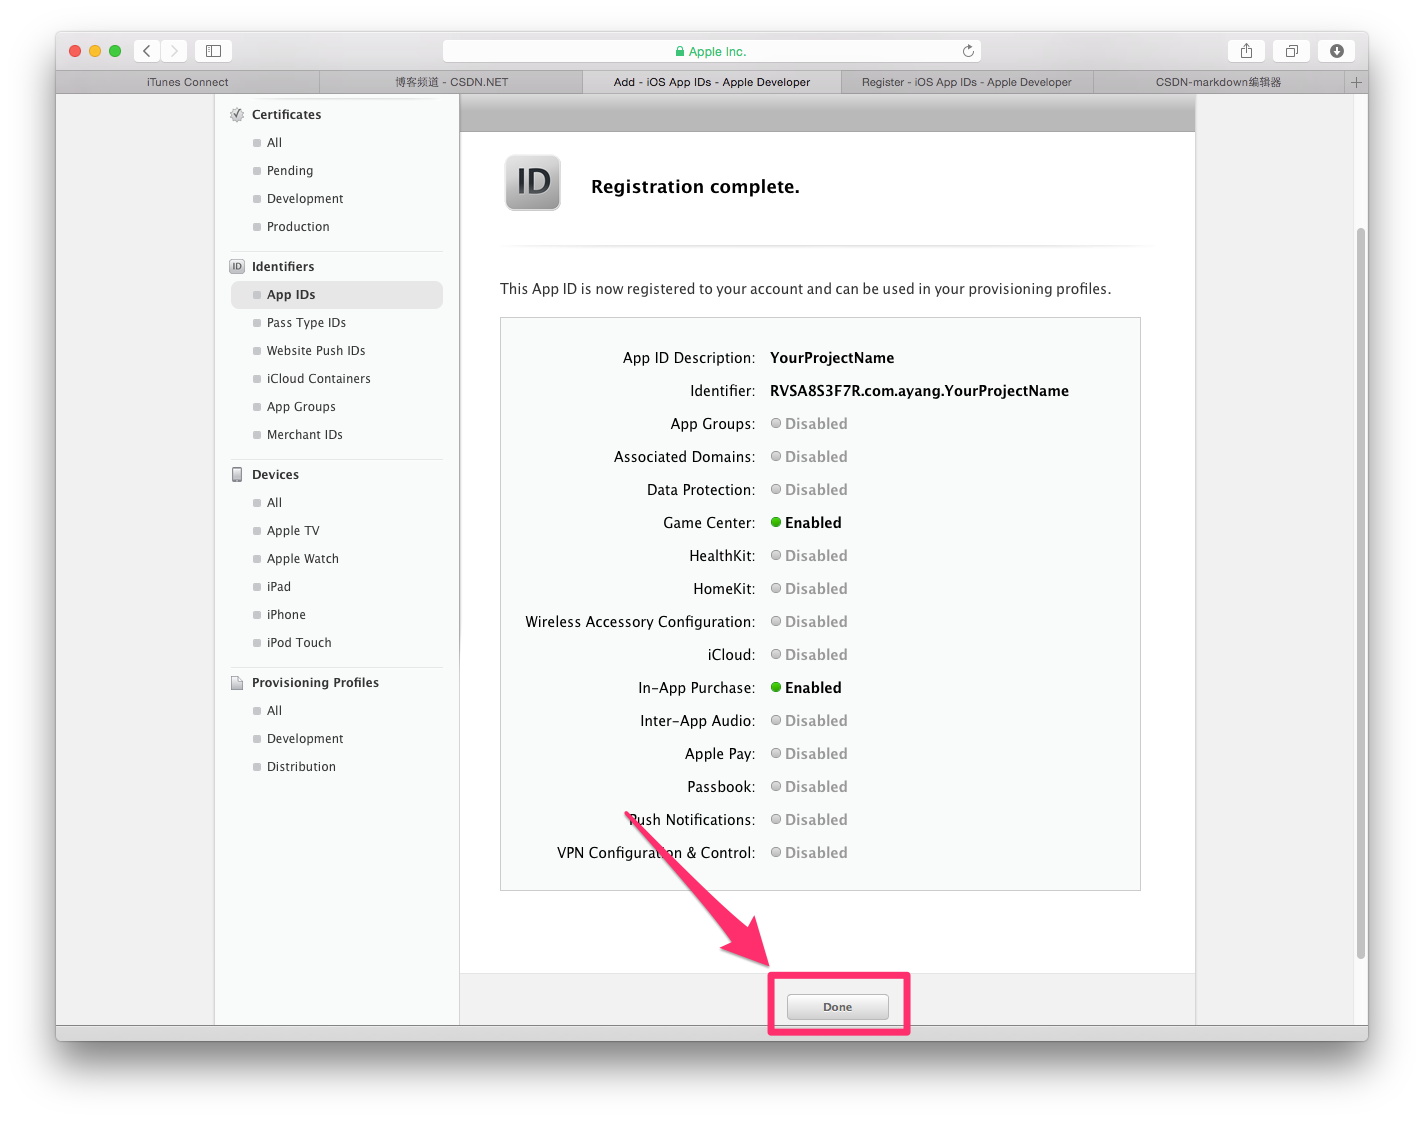
8.点击Done
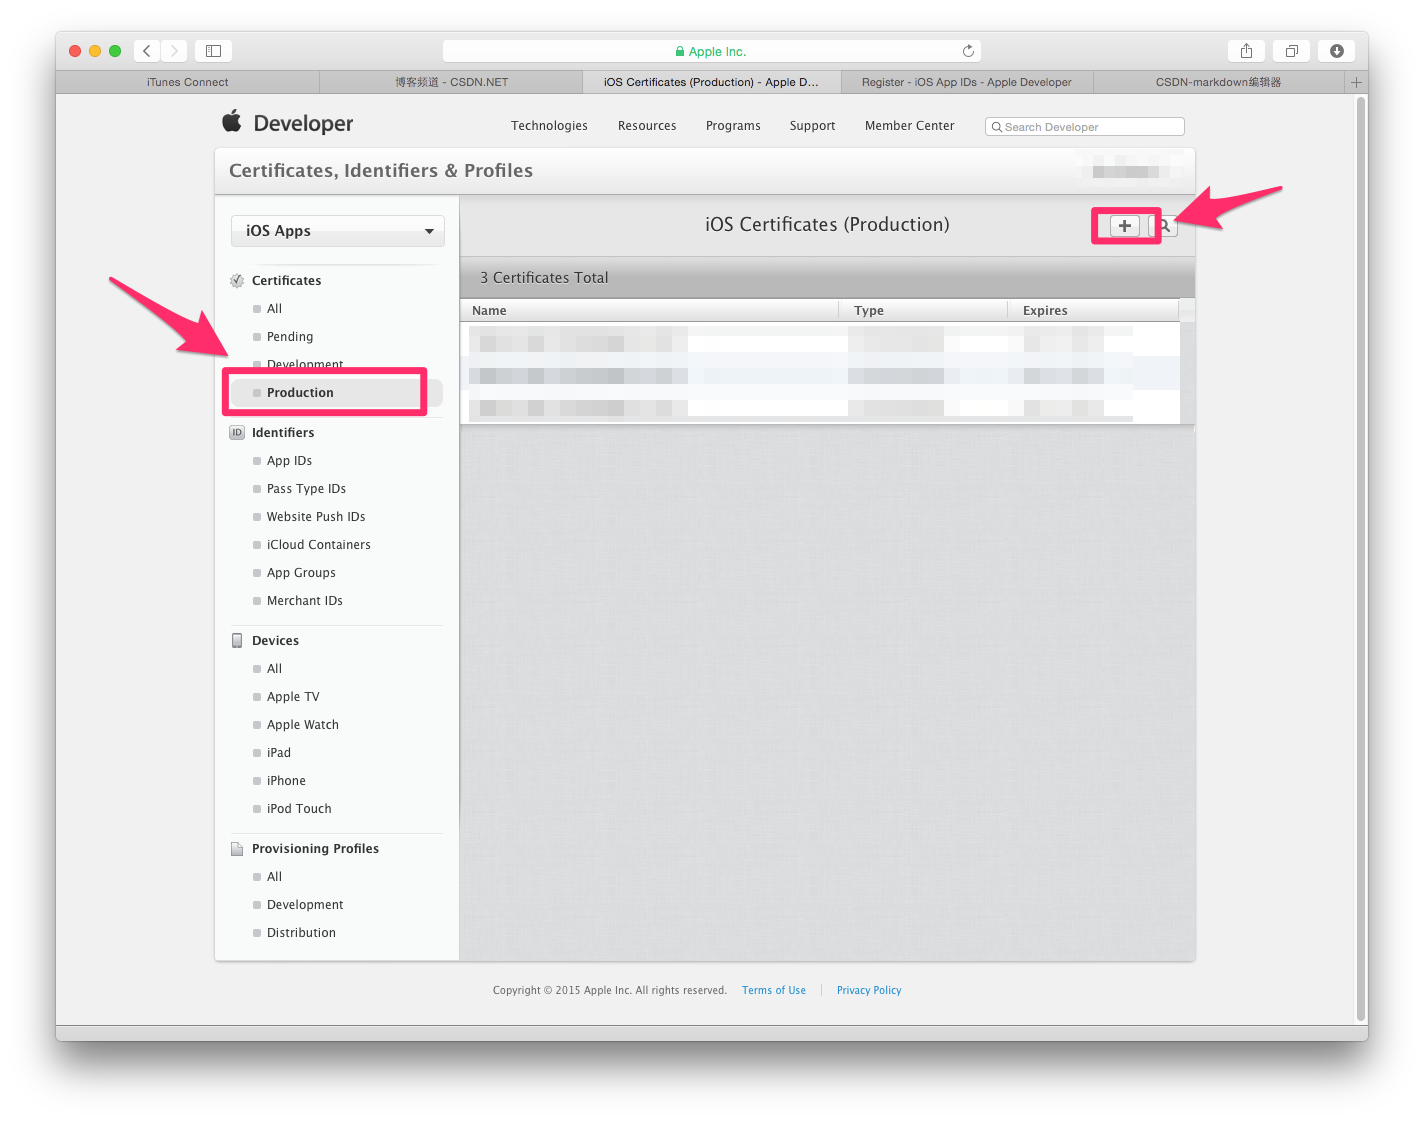
二.创建发布证书(若已创建过发布证书,现在用的是p12文件,可直接跳到第21步) 9.点击Production后,点击 + 号
10.点击App Store and Ad Hoc
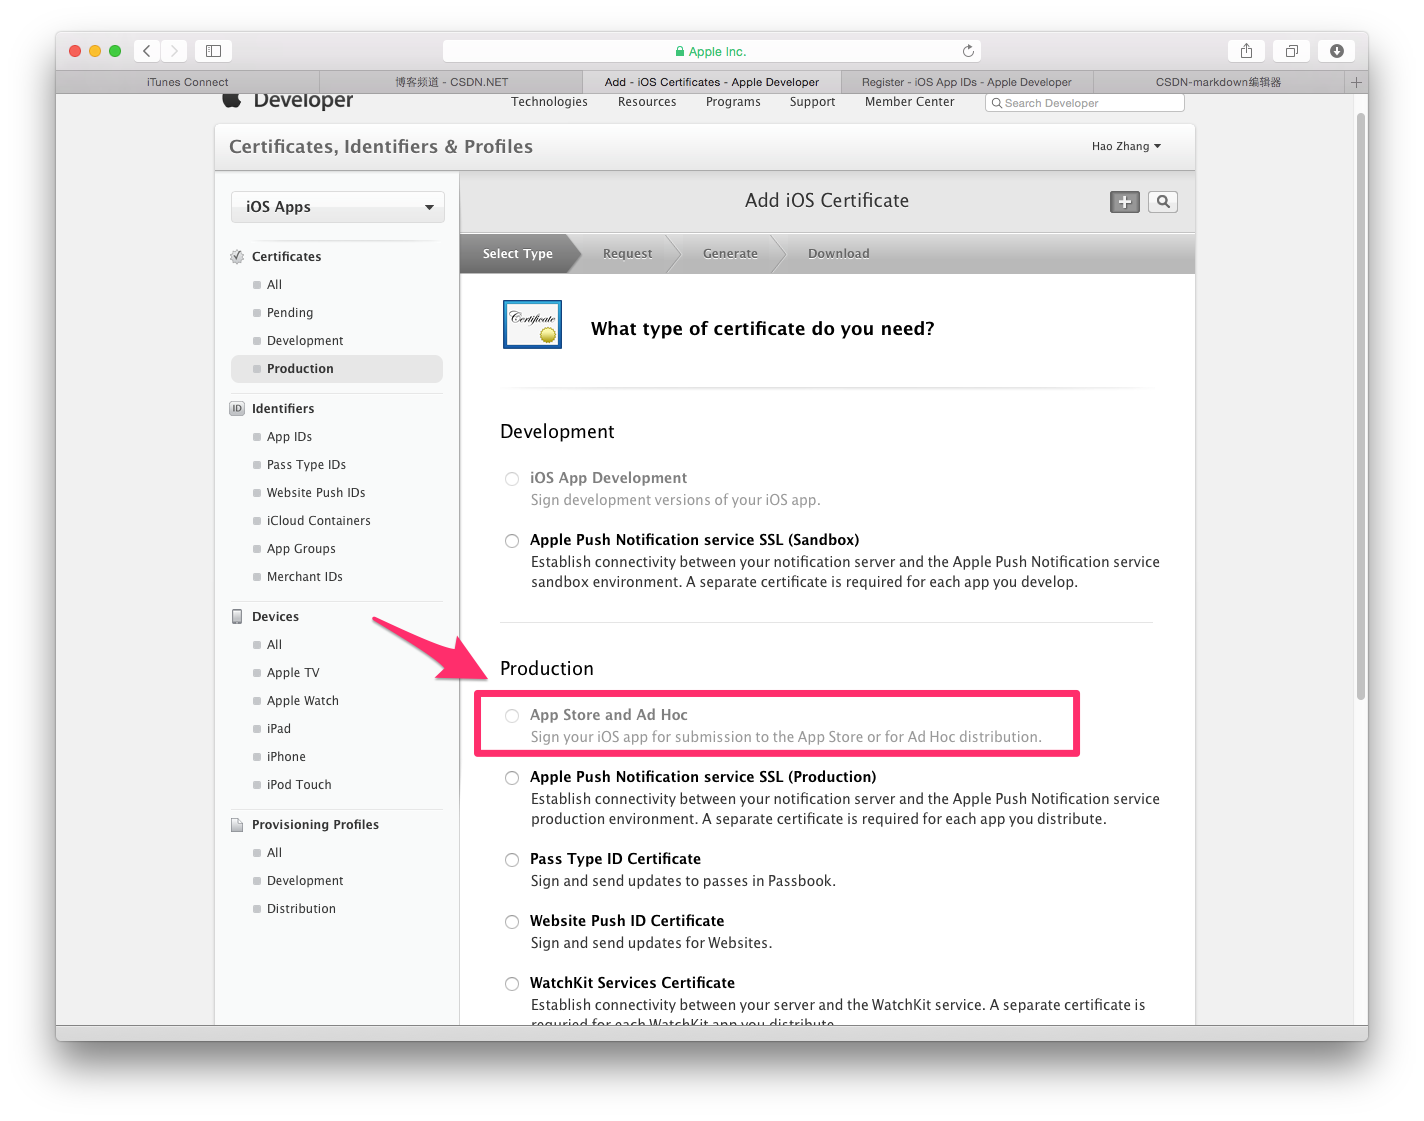
11.点击Continue

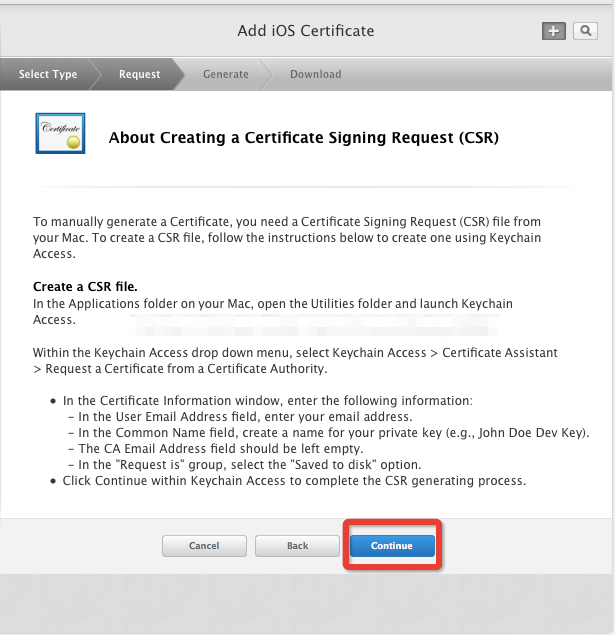
12.点击Continue
创建本地证书 13.此时返回到桌面,在点开LaunchPad,在其他中找到钥匙串访问,切记不要关闭浏览器
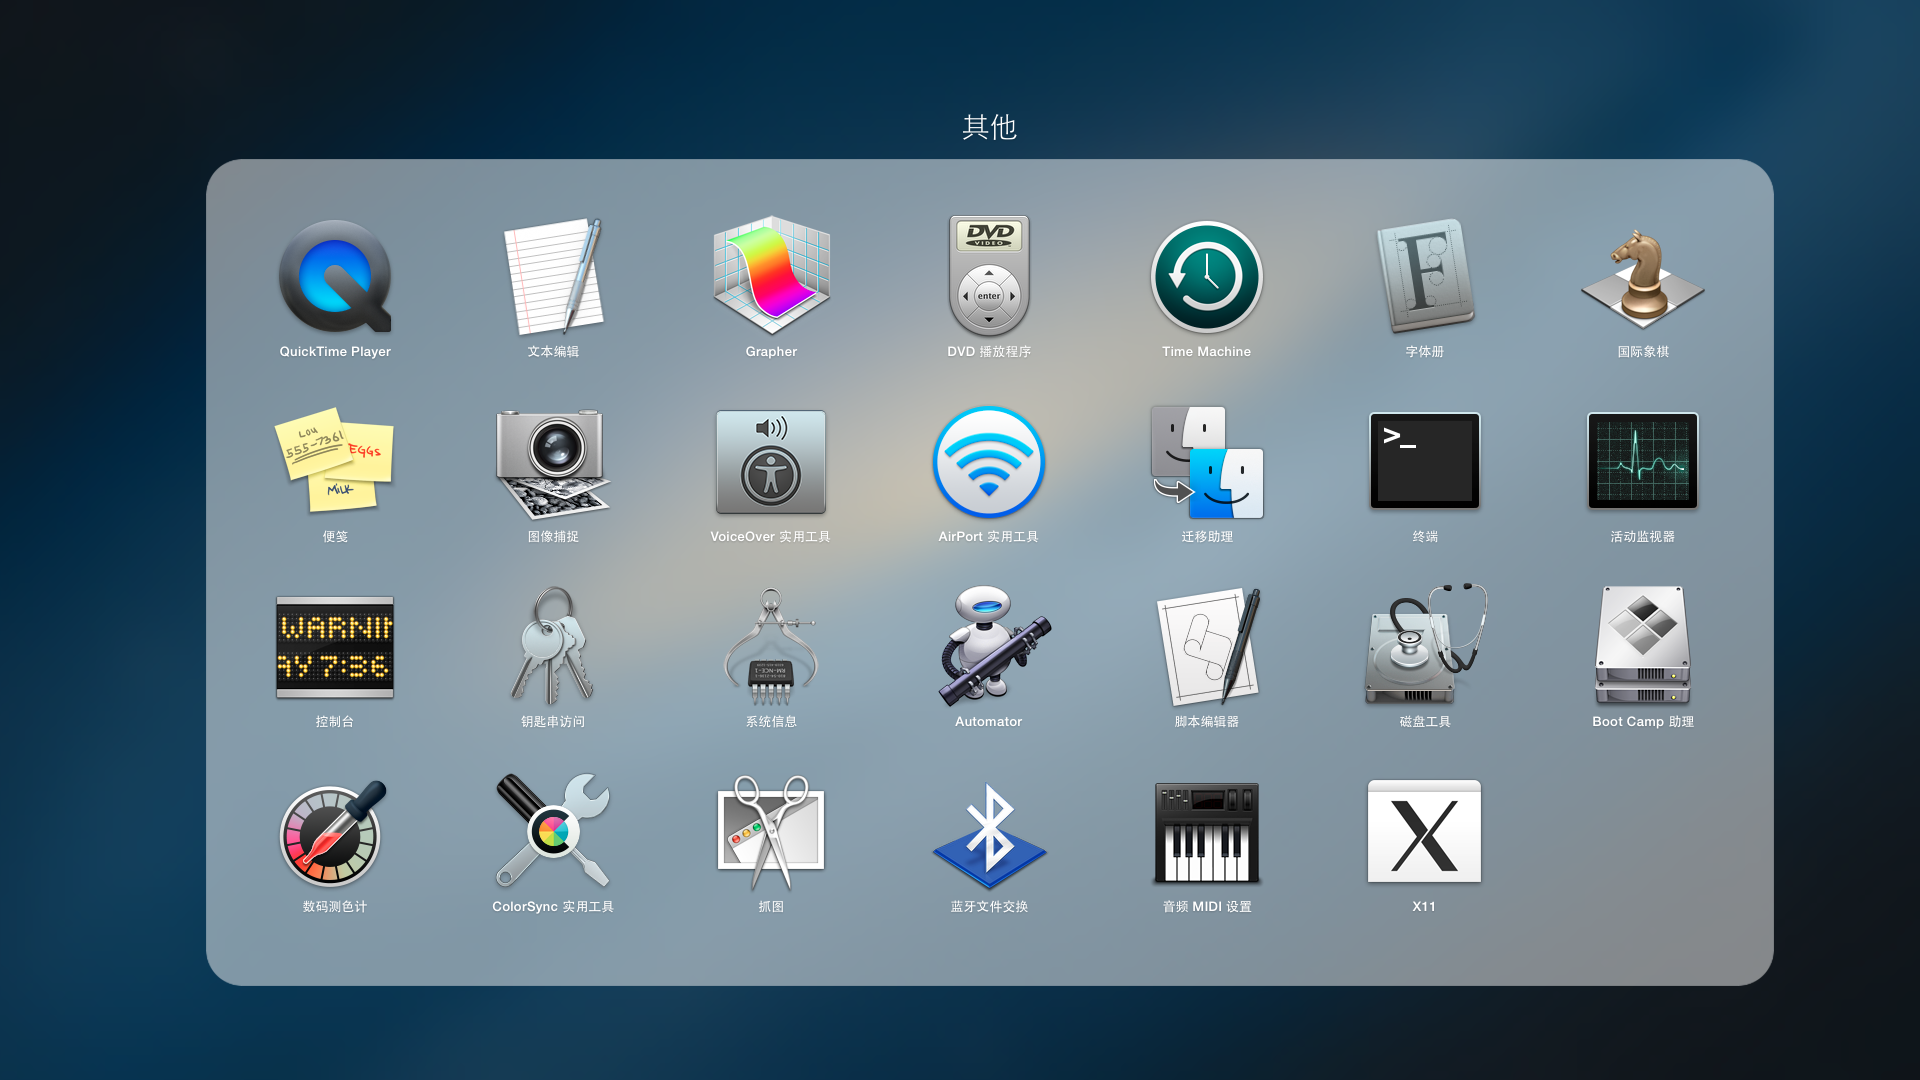
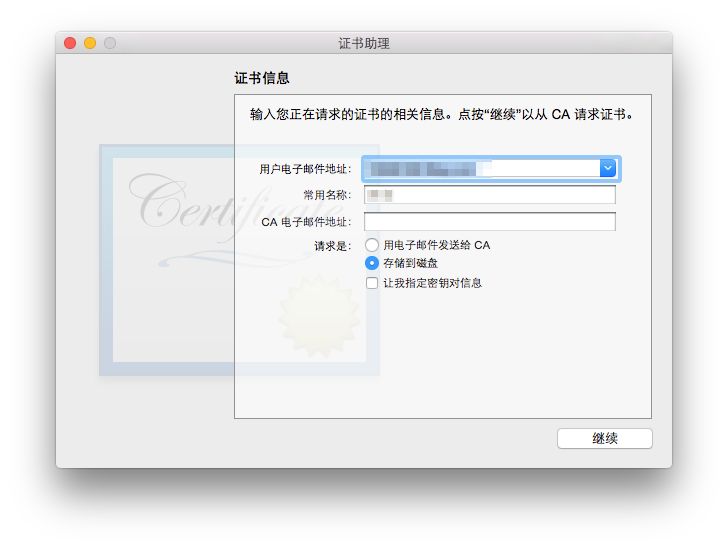
14.打开钥匙串访问,点击电脑左上角的钥匙串访问–证书助理–从证书颁发机构请求证书

15.会出现如下界面,选择存储到磁盘,点击继续
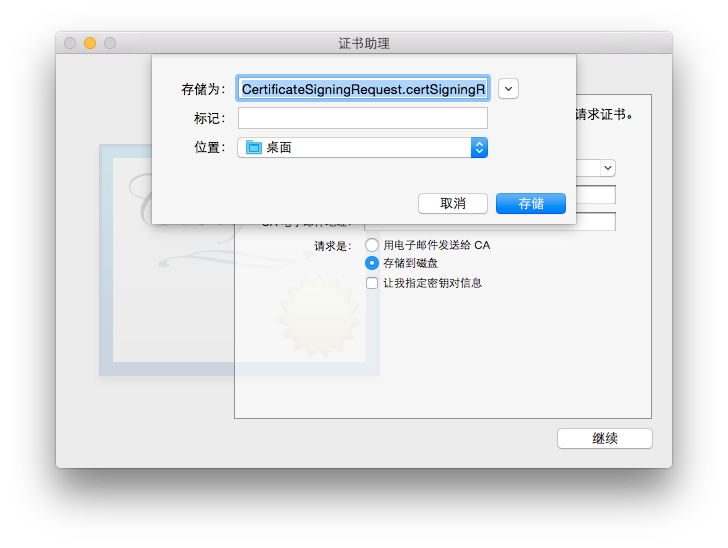
16.选择存储到桌面,存储
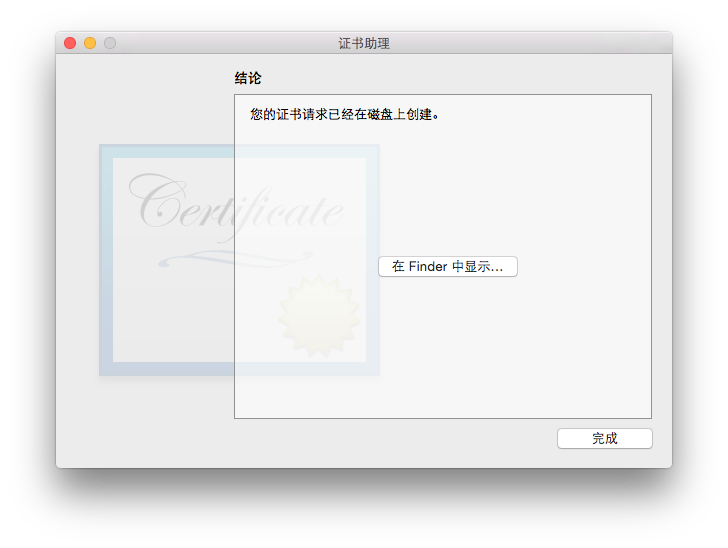
17.点击完成
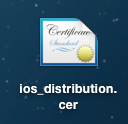
18.你会在桌面上看到下面的文件
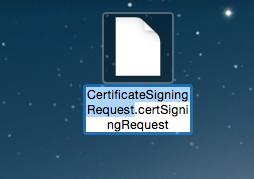
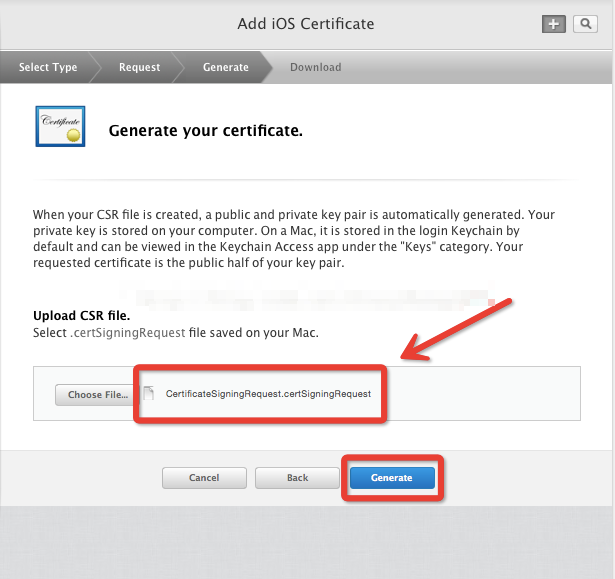
19.然后回到浏览器,点击choose File.. 选择创建好的:CertificateSigningRequest.certSigningRequest 文件,点击Generate
20.点击Download下载创建好的发布证书(cer后缀的文件),然后点击Done,你创建的发布证书就会存储在帐号中。
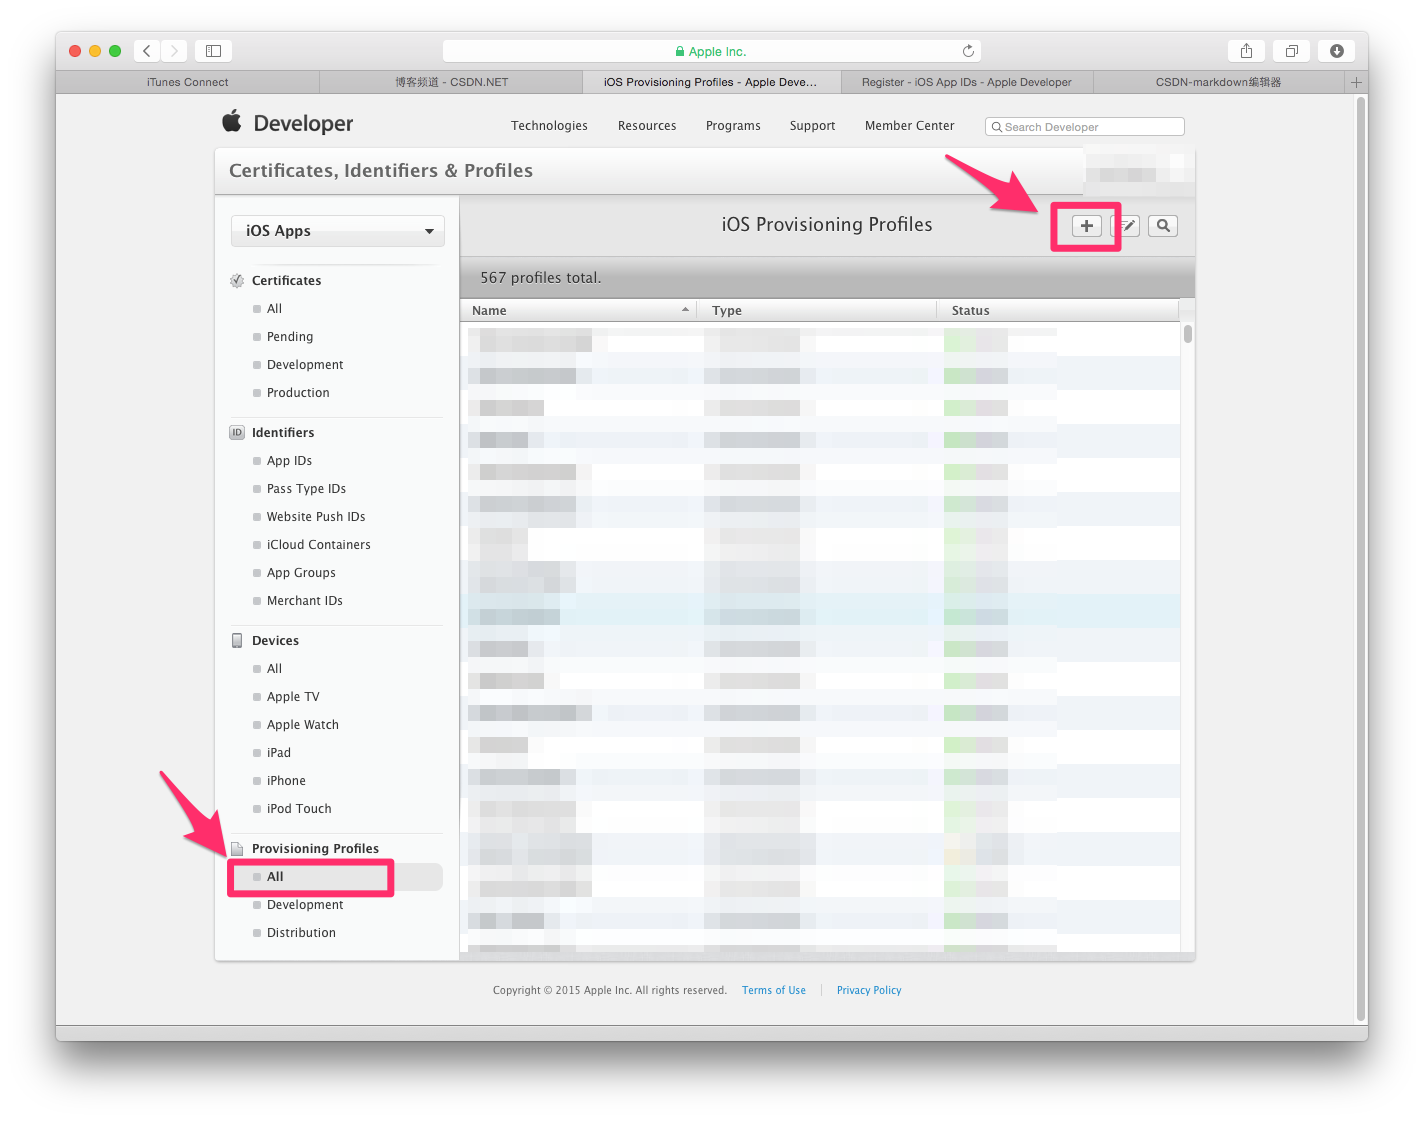
注:一般一个开发者帐号创建一个发布证书就够了,如果以后需要在其他电脑上上架App,只需要在钥匙串访问中创建p12文件,把p12文件安装到其他电脑上。这相当于给予了其他电脑发布App的权限。 创建PP文件 21.找到Provisioning Profiles ,点击All,然后点击右上角 + 号
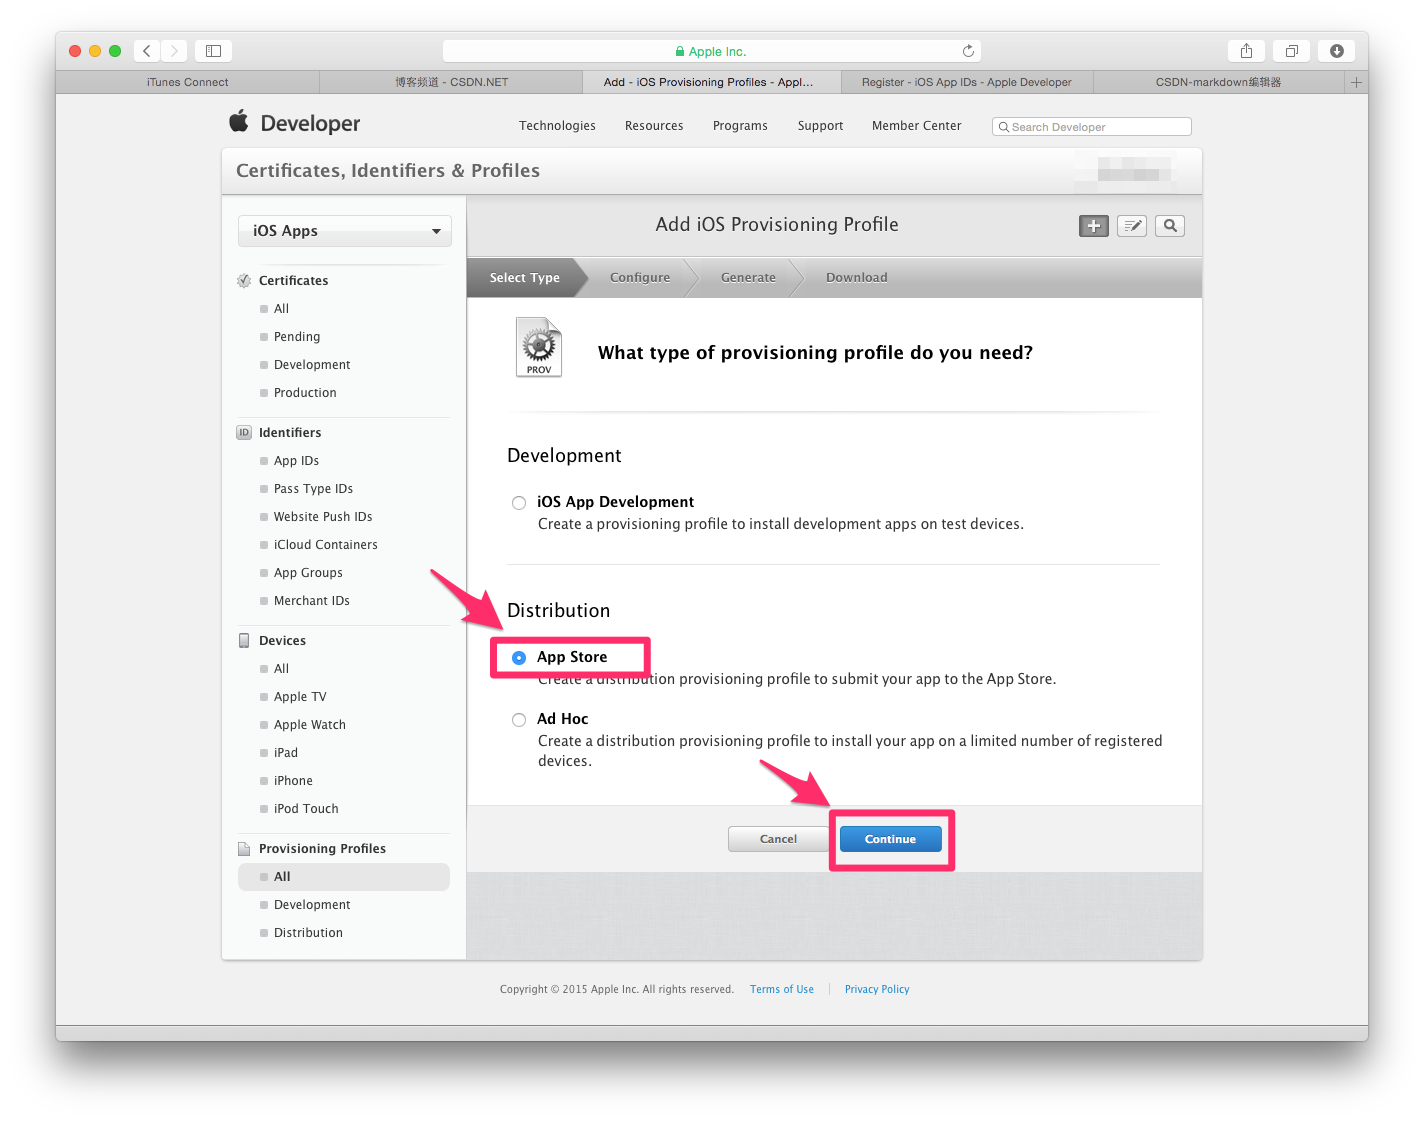
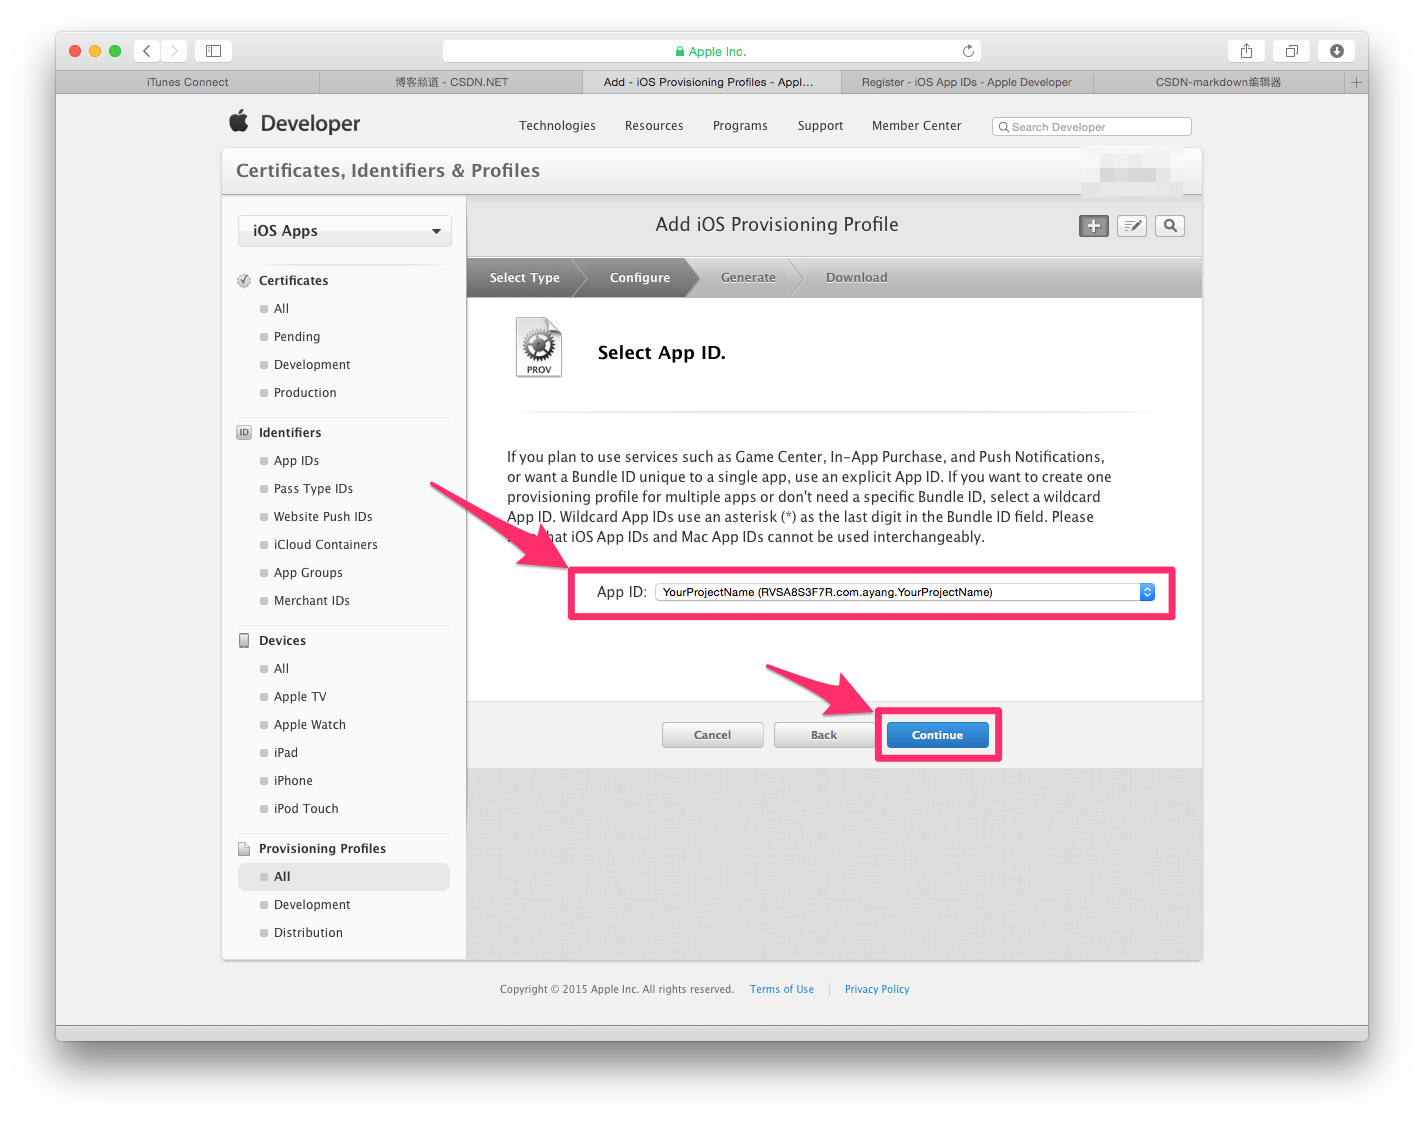
22.选择App Store,点击Continue
23.在App ID 这个选项栏里面找到你刚刚创建的:App IDs(Bundle ID) 类型的套装,点击Continue
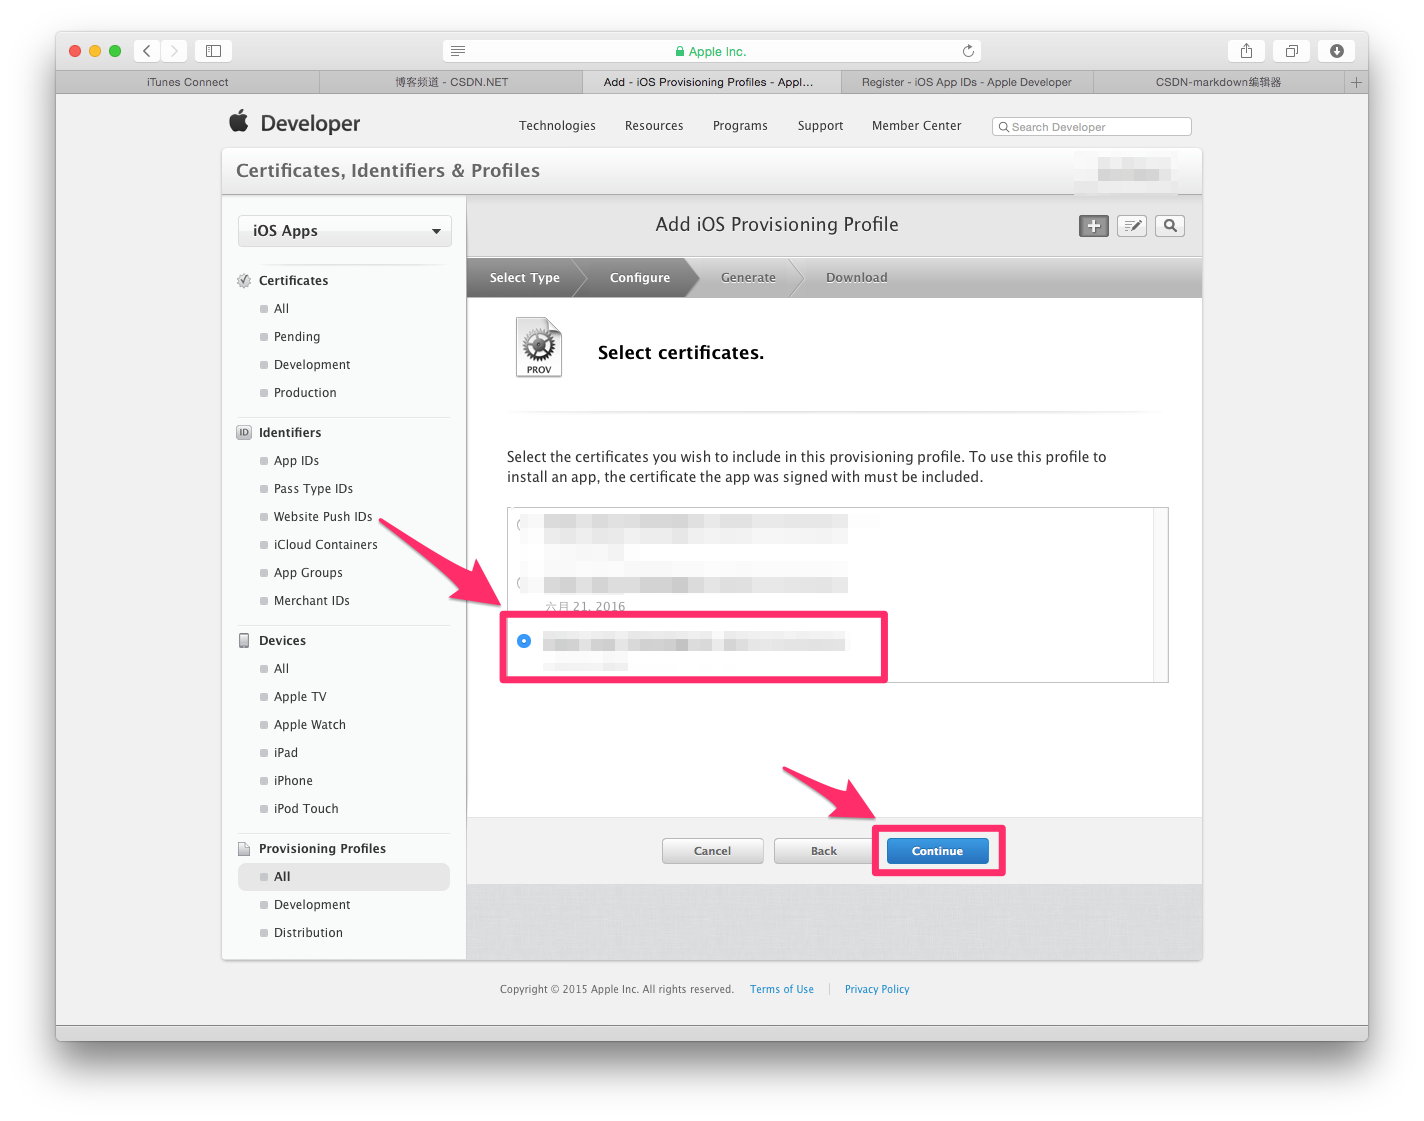
24.选择你刚创建的发布证书(或者生成p12文件的那个发布证书),点击Continue
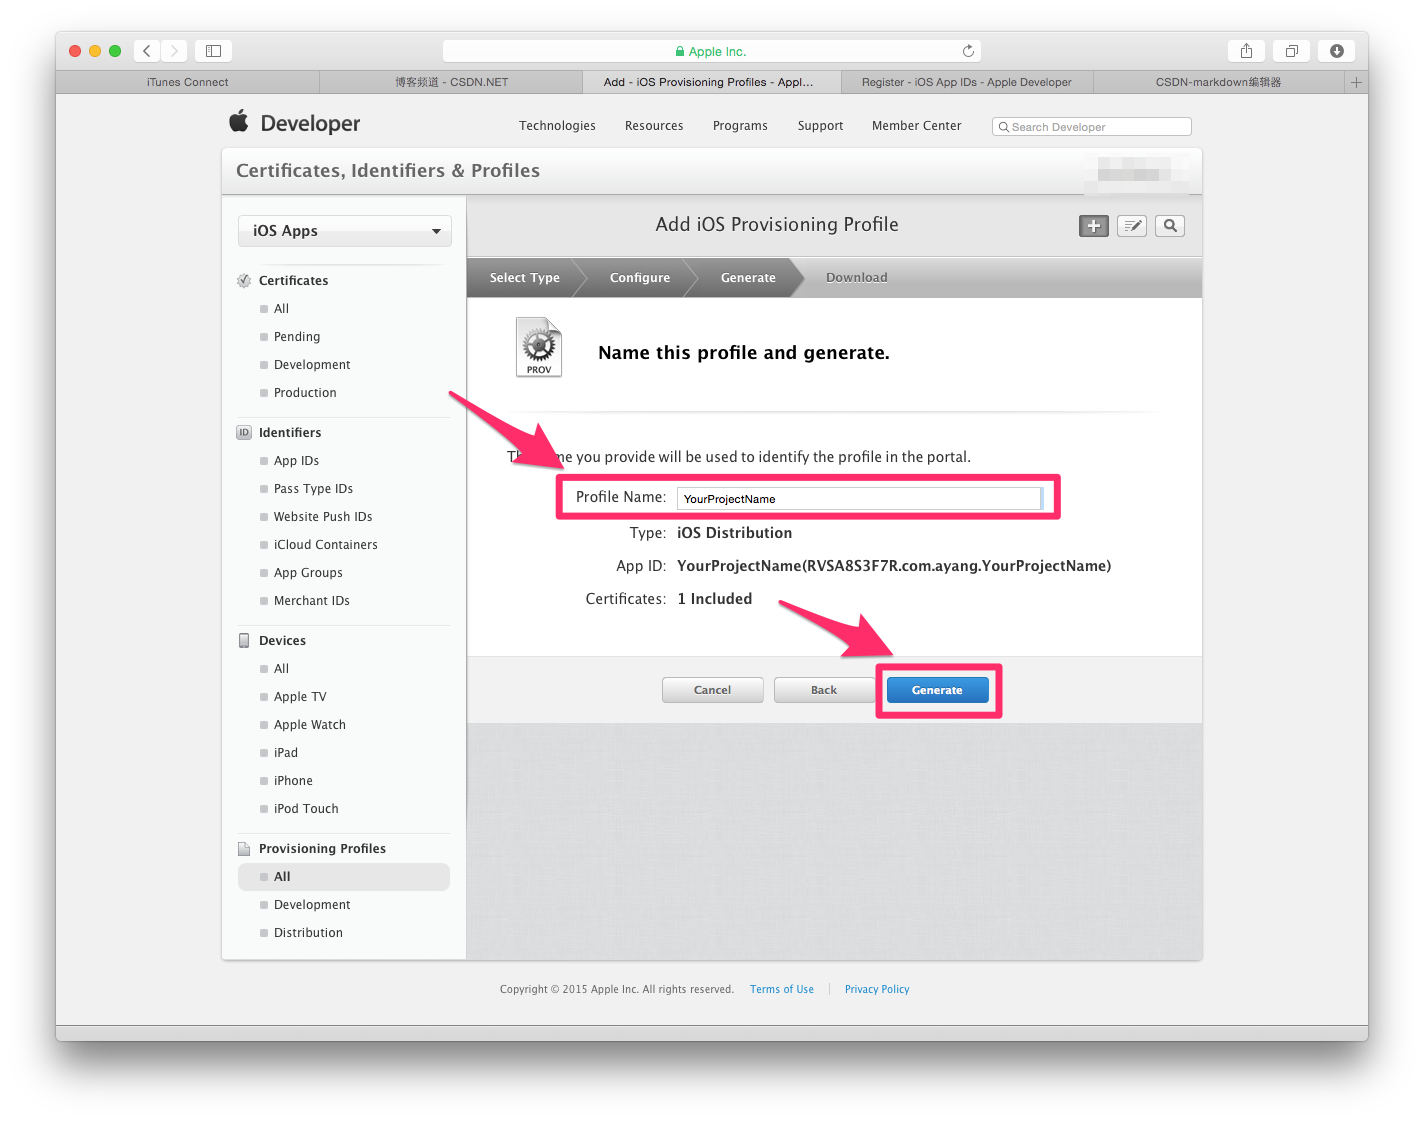
25.在Profile Name栏里输入一个名字(这个是PP文件的名字,可随便输入,在这里我用工程名字,便于分别),然后点击Generate
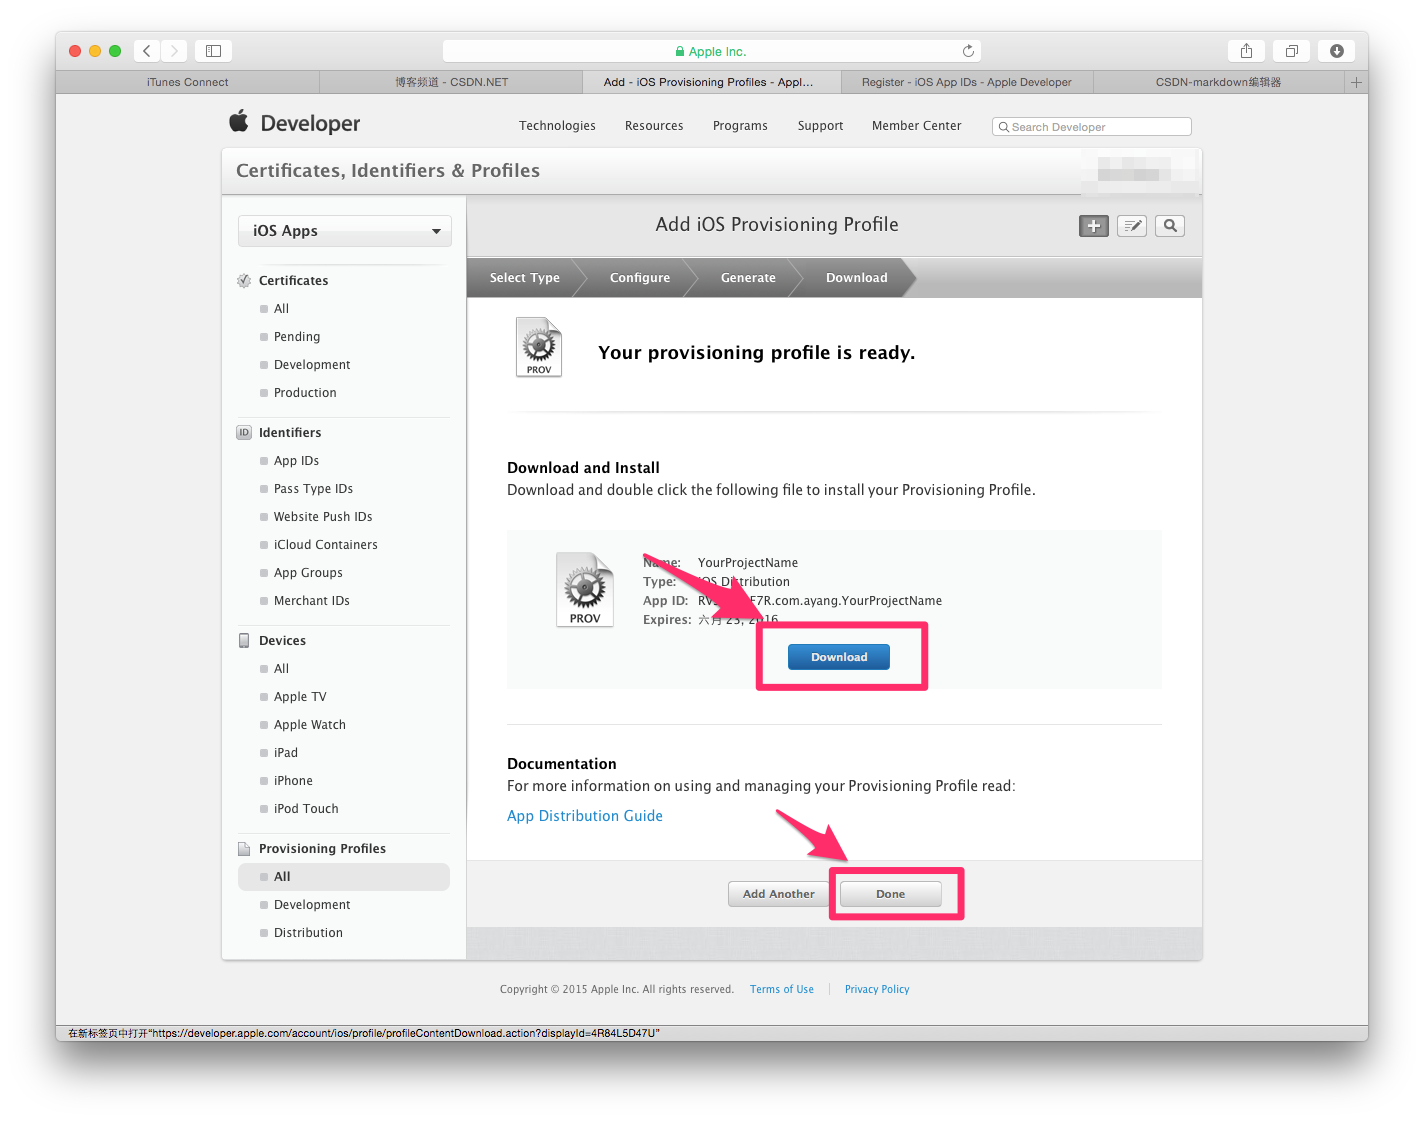
26.Download生成的PP文件,然后点击Done
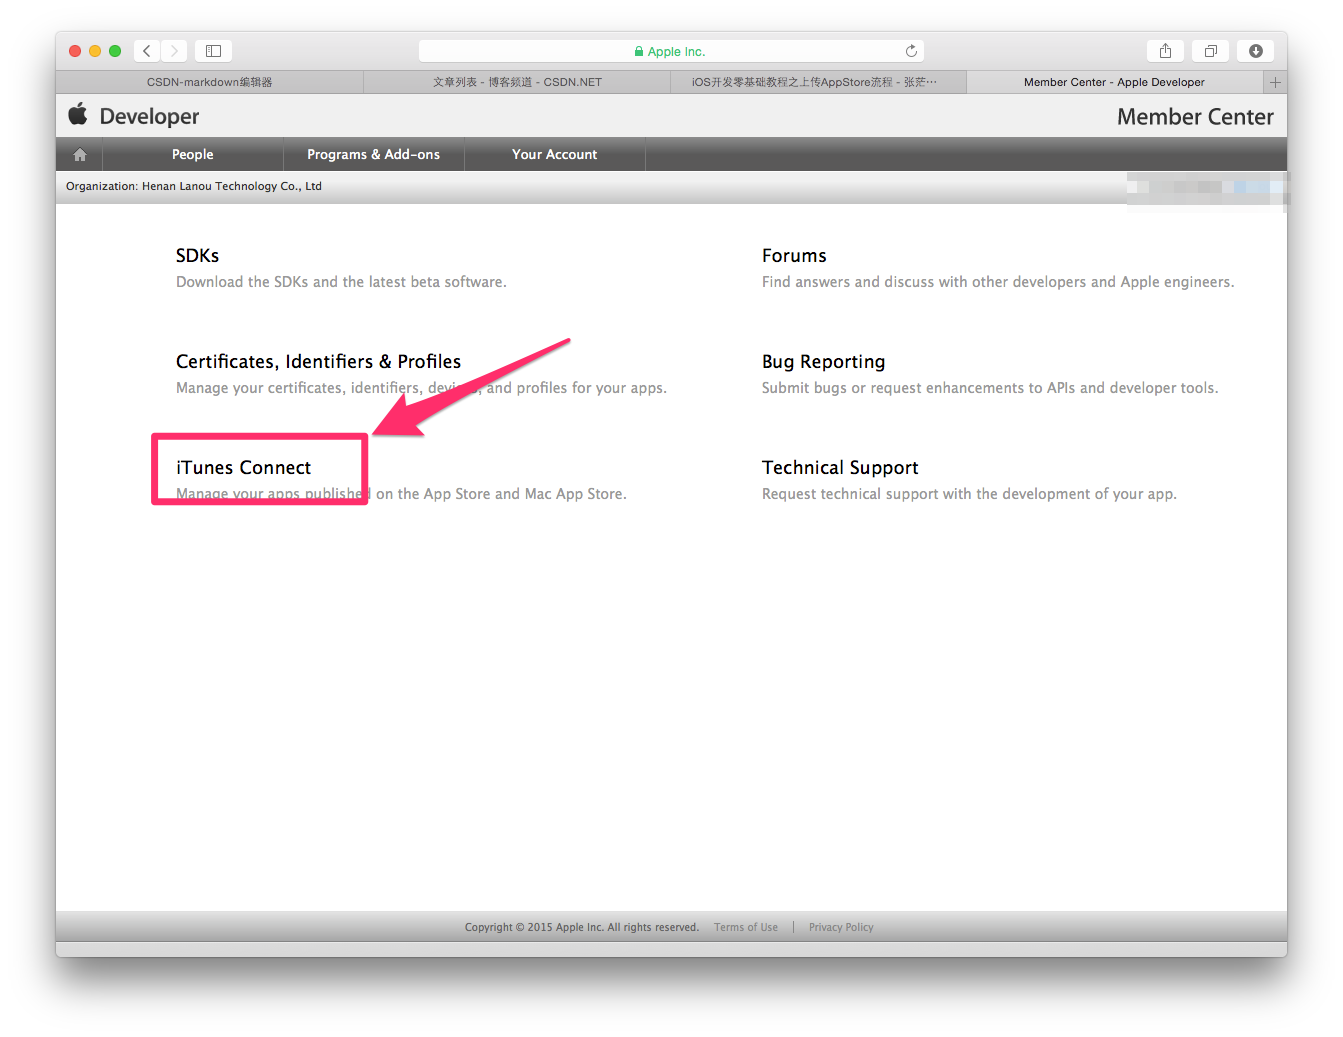
在App Store开辟空间 27.回到Member Center,点击iTunes Connect
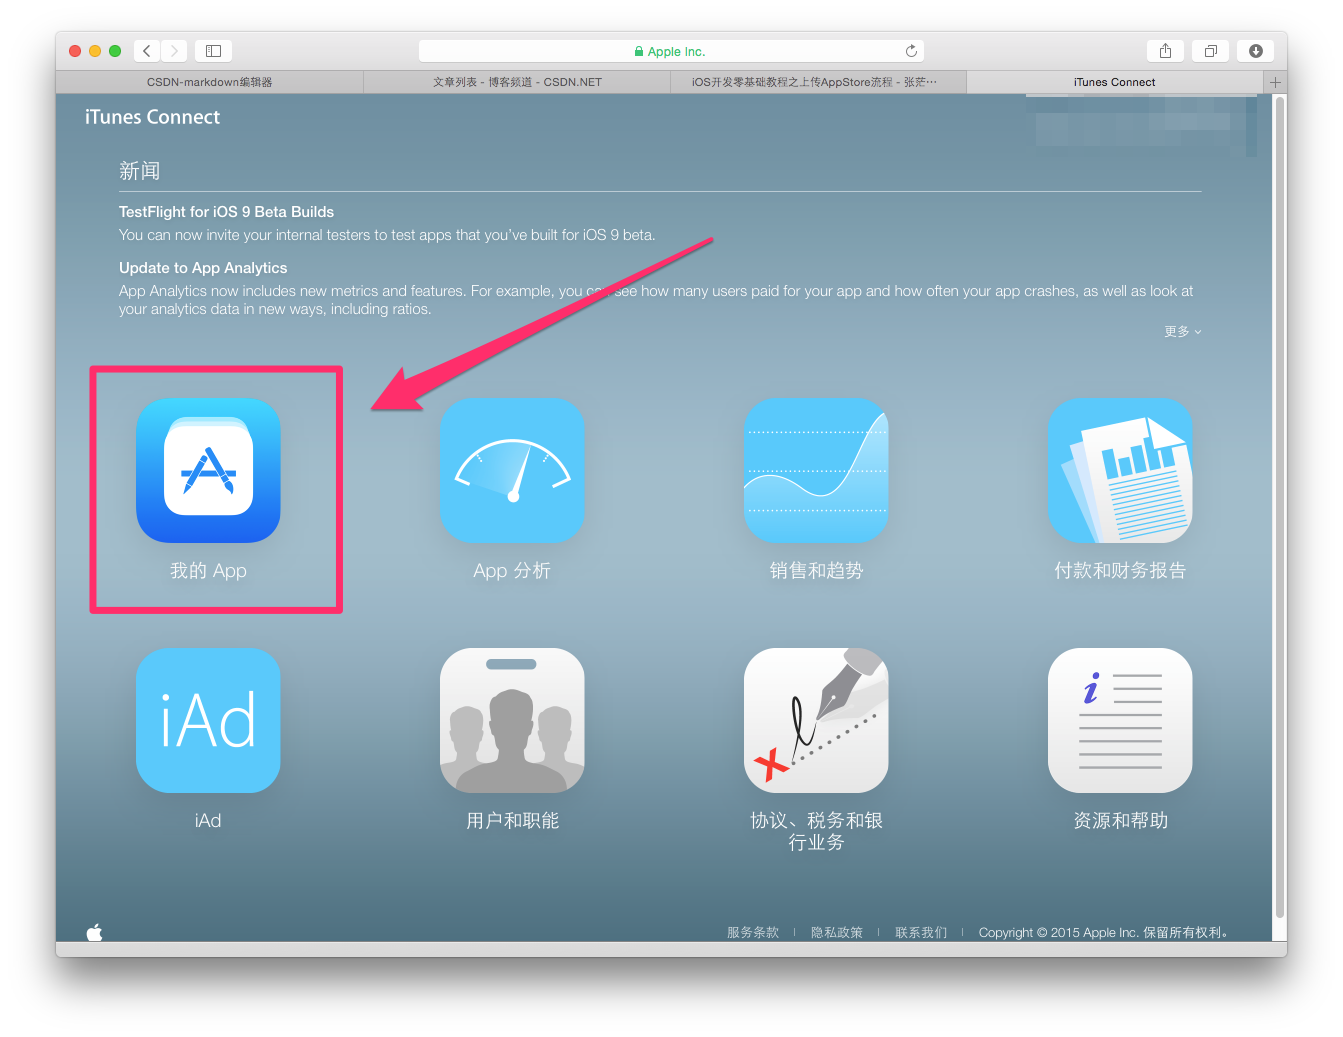
28.点击我的App
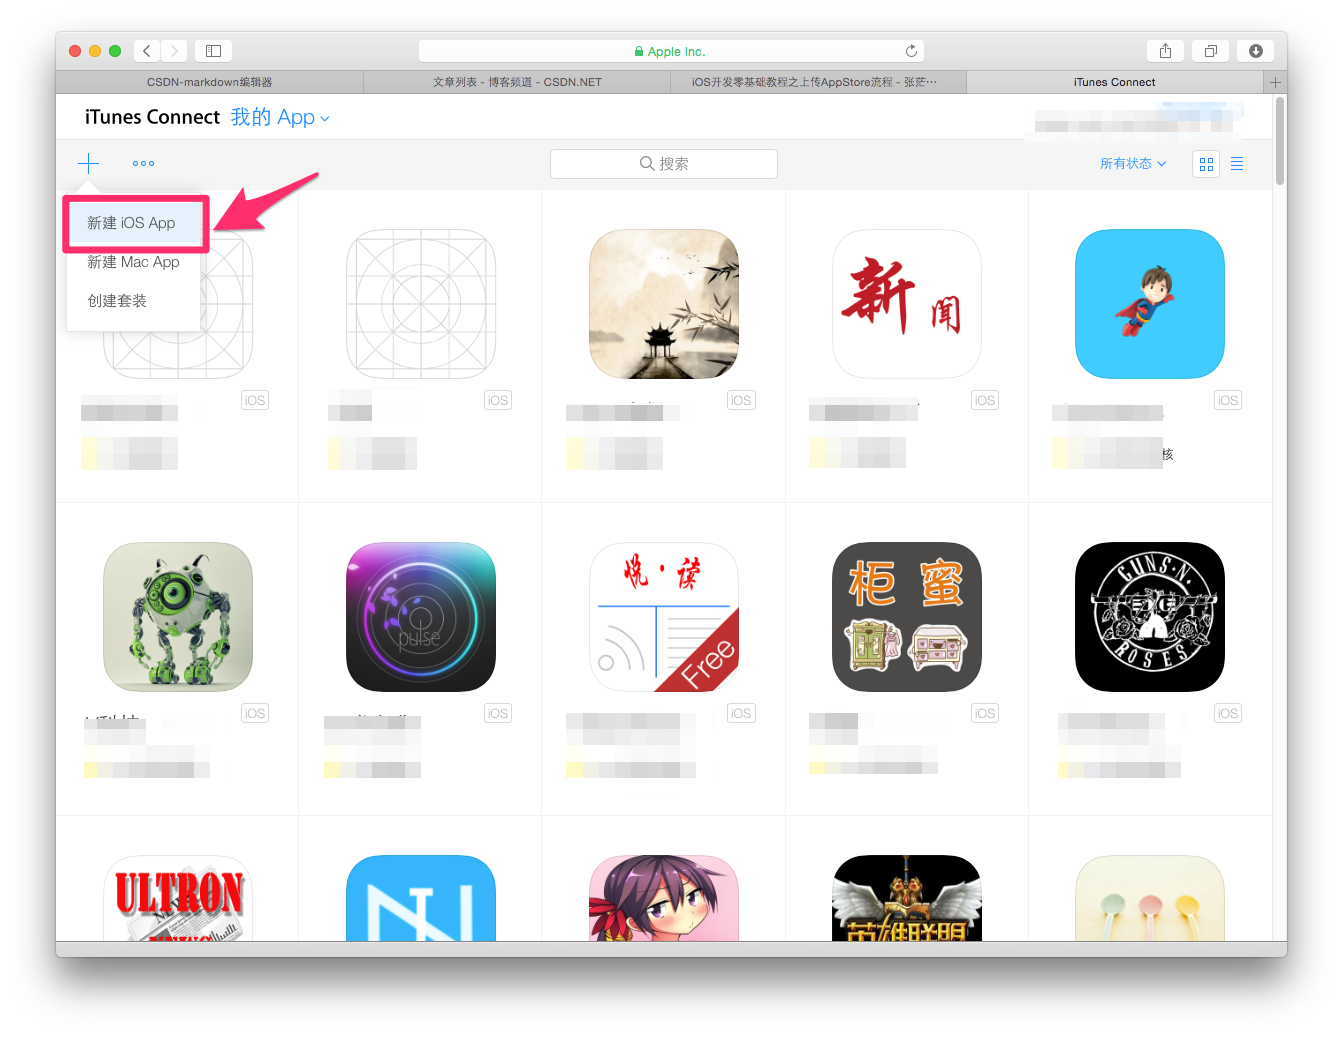
29.点击新建 iOSApp
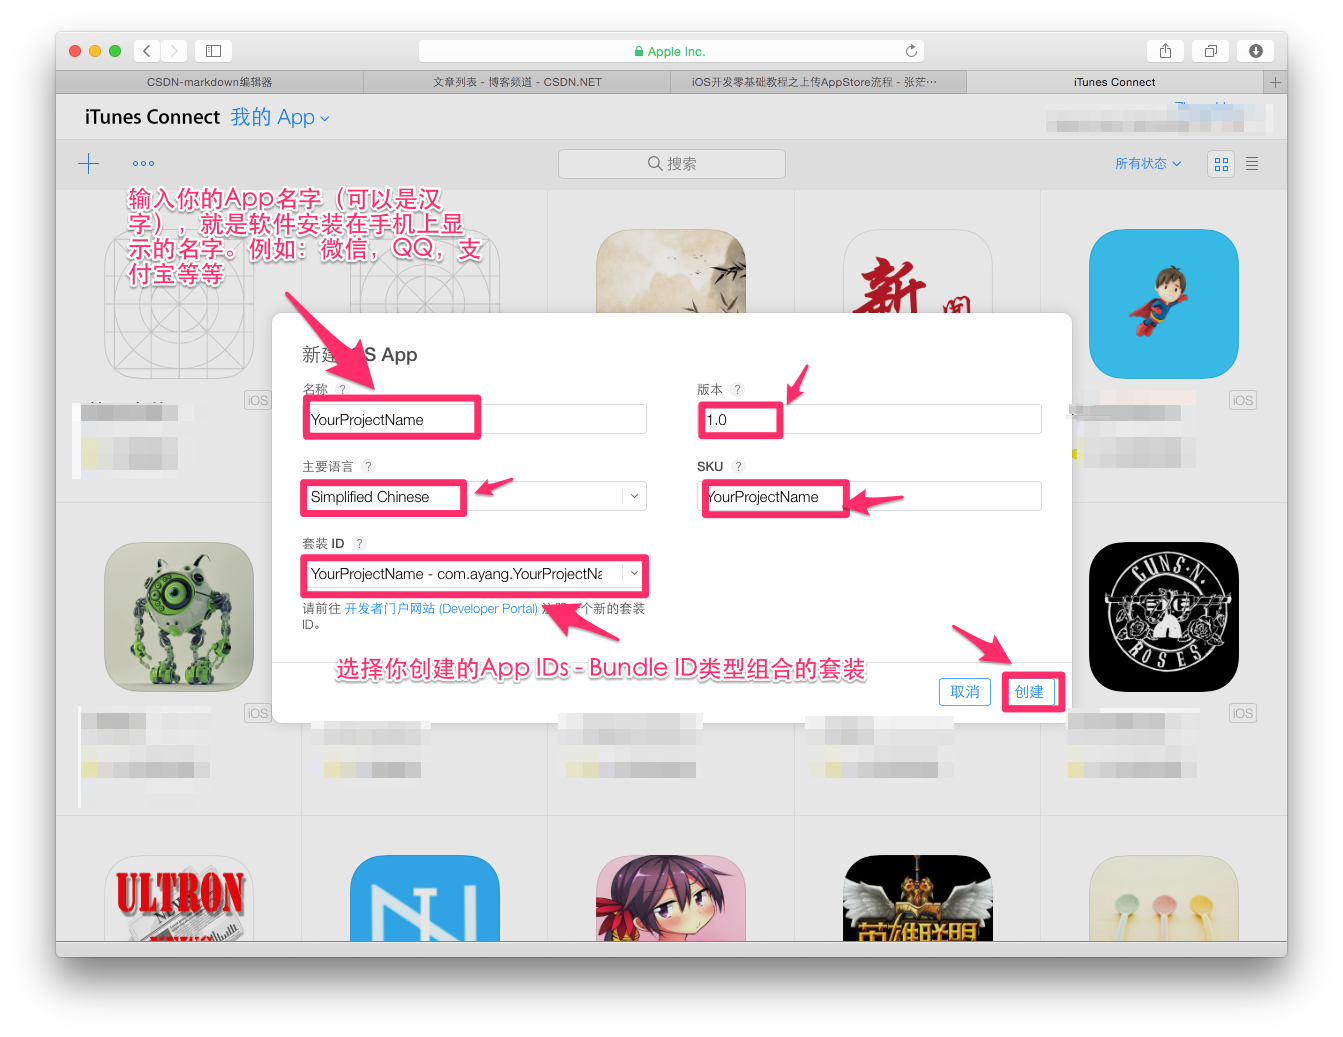
30.依次按提示填入对应信息,然后点击创建
31.依次把不同尺寸的App截图拉入到对应的里面
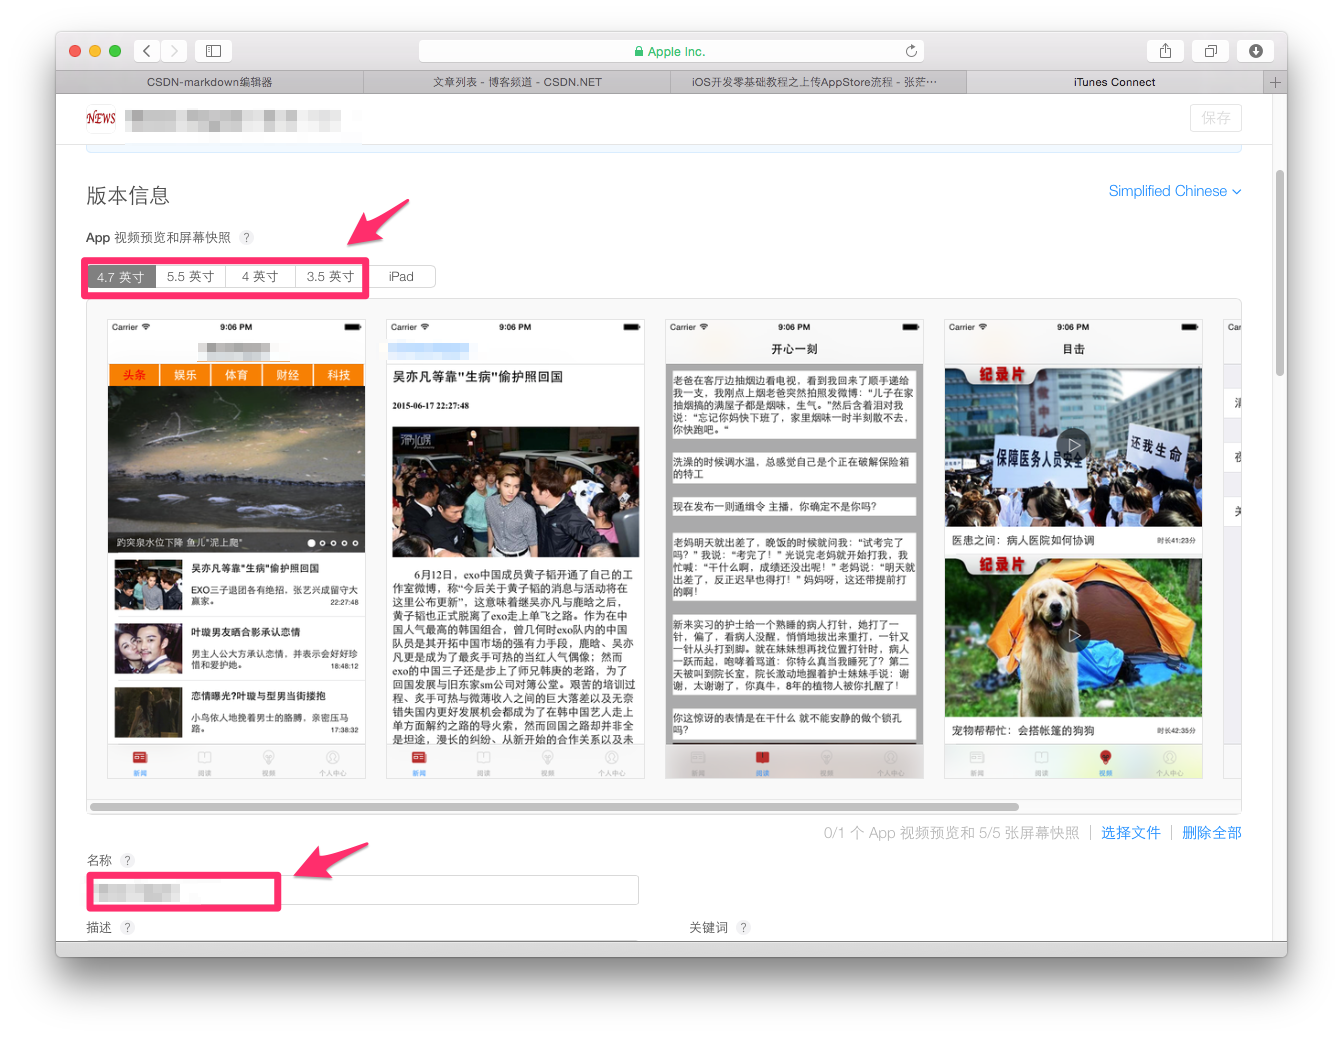
32.填入App简介
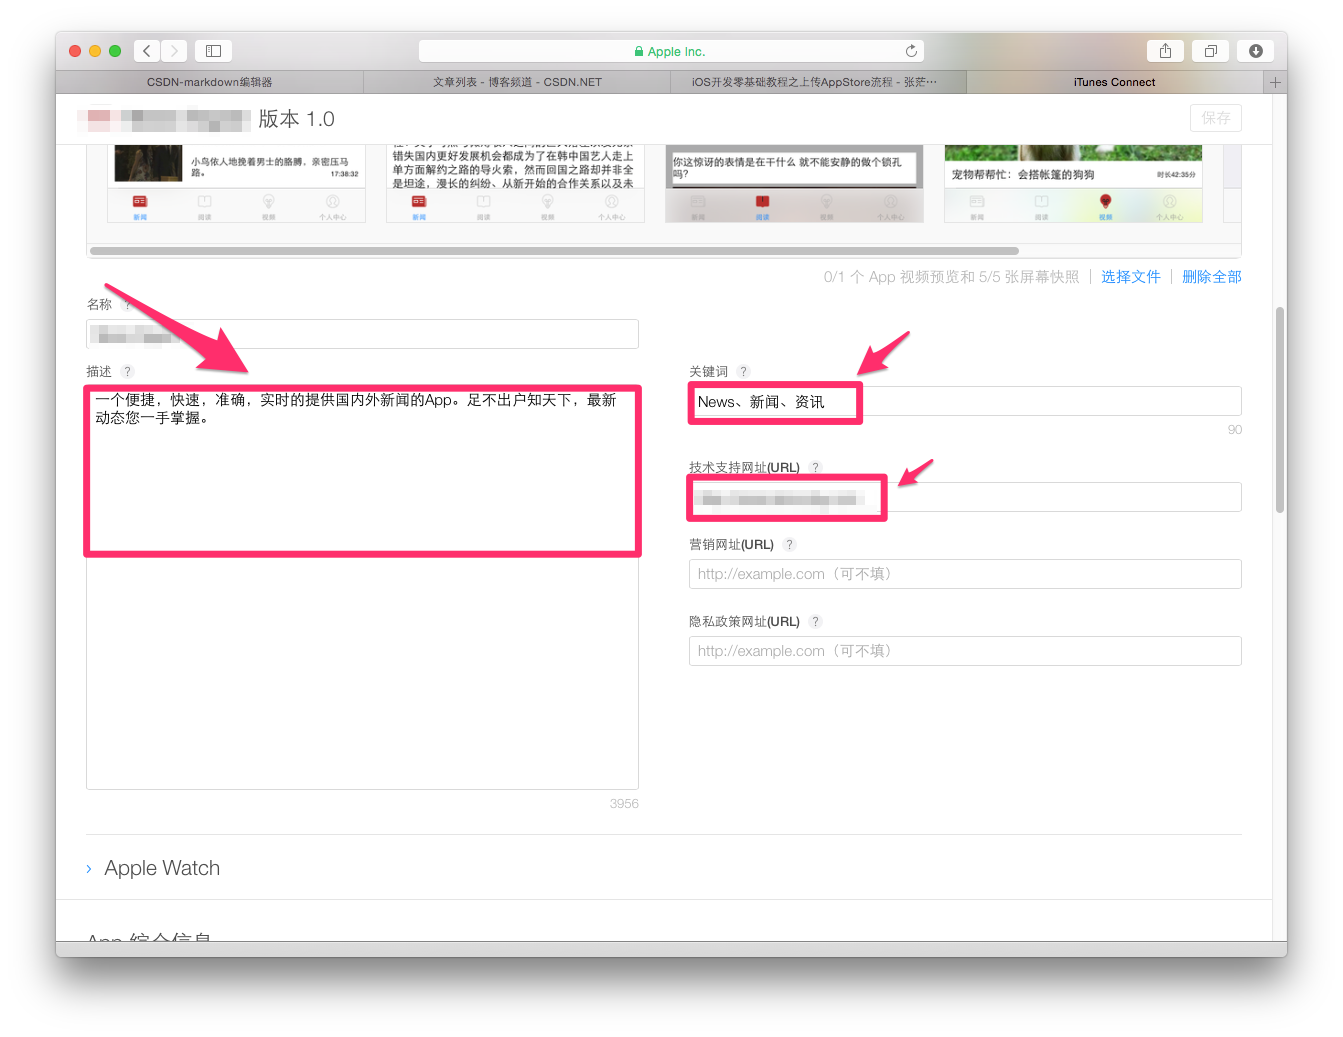
33.按提示依次输入
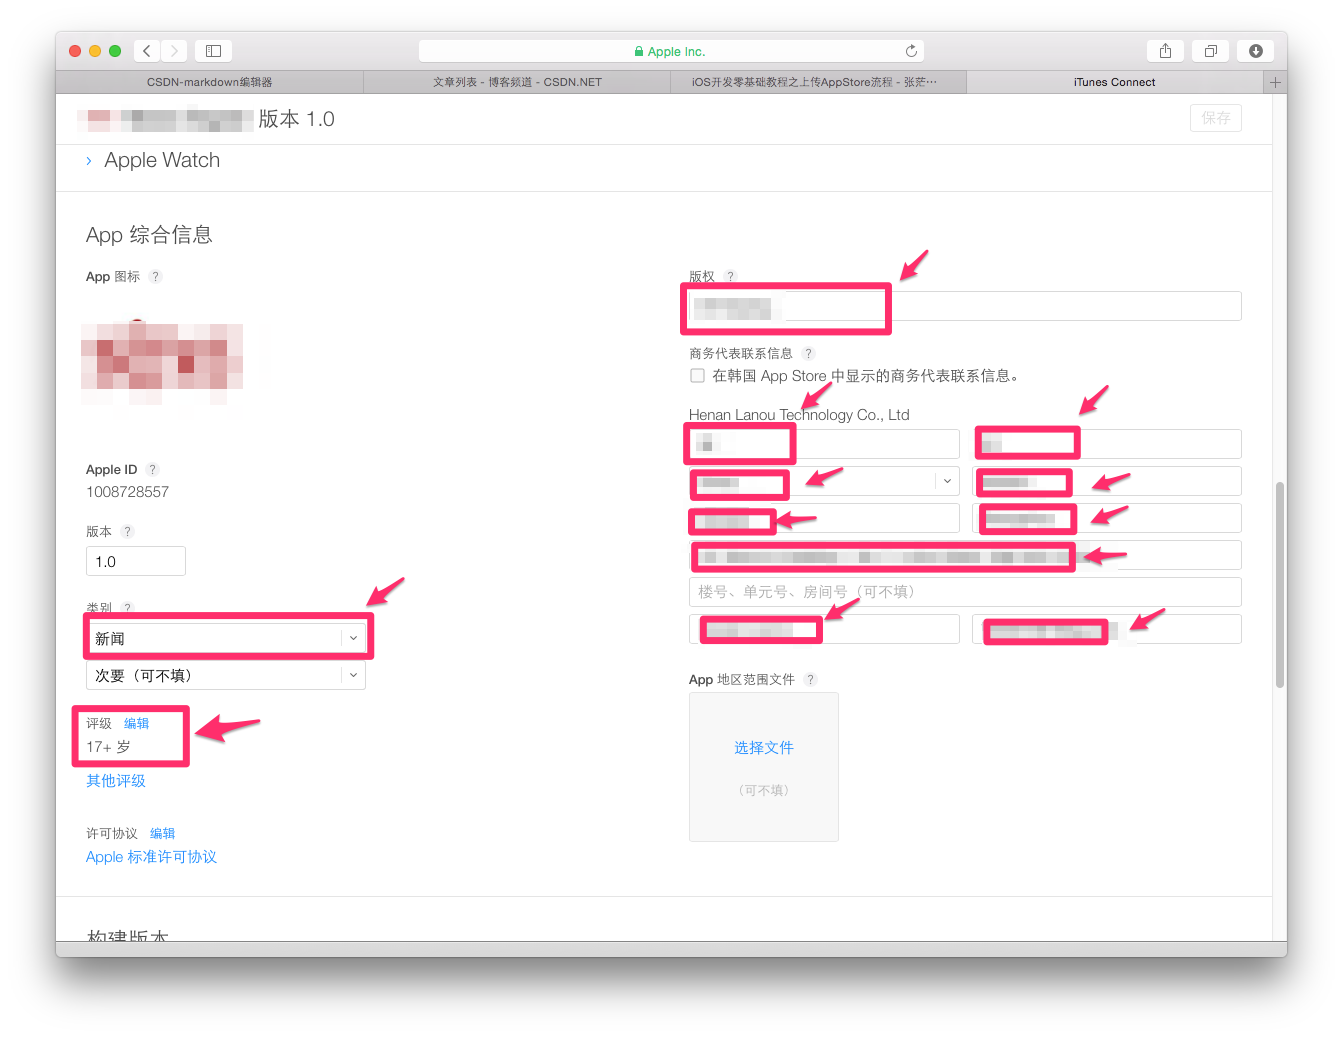
34.此时这个构建版本还没有生成,我们先把基本信息填写完毕,然后再进入Xcode中把项目打包发送到过来。 注意:填写完一定要点击右上角的保存。
在Xcode中打包工程
找到你刚刚下载的发布证书(后缀为.cer)或者p12文件,和PP文件,双击,看起来没反应,但是他们已经加入到你的钥匙串中。
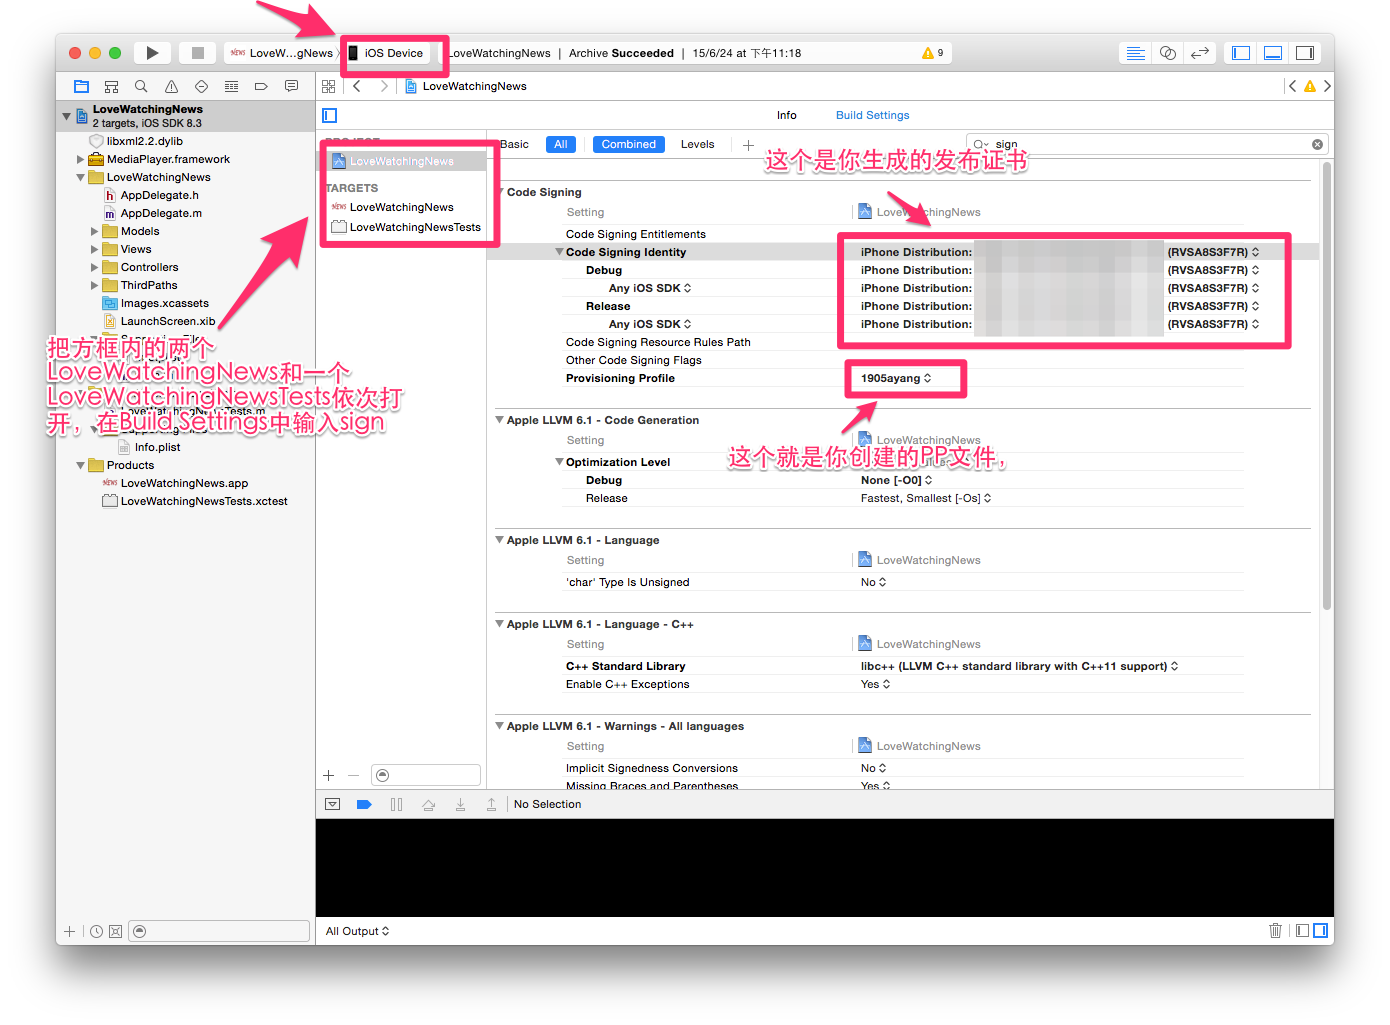
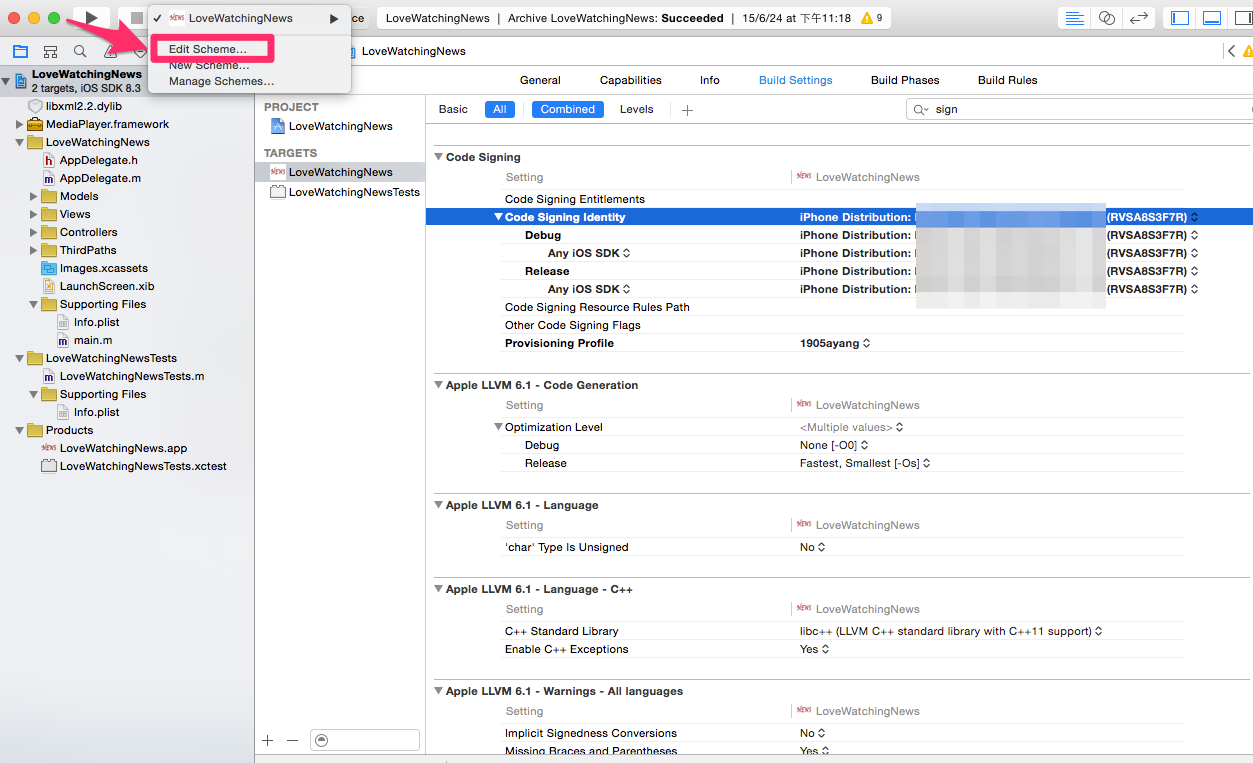
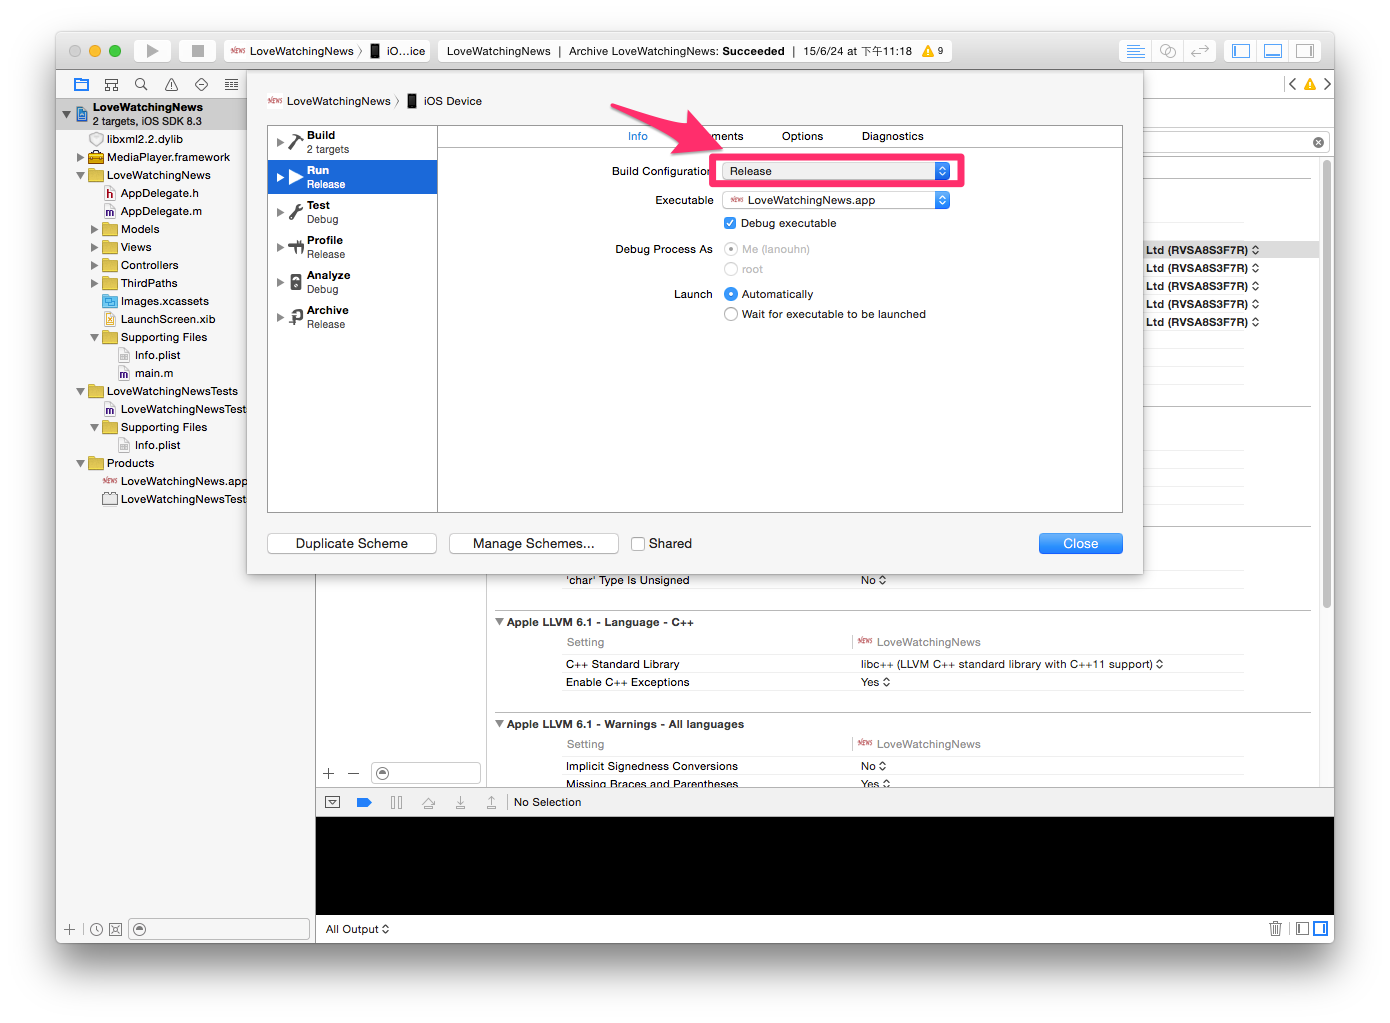
35.在Xcode中选择模拟器为iOS Device,按照下图提示操作
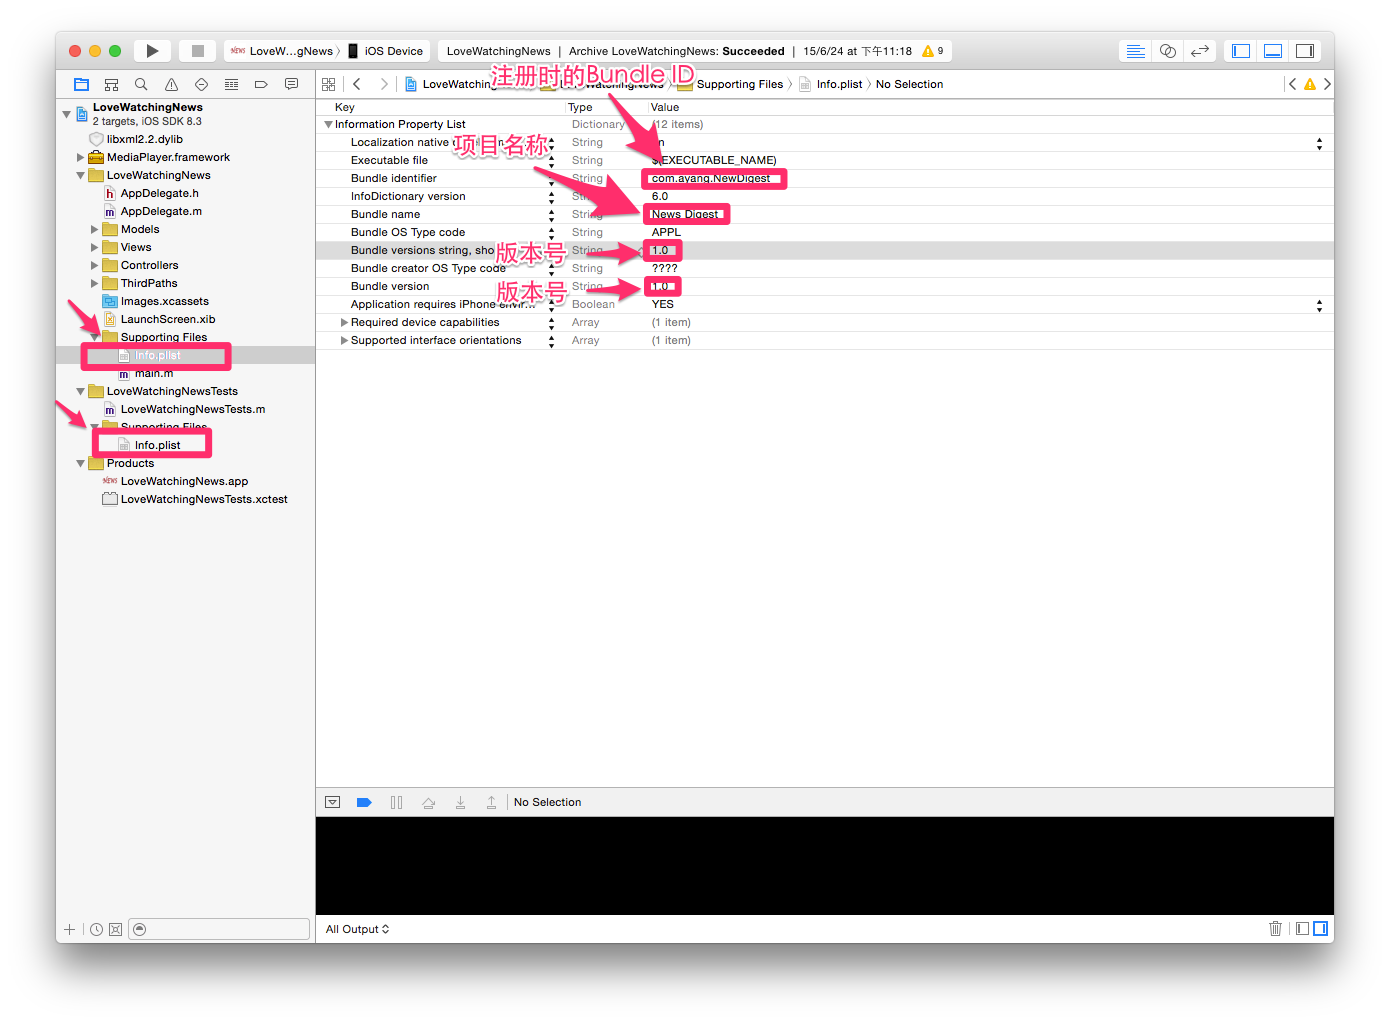
 36.修改.plist文件,两个.plist文件都要修改
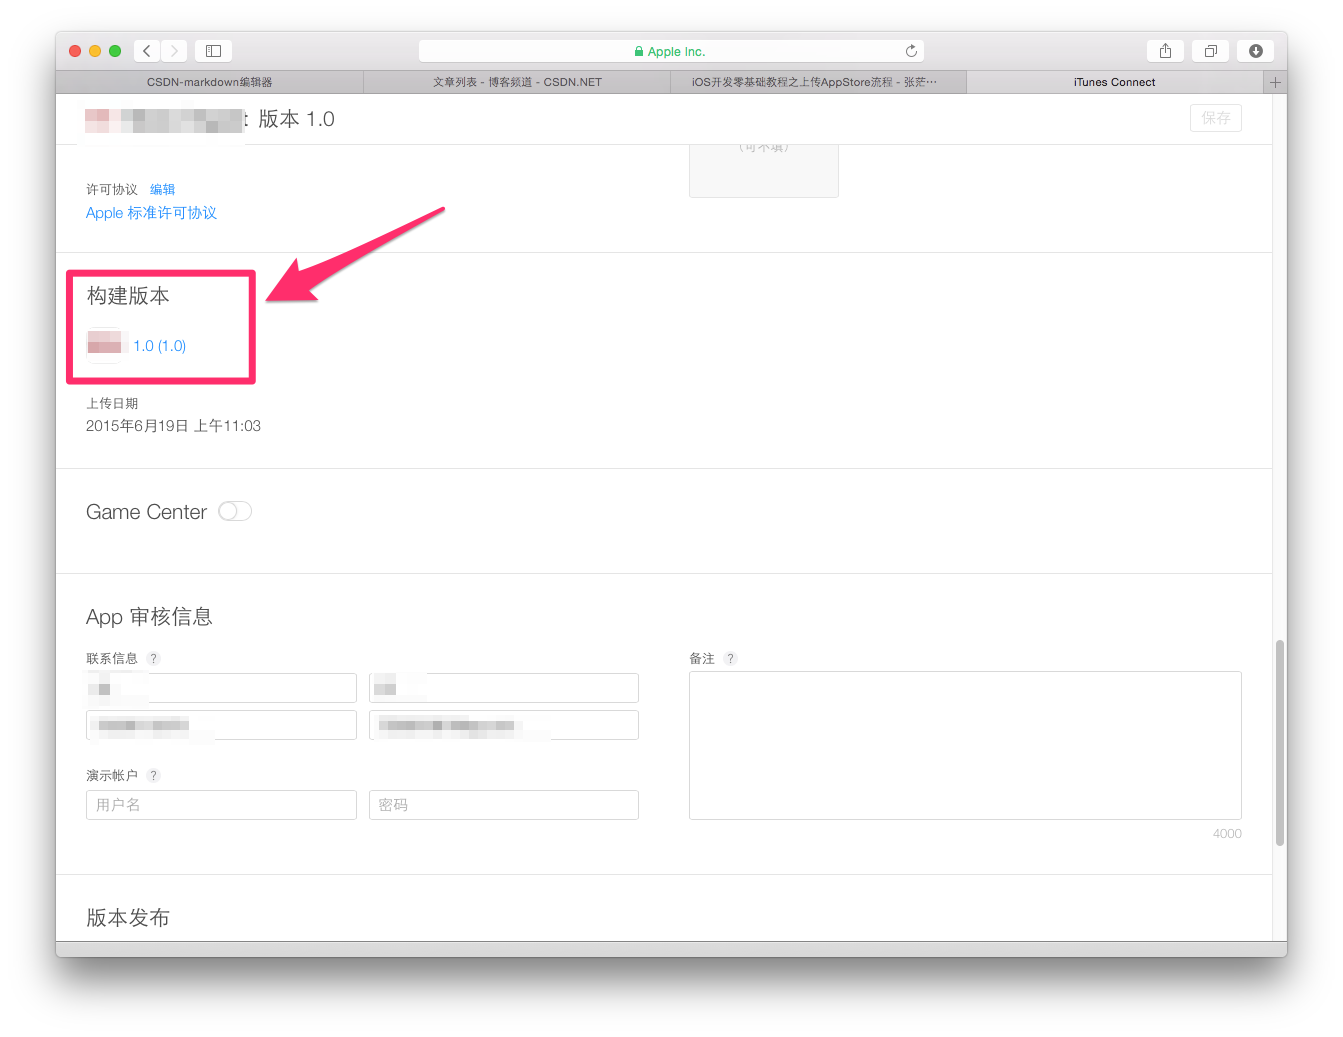
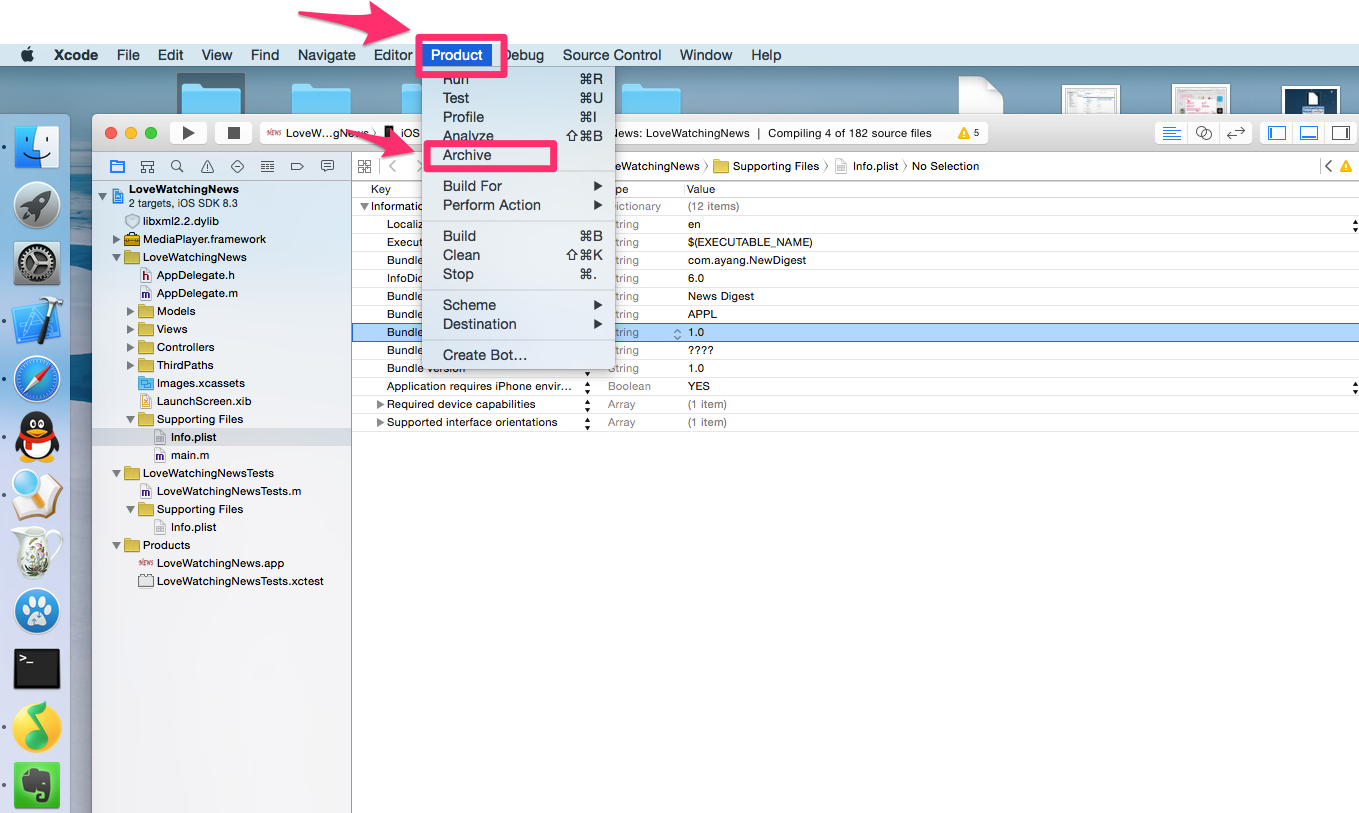
37.然后发送到我的App
38.发送成功后返回到我对App,刷新页面,在构建版本处就会有个 + 号,点击 + 号把发送过来的程序添加上去就行了
39.然后在定价处设置你的App上架后是免费还是收费。
40.回到我的App,点击发布就ok了。
- iOS App 上架流程
- iOS App上架流程
- iOS App上架流程
- iOS App上架流程
- iOS app上架流程
- iOS app上架流程
- iOS APP上架流程
- iOS App上架流程
- iOS APP上架流程
- iOS APP上架流程
- iOS App上架流程
- iOS App上架流程
- iOS App上架流程
- iOS app上架流程
- iOS app上架流程
- iOS App上架流程
- App上架流程(IOS)
- iOS app上架流程
- 53. Maximum Subarray
- HDU-1010-Tempter of the Bone(搜索奇偶剪枝)
- 一些常用算法的代码(1)
- nyoj166-小珂的数学题
- sass不支持GBK
- iOS APP上架流程
- TableViewCell的点击打钩
- 【linux】linux下安装Node.js
- POJ-3100-Root of the Problem,原来是水题,暴力求解~~~
- memcached出现:Fatal error: Call to undefined method Memcached::connect()
- poj 1860 Currency Exchange bellman
- ArcGIS Runtime SDK for iOS(四) ---使用geometry的原始数据重绘折线
- iOS小技巧 - 利用GCD创建更加准确的定时器
- summary:http乱码