adb devices error
来源:互联网 发布:centos 7内核支持ntfS 编辑:程序博客网 时间:2024/05/16 20:29
Windows ADB Configuration
The first step in configuring a Windows based development system to connect to an Android device using ADB is to install the appropriate USB drivers on the system. In the case of some devices, the Google USB Driver must be installed (a full listing of devices supported by the Google USB driver can be found online at http://developer.android.com/sdk/win-usb.html).
To install this driver, launch Eclipse and perform the following steps:
1.Launch Eclipse and open the Android SDK Manager (Window -> Android SDK Manager).
2. Scroll down to the Extras section and check the status of the Google USB Driver package to make sure that it is listed as Installed.
3. If the driver is not installed, select it and click on the Install packages button to initiate the installation.
4. Once installation is complete, close the Android SDK Manager.
For Android devices not supported by the Google USB driver, it will be necessary to download the drivers provided by the device manufacturer. A listing of drivers and download information can be obtained online at http://developer.android.com/tools/extras/oem-usb.html.
When an Android device is attached to a Windows system it is configured as a Portable Device. In order for the device to connect to ADB it must be configured as an Android ADB Composite Device.
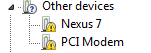
Figure 5-5
Right-click on the device name and select Update Driver Software from the menu. Select the option to Browse my computer for driver software and in the next dialog, keep the Include subfolder option selected and click on the Browse… button. Navigate to the location into which the USB drivers were installed (in the case of the Google USB driver, this will be <sdk path>\sdk\extras\google\usb_driver) and click on OK to select the driver folder followed by Next to initiate the installation.
During the installation, a Windows Security prompt will appear seeking permission to install the driver as illustrated in Figure 5-6. When this dialog appears, click on the Install button to proceed.
- adb devices : error:
- adb devices error
- adb devices error or offline
- adb shell error: no devices/emulators found
- adb故障:adb devices error protocol falut(no status)
- 使用adb devices命令,error:device offline的错误。
- adb:) adb devices
- 【ERROR】---Error executing "adb devices":ADB server didn't ACK
- 关于Ionic run android 的Error executing "adb devices": error解决办法
- adb命令之 adb devices
- adb devices no permissions
- adb devices no permission
- adb devices no permissions
- adb devices ???????????? no permission
- adb devices (Ubuntu12.04)
- adb devices no permissions
- adb-with-multiple-devices
- adb devices找不到设备
- jQuery 核心 - noConflict() 方法[避免冲突的方法]
- 分布式自增ID解决方案-Twitter Snowflake
- html5-css样式
- Hibernate三级缓存浅谈
- untiy 3d ShaderLab_第5章_第一个被执行的Pass_2_3个渲染路径之外
- adb devices error
- 解决SwipeRefreshLayout和ScrollView中嵌套ViewPager卡顿问题
- 【Get深一度】Microsoft Office 2013 Word中图片插入后变模糊解决办法
- Material 中的SearchView的学习和研究
- cardview-简单应用
- ios观察者设计模式。(在一个类监听另一个类属性的变化时响应)
- C++重载赋值运算符(=)
- html+css 常用的知识点
- 动态链接库是如何建立的(2)