consul(第二篇)consul Ops
来源:互联网 发布:淘宝一个金冠要多少丹 编辑:程序博客网 时间:2024/05/02 04:33
consul Ops
consul client
通过下面的命令可以创建consul client
nohup consul agent -data-dir /tmp/consul -node=liaokailin -bind=192.168.21.48 -join=120.76.145.187 &node指定client节点名称bindclient绑定的ipjoin指定加入到的consul serverip地址
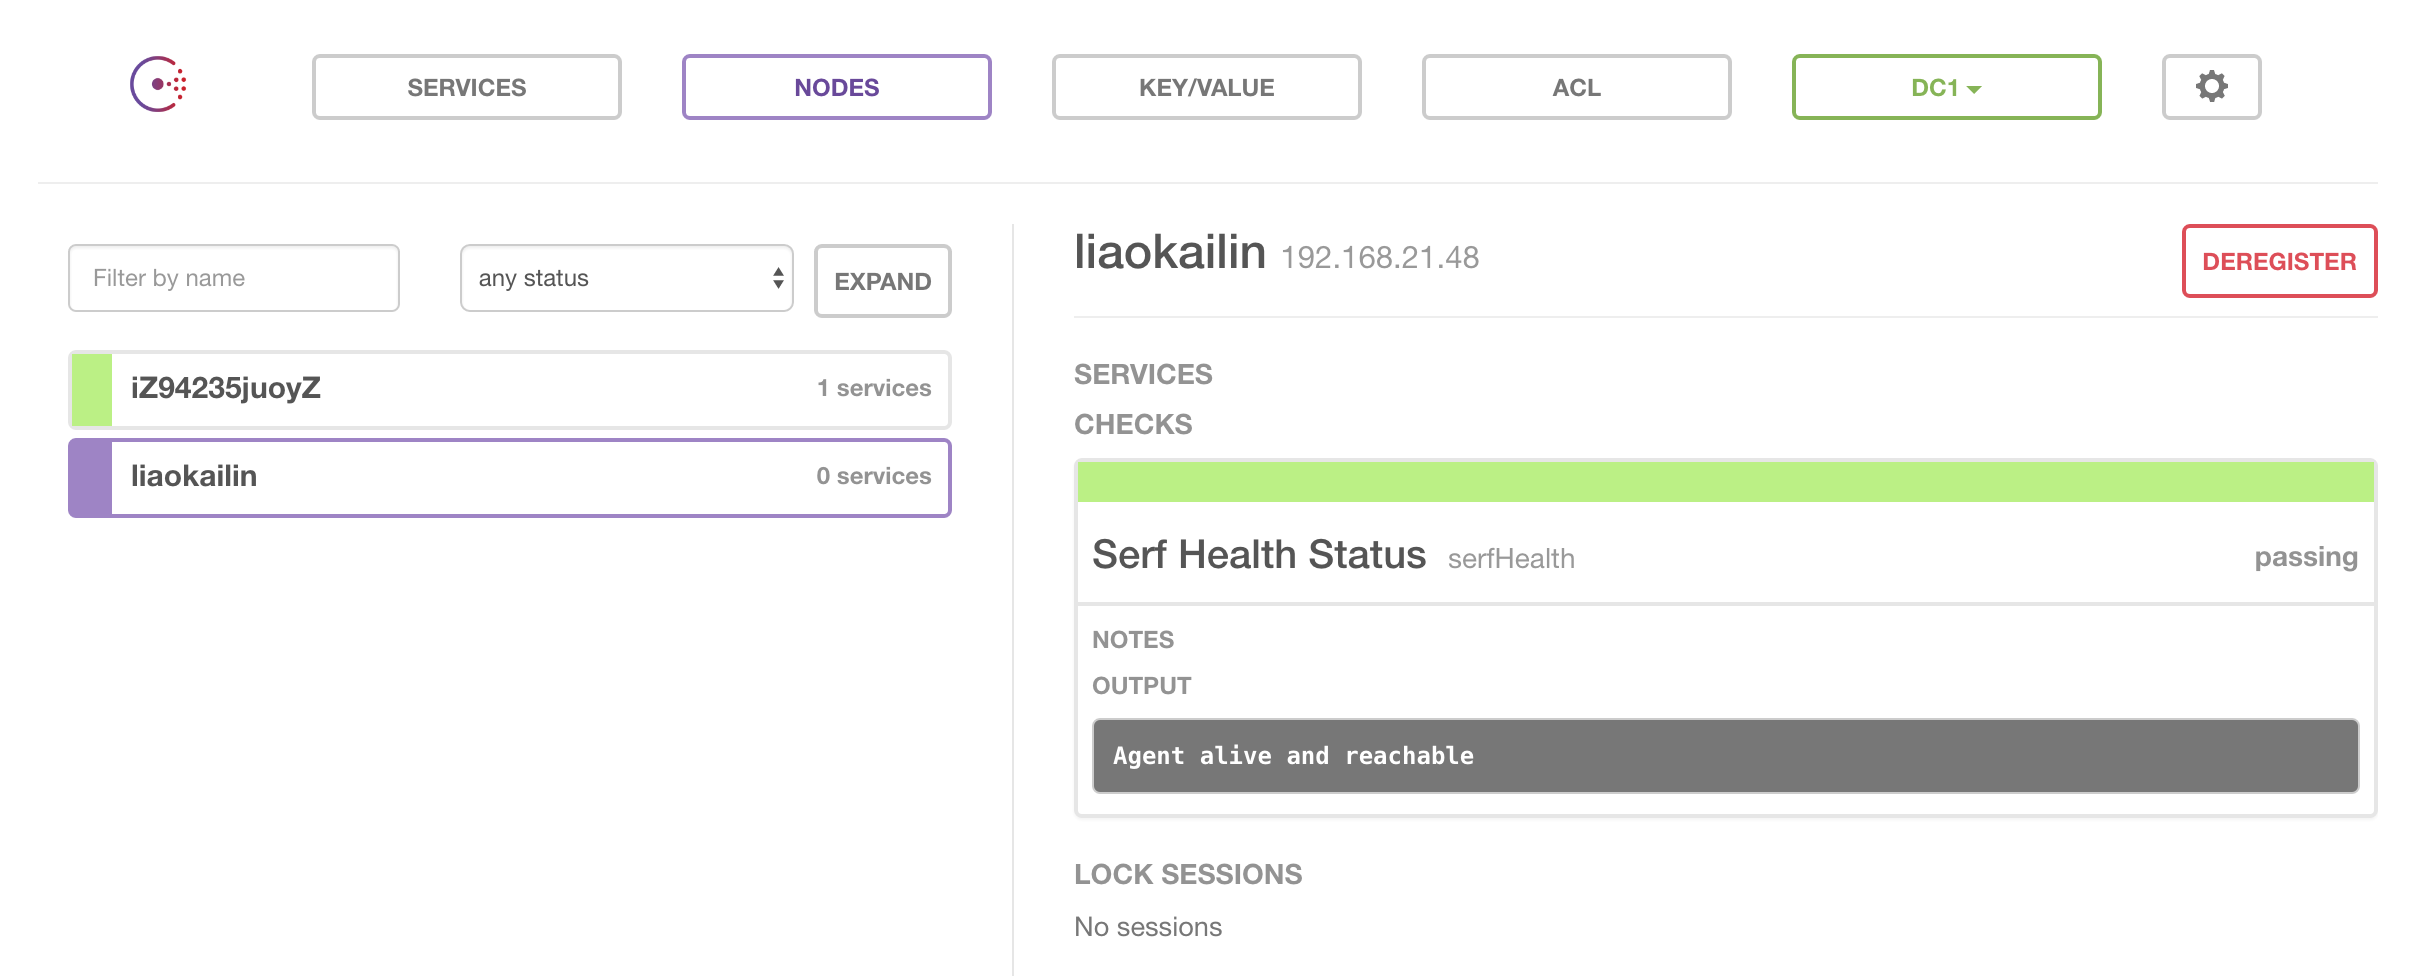
启动后访问 http://120.76.145.187:8500/ui 得到:
通过执行
consul members --rpc-addr=120.76.145.187:8400得到
Node Address Status Type Build Protocol DCiZ94235juoyZ 120.76.145.187:8301 alive server 0.6.4 2 dc1liaokailin 192.168.21.48:8301 alive client 0.5.2 2 dc1``可以看出一个为`server` 一个为`client`##service register在consul中实现服务发现的前提是进行服务注册###命令实现执行如下命令构建一个服务mkdir /etc/consul.d
vim /etc/consul.d/first-service.json
输入以下内容{“service”: {“name”: “first-service”, “tags”: [“dev”], “port”: 8081}}
以上信息定义一个名称为`first-service`,tag为`dev`的`service`,一个服务可以有多个tag用以区别在不同的环境,因此在进行服务发现时要精准发现一个服务需要`tag`和`name`两个条件配置完成后指定如下脚本consul agent -data-dir /tmp/consul -node=liaokailin -bind=192.168.21.48 -join=120.76.145.187 -config-dir /etc/consul.d
“
访问http://120.76.145.187:8500/v1/catalog/services获取所有的服务,得到结果:
{consul: [ ],first-service: ["dev"]}通过dns
dig @120.76.145.187 -p 8600 first-service.service.consul SRV得到
penAccoutIntrs; <<>> DiG 9.8.3-P1 <<>> @120.76.145.187 -p 8600 first-service.service.consul SRV; (1 server found);; global options: +cmd;; Got answer:;; ->>HEADER<<- opcode: QUERY, status: NOERROR, id: 26100;; flags: qr aa rd; QUERY: 1, ANSWER: 1, AUTHORITY: 0, ADDITIONAL: 1;; WARNING: recursion requested but not available;; QUESTION SECTION:;first-service.service.consul. IN SRV;; ANSWER SECTION:first-service.service.consul. 0 IN SRV 1 1 8081 liaokailin.node.dc1.consul.;; ADDITIONAL SECTION:liaokailin.node.dc1.consul. 0 IN A 192.168.21.48;; Query time: 44 msec;; SERVER: 120.76.145.187#8600(120.76.145.187);; WHEN: Thu Jun 2 15:52:29 2016;; MSG SIZE rcvd: 162java实现
pom.xml
<dependencies> <dependency> <groupId>com.orbitz.consul</groupId> <artifactId>consul-client</artifactId> <version>0.12.2</version> </dependency> <dependency> <groupId>junit</groupId> <artifactId>junit</artifactId> <version>4.10</version> </dependency> </dependencies> <repositories> <repository> <snapshots> <enabled>false</enabled> </snapshots> <id>central</id> <name>bintray</name> <url>http://jcenter.bintray.com</url> </repository> </repositories>创建一个单元测试
package com.lkl.consul;import com.google.common.net.HostAndPort;import com.orbitz.consul.AgentClient;import com.orbitz.consul.Consul;import org.junit.Test;import java.util.UUID;import java.util.concurrent.TimeUnit;/** * 服务注册 * Created by liaokailin on 16/6/2. */public class ServiceRegister { @Test public void registerServiceForConsul() throws Exception { Consul consul = Consul.builder().withHostAndPort(HostAndPort.fromParts("127.0.0.1", 8500)).build(); AgentClient agentClient = consul.agentClient(); String serviceId = UUID.randomUUID().toString(); String serviceName = "java-consul-service"; String serviceTag = "test"; long ttl = 3l; agentClient.register(9090, ttl, serviceName, serviceId, serviceTag); agentClient.pass(serviceId); System.out.println("succ."); TimeUnit.MINUTES.sleep(2); }}首先通过builder构建consul对象,通过agent注册一个服务.
通过web-ui可以发现服务成功注册.
健康检查
命令实现
vim /etc/consul.d/first-service.json
结果:
cat first-service.json | json_pp{ "service" : { "check" : { "script" : "curl localhost:8080 >/dev/null 2>&1", "interval" : "3s" }, "name" : "first-service", "tags" : [ "dev" ], "port" : 8081 }}增加了check,表示间隔3秒访问一次localhost:8080,如果成功表示service为passing 否则为critical
由于localhost:8080不能访问,所以通过web-ui发现状态为critical,如果本地启动一个tomcat监听8080端口,则服务状态为passing
java实现
package com.lkl.consul;import com.google.common.net.HostAndPort;import com.orbitz.consul.AgentClient;import com.orbitz.consul.Consul;import com.orbitz.consul.HealthClient;import org.junit.Test;import java.net.URI;import java.util.UUID;import java.util.concurrent.TimeUnit;/** * 健康检查 * Created by liaokailin on 16/6/2. */public class HealthCheck { @Test public void doHealthCheck() throws Exception { Consul consul = Consul.builder().withHostAndPort(HostAndPort.fromParts("127.0.0.1", 8500)).build(); AgentClient agentClient = consul.agentClient(); String serviceName = "health-check-service"; String serviceTag = "test"; agentClient.register(9090, HostAndPort.fromParts("127.0.0.1", 8080), 3l, serviceName, "service-id", serviceTag); TimeUnit.MINUTES.sleep(2); }}这种方式为client agent间隔3秒会自动ping http://localhost:8080来进行将康检查,还可以通过agentClient.pass()让service主动
向agent报告健康
key-value
命令方式
输入key
curl -X PUT -d 'test' http://localhost:8500/v1/kv/web/key1查询所有值
curl http://localhost:8500/v1/kv/?recurse查询指定key对应值
curl http://localhost:8500/v1/kv/web/key1java方式
package com.lkl.consul;import com.google.common.base.Optional;import com.google.common.net.HostAndPort;import com.orbitz.consul.Consul;import com.orbitz.consul.KeyValueClient;import com.orbitz.consul.model.kv.Value;import org.apache.commons.codec.binary.Base64;import org.junit.Test;import sun.misc.BASE64Decoder;import java.util.List;import java.util.Set;/** * key-value操作 * Created by liaokailin on 16/6/3. */public class KeyValues { /** * 新增一个key */ @Test public void pubKey() { Consul consul = Consul.builder().withHostAndPort(HostAndPort.fromParts("127.0.0.1", 8500)).build(); KeyValueClient keyValueClient = consul.keyValueClient(); keyValueClient.putValue("/web/key3","test"); } /** * 按key获取值 */ @Test public void getValueByKey(){ Consul consul = Consul.builder().withHostAndPort(HostAndPort.fromParts("127.0.0.1", 8500)).build(); KeyValueClient keyValueClient = consul.keyValueClient(); Optional<String> result = keyValueClient.getValueAsString("/web/key3"); System.out.println(result.get()); } /** * 获取values */ @Test public void getValues(){ Consul consul = Consul.builder().withHostAndPort(HostAndPort.fromParts("127.0.0.1", 8500)).build(); KeyValueClient keyValueClient = consul.keyValueClient(); List<Value> values = keyValueClient.getValues("/web"); for(Value value : values){ System.out.println(value.getKey()+","+ new String(Base64.decodeBase64(value.getValue().get())) ); } }}consul架构
相关术语
Agent长期运行在后台的守护进程,通过consul agent运行,不论是客户端还是服务端都是一个agentClient转发所有的RPC到服务端的agent,client是相对无状态的,主要与service以及通过局域网的gossip pool与server通信,对资源消耗少Server负责参数Raft选举、维护集群状态、响应RPC、通过广域网gossip pool与其他数据中心通信Datacenter数据中心,可以理解为一个私有的、低延迟的网络环境Consensus一致性,集群状态下多个服务器在状态上达成一致,为了以容错方式达成一致,一般有超过半数一致则可以认为整体一致
consul使用Raft实现一致性,进行leader选举,在consul中的使用bootstrap时,可以进行自选,其他server加入进来后bootstrap就可以取消Gossipconsul通过Serf提供基于Gossip协议通信,Serf是去中心化的服务发现和编制的解决方案,节点失败侦测与发现,具有容错、轻量、高可用的特点。LAN Gossip同一网络或者数据中心节点通信协议WAN Gossip不同网络或不同数据中心中server通信协议
图表说明
利用官网给出的图片

通过以上图片可以发现:
1.同一数据中心Client与Server通过LAN Gossip通信,service与server不会直接通信,其通信流程为service–>client –>server
2.server通过Raft算法进行选举
3.不同数据中心通过WAN Gossip通信
ok ~ it’s work ! more about is here
转载请注明
http://blog.csdn.net/liaokailin/article/details/51612247
欢迎关注,您的肯定是对我最大的支持

- consul(第二篇)consul Ops
- consul
- consul
- consul-template入门篇
- consul部署 docker篇
- 【Consul】CONSUL调研
- 【Consul】CONSUL环境部署
- 【Consul】Consul架构-简介
- 【Consul】Consul架构-简介
- consul服务发现入门篇
- consul 入门
- Consul 简介
- Consul入门
- consul简介
- consul资料
- Consul入门
- consul 入门
- Consul 使用
- windows加入tomcat服务与参数配置
- mac下编译java+tomcat出现javax.servlet 不存在
- ubuntu 正在读取软件包列表... 有错误!
- PHP语言优势
- 算法导论第二章-算法基础-Cpp代码实现
- consul(第二篇)consul Ops
- Jquery 获取 radio/select/checkbox 选中值
- 每天15min-HTML5(10)-表单(上)
- 《JavaScript DOM 编程艺术》读书笔记
- 使用 Jsoup 爬虫解析 html 新闻的实例
- 在CentOS 7上安装.NET Core R2跑Hello World
- 进程间通信----命名管道
- char与byte的区别
- Struts2.3+Spring3.2.8+Hibernate4.1全注解配置