Android 5.0及以上实现屏幕截图
来源:互联网 发布:盘古软件 编辑:程序博客网 时间:2024/06/04 20:10
在Android 5.0,API 21 之前想要截图系统屏幕必须Root才能完成,5.0之后开放了接口,下面看我们是怎么实现的。
–
1. 涉及到的相关类
1.
MediaProjectionManager官方原话: Manages the retrieval of certain types of {@link MediaProjection} tokens.
这个类通过Context#getSystemService中MEDIA_PROJECTION_SERVICE获取,他的功能就是获取MediaProjection2.
MediaProjection官方原话:A token granting applications the ability to capture screen contents and/or record system audio. The exact capabilities granted depend on the type of MediaProjection.在这个类中我们能获取到屏幕的内容
3.
ImageReader官方原话:The ImageReader class allows direct application access to image data
rendered into a {@link android.view.Surface}
通过这个类我们可以把Surface转换成图片
2. 上面三个类就可以完成我们截取屏幕图片的操作,那么下面我们将解释他们是怎么合作完成的
1. 首先获取用户授权,截图屏幕需要用户手动授权后才能操作
@TargetApi(Build.VERSION_CODES.LOLLIPOP) public void requestCapturePermission() { if (Build.VERSION.SDK_INT < Build.VERSION_CODES.LOLLIPOP) { //5.0 之后才允许使用屏幕截图 return; } MediaProjectionManager mediaProjectionManager = (MediaProjectionManager) getSystemService(Context.MEDIA_PROJECTION_SERVICE); startActivityForResult( mediaProjectionManager.createScreenCaptureIntent(), REQUEST_MEDIA_PROJECTION); }这里必须使用
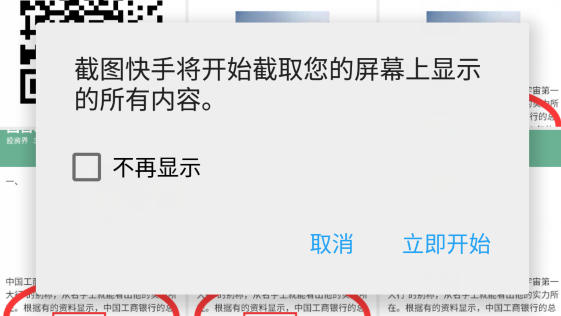
startActivityForResult因为在createScreenCaptureIntent()方法中会返回用户授权截取屏幕的结果,用户根据下面弹窗允许或者拒绝
用户选择后在Activity 的
onActivityResult中操作返回的结果data@Override protected void onActivityResult(int requestCode, int resultCode, Intent data) { super.onActivityResult(requestCode, resultCode, data); switch (requestCode) { case REQUEST_MEDIA_PROJECTION: if (resultCode == RESULT_OK && data != null) { FloatWindowsService.setResultData(data); startService(new Intent(getApplicationContext(), FloatWindowsService.class)); } break; } }这里我是用
FloatWindowsService在桌面上显示一个悬浮按钮,点击截屏,下面我们看在FloatWindowsService是如何实现截图
2. 截取屏幕内容生成Bitmap
首先创建
ImageReader实例private void createImageReader() { mImageReader = ImageReader.newInstance(mScreenWidth, mScreenHeight, PixelFormat.RGBA_8888, 2); }然后点击事件中触发
startScreenShot()private void startScreenShot() { mFloatView.setVisibility(View.GONE); Handler handler = new Handler(); handler.postDelayed(new Runnable() { public void run() { //获取当前屏幕内容 startVirtual(); } }, 5); handler.postDelayed(new Runnable() { public void run() { //生成图片保存到本地 startCapture(); } }, 30); }在
startVirtual()方法中我们做一件事,就是获取当前屏幕内容public void startVirtual() { if (mMediaProjection != null) { virtualDisplay(); } else { setUpMediaProjection(); virtualDisplay(); } }与此同时需要获取
MediaProjection实例,而mResultData是授权后返回的结果public void setUpMediaProjection() { if (mResultData == null) { Intent intent = new Intent(Intent.ACTION_MAIN); intent.addCategory(Intent.CATEGORY_LAUNCHER); startActivity(intent); } else { //mResultData是在Activity中用户授权后返回的结果 mMediaProjection = getMediaProjectionManager().getMediaProjection(Activity.RESULT_OK, mResultData); }}最终得到当前屏幕的内容,注意这里
mImageReader.getSurface()被传入,屏幕的数据也将会在ImageReader中的Surface中private void virtualDisplay() { mVirtualDisplay = mMediaProjection.createVirtualDisplay("screen-mirror", mScreenWidth, mScreenHeight, mScreenDensity, DisplayManager.VIRTUAL_DISPLAY_FLAG_AUTO_MIRROR, mImageReader.getSurface(), null, null); }最后把
mImageReader得到的屏幕内容数据转换成图片,在AsyncTask中处理,
Image.Plane中的 buffer 数据并不是完全是Bitmap所需要的,需要注意下面3点1. Image 设置的图片格式与Bitmap设置的必须一致
2. 缓冲数据存在行间距,所以我们必须去除这些间距
3. Image 使用后必须调用
image.close();关闭,否则再次使用会报错@Overrideprotected Bitmap doInBackground(Image... params) { if (params == null || params.length < 1 || params[0] == null) { return null; } Image image = params[0]; int width = image.getWidth(); int height = image.getHeight(); final Image.Plane[] planes = image.getPlanes(); final ByteBuffer buffer = planes[0].getBuffer(); //每个像素的间距 int pixelStride = planes[0].getPixelStride(); //总的间距 int rowStride = planes[0].getRowStride(); int rowPadding = rowStride - pixelStride * width; Bitmap bitmap = Bitmap.createBitmap(width + rowPadding / pixelStride, height, Bitmap.Config.ARGB_8888); bitmap.copyPixelsFromBuffer(buffer); bitmap = Bitmap.createBitmap(bitmap, 0, 0, width, height); image.close();最后把生成的bitmap保存起来,就ok了
源码
APK
1 0
- Android 5.0及以上实现屏幕截图
- Android 5.0及以上实现屏幕截图
- Android屏幕截图实现
- android 应用实现屏幕下沉(android 4.4及以上)
- Android-屏幕截图功能实现
- Android屏幕及view的截图
- Android屏幕截图实现 (adbd部分)
- Android屏幕截图实现 (adbd部分)
- 实现屏幕截图的代码-Android
- Android源码中屏幕截图的实现
- Android源码中屏幕截图的实现
- (转)Android屏幕截图实现 (adbd部分)
- android中实现屏幕截图的代码
- Android 代码实现屏幕截图功能
- delphi实现屏幕截图
- VC实现屏幕截图
- C# 实现屏幕截图
- C# 实现屏幕截图
- JSP学习笔记2
- Linux IPC(进程间通信)摘要(信号灯,共享内存,消息队列,管道)(一)
- OpenFOAM用wmake编译applications/test里的文件时缺少libmpi.so.1的解决办法
- 关于线程同步问题
- Android Databinding 从入门到转行(四)自定义设置通知刷新回调
- Android 5.0及以上实现屏幕截图
- View.OnTouchListener 触碰事件
- TOJ 3990.I guess the gift is a bag! II(质因数、欧拉函数好题)
- 利用dim4j来保存用户信息
- Web Worker Best Practices
- You must rebuild it with bitcode enabled (Xcode setting ENABLE_BITCODE)
- 苹果笔记本电脑运行win系统时温度过高解决办法
- URL编码与解码
- 使用JAXB来完成Javabean与XML文件(字符串)之间的相互转换